
Malt Extract Agar: A Practical Guide for Hobbyists and Labs
You're at the workbench with a packet of powdered malt extract, a bottle of agar, and a stack of empty Petri dishes. The instructions look simple, but the first batch raises practical questions fast. How acidic should the medium be? When is it cool enough to pour? If a plate turns green, did the recipe fail, or was the culture already contaminated?
Malt extract agar, usually shortened to MEA, becomes much easier to use once you understand what it selects for, what it can't tell you, and how its preparation affects what appears on the plate. The recipe matters, but judgment matters more. A clean plate, the right medium for the job, and careful interpretation will teach you far more than a plate that only produces fast growth.
What Malt Extract Agar Is and Why Cultivators Reach for It
A first plate can look deceptively simple: a firm, amber surface with a small piece of tissue or spore sample in the center. Malt extract agar is a solid fungal culture medium made from malt extract, agar, and water. Agar creates the stable surface, while malt extract provides readily available carbohydrates and other nutrients for many yeasts and filamentous fungi. Some commercial formulas also add mycological peptone or related supplements.
Early mycologists in the 1920s helped establish malt extract agar as a standard medium for fungal study. A modern reference formula lists 30.0 g/L malt extract, 5.0 g/L mycological peptone, and 15.0 g/L agar, with a final pH of 5.4 ± 0.2 at 25°C, as shown in this Merck formulation document. The exact product matters because different formulations can change how quickly colonies grow and how clearly their features appear.
Why the ingredients matter
Malt extract creates a nutrient-rich, mildly acidic environment that often favors fungi over many bacterial competitors. It does not exclude bacteria completely. Contamination can still enter through the culture, tools, surrounding air, or handling technique, so an acidic medium cannot replace clean work.
Agar is mainly the support structure, not the food source. Once solidified, it lets you inspect colony texture, color, margins, and growth pattern over time. Because the powder dissolves when heated, MEA also works for poured plates, slants, and some culture procedures that require remelting.
Practical rule: Treat the recipe as a starting point, not a cleanliness guarantee. Sterile handling determines whether the plate shows the intended culture or the organism that reached the medium first.
Brewer's malt extract is not automatically interchangeable with a mycological-grade MEA premix. Brewing products may differ in sugar profile, color, filtration, additives, and acidity. A laboratory premix aims for repeatable composition, while a brewing ingredient may introduce variation. Check the label and preparation instructions before making the substitution.
MEA gives a first-time grower enough nutrition for mycelium to become visible, while leaving colony structure available for inspection. It suits legal food-mushroom work, classroom demonstrations, and basic fungal isolation. For slow, highly sensitive, or heavily competing cultures, another medium may reveal more. The best choice depends on the question the plate needs to answer, rather than on which recipe produces the fastest growth.
Choosing MEA Over Other Fungal Media for Real Workflows
The right medium depends on what you want the plate to reveal. MEA is a strong general-purpose choice, but it isn't automatically superior for every organism or experiment.
Potato dextrose agar, or PDA, is a close competitor for many mushroom cultures. It provides a familiar carbohydrate-rich surface and can produce vigorous growth. During sterilization, however, potato-based media may darken or caramelize, changing the final chemistry. That variation can complicate work with slow isolates or make comparisons between batches less consistent.
Yeast malt agar, or YMA, is more heavily oriented toward yeast-focused work. Its combination of malt and yeast-derived nutrients can support yeasts and molds, but an enriched medium may also support unwanted organisms. It's useful when yeast recovery or enumeration is central, while MEA often gives a more broadly useful starting surface for observing filamentous fungi.
Low-nutrient choices such as water agar serve a different purpose. They're useful when you need to reduce available nutrition, observe germination, separate a culture from a rich competitor, or explore how an organism behaves under nutritional stress. They're not usually the first plate for building healthy radial mycelial growth.
Medium | Nutrient level | Best workflow | Key tradeoff |
|---|---|---|---|
MEA | Moderate to rich | General fungal culture, morphology reading, routine isolation | Can still support contaminants if technique is poor |
PDA | Rich | Mushroom culture and comparison work | Sterilization can alter color and chemistry |
YMA | Rich, yeast-oriented | Yeast cultivation and mixed yeast-mold work | Enrichment may reduce selectivity in dirty samples |
Water agar and other low-nutrient media | Low | Cleanup, germination, stress response, specialized isolation | Often slower or less vigorous for routine expansion |
Let the question choose the medium
If you're trying to see whether a culture is clean and growing normally, MEA gives you a readable baseline. If you're comparing a mushroom isolate against a familiar recipe, PDA may be informative. If you're investigating yeast behavior, YMA makes more sense. If a rich plate is overwhelmed by competitors, a low-nutrient medium can help you change the selection pressure.
Medium choice can change biology, not just appearance. A 2025 study found that Trichoderma grown on MEA produced a different metabolite profile from cultures grown on PDA, with MEA favoring antiproliferative activity and PDA favoring stronger antibacterial activity against Gram-positive bacteria. Another 2025 paper reported that increasing malt extract concentration reduced broad surface spread while increasing total biomass. In other words, a larger colony isn't always a more productive or vigorous culture. See the published comparison of malt-based and potato-based media for the experimental context.
Preparing the Medium Step by Step
A clean bottle, accurate scale, distilled water, MEA powder or separate ingredients, a heat source, and a pH meter or suitable strips are enough to begin. Read the product label first. Premixed powders can use different total concentrations, so the label takes priority over a generic recipe.
Hydrate before you heat
Measure the required powder into part of the room-temperature distilled water. Stir or swirl until every particle is wet, then add the remaining water. This short hydration step helps prevent agar clumps from floating through the mixture or sticking to the vessel's base.
For separate ingredients, malt extract provides nutrients and agar forms the gel. Mycological peptone can enrich the medium, though additions should follow a tested formulation rather than guesswork. Use the formulation values from the manufacturer's documentation linked earlier, and adjust only if your specific premix label states different concentrations.
Warm the mixture gradually while stirring. Continue until the agar dissolves and the liquid looks even, then stop heating. Overheating can darken the medium, increase evaporation, and change the final concentration.
Common batch killer: Evaporation changes the balance of the ingredients. If the liquid level drops during heating, measure the remaining volume and restore it with distilled water before sterilization.
Check the pH before sterilization
Let the dissolved medium cool enough for safe measurement, then check its pH. A mildly acidic result around 5.5 to 6.0 is a practical starting range for general fungal work unless the product specification states another target. Fungi often tolerate acidity better than many bacteria, yet pH still affects growth and can change which organisms gain an advantage.
Some specialized formulations acidify the finished medium to pH 3.5 with 10% lactic acid or 5% tartaric acid to suppress bacteria. Treat that as a selective adjustment, not a default step for every MEA batch. The technical specification for acidified MEA illustrates why pH, inoculum, and incubation conditions need to be considered together.
Use a vessel with space for expansion. Cover its neck with foil or use a manufacturer-approved vented closure, and label the contents. A liquid container must not be sealed tightly before heating. At this point, the bottle is prepared for sterilization, not direct pouring.
For a visual check of the sequence, compare your setup with this agar plate preparation guide.
Sterilizing MEA Safely with a Pressure Cooker or Autoclave
Sterilization protects the work you've already done. A clean recipe and careful pouring can't compensate for surviving spores inside the bottle.
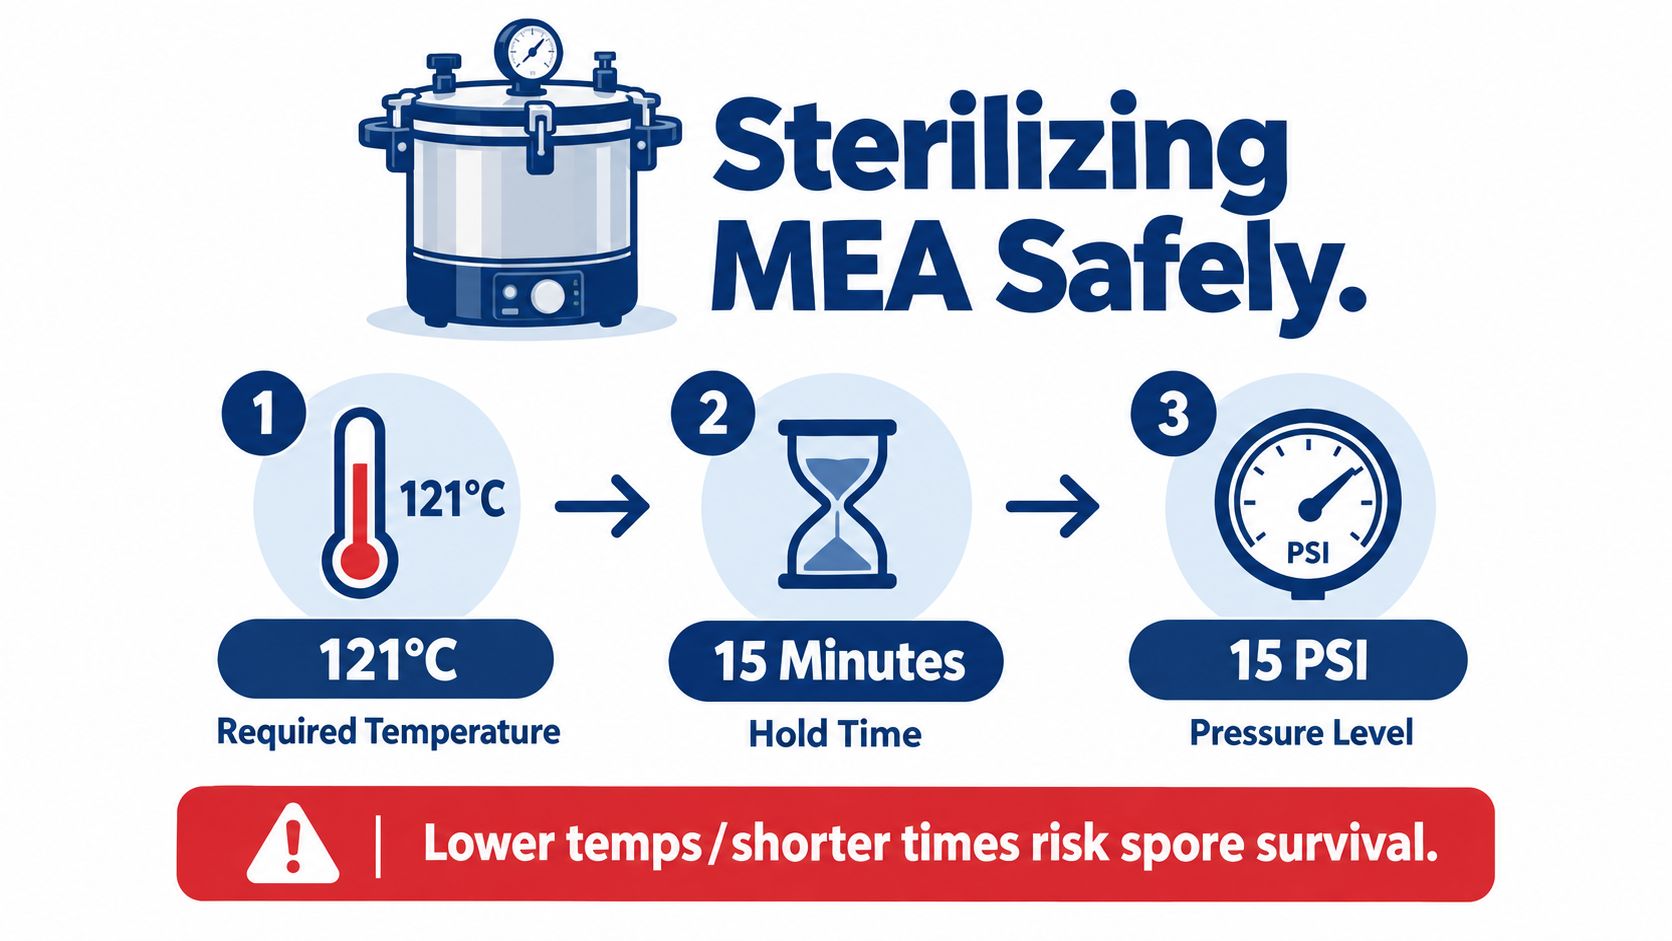
For routine laboratory preparation, technical sheets commonly specify heating the medium under controlled conditions around 115 to 121°C for 10 to 15 minutes, followed by cooling before pouring. A pressure cooker or autoclave must reach the appropriate temperature throughout the load, not merely show pressure on the gauge.
Pressure cooker checks
Place a rack inside the cooker so bottles don't sit directly on the base. Add the manufacturer-specified water, arrange containers with space between them, and keep foil secure over bottle openings. The lid gasket, vent, gauge, and weight must be in good condition.
A laboratory autoclave can run a validated cycle directly. With a home pressure cooker, follow the appliance manual and don't rely on an unverified gauge. The commonly cited target for a standard sterilization cycle is 121°C at 15 psi for 15 minutes, but the correct hold begins only after the cooker reaches operating pressure and temperature.
The cooker should vent continuously before you fit the weight, and the weighted rocker should move in a controlled way rather than bounce violently. If the unit loses pressure, stops venting correctly, or behaves unexpectedly, stop and troubleshoot instead of extending the cycle randomly.
Safety boundary: Never force-cool the cooker, remove the lid under pressure, or open it while steam is escaping. Let pressure fall naturally, then open the lid away from your face.
Don't add supplements after sterilization unless you're using a separately validated sterile-addition procedure. Opening the bottle to add nutrients defeats the barrier you just created. For a detailed setup reference, use this pressure cooker sterilization walkthrough.
Pouring Clean Plates Without Contamination
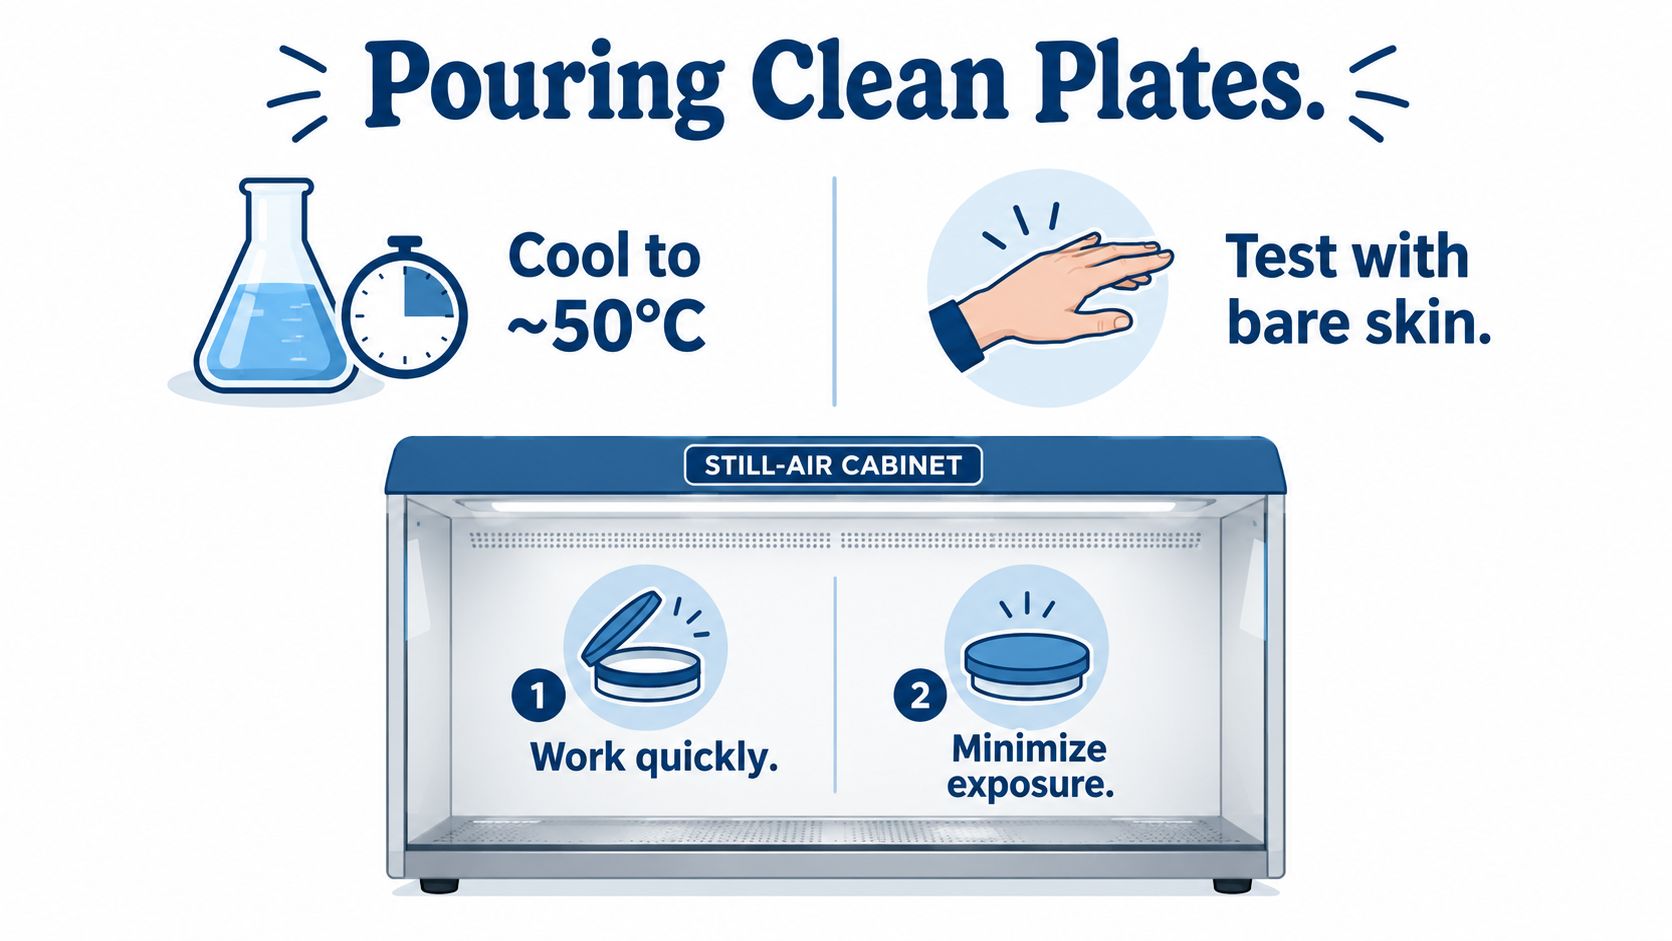
After sterilization, let the bottle cool until the medium is fluid but no longer dangerously hot. Many workflows pour at roughly 44 to 50°C, and a practical technical range is described in this MEA preparation sheet. If you test the container against bare skin, keep the contact brief and stop if it feels hot. Don't use a skin test as a substitute for a thermometer in a professional laboratory.
Work inside a properly prepared still-air box or beneath a functioning flow hood. Clean the work surface, the outside of the bottle, and the plate packaging with an appropriate disinfectant. Arrange everything before opening anything so the agar spends as little time exposed as possible.
A steady pour makes a better plate
For a 90 mm plate, roughly 15 mL per plate is recommended by some technical specifications, while other workflows use around 20 mL. Use one consistent volume within your own workflow so plates have comparable depth. Pour in a smooth stream, avoid splashing, and cover each dish immediately.
Under a flow hood, keep your hands below the clean airflow and raise plates on a rack if needed. Inside a still-air box, work slowly enough to avoid turbulence but quickly enough to limit exposure. Don't stack dishes until the agar has gelled.
Watch the surface as it sets. Bubbles usually come from pouring too quickly or from agitation. Condensation often means the medium was too hot or the plates were covered before they cooled. Uneven agar usually results from pouring on a tilted surface.
A clean plate should look boring: level, intact, and free of unexplained droplets, cracks, or discoloration.
Once the agar has set, wrap the plate edges with Parafilm or place them in a clean sleeve bag. Wrapping limits air exchange and helps protect the edge from accidental exposure, but it won't rescue a plate poured in a contaminated environment. For technique details, review this aseptic lab practice guide.
Reading Plates, Spotting Trouble, and Troubleshooting
A plate doesn't prove your preferred explanation. It gives you visual evidence that must be read cautiously.
Healthy fungal mycelium commonly appears white at first, with an even radiating edge. Some cultures look cottony, while others form denser strands or rhizomorphic growth. Texture and growth pattern help, but neither one identifies an organism by itself. Color can change with age, nutrition, temperature, and sporulation.
Use several clues together
Green growth often suggests a sporulating Trichoderma-type contaminant, while dark growth can occur with Aspergillus-type molds. Pink colonies may indicate yeast-like contamination, and wet, spreading, sour-smelling growth can point toward bacteria. These are useful warning signs, not absolute identifications. Don't open suspicious plates to smell them.
Observation | Likely identity | Recommended action |
|---|---|---|
Even white growth with a clean advancing edge | Intended filamentous fungus is possible | Keep labeled and monitor |
Rapid green sporulation | Trichoderma-type mold is possible | Seal, isolate, and discard according to your waste procedure |
Dark or black sporulating growth | Aspergillus-type or another dark mold is possible | Don't open casually, isolate and discard |
Pink, glossy, or yeast-like patch | Yeast contamination is possible | Compare with controls and isolate |
Wet, spreading, translucent growth | Bacterial contamination is possible | Seal and discard, don't transfer |
If every plate turns green within a short interval, suspect a shared failure. The likely sources include a high spore load in the sample, contaminated tools, poor still-air-box preparation, or excessive exposure during pouring. If none of the plates grows, check whether the source culture was viable, whether the medium overheated, and whether the sterilization or cooling process damaged the workflow.
A single questionable spot doesn't always mean the entire batch is useless. Keep it separate from clean plates and never transfer from a region you can't confidently distinguish. Label every dish with the preparation date, source, and transfer details. A sealed bag is safer than an open plate on the workbench.
Reading plates is a learned comparison skill. Keep a clean control plate, photograph cultures under consistent lighting, and build your reference library from known, legal organisms.
For clinical or contamination investigations, MEA can be useful but it isn't a complete identification system. A 2025 onychomycosis study reported that MEA supported dermatophytes, non-dermatophyte molds, and yeasts. The study reported MEA culture sensitivity of 63.3%, compared with 59.2% for KOH microscopy alone, while combined testing reached 71.4%. Those values come from the study's stated conditions and shouldn't be treated as a universal result for every sample. Read the onychomycosis culture study for the testing context.
Storing Plates and Finishing with Safety and Legal Reminders
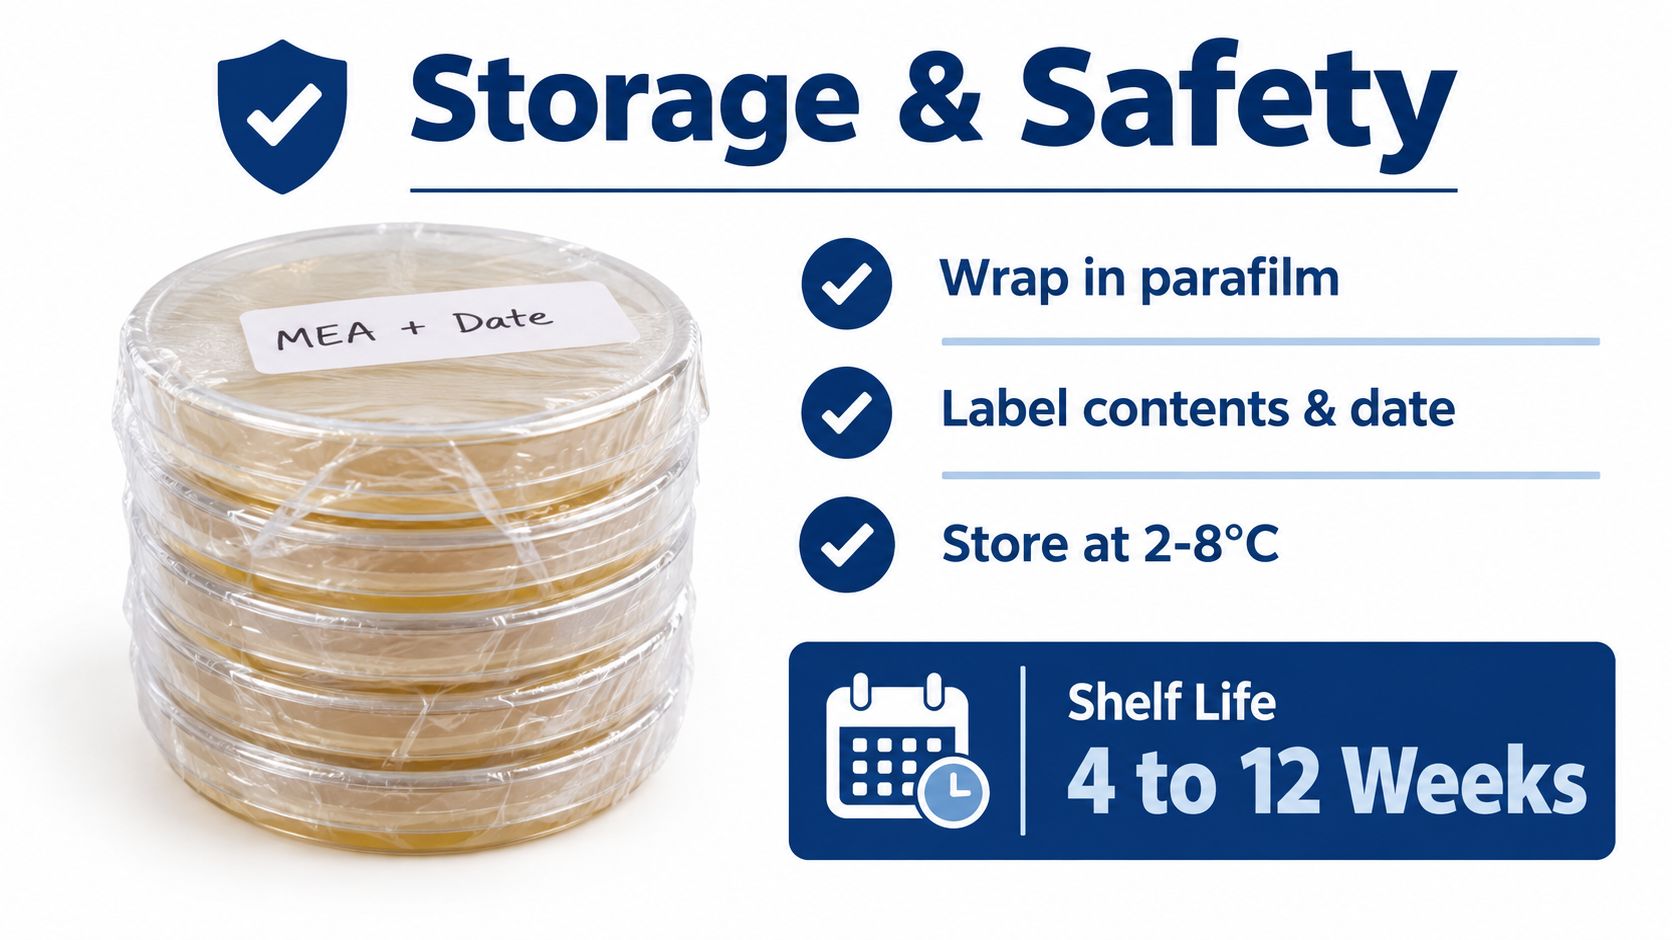
Once the agar has gelled, seal each plate with Parafilm or place it in a clean sleeve bag. Label the contents and preparation date, then refrigerate the plates at 2 to 8°C. Depending on formulation, exposure, and contamination control, many suppliers list poured-plate shelf lives from several weeks to a few months. Inspect every dish before use. Cracks, drying, discoloration, unexpected droplets, or visible growth mean the plate should be set aside.
A cold plate can create a wet film when opened. Let it return to room temperature with the lid closed before inoculation, so condensation is less likely to run across the agar. Keep equilibration away from an open workspace, where dust and airborne spores can settle.
Disposal deserves the same care as preparation
Treat unknown molds and mixed cultures as potentially hazardous. Do not open a contaminated plate to scrape, smell, or inspect spores. Seal it in an autoclavable bag, use your equipment's validated disposal procedure, and let the load cool before handling. A common hobbyist practice, described by Colorado Cultures, is pressure cooking contaminated plates at 121°C for 45 minutes, but home equipment and local waste rules differ. Follow the cooker manual and applicable regulations rather than treating that practice as universal.
Sporulating molds also require respiratory precautions. Handle organisms such as Aspergillus carefully, and do not assume a simple face covering provides the protection of a properly selected, fit-tested respirator. Clinical isolates, unknown-risk environmental samples, and large quantities of mold belong in an appropriate laboratory facility.
Malt extract agar fits lawful food, brewing, educational, and research-oriented mycology. Cultivating psychoactive species is illegal in many jurisdictions. Check local law before buying cultures, growing organisms, or disposing of biological material, and keep the work within legal purposes.
Colorado Cultures sells a pre-mixed Malt Extract Agar Pre-Mix and pre-poured plates made with light malt extract and bacteriological agar. These options let beginners focus on sterile technique instead of weighing every ingredient. Visit Colorado Cultures to compare supplies, educational resources, grow materials, and local support for legal mushroom work.
Comments