
Cinnamon Cap Mushroom: Identification and Edibility
If you search for a cinnamon cap mushroom and find two different mushrooms staring back at you, which one have you found? That confusion isn't your fault. The common name gets used loosely, and common names don't carry the precision that scientific names do. You'll get much further, and stay much safer, once you anchor every observation to a species, a substrate, and a set of field marks you can check yourself.
What a Cinnamon Cap Mushroom Actually Is
Most sources tie the name cinnamon cap mushroom to Pholiota adiposa, a wood-decaying scalycap in the family Strophariaceae. Think of the family as a neighborhood and the species as a specific house. Knowing the neighborhood helps, but it doesn't tell you who lives at the address you're looking at.
The layout below shows why a shared nickname can send beginners in two directions at once.
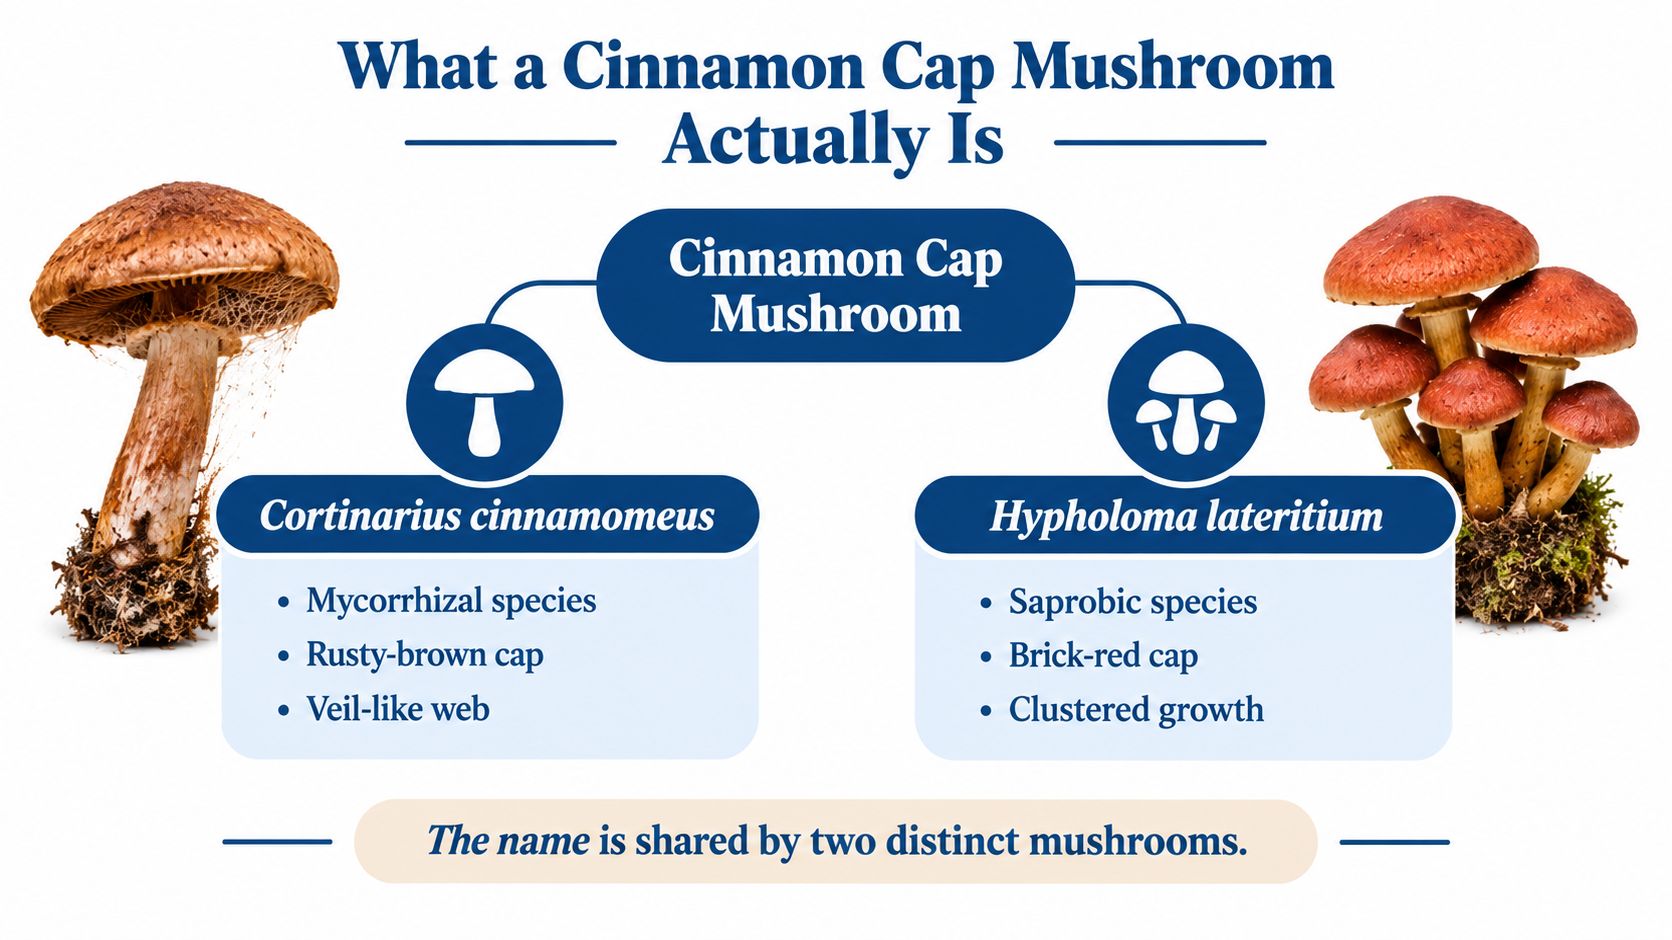
A Name That Describes What You See
The scientific name is a small field guide by itself. Pholiota derives from a Greek term associated with scales, and adiposa refers to the greasy or fatty cap surface when it's moist, traits summarized in the documented history and description of Pholiota adiposa. That history goes back to 1786, when August Batsch described it as Agaricus adiposus. In 1871, Paul Kummer moved it to Pholiota, giving us the combination used today.
That history matters for a practical reason. Older books, culture labels, and online photos may use different names for closely related scalycaps. If you only track the nickname, you can't tell whether two sources are even discussing the same organism.
Start with the Latin name. A nickname tells you what someone thought a mushroom looked like. A scientific name tells you what organism they claimed to identify.
What Kind of Fungus It Is
P. adiposa is saprobic, which means it feeds by breaking down dead woody material rather than partnering with a living tree root or infecting living tissue as its main strategy. You'll most often encounter it in clusters on hardwoods. Its reported range includes Europe, Asia, and North America, with broader species-group records extending further.
Hold onto two anchors from here on. First, cinnamon cap in this guide means the scaly, greasy-capped P. adiposa unless another species is named explicitly. Second, appearance alone won't finish an identification, because related Pholiota species can overlap a great deal.
Key Field Marks for Identification
Don't try to name a cluster from cap color alone. Work through the mushroom in a fixed order, top to bottom and outside to inside, and write down what you see. That habit slows you down in a useful way and gives an experienced identifier something concrete to review later.
Cap, Gills, and Stem
Cap surface: Look for a scaly texture and a surface that can feel greasy when moist. Note whether scales sit flat or lift, and whether they're concentrated near the center or spread across the cap.
Cap color and shape: Record the color on young and older caps separately, since moisture and age change both. A single mature specimen can mislead you if you haven't seen the cluster's younger buttons.
Gills: Turn one cap over and note the gill color, spacing, and how the gills meet the stem. Photograph this view straight on, because it's the angle beginners most often forget.
Stem and flesh: Check for scales, a ring or ring zone, and how firmly the cluster attaches to wood. Cut one specimen lengthwise and note the flesh color before it dries or bruises.
Each check takes less than a minute, but together they replace a vague impression with evidence. You're not hunting for one magic trait. You're building a pattern that either fits P. adiposa consistently or starts to fall apart.
The Spore Print Step
A spore print adds a trait you can't get from a trailside photo. Place a mature cap gill-side down, leave it undisturbed, and record the deposited color before you handle it further. If you're new to the technique, a step-by-step explanation of how to make and read a spore print will help you avoid a faint, contaminated, or misread result.
Photograph the whole cluster in place before you pick anything. Substrate, grouping, and the underside of the cap disappear from the record the moment you carry a loose specimen home.
Finish by noting the wood type if you can identify it, whether the wood is a log, stump, or buried debris, and whether the mushrooms emerge from bark, a crack, or exposed wood. Those details won't identify the species by themselves. They will often rule out mushrooms that merely share a brown cap.
Where It Grows and When to Look
Habitat turns a guess into a narrower, testable idea. Since P. adiposa is saprobic, your search image should start with dead hardwood, not soil, mulch beds, or living trunks chosen at random. It most often appears in clustered growth on hardwoods including beech, birch, alder, poplar, and oak.
The setting in this photo captures the kind of damp, wood-rich microhabitat worth slowing down for.
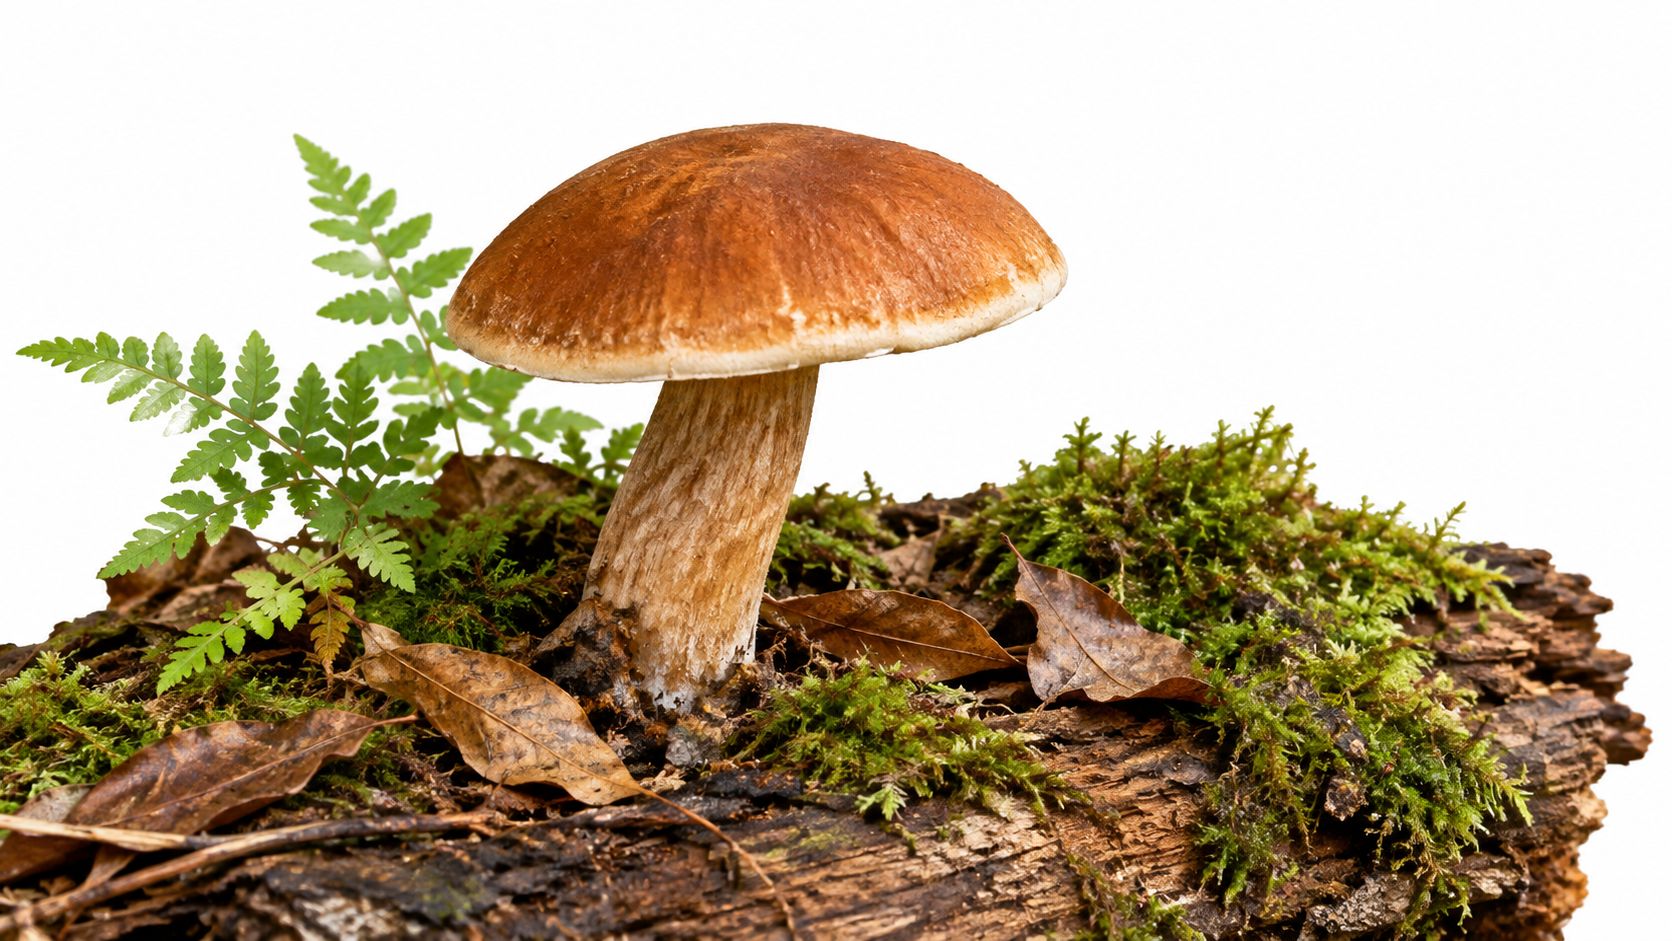
Reading a Log Like a Habitat
Walk the shaded side of fallen hardwood where moisture lingers after rain. Check cracks in bark, broken branch stubs, and the line where a log contacts damp leaf litter. A cluster emerging from buried wood can look terrestrial at first glance, so trace the stem bases carefully before you decide what it's growing from.
Elevation changes the calendar rather than the basic rule. Lower, warmer sites can dry out quickly, while higher forests hold moisture longer but warm up later. In either setting, you're looking for the same sequence, sustained moisture in the wood followed by conditions cool enough for fruiting bodies to develop without drying out.
Timing Your Walk
Don't treat a single dry walk as proof a site is empty. Wood-decay fungi can sit invisible as mycelium inside a log and fruit only when moisture and temperature line up. Revisit promising hardwood after wet periods, and compare several logs of the same tree species in the same drainage.
After soaking rain: Check shaded logs first, since exposed wood loses surface moisture fastest.
During cool spells: Look for young clusters in bark cracks before caps fully expand.
On return visits: Photograph the same log from the same angle so you can see whether a cluster is new, expanding, or decaying.
That repeat-visit habit teaches you more than covering extra miles. You'll start connecting a particular log, its moisture, and its fruiting window into one mental model you can reuse in other temperate forests.
Edibility and the Pholiota Nameko Connection
Here's the assumption worth challenging directly. If a mushroom is sold in a market under a familiar nickname, that doesn't mean every wild mushroom given the same nickname is the same species or is safe to eat. Edibility follows a confirmed species identification, not a common name.
Two Pholiota Species, Two Different Caps
The name cinnamon cap is also commonly used for Pholiota nameko, a small brown mushroom with a characteristic gelatinous or slimy cap. Specialist coverage describes P. nameko as an edible, hardwood-rotting species cultivated especially on sawdust or logs, a distinction laid out in detailed background on nameko cultivation and identity. Its slippery surface is a useful culinary clue when you're handling a known cultivated product. It isn't a standalone safety test in the woods.
By contrast, P. adiposa is the scaly-capped species anchored earlier in this guide. Slippery versus scaly sounds like a simple split, and in a cultivated setting with a labeled culture it often is. In a wild cluster, rain, age, and handling can change how a cap feels, so texture still has to sit alongside substrate, gills, spore print, and expert review.
The contrarian point is simple. The trait that makes nameko recognizable in a kitchen, its slippery cap, is not enough evidence to approve a wild mushroom for your plate.
What This Means for Cooks
If you want to cook with nameko, buy it or grow it from a labeled commercial culture whose scientific name you can read before you pay. That gives you a known organism, a known substrate, and a harvest you can trace. A wild brown cluster gives you none of those controls.
Don't infer edibility for P. adiposa from nameko's culinary reputation, and don't transfer a recipe from one species to another because a website used the same nickname for both. If a seller can't give you a scientific name, that's not a minor paperwork problem. It's the point where a careful buyer walks away.
Treat this subject as cultivation and food sourcing, not casual foraging approval. Any wild mushroom you are considering as food needs expert identification of the actual specimen, not a photo match against a market mushroom with a similar name.
Look-Alikes and How to Stay Safe
Look-alike risk is easier to manage when you sort confusions into groups. One group is other scaly Pholiota species, which can be difficult to separate. The other is unrelated brown, clustered wood-decay mushrooms that share habitat and general color but differ in finer features.
Modern identification is complicated because mushrooms historically assigned to P. adiposa, P. aurivella, and P. limonella have shown close or overlapping genetic relationships. That's not a reason to give up on field marks. It's a reason to stop pretending a quick visual match is the same as confirmation.
Feature | Cinnamon cap (Pholiota adiposa) | Other scaly Pholiota | Other brown wood-decay mushrooms |
|---|---|---|---|
Cap surface | Scaly, can feel greasy when moist | Often scaly, pattern varies | May be smooth, sticky, or fibrous |
Growth | Clustered on dead hardwood | Often clustered on wood | Clustered, scattered, or on buried wood |
Identification problem | Needs full feature set | Can overlap closely, may need molecular work | Substrate and spore print often help separate |
Safe response | Document, don't assume | Get expert review | Rule out before any culinary thought |
Questions to Ask Before You Go Further
Ask what exact wood the cluster grows from and whether the stems emerge from that wood. Then ask whether cap, gills, stem, flesh, and spore print all point the same way. If one feature conflicts, you don't average the evidence. You stop and treat the identification as unresolved.
Storage is part of safety too. A correctly identified edible mushroom can still spoil, and confusing spoilage with normal aging is its own beginner mistake. If you're unsure how moldy food risks differ from ordinary freshness questions, background on what happens if you eat mold is a useful separate check before anything questionable goes into a pan.
When in doubt, throw it out isn't a slogan. It's a decision rule for the moment your evidence stops agreeing with itself.
Keep wild specimens you collect for identification separate from food mushrooms, label them with date and location, and don't taste a piece to test it. No field mark you can check at home converts an uncertain Pholiota into a safe meal.
Cultivating Cinnamon Cap at Home
Growing a cinnamon cap mushroom at home works best when you stop looking for one perfect room temperature. Cultivation is a two-phase process. You first let mycelium colonize the substrate under warmer conditions, then you deliberately shift to cooler, humid, lightly lit conditions to encourage fruiting.
This four-step overview shows that phase change before we get into the measured benchmarks.
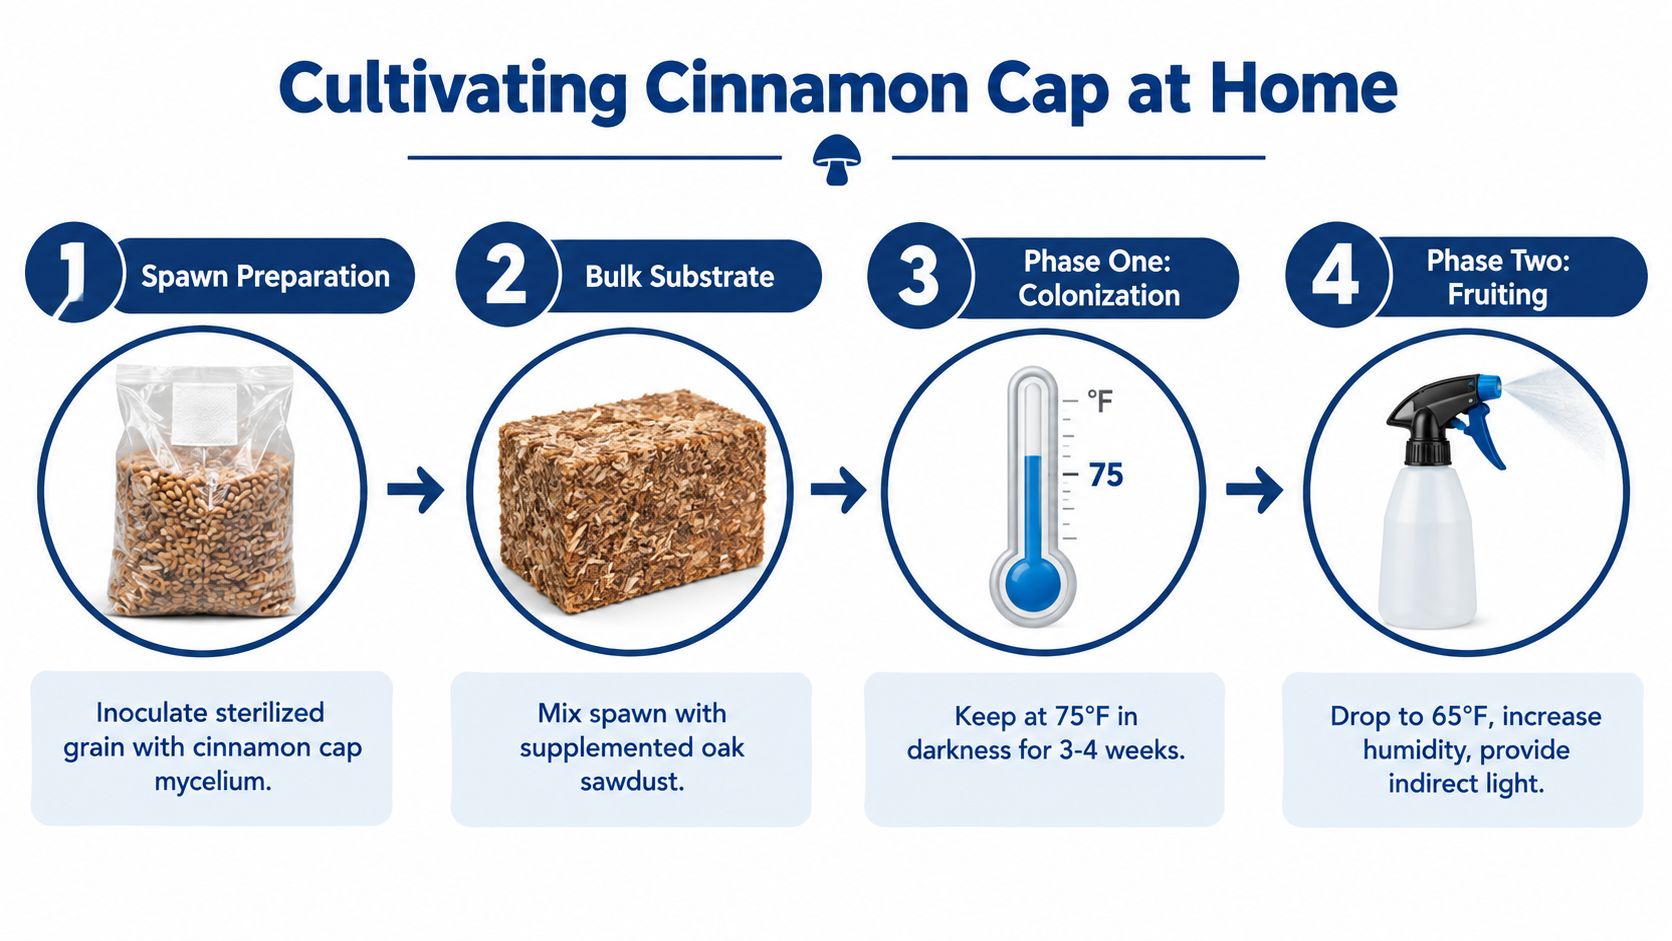
Phase One Colonization
A 2023 study of a wild P. adiposa strain from Mudanjiang City, Heilongjiang Province, China reported optimal mycelial growth at 25°C and pH 6.5 to 7.0, with glucose as the preferred carbon source and yeast paste as the preferred nitrogen source, according to peer-reviewed cultivation research indexed on PubMed. The strain was identified using both morphology and molecular comparisons of ITS and nLSU sequences. That detail matters because it ties the numbers to a confirmed organism rather than an anonymous nickname.
For a home grower, the lesson isn't to copy a laboratory medium at your kitchen counter. It's to keep colonization conditions stable and warm within the tested range, protect the bag from contamination, and wait for a complete spawn run before you try to trigger fruiting.
Phase Two Fruiting
In strain-selection work, cultures held at 25°C were cold-shocked at 0 to 5°C for 3 to 5 days after complete spawn run, then fruited at 18 ± 2°C, 80 to 90% relative humidity, and 12 hours of illumination at 300 to 600 lux, conditions described in published Pholiota strain-selection research. Treat that exact cold shock as strain and system dependent rather than mandatory for every modern bag. The transferable principle is the deliberate temperature drop plus consistent moisture, not heavier misting alone.
The short video below is useful for seeing how a grower handles the transition from a colonized block to an active fruiting environment.
Keep humidity high enough that primordia don't dry out, but don't seal the chamber into stagnant wetness. Fresh-air exchange still matters. If pins stall, check whether you changed the environment between phases before you blame the culture.
Substrate Decisions and What Actually Changes
Beginners often ask for the best substrate as if it's a single recipe with a correct answer. A better question is what outcome you're optimizing for. Yield, reliability, contamination risk, and nutritional profile don't always move together.
What Controlled Trials Show
In one fruiting trial noted earlier, the highest reported yield was 24.96 g per cultivation bag using a substrate containing 20% sawdust, 10% wheat bran, 1% soybean powder, and 1% quicklime powder. Don't read that as a universal promise. Strain genetics, substrate moisture, sterilization, temperature, and fruiting conditions can all change the result, so it works better as a reference point for your own notes than as a target you chase blindly.
All strains in the strain-selection work also colonized a supplemented substrate of 60% cottonseed hull, 18% sawdust, 15% wheat bran, 5% corn flour, 1% gypsum, and 1% lime. That tells you supplemented mixes can work. It doesn't tell you the richest mix is automatically the safest choice for a first grow, since added nutrition can also feed contaminants when sterile technique slips.
When Yield Isn't the Whole Story
A 2025 study compared standard commercial substrate, willow-based formulations, willow combined with cottonseed hulls, and willow alone, and all tested substrates supported colonization and fruiting. Total yield and biological efficiency didn't differ significantly among several treatments, yet willow-grown mushrooms showed higher concentrations of some nutrients including vitamin D2 and minerals including calcium, magnesium, and sodium, in research comparing substrate effects on production and nutrition. That challenges the idea that the largest harvest is always the best harvest.
A separate 2025 domestication comparison also found soluble protein of 186.16 ± 27.58 μg/mL in natural samples versus 48.28 ± 1.62 μg/mL in cultivated samples. Use that as a reminder that growing conditions shape composition, not as a scorecard for wild versus cultivated mushrooms.
First-grow rule: Choose a reliable sterilized substrate and finish a clean run before you start redesigning the recipe.
If you're weighing sawdust, supplemented hardwood, and other bases, a practical overview of what you can use for mushroom substrate helps you separate the base material from supplements and sterilization needs. After a successful first flush, change one variable at a time in side-by-side bags. That's how a substrate preference becomes evidence instead of folklore.
Colorado Context and Common Beginner Questions
Colorado rewards patience more than mileage. A Denver grower working indoors can control the phase shift described above, while a forager in the foothills has to wait for hardwood, moisture, and cooler nights to align. Those are different activities with different risk profiles, and mixing lessons from one into the other is where beginners get into trouble.
This screenshot gives a sense of the kind of mycelium development resources local growers look for before they move a project outdoors or into a larger setup.

If you're comparing indoor bags with logs or beds, background on outdoor mushroom cultivation methods and timing helps you judge where a wood-loving species fits and where it doesn't. At elevation, protect outdoor projects from rapid drying and plan scouting around moisture rather than a fixed calendar date.
Quick Answers for First-Time Growers
Can I grow it on supplemented sawdust in a dry home? Yes, in principle, but you'll need a contained fruiting space where you can hold humidity without creating stagnant, soaking surfaces.
Should I cold-shock my first bag? Only follow a cold-shock step if your culture supplier recommends it for that strain and system, since responses vary.
What's the simplest safety rule for a wild brown cluster? Don't eat it based on a common name, a photo match, or a slippery or scaly cap. Get the actual specimen identified by an expert.
What should I buy first? A labeled culture with a scientific name and a properly sterilized substrate matched to that culture, before any recipe experiments.
Start cultivated, document everything, and let wild finds teach you identification rather than dinner. That order builds skill without borrowing risk you don't need.
If you're ready to grow from a labeled culture instead of guessing from a nickname, Colorado Cultures offers sterilized grain, substrates, all-in-one grow bags, and hands-on classes for Denver-area growers. Stop by a Lakewood or Englewood storefront or order online, bring your cinnamon cap questions, and get practical help matching a culture to a clean, reliable first run.
Comments