
Sterile Scalpel Blade Handling for Growers
You've just opened a fresh plate inside a still air box, the sterile scalpel blade is in your gloved hand, and the clean transfer looks simple. Then you pause to adjust the lid, set the blade down, or cool it against a surface. That small movement can undo the protection you paid for before the blade ever touches agar.
A sterile blade helps, but it doesn't create sterile technique. In mycology, success depends on what happens during the few moments after opening the package: where your hands travel, what the edge passes over, how long the plate stays exposed, and whether the blade is cooled without touching anything questionable.
Why Blade Handling Dictates Mycology Success
Inside a still air box, the risky moment often comes after the sterile scalpel blade is opened. The edge may be clean, yet a glove, wrapper, plate rim, or box surface can contaminate it during one unnecessary adjustment. The CDC's infection-control guidance classifies scalpels among instruments that penetrate soft tissue or bone and states that these instruments should be sterilized after each use or discarded.
The same principle applies to agar work. A blade can leave its package sterile and become unusable seconds later. In practice, excessive handling and poor cooling create more failures than the blade itself.
Prepare before the wrapper moves
Inside a still air box, arrange the complete workspace first. Clean the surface, place the receiving plate or tube, clear the waste area, and establish the blade's travel path before opening the source plate. This removes the small decisions that cause awkward hand movements once the culture is exposed.
A flow hood supplies filtered airflow, but hand position still matters. Keep exposed plates in the clean airflow, avoid reaching over them, and keep your forearms from crossing the work zone. In a still air box, move slowly enough to avoid turbulence while maintaining a steady rhythm. Hesitation is a problem when it leads to hovering, repeated repositioning, or contact with nearby objects.
Practical rule: Stage every object you may need before opening the plate.
Hold the scalpel by its handle or mounting point. Keep the blade pointed away from your fingers and exposed agar. Do not place it on the box floor, a glove, the wrapper, or the outside of a plate. If the blade requires flame sterilization, plan a clean cooling point before beginning. Cooling against a questionable surface defeats the sterilization step.
Control the blade's travel
Open the source plate only after the receiving medium and waste container are ready. Keep the lid low and the exposed area brief, then make the cut with a controlled motion. A single clean pass is usually easier to manage than sawing, probing, or repeatedly lifting the blade.
Every extra movement adds a contact opportunity. Repositioning can drag contaminants across agar, while a wide arc can carry the blade through a less controlled part of the box or hood. Keep the edge within the planned route from donor material to receiving medium.
For tissue transfers, decide where the sample will land before unwrapping the tool. Keep the handle stable, move the blade with the fingers rather than the whole arm, and avoid correcting the angle over an open plate. Close or cover the receiving vessel as soon as the transfer is complete. This physical discipline keeps the sterile blade from becoming the source of an otherwise avoidable contamination event.
Choosing Between Single-Use and Reusable Options
A single-use sterile scalpel blade and a reusable handle solve different problems. The disposable setup reduces preparation and gives you a sealed, sharp edge at the start of a transfer. A reusable handle can make routine work economical, but only if you can sterilize it reliably and inspect the blade after heating.
The history of the modern scalpel reflects this same shift toward replaceable cutting blades. Morgan Parker patented a two-piece scalpel design in 1915, allowing the blade to be detached and replaced while keeping the handle, as described in the British Journal of Surgery historical account. Cold-sterilization methods associated with Bard-Parker also helped make disposable blades practical because repeated heat exposure dulled blades.
Compare the setups before choosing
Feature | Single-Use Sterile Blade | Reusable Handle and Blade |
|---|---|---|
Starting condition | Individually sealed and ready when opened | Requires validated sterilization before use |
Main advantage | Fast setup and predictable initial sterility | Reusable handle and flexible routine workflow |
Main risk | Sterility is lost after opening or package damage | Heat can dull the edge, and poor cleaning can leave contamination |
Best fit | Critical isolation work and beginners | Repeated routine transfers with controlled bench procedures |
After opening or use | Discard if sterility is uncertain, even if unused | Re-sterilize only when the blade and holder are suitable for that process |
For an important isolation, a sealed disposable blade is usually the simpler choice. Colorado Cultures offers Sterile Disposable Scalpels, #11, as singles or a 10-pack, which is one practical format for keeping a fresh tool available without maintaining a reusable blade system. A stainless steel scalpel guide can also help you understand the handle and blade considerations before assembling a reusable setup.
Don't treat an opened disposable blade as clean inventory. If you unwrap it and decide not to use it, you can't assume it remains sterile for a later transfer. Packaging instructions commonly direct users not to re-sterilize or reuse single-use blades, and sterile items should remain in intact wraps, pouches, or rigid containers until use, as described in the sterile surgical blade instructions.
Where reusable equipment earns its place
Reusable handles make sense when you perform frequent routine transfers and have a dependable sterilization process. They're less forgiving when the operator improvises. A handle that looks clean may still have residue in its mounting slot, while a blade that survives heating may no longer cut cleanly.
Choose the disposable route when the transfer is valuable, your technique is still developing, or you don't have a validated method for cleaning and sterilizing reusable equipment. Choose reusable equipment when you can control preparation, verify fit, protect the edge, and dispose of damaged blades immediately.
Flame Sterilization and Edge Protection
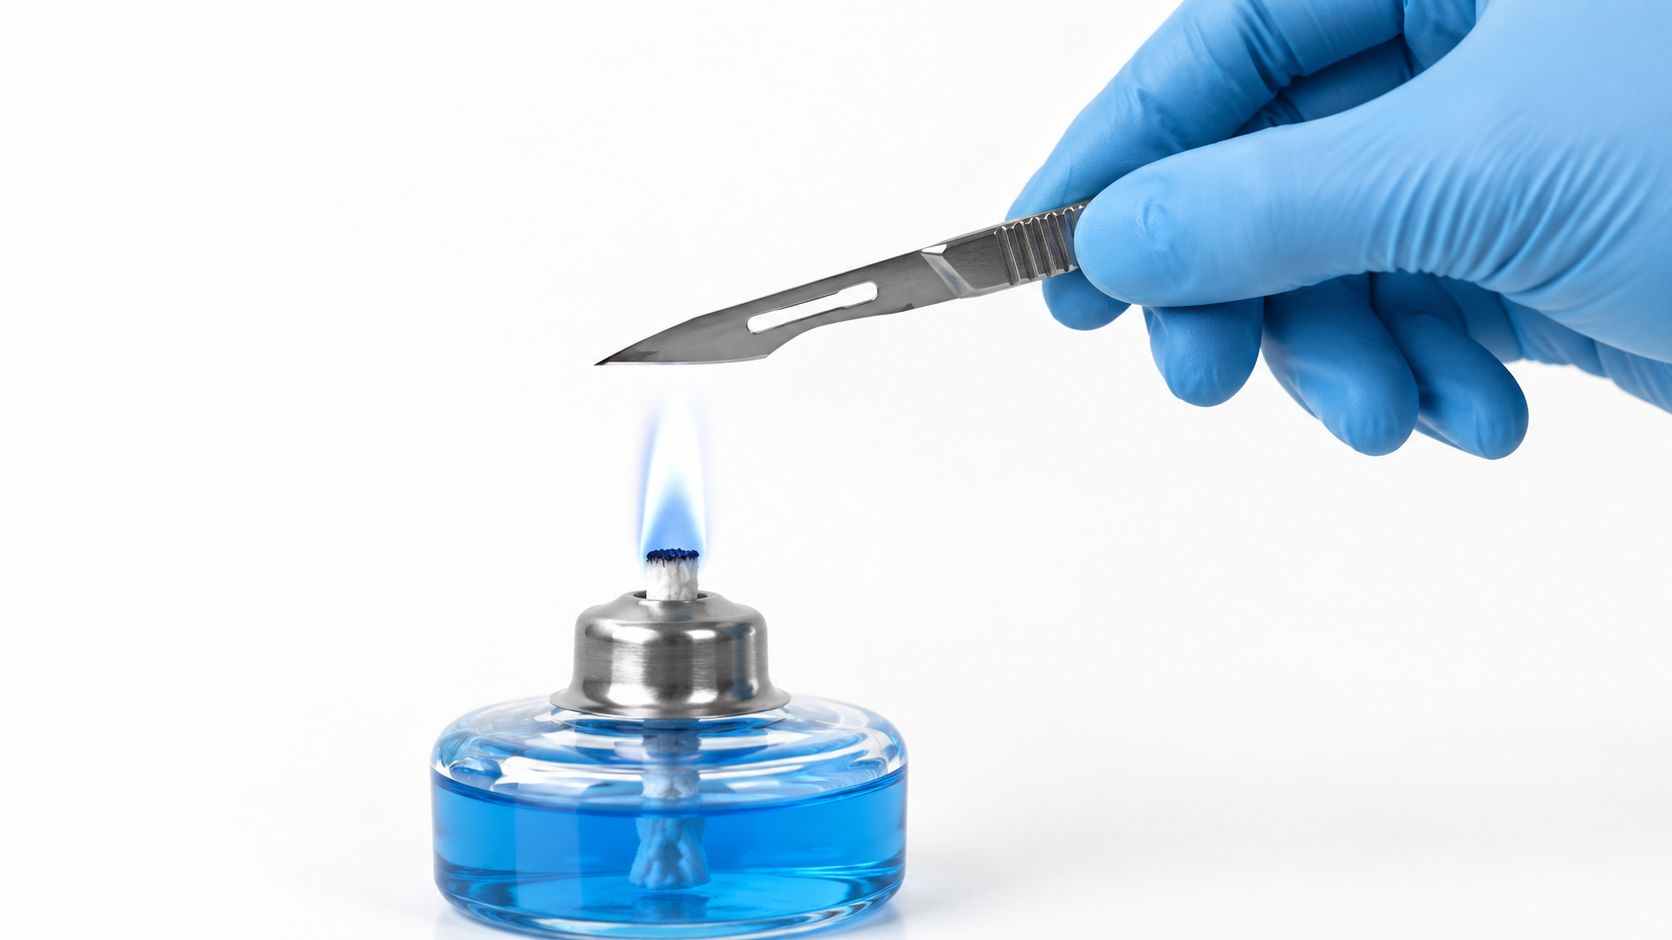
Flame sterilization works because it exposes the metal edge to intense heat, but it also creates a sharpness problem. A blade can be microbiologically clean and mechanically poor. If it has been overheated, the edge may drag through agar, crush tissue, or force you to repeat the cut.
Mount and heat with control
Use a compatible handle and inspect the fit before bringing the blade near the flame. The blade must sit securely. A loose mounting point can shift during a cut, and correcting it inside the work area creates an avoidable contamination and injury risk.
For a reusable metal blade, hold the sharp side at a shallow angle through the flame rather than leaving one section fixed in the hottest point. Move the blade smoothly so heat is distributed rather than concentrated at the edge. Avoid waving it rapidly, which makes the motion harder to control and can bring the blade through contaminated air paths or into nearby objects.
There isn't one universal heating duration that safely preserves every blade. The correct exposure depends on the blade material, flame, and validated procedure. The bench sterilization guidance for plant tissue culture gives dry-heat holding examples of 160 °C for 45 minutes, 170 °C for 18 minutes, and 180 °C for 7.5 minutes, while also noting that flaming can dull scalpel edges.
After heating, keep the blade moving and allow it to cool briefly in the clean working area. Never cool it by touching agar, the plate rim, a glove, or another instrument. Those surfaces can contaminate the edge immediately.
Inspect before cutting
Look at the edge under your available bench light. Reject a blade showing visible dulling, discoloration, corrosion, deformation, or residue. Don't test sharpness with a finger. A dull edge can be detected during the first controlled cut, but replacing it before contact is safer for both your culture and your hand.
Edge protection matters: Sterilization is only successful for the workflow if the blade remains usable. A damaged edge turns a clean transfer into a tearing and dragging exercise.
Open flames aren't the only option. The same bench guidance identifies flame use for scalpels while noting that dry-heat approaches such as glass-bead sterilizers can be safer and more efficient for some instruments. If you're comparing methods, this practical overview of how to sterilize equipment is useful alongside broader handling guidance, including OSHA compliant tattoo safety by Think Tank.
Flame sterilization is workable when you control the sequence, avoid excessive heating, cool without contact, and replace any blade that no longer cuts cleanly. It doesn't work when the operator treats “heated” as automatically equivalent to “ready to use.”
Executing Clean Tissue Transfers and Agar Work
The transfer begins with your hands, not the blade. Anchor your forearms or wrists where possible without touching the work surface, keep your elbows stable, and move from the shoulder and forearm rather than making small nervous finger movements over an open plate. This gives the blade a predictable path.
For an agar-to-agar transfer, open the donor plate only as far as needed. Bring the cooled blade down vertically or at a controlled shallow angle, depending on the wedge you need, and make one clean cut through the selected mycelium and agar. Don't scrape back and forth. A sawing motion tears the wedge and creates more opportunities for the blade to contact unwanted areas.
Move the wedge without crossing exposed surfaces
Keep the receiving plate positioned close enough that the sample travels a short distance. Lift the wedge with the blade or a sterile tool, keep it visible, and move directly to the new plate. Don't hover over the exposed receiving agar while deciding where to place it.
Set the wedge mycelium-side down when that orientation suits the transfer, then withdraw the blade along the same controlled path. Close the receiving plate promptly. The aseptic technique lab guidance reinforces the broader principle that preparation and disciplined handling protect the transfer more effectively than frantic corrections after exposure.
For mushroom tissue cloning, select interior tissue from a healthy specimen rather than dragging the blade through the outer surface. Prepare the recipient medium before opening the donor. Make the cut, transfer the tissue immediately, and close the receiving container.
Build sterilization into the rhythm
In mycology-style sterile transfers, the usual rhythm is simple: sterilize the blade, cool it briefly without contact, make one cut or transfer, then re-sterilize before the next task. This reduces cross-contamination between samples and limits the time a hot blade spends near living tissue or agar, as described in practical sterile tissue-culture handling guidance.
Don't place a hot blade beside the plate while it cools. Don't blow on it. Don't touch the edge to check whether it's ready. Hold the handle still, keep the edge away from exposed surfaces, and wait until it has cooled enough to avoid thermal damage.
A useful operator's rhythm is:
Cut once: Make the smallest clean cut that accomplishes the transfer.
Transfer directly: Keep the wedge moving toward the prepared receiving plate.
Close promptly: Lower the lid without sweeping it across the work area.
Re-sterilize: Reset the blade before contacting another sample.
The best transfer often looks uneventful. There's no repeated probing, no searching for a place to set the blade, and no long pause with an open plate.
Managing Sharps Safety and Proper Disposal
A sterile scalpel blade can still injure your hand. Sterility describes microbial condition, not protection from the sharp point. During mounting, cooling, blade changes, and disposal, keep your attention on finger position as well as contamination control. Inside a still air box or flow hood, rushed micro-movements create avoidable risk: reaching over an open container, rotating the handle near your fingers, or searching for somewhere to place a used blade.
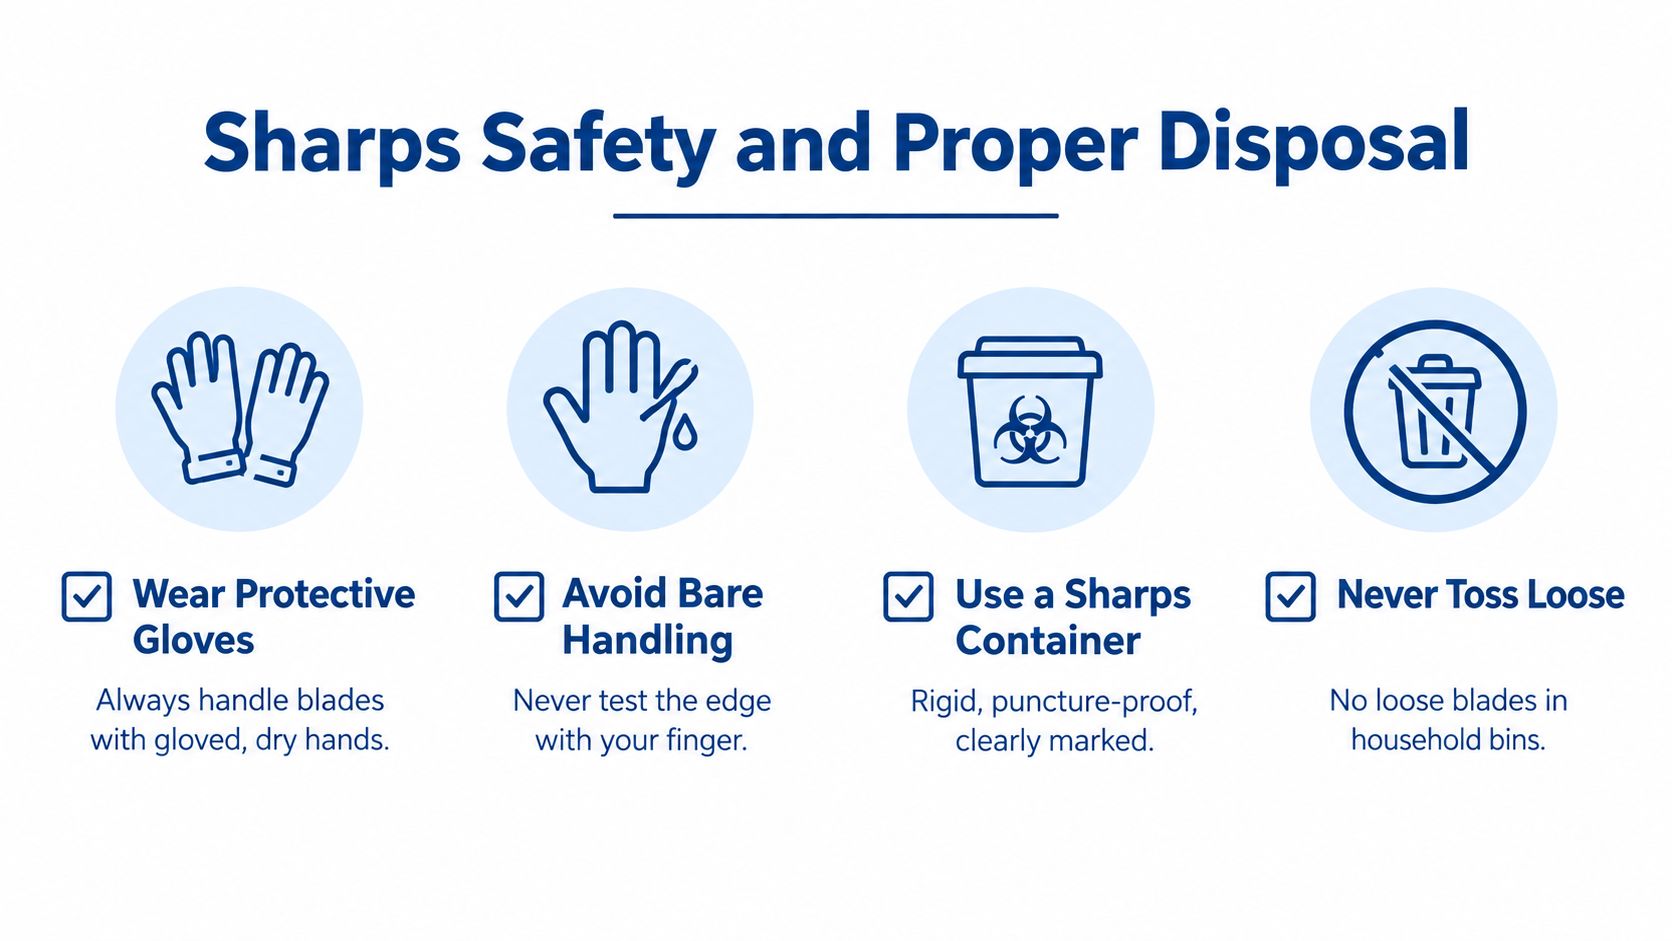
Set a rigid, puncture-resistant sharps container within easy reach before starting. Keep it stable, clearly marked, and positioned so an exposed blade never has to cross the room. A household trash bin is not suitable for a loose scalpel.
Remove the blade without bare handling
Use a blade remover, hemostat, or another tool intended for controlled removal. Keep the point and edge directed away from your body. Do not bend, snap, or pry the blade loose with your fingers. Gloves provide a barrier, but a sharp edge can still penetrate them.
A protective cover may help during brief handling, provided it remains secure. Never use a cover as a reason to leave a used blade on the bench. If it shifts, cracks, or fails to lock, treat the exposed blade as hazardous and move it directly to the sharps container.
Grip the handle deliberately, keep your free hand out of the blade's path, and make one controlled movement from the work surface to the disposal opening. Avoid passing the blade over open plates, bottles, or your other hand.
Set up disposal before starting
Place the container before opening the sterile package. Leave clear space around its opening so you can deposit the blade without pushing past supplies or waste. If it becomes full, damaged, or awkward to use, stop and replace it according to local disposal requirements.
A safe bench has a destination for every sharp before the first cut.
Never hide a used blade beneath wrappers or towels. Do not carry it to another room, place it in a sealed plastic bag, or assume that a closed bag prevents puncture. The disposal container must resist penetration and remain closed during normal handling.
The short video below provides a visual reminder of safe sharps habits:
Keep the bench uncluttered, use dry gloves for a steady grip, and discard damaged or dull blades without testing them. A clean culture is not worth an avoidable hand injury.
Building a Repeatable Sterile Workflow
Reliable sterile work comes from repeating the same physical sequence until you no longer improvise. Before opening anything, clean the workspace, position the source and receiving containers, prepare the waste area, stage the sharps container, and confirm that the handle or disposable scalpel is ready.
Then follow the path:
Stage: Put every object within reach without crossing exposed plates.
Open: Unwrap the blade only when the transfer can begin.
Sterilize and cool: Heat reusable metal appropriately, then cool it without contact.
Transfer: Make one controlled cut and move directly to the receiving medium.
Reset: Re-sterilize between separate cuts or samples.
Dispose: Secure the blade immediately when the work ends.
For broader infection-control learning, an infection control certification course from Premiere Education offers context that extends beyond mushroom cultivation. The core lesson remains practical: fewer movements, fewer contacts, and a prepared disposal route give you more control.
A sterile scalpel blade is one part of the system. Your hand position, cooling method, plate exposure, and disposal habits determine whether that sterile starting point survives the transfer.
Colorado Cultures supplies sterile disposable scalpels, sterilized grain bags, substrates, grow kits, and other mycology tools for home and lab workflows. Visit Colorado Cultures to choose supplies that fit your setup and build a cleaner, safer transfer routine.
Comments