
All in One Grow Bag Fruiting Conditions
Most all in one grow bag fruiting conditions guides start with a neat number, usually a warm room and very high humidity, then treat the job as finished. That advice is easy to remember and often wrong in Colorado. A bag fruits well when humidity, fresh air exchange, temperature, and light work together for the species and growth stage, not when a cheap hygrometer happens to display a familiar reading.
The problem becomes obvious in dry indoor air. A bag can hold enough moisture for pinning while still lacking the gas exchange needed to build healthy fruits. Open it too aggressively and the surface dries before pins establish. Keep it sealed and saturated, and carbon dioxide can accumulate, leading to weak or misshapen growth. The practical skill is learning which dial to move, and when.
Why Generic Fruiting Numbers Fail Most Grow Bags
Generic fruiting numbers fail because they treat every species, room, and growth stage as interchangeable. A target for a coastal grow room does not automatically suit an all-in-one bag in Colorado's dry indoor air. General guidance places fruiting humidity in a high range and pairs it with regular fresh-air exchange, while warning that carbon dioxide must remain controlled (fruiting guidance on humidity and fresh air exchange).
Those figures describe a trade-off, not a recipe. During pinning, the exposed surface needs a protected, humid microclimate so tiny primordia do not stall or dry. After pins establish, the balance shifts toward more air exchange. Stale air can produce weak or misshapen fruits, but aggressive ventilation strips moisture from the block. In Colorado, winter heating makes that loss especially fast.
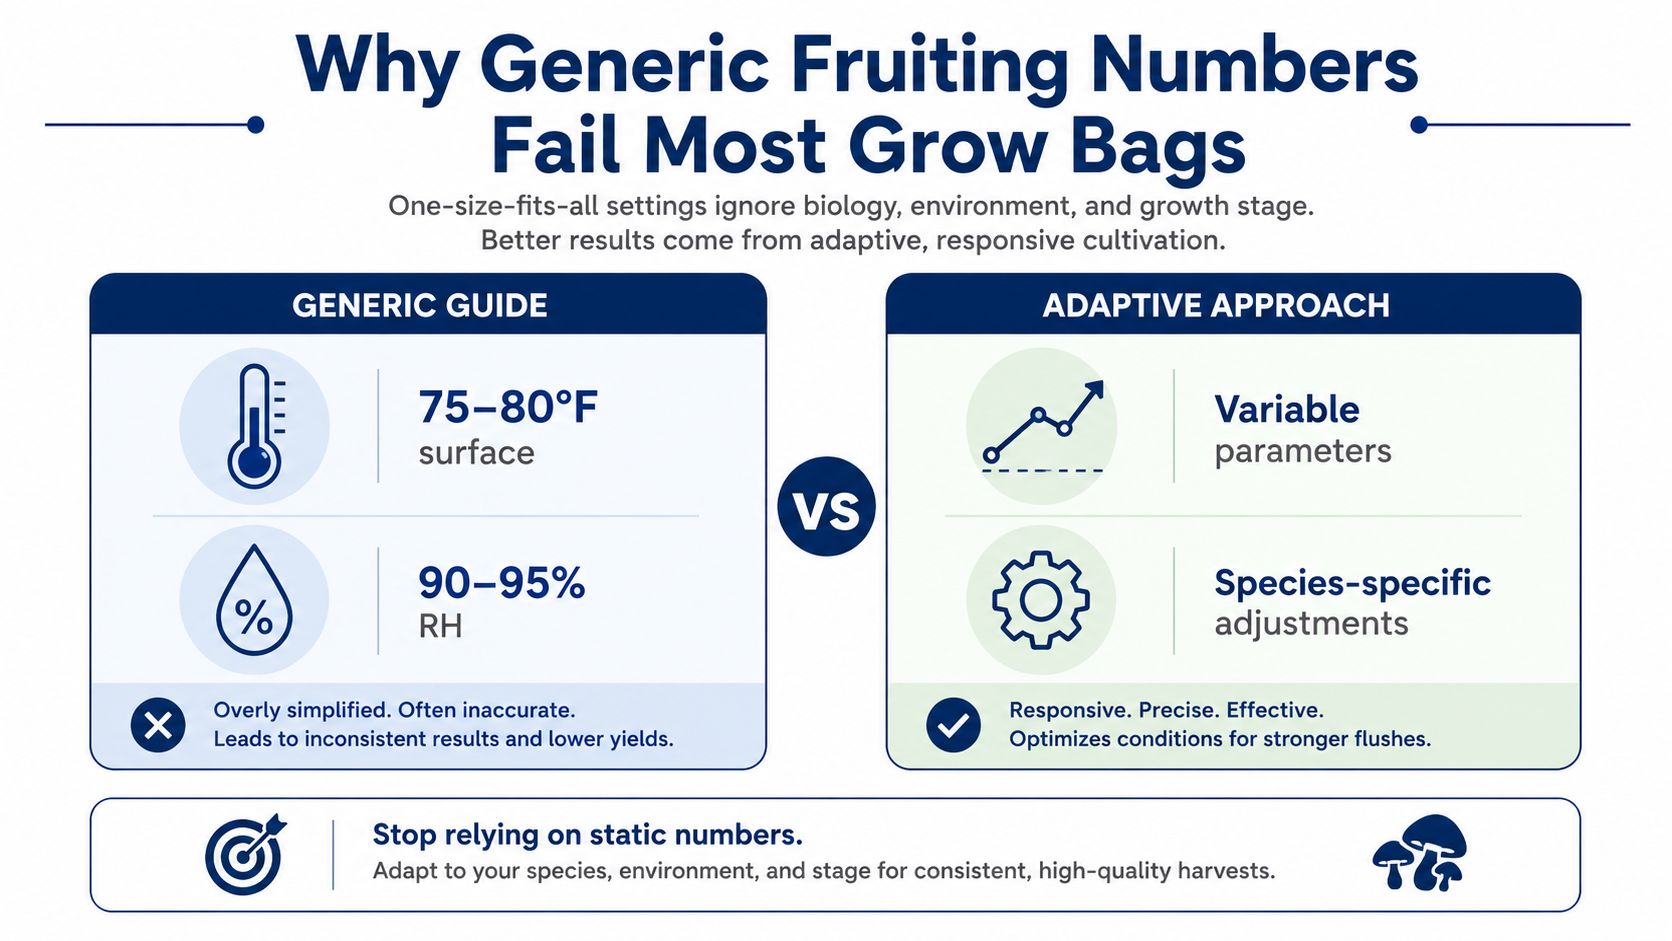
Treat the environment as four connected dials
Humidity supplies moisture at the surface and around young pins. FAE replaces stale air, but also increases evaporation. Temperature affects development speed and fruit shape, while light helps orient growth and supports normal form without warming the block.
Species changes the setting, and so does the flush. A first flush begins with a hydrated substrate and usually tolerates a more protective setup while pins establish. Later flushes start with less available water, so copying the first-flush ventilation routine can dry the block before new pins develop. Adjust based on surface appearance, fruit shape, and moisture loss rather than a fixed display reading.
Practical rule: Change one environmental variable at a time. Otherwise, you cannot tell which correction helped.
Comparing grain bags, all-in-one bags, and grow kits helps clarify the setup, but it does not set the fruiting schedule. The culture in front of you still determines the adjustment. A generic target can start the process, yet the surface, pins, caps, and substrate moisture show whether the bag needs more protection or more air.
Reading Colonization Cues Before You Open the Bag
Don't open a bag because a calendar says it should be ready. Open it when the block shows biological readiness. A mature block is generally fully white and consolidated, with mycelium covering the substrate rather than leaving exposed grain or dark, suspicious patches.
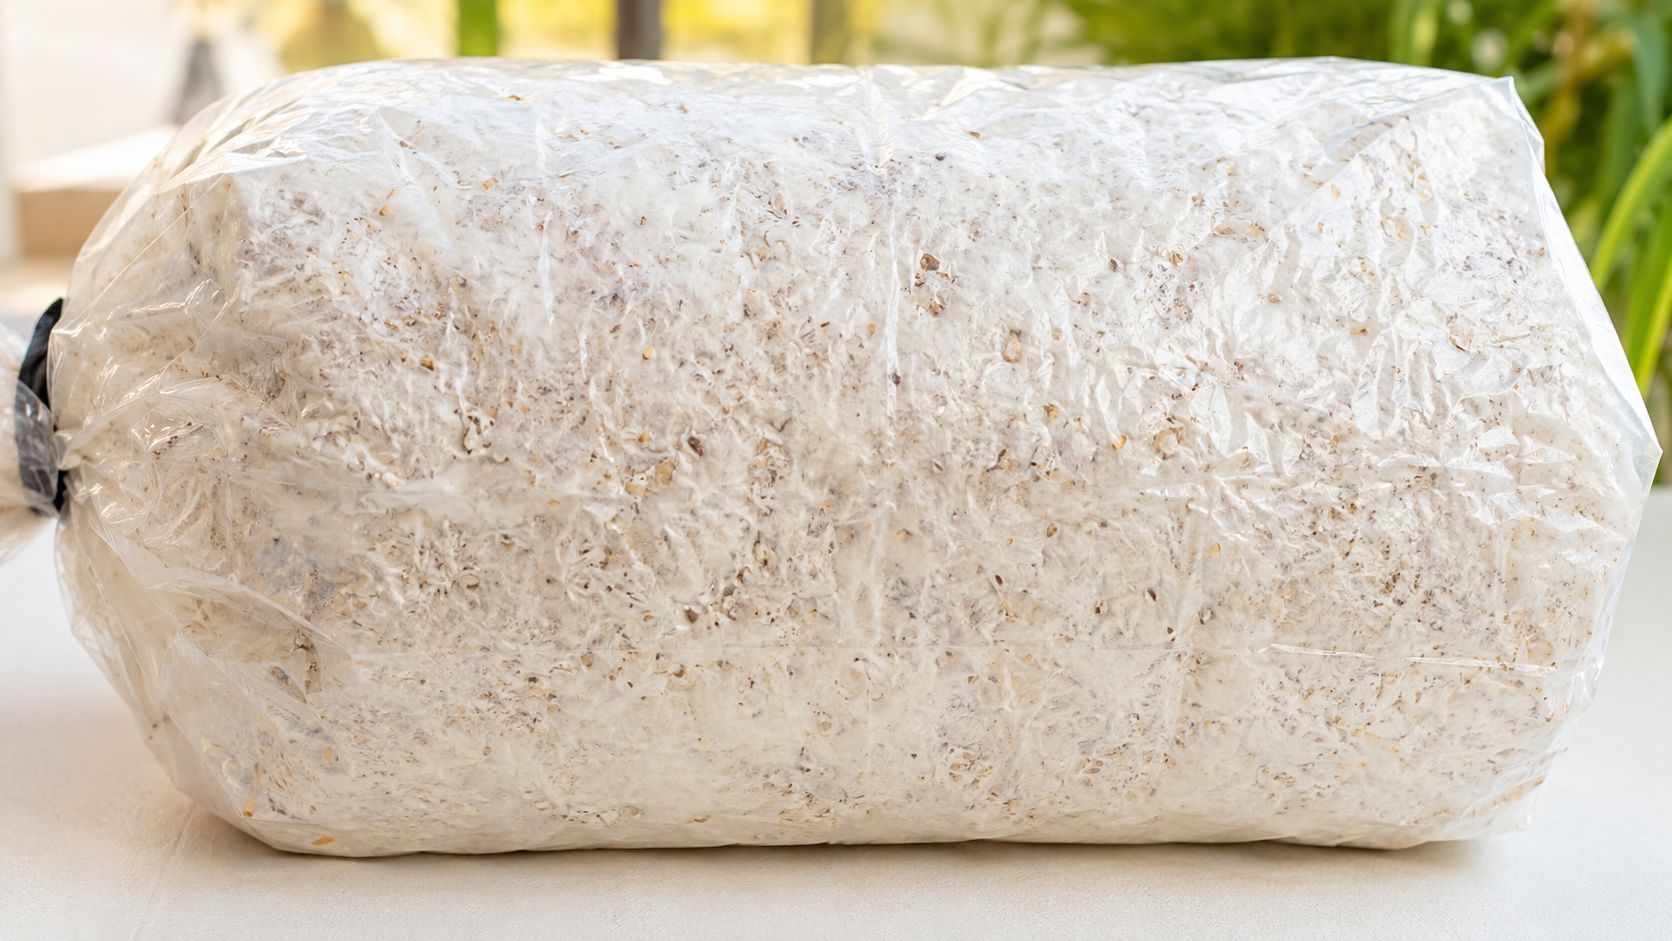
Use your eyes first
Inspect the top, sides, and bottom through the plastic. Look for a dense white network and a block that appears unified rather than loose. Wet-looking pockets, unexplained dark areas, or exposed grain that never gets covered are reasons to pause instead of cutting into the bag.
A faint sweet, earthy smell is consistent with a healthy culture. Sour, ammonia-like, or strongly alcoholic odors point to a problem, and the safest response is to isolate and retire the bag rather than trying to fruit it beside healthy cultures.
Confirm the block has structure
Press the outside of the bag gently. A colonized block should feel firm and resistant. A soft, airy, or spongy area can indicate that uncolonized pockets remain, and opening the bag early can expose those weak areas to contamination and drying.
The filter area and seams can also reveal early fruiting behavior. Tiny white nodules or developing pins along a seam or near the filter patch show that the culture is responding to environmental cues. Those signs can matter more than an arbitrary waiting period.
A bag that's biologically ready may announce it before your schedule does. Follow the block, not the date.
If the block looks healthy but hasn't consolidated, give it more time. If it shows clear pinning cues, prepare the fruiting space before cutting so the newly exposed surface isn't left waiting in dry room air. Clean handling still matters at this transition, even though the bag was previously sealed.
Opening the Bag Without Drying It Out
Prepare the workspace before you make the first cut. Wipe the work surface, clean your hands and scissors with 70% isopropyl alcohol, and set the bag flat on the sanitized area. The aim is to make one controlled opening, not repeatedly trim and handle the plastic.
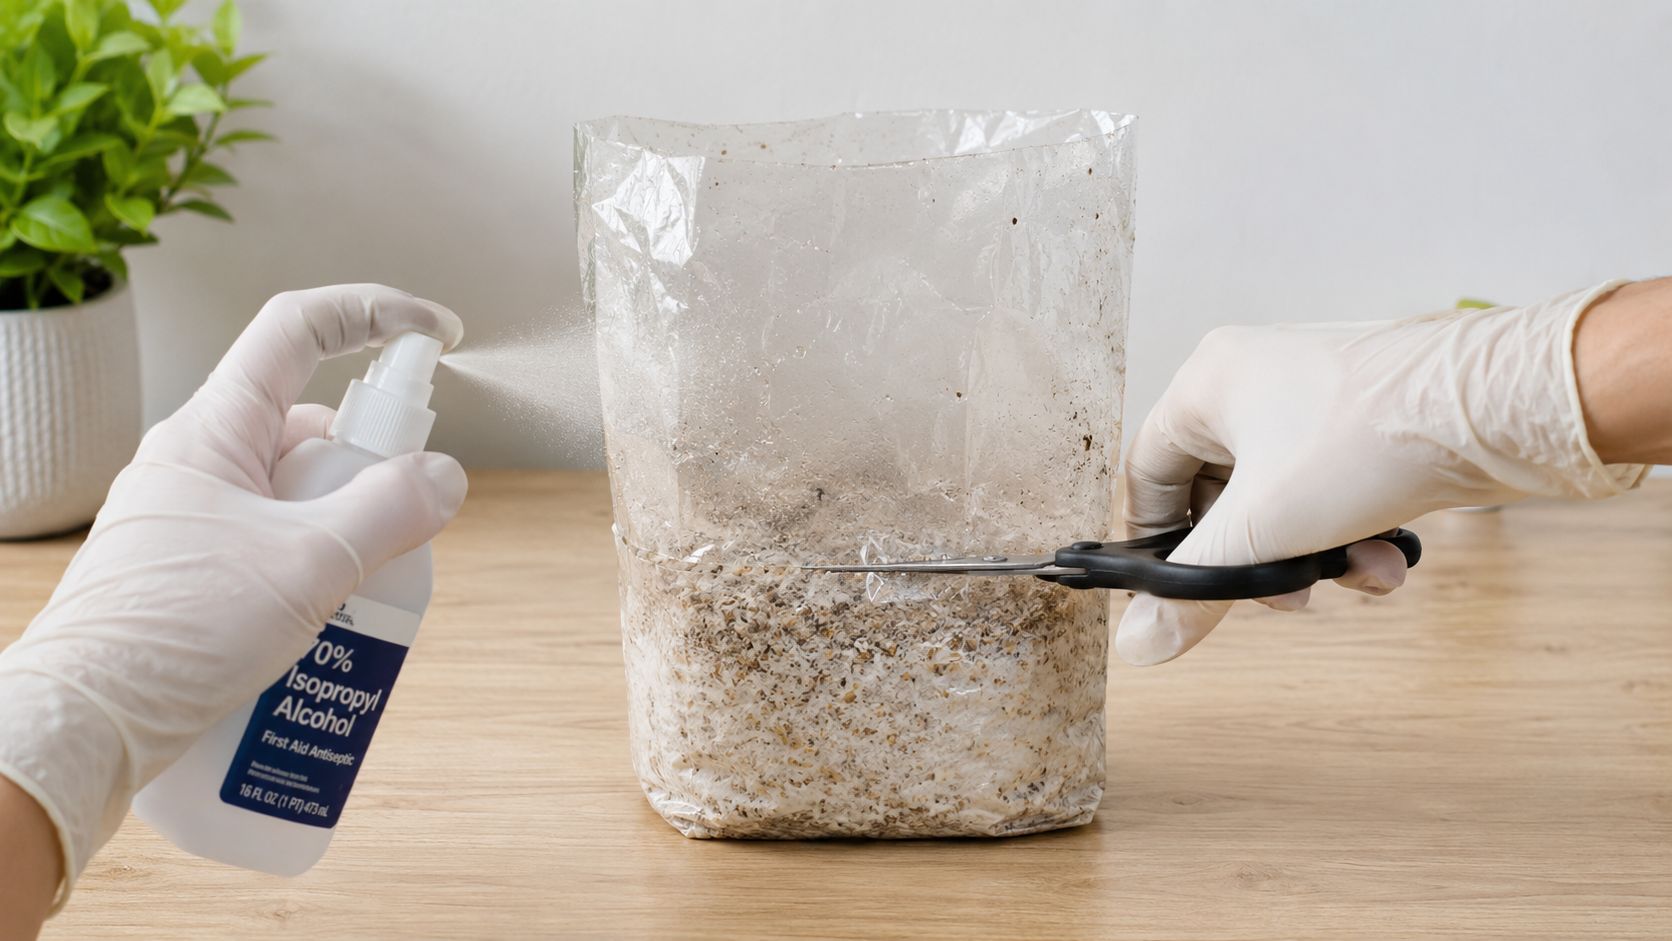
Make a humidity-preserving cut
Cut just above the substrate line and leave a standing wall of bag around the block. Folding the upper plastic down is preferable to removing it completely because the remaining material helps hold a humid microclimate around the fruiting surface.
Expose most of the top without turning the block into an open-air display. A useful starting point is to expose roughly 70–80% of the top surface, while leaving part of the filter patch covered. That arrangement gives the culture access to fresh air without allowing the dry room to strip moisture from every exposed edge at once.
The exact cut depends on the bag design and species. A narrow opening may protect moisture but restrict air. A wide opening may improve gas exchange while forcing you to mist more often. Watch the surface response for the next several hours rather than making several cuts immediately.
Decide whether a casing fits the species
Some cultures can benefit from a thin casing layer. Chestnut, almond, and sometimes shiitake may respond well to about 1/4 inch of pre-pasteurized 50/50 peat and coco coir, applied evenly over the surface and lightly re-misted. Don't add casing automatically. A casing changes the moisture behavior of the block, so it should match the species and the product instructions.
If condensation has completely cleared from the exposed surface, apply a light mist with sterile water. Avoid flooding the block. Let the bag rest for about five minutes before adjusting airflow, and don't fan directly into the opening during the first 48 hours. Early pin formation needs a stable surface more than it needs forceful air movement.
For a broader handling sequence, follow mushroom grow bag opening and fruiting instructions. The cut is only the beginning. Placement, room humidity, and the width of the opening determine whether the microclimate survives.
Humidity, FAE, Temperature, and Light Targets
Generic fruiting numbers become useful only after you account for growth stage and Colorado's dry indoor air. Use the humidity and CO₂ ranges covered earlier as boundaries, then shift the balance between moisture retention and fresh air. During pinning, protect the surface and tiny primordia from rapid evaporation. Once stems and caps begin expanding, increase exchange gradually if the bag can maintain a lightly moist surface.
Variable | Pinning Stage | Elongation Stage |
|---|---|---|
Humidity | Keep the surface near the upper end of the fruiting range | Let the surface become modestly drier without allowing it to dull or crack |
FAE | Exchange enough air to prevent staleness while protecting pins | Increase gentle exchange as fruits expand, stopping before the block dries |
Temperature | Match the species and avoid abrupt changes during initiation | Hold the selected range steady rather than chasing faster growth |
Light | Indirect daylight or gentle LED exposure to orient pins | Continue consistent indirect light without heating the block |
Humidity is a surface condition
A room hygrometer cannot show the microclimate directly around the substrate. Check for a lightly glistening surface and healthy condensation, not constant dripping or a waterlogged block. Pinning benefits from stable moisture. Later flushes generally tolerate a slightly drier surface, which can reduce stagnant, overly wet growth as fruits gain mass.
Colorado's dry air raises evaporation quickly. A shotgun-style setup with broad, repeated fanning can remove moisture faster than the block replaces it. A room humidifier can stabilize the surrounding air, and growers needing more capacity can browse EcoQuest Purifiers humidifiers as one equipment option. Keep the unit clean, and do not aim a forceful stream directly at the bag.
FAE should solve a symptom
Fresh air exchange is a correction, not a target to maximize. Cracked caps, aborted pins, or a dull surface usually call for less intense or less frequent exchange before you add water. Excessive fuzz on stems or elongated fruits points toward insufficient exchange, so widen the opening or increase gentle airflow in small steps.
Temperature follows species and culture instructions rather than one universal dial. Gourmet cultures vary from moderate to warmer fruiting conditions, and reishi may prefer warmer handling than oysters or lion's mane. The bag's instructions take priority when they differ. For more specific guidance, use Colorado Cultures' mushroom fruiting temperature guide.
Light needs to be consistent, not intense. Indirect daylight or a steady LED cycle helps pins orient and develop form. Keep the light from warming the plastic or drying one side of the block. Rotate the bag only when one-sided growth becomes noticeable.
Species-Specific Fruiting Conditions in Bags
“All-in-one grow bag fruiting conditions” isn't one universal recipe because each species negotiates moisture, air, and temperature differently. The ranges below are practical starting points for common gourmet cultures, but the culture's own instructions should take priority when they differ.
Species | Temp (°F) | Humidity (%) | FAE | Cold Shock |
|---|---|---|---|---|
Blue oyster, Pleurotus ostreatus | 60–75°F | High during pinning, somewhat drier late | Heavy, especially as stems extend | Usually not the primary trigger |
Pearl oyster, Pleurotus pulmonarius | Toward the warmer end of 60–75°F | High and stable during pinning | Strong exchange once pins establish | Usually not the primary trigger |
Lion's mane, Hericium erinaceus | 60–68°F | High and consistent | Lower, gentler exchange | Often less important than stable conditions |
Chestnut, Pholiota adiposa | Cool fruiting conditions | High during pinning | Moderate, adjusted to surface moisture | Often benefits from a cold initiation period |
Shiitake, Lentinula edodes | Species and culture dependent | Controlled surface moisture | Moderate, with block exposure | Commonly important for initiation |
Oysters reward air, but not at the expense of moisture
Blue oyster is generally the most forgiving of the group. It can handle a broad fruiting range, and mature clusters often tolerate somewhat drier air than delicate species. The trade-off is that oysters quickly reveal inadequate FAE through long stems and small caps, so the opening usually needs to become more generous as the cluster develops.
Pearl oyster tends to favor the warmer portion of its range and can pin rapidly when humidity remains high. That speed creates a moisture trap: a crowded pinset needs air movement, but a dry room can turn the same response into aborted pins.
Lion's mane needs restraint
Lion's mane prefers cooler conditions and a protected, humid surface. Too much FAE can dry the growing tips, while insufficient exchange can produce weak, poorly formed growth. Aim for dense icicle development rather than trying to force air through the bag as you would with an oyster.
Chestnut is less forgiving of a generic setup. If it stalls after colonization, the missing trigger may be temperature rather than moisture. Shiitake is also a difficult fit for casual bag fruiting because it prefers block-style management, often including cold shocking and surface preparation. Without those steps, an all-in-one bag may remain colonized but refuse to produce a useful flush.
Troubleshooting Common Fruiting Problems
A failed bag usually doesn't need five simultaneous corrections. Pick the clearest symptom, change the most likely cause, and give the culture time to show whether the adjustment helped.
Start with the pin and cap
Stalled pins with brown tips usually point to excessive drying from aggressive FAE. Reduce fanning, protect the opening, and raise local humidity before adding more ventilation.
Side pins with an empty top suggest the side of the block has a better moisture boundary than the exposed surface. Check whether the top is drying too quickly, then mist the surface lightly and improve the light reaching the block rather than cutting a much larger opening.
Dry, cracked caps during growth mean the fruiting surface has lost moisture too quickly. Mist carefully, inspect whether a vent or fan is blowing directly at the bag, and move the block out of that airflow.
Read stems and surface texture
Fuzzy feet on stems are commonly associated with stale air and higher CO₂. Widen the opening or add gentle exchange, but don't compensate with a blast of dry air that creates a second problem.
No pins after colonization can mean the species is waiting for a temperature cue. For cultures that respond to cold initiation, lower the fruiting temperature by 10°F for 48 hours and then return to a stable species-appropriate range. Treat that as a species-specific intervention, not a universal command.
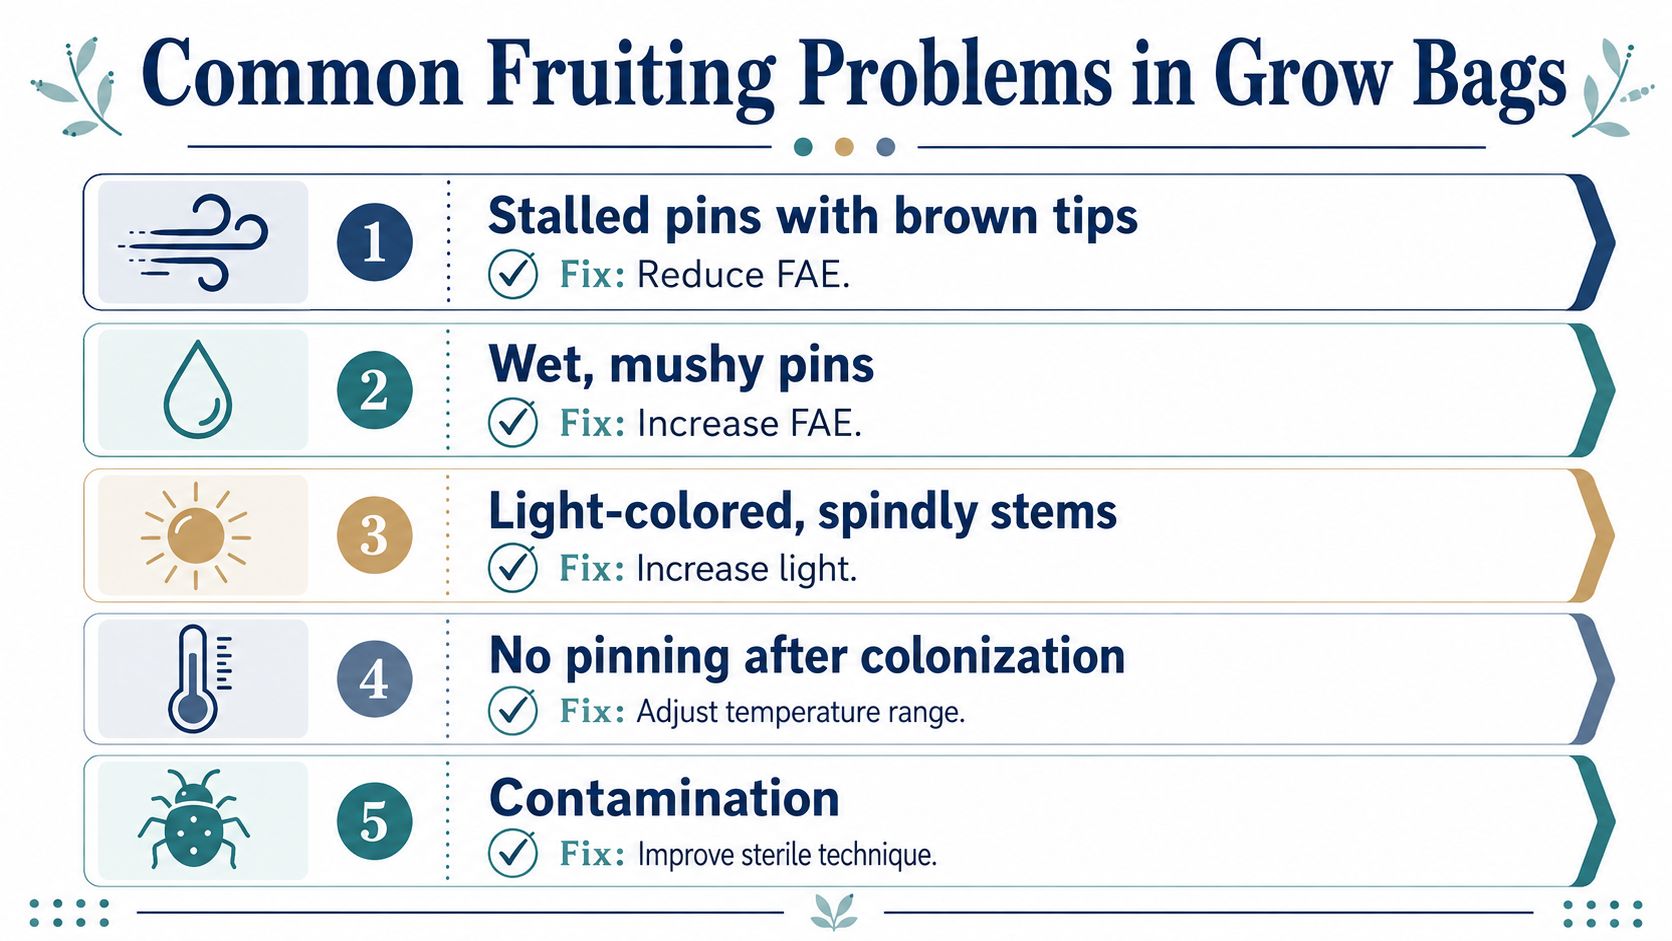
The single adjustment that fixes the most ordinary bag problems is often the humidity-to-air ratio. Don't chase every symptom with more fanning.
For wet, mushy pins, reverse the diagnosis. Reduce surface saturation and increase gentle FAE, while checking that standing water isn't collecting against the pins. If contamination appears, isolate the bag and review sterile handling rather than trying to rescue it beside clean cultures.
Use the following visual walkthrough as a reminder that troubleshooting starts with the physical setup, not just the numbers.
Realistic Timeline From Bag to Final Flush
Start the clock when the block is fully colonized and enters fruiting conditions, not when you first inoculate it. Some bags begin pinning within 3–10 days after opening, and a first harvest commonly falls around 7–14 days after opening, although species, culture, temperature, moisture, and handling can move that window (bag grow-kit timeline guidance).
A practical flush sequence
During the first few days, watch for surface recovery and early pins. Keep the opening protected, maintain stable indirect light, and avoid direct fanning. Once pins are established, adjust FAE according to stem shape and cap moisture rather than increasing it on schedule.
The first flush usually provides the clearest read on your setup. After harvest, remove spent tissue, allow the block to recover, and rehydrate according to the bag or culture instructions. A second flush may begin around days 21–35 after the initial fruiting transition, but the interval varies with species and how much moisture the block retained. Later flushes commonly become less vigorous, so retire the bag when the substrate no longer recovers, smells healthy, or produces viable pins.
Pin-ready checklist
Surface: Lightly hydrated, not flooded or visibly collapsing.
Air: Enough exchange to prevent fuzzy stems, without drying the opening.
Temperature: Matched to the species and current stage.
Light: Consistent indirect exposure that doesn't heat the block.
Handling: Clean hands, tools, and workspace before every cut or harvest.
After harvest: Remove debris, restore moisture carefully, and reassess the surface before changing airflow.
A successful repeat flush comes from recording what the bag did. Note the opening size, room dryness, misting response, pin location, and fruit shape. That record is more useful than copying a generic target from a different species or climate.
Colorado Cultures provides sterilized all-in-one grow bags, substrates, grow kits, cultures, and practical instructions for home and lab cultivation. If you're tuning fruiting in Colorado's dry air, visit Colorado Cultures to choose supplies and get guidance that matches your species and setup.
Comments