
Contamination Control Strategy for Mushroom Growing
You sterilized your grain, wiped the table, flamed the needle, and still lost bags. Maybe the growth looked fine for a few days, then one corner went wet and sour. Maybe a jar looked clean until shake day, then green showed up like it had been waiting for the exact right moment. That's the point where most growers start hunting for a magic fix: a stronger disinfectant, a different room, a new gadget.
Usually the problem isn't one missing trick. It's that the grow has no system.
In mushroom work, a contamination control strategy means your clean culture work, sterilization, moisture targets, inoculation technique, room setup, and monitoring all support each other. If one part is weak, the stronger parts don't save it for long. I've seen growers mop a room obsessively while injecting questionable liquid culture into underprocessed grain. That never ends well.
What a Contamination Control Strategy Really Means for Growers
A lot of home growers treat contamination like bad luck. They lose a few bags, spray more alcohol, and hope the next run turns out better. That approach feels productive because you're doing something, but it misses the issue. Contamination usually enters through a chain of small failures, not one dramatic mistake.
That's why the phrase contamination control strategy matters. In sterile manufacturing, the idea shifted from isolated cleanroom rules to a facility-wide, risk-based system. The revised EU GMP Annex 1 published on 25 August 2022 made contamination control strategy a formal site-wide requirement for sterile manufacturing, effective 25 August 2023, with one lyophilizer-related provision delayed until 25 August 2024. It also defines CCS as a planned set of controls for microorganisms, endotoxin or pyrogen, and particles, and requires manufacturers to define critical control points and assess the effectiveness of design, procedural, technical, organizational, and monitoring controls in one connected strategy, as laid out in the revised Annex 1 text.
For mushroom growers, that same logic translates cleanly. You don't need a pharma suite. You do need one workflow that answers a few blunt questions. Where can contamination enter? Which controls block it? How do you know those controls still work?
Cleaning is not the strategy
A wiped table is useful. A still-air box is useful. A HEPA unit can be useful. None of those, by themselves, are a strategy.
A practical grower version of CCS links these pieces in order:
Inoculant quality decides whether you're introducing clean mycelium or hidden contamination.
Sterilization decides whether your grain starts clean.
Moisture control decides whether the substrate supports fast healthy growth or bacteria.
Aseptic transfers and inoculation decide whether you keep contamination out during handling.
Colonization speed decides how long contaminants have to compete.
Room and air controls support the whole process, but they can't rescue dirty spawn.
Practical rule: If you're trying to solve a spawn problem by cleaning the fruiting room harder, you're usually working on the wrong end of the process.
What small growers should document
You don't need a corporate binder. You do need notes clear enough that you could repeat a clean batch and investigate a failed one. Write down what culture you used, what grain you ran, how long you sterilized it, where you inoculated it, and what happened afterward. That turns “I think this room is the problem” into something testable.
This is also where growers underestimate the room itself. If your work area has dusty returns, pressure swings, or stale air, those conditions can keep feeding failures. For people trying to improve the room side of the system, looking at residential or workshop-focused indoor air quality services can help you think more clearly about filtration, airflow paths, and how particles move through a space.
The main shift is mental. Stop asking, “What should I spray?” Start asking, “What are my contamination entry points, and how are they controlled from agar to fruiting?”
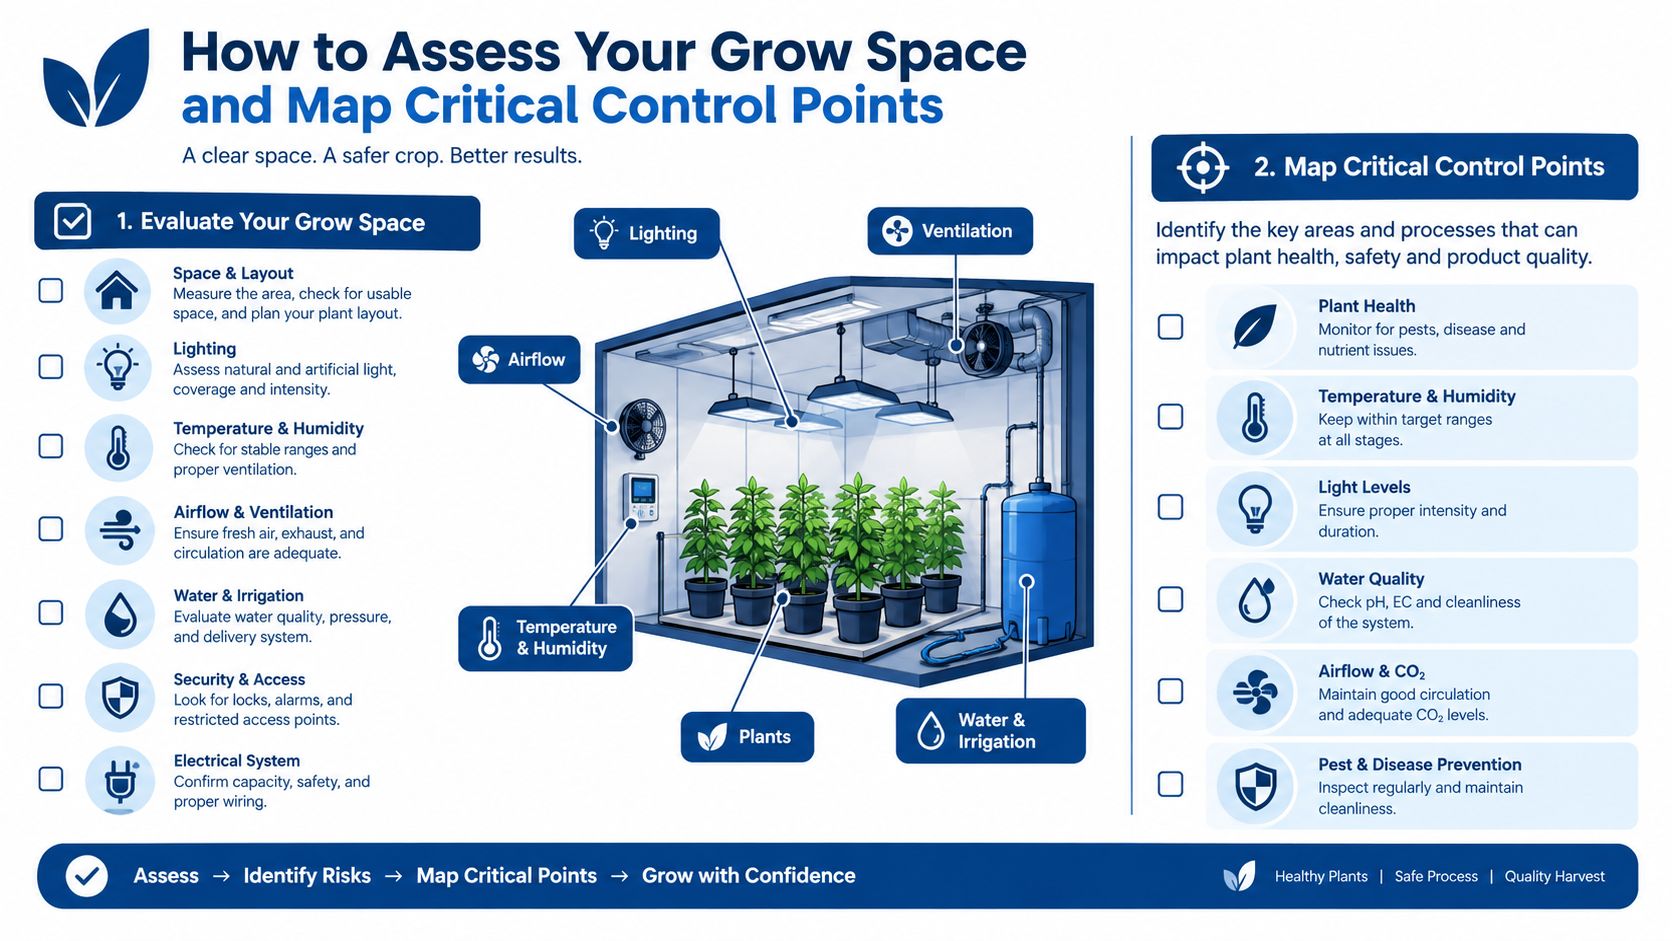
How to Assess Your Grow Space and Map Critical Control Points
Most contamination audits fail because the grower starts by staring at the room. Start with the workflow instead. Walk the whole path from culture plate to finished block and mark every handoff. That's where contamination risk lives.
A clean assessment is less about perfection and more about visibility. You want to know where contamination can enter, where it can spread, and where you can catch it before it ruins the next step.
Walk the process in order
Use one notebook page per run and trace the path:
Culture source. Agar wedge, liquid culture, clone, or spore source.
Media prep. Agar, grain, and any supplements.
Sterilization and cooling. Pressure cycle, unload, storage.
Inoculation zone. Still-air box, hood, or open room.
Colonization shelf. Temperature stability, handling frequency, stacking.
Bulk transfer or fruiting. Exposure to room air, surface moisture, and traffic.
When you do this, patterns show up fast. The “mystery contamination” often traces back to one of four things: questionable culture, underprocessed grain, wet grain, or sloppy movement between clean and dirty tasks.
Zone the space like it matters
You don't need a commercial layout, but you do need separation. In a home setup, I like a simple three-zone model.
Zone | What happens there | What should never happen there |
|---|---|---|
Clean zone | Agar work, inoculations, sterile tools | Open tubs, dirty harvest bins, used substrate |
Controlled zone | Incubation, colonizing bags, clean storage | Sweeping, house traffic, pets |
Dirty zone | Fruiting, spent blocks, wash-up, trash staging | Open sterile grain, plate work |
If your “lab” and your fruiting area are the same desk, write that down plainly. The point isn't shame. The point is to see where your process is asking for contamination pressure.
After you map zones, assign each critical control point to a control and a check.
Culture cleanliness pairs with agar observation and transfer notes.
Sterilization pairs with cycle records and post-cycle inspection.
Air handling in the inoculation area pairs with a setup checklist.
Personnel movement pairs with a rule about task order and glove changes.
Moisture level pairs with visual grain checks and batch notes.
A control point isn't useful unless you can tell whether it passed or failed.
Here's a helpful walk-through if you want a visual reset before you audit your own layout:
A one-session self-audit
Run this checklist in one pass through your space:
Check your direction of movement. Start clean tasks first, dirty tasks last.
Look above the workspace. Vents, shelves, fabric, and cardboard all shed.
Watch your hands. The biggest breaks often happen after touching non-sterile surfaces mid-task.
Inspect cooling and storage. Sterile grain is vulnerable after the cycle if it cools in a contaminated area.
Review where failures cluster. If bags from one shelf or one inoculation session fail together, that's a clue.
By the end of the audit, you should have a short list of true critical control points. Not twenty. Just the few places where one miss can spoil everything downstream.
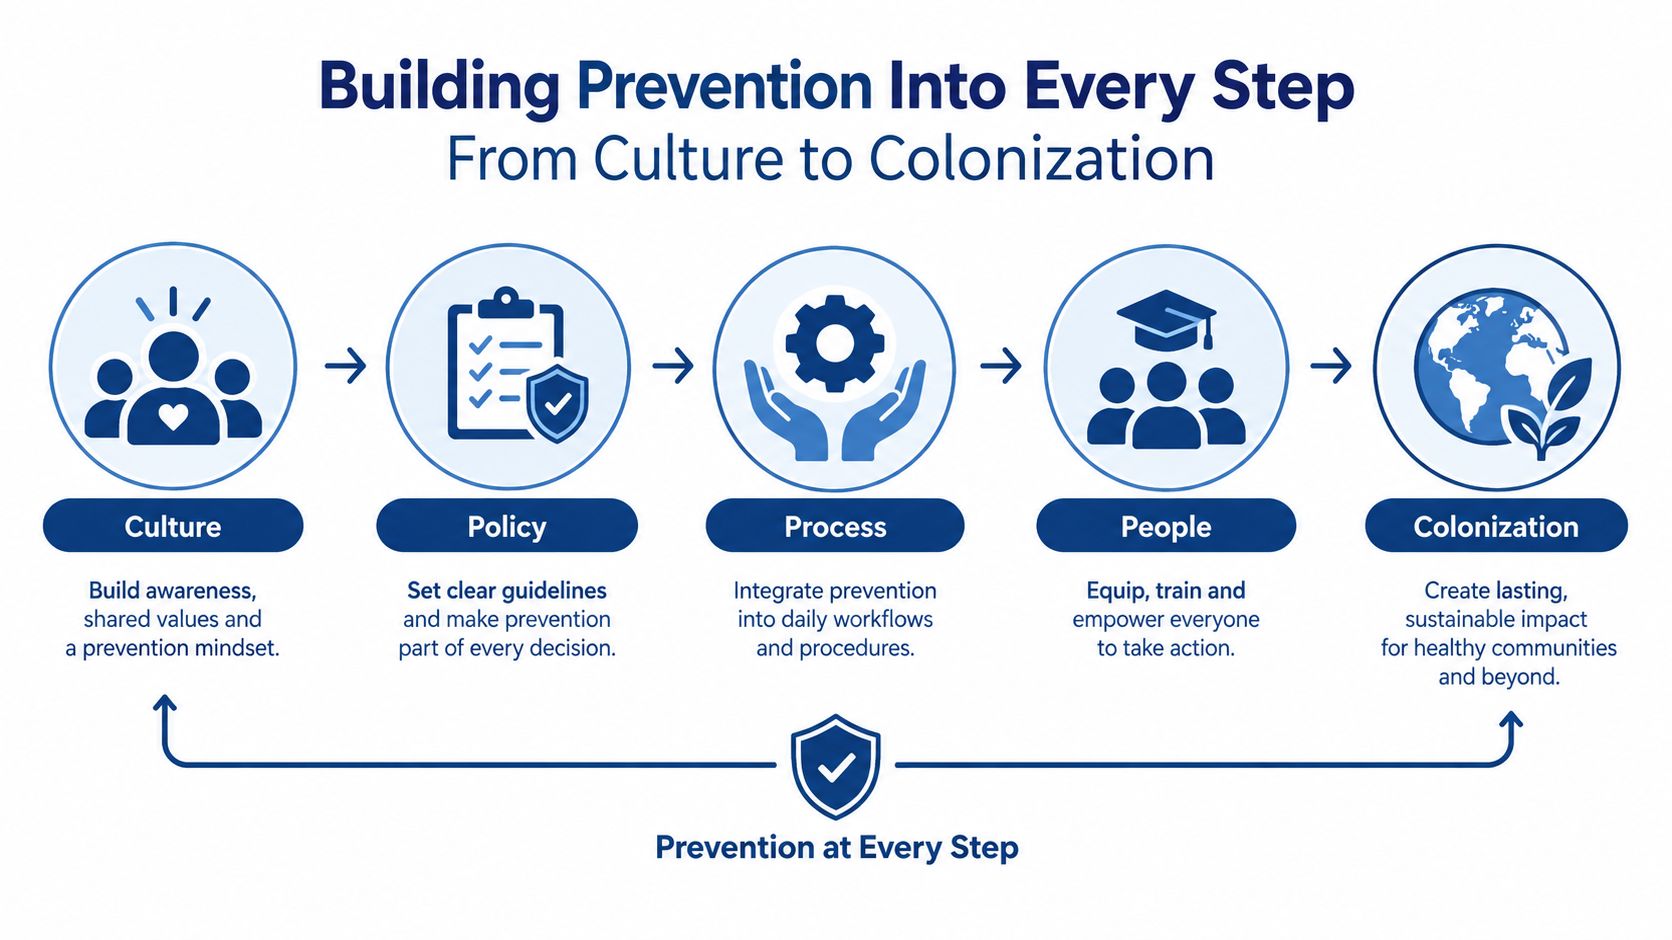
Building Prevention Into Every Step From Culture to Colonization
A common home-lab failure looks like this. The room got wiped down, gloves got sprayed, the flow hood is running, and the whole grain run still goes sour a week later. The miss usually happened earlier. Dirty culture, wet grain, a weak sterilization cycle, or sloppy post-cycle handling will beat a clean-looking room every time.
A contamination control strategy at this stage is a linked process, not a stack of separate cleanliness tips. Culture quality affects what goes into grain. Grain prep and sterilization affect whether that inoculant gets a fair shot. Inoculation technique affects whether the clean work stays clean long enough to colonize fast. If you want a useful grower version of CCS, treat each step like part of one auditable workflow.
For sterile mushroom work, the order is simple: start with clean inoculant, run a repeatable sterilization cycle, hit proper moisture, inoculate under controlled air, and set the bag up to finish colonization quickly. A practical guide to preventing contamination in mushroom cultivation covers that priority well. Growers who reverse the order often spend more time cleaning surfaces than fixing the process that contaminates the bags.
Start with culture you trust
If a plate is questionable, it is already too expensive.
That sounds harsh, but anyone who has burned a shelf of grain on a bad transfer learns it fast. “Mostly clean” on agar is how bacteria and mold get scaled into bags that looked fine on day three and turned ugly on day eight. I would rather lose one plate than lose twenty bags, the grain in them, and two weeks of incubation space.
Agar earns its place because it shows problems early. Grain usually hides them until the run is already committed. Liquid culture has the same issue. It can look clean in a jar and still spread contamination efficiently if it was never tested on agar or a small grain batch.
A few habits keep this step honest:
Transfer only from clean, deliberate sectors. Do not cut through suspect growth because the center looks aggressive.
Test liquid culture before scaling. One small test run tells you whether the jar is worth using.
Retire cultures that keep raising doubts. Repeated hesitation usually means the culture, your handling, or both need to be reset.
Validate sterilization and moisture together
Sterilization and hydration are tied to each other in practice. A bag that is too wet can survive the pressure cycle and still hand bacteria an easy win afterward. A bag that is too dry may stay clean but colonize slowly, which keeps it vulnerable longer.
Cycle time matters, but only if the load makes sense. Overpacked bags, inconsistent fill weights, or a pressure cooker stuffed differently every run make the result hard to trust. Small labs get better results when they standardize bag size, grain amount, hydration method, and loading pattern. Then a failed batch means something you can trace.
Post-cycle handling matters more than many growers admit. Grain fresh out of sterilization is not protected by magic. If it cools next to open shelving, cardboard, traffic, or a dirty fan path, you just spent hours creating sterile material and then parked it in a risky area.
Use a simple routine:
Prep grain to a consistent moisture target by feel and appearance. Kernels should be hydrated, not bursting and not leaving free water in the bag.
Run the same load style each time. Consistency makes weak cycles easier to spot.
Cool grain in a protected area. Treat that cooling window like part of sterilization, not aftercare.
Label batches clearly. If one prep day was off, you need to identify every bag from that lot fast.
If you want a practical reference for small-lab prep and post-cycle handling, Colorado Cultures has a straightforward guide on how to sterilize equipment.
Build inoculation around controlled movement
Once the culture and grain are sound, sterile technique starts paying off the way growers expect. At home scale, that usually means clean agar work, tested liquid culture, and inoculation in a still-air box or in front of a properly run flow hood. The specific tool matters less than the discipline behind it.
A still-air box is slower. It also beats rushed open-air work by a mile. A hood is faster and more forgiving, but only if the operator stops waving hands, sleeves, and dirty objects through the clean stream. Good inoculation work has rhythm. Bad inoculation work has extra reaches, pauses, phone checks, glove adjustments, and tools set down in the wrong place.
Keep the sequence tight. Set out only what the session needs. Flame, cool, transfer, seal, and move on. If you touch something outside the sterile field, reset instead of pretending that one quick contact does not count.
Most bag losses during inoculation come from broken rhythm, not dramatic mistakes.
Set bags up to colonize fast
Fast colonization is part of contamination prevention because it shortens the window where competitors can establish themselves. Healthy inoculant, well-prepped grain, sensible spawn ratios, and stable incubation conditions all push in the same direction. The bag gets through its vulnerable phase sooner.
The trade-off is real. Pushing speed with overheated incubation, excessive moisture, or a culture you did not verify usually backfires. Slow and steady is still better than fast and sloppy. What you want is clean momentum.
Leave bags alone more than your instincts want to. Constant squeezing, early shaking, and repeated moving between shelves adds variability without giving you better information. Bags do best when the system upstream was built correctly and the colonization environment stays boring. That is the point of CCS in a home or small-lab grow. Every step supports the next one, and every result can be traced back to how the batch was run.
Early Detection and Monitoring That Actually Catches Problems
Prevention is only half the job. You also need a way to tell whether your controls are working before a whole shelf turns on you. Waiting for obvious green mold is late detection. By then, the loss already happened.
Good monitoring at home scale isn't fancy. It's disciplined. You're looking for trends in cultures, grain behavior, smell, timing, and environmental clues that repeat.
Read the grow before it crashes
Healthy mycelium has a look and pace that becomes familiar once you stop chasing every variation. Trouble often shows up first as hesitation. Growth stalls. Condensation gets odd. The grain looks greasy or overly wet. A bag smells sour, sweet in the wrong way, or sharply off when filtered air passes near it.
Use direct observations, not wishful thinking. If one bag colonizes cleanly and another from the same session lags hard, isolate the slower one and log it. If a plate throws repeated edge contamination from one side, pay attention to where that plate sat and how you handled it.
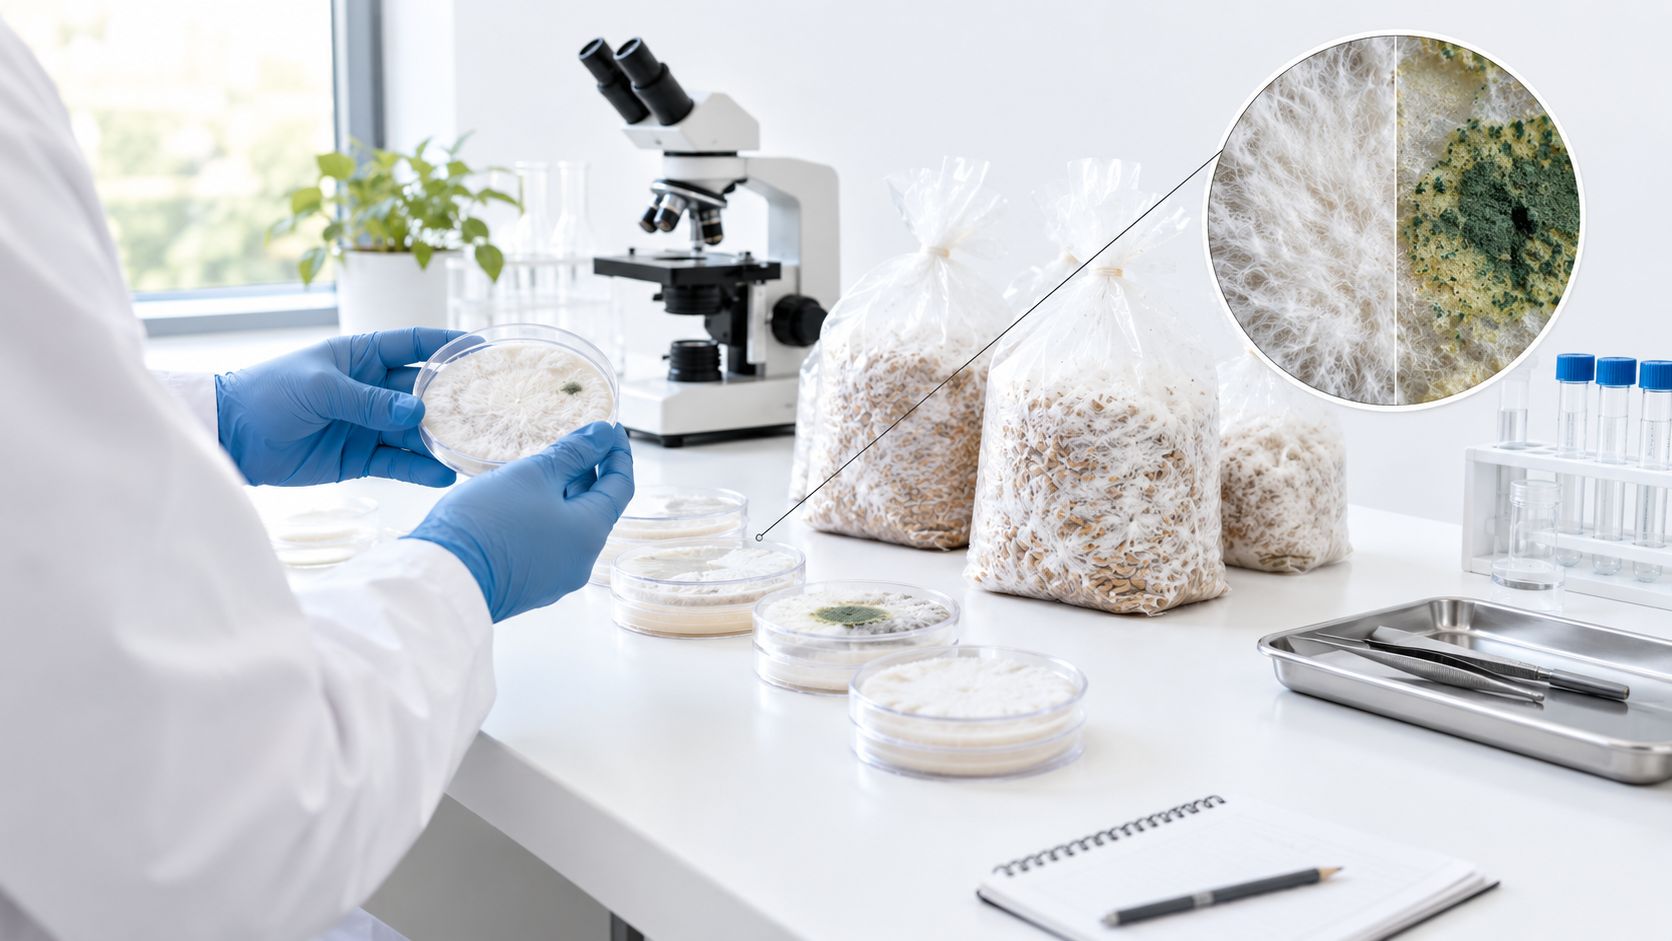
For growers who want help distinguishing common molds and problem patterns, a visual mold identification guide can make your notes much more specific.
Use simple environmental monitoring
One of the biggest gaps in public grow advice is measurement. A lot of people say “sanitize more” without telling you how to tell if sanitation changed anything. Recent mushroom cultivation material points small growers toward isolation, batch logging, and environmental checks such as open agar plates placed in strategic locations, discussed in this monitoring-focused mushroom contamination guide. That's a much better habit than guessing.
Try placing open agar plates briefly in locations that matter most:
Near the inoculation area to see what settles where you do sterile work
Near incubation shelves if one rack produces repeated issues
Near doors or vents if contamination seems tied to room activity
Near fruiting gear to understand how “dirty” tasks are affecting nearby zones
You're not trying to prove the room is perfect. You're building a map of pressure points.
Borrow the benchmark mindset
In cleanroom-style contamination control, major technical benchmarks include pressure differentials of about 10 to 15 Pa between grades, HEPA or ULPA filtration with integrity testing, directional airflow verification, and continuous or high-frequency environmental monitoring, as summarized in a clinical microbiology review on contamination reduction and contamination control. The same review also reports that sterile technique in blood culture workflows was associated with a contamination reduction estimate of 0.443 across 56,126 samples, with p < 0.001, which is a useful reminder that technique-level controls can make a measurable difference before broader environmental controls are layered in.
You probably aren't measuring pressure differentials in a spare bedroom. Still, the principle applies. Air should move predictably, not chaotically. Filtration should be maintained, not assumed. Monitoring should happen often enough that you notice drift before failure becomes normal.
The home-lab version of monitoring is simple: observe, log, compare, adjust, repeat.
A notebook with culture source, prep date, sterilization batch, inoculation session, shelf location, and outcome will teach you more than memory ever will.
Remediation Workflows When Contamination Happens
When contamination shows up, speed matters. So does restraint. A lot of growers make the problem worse by opening a suspect bag indoors, poking at a jar to “confirm” it, or carrying contaminated material through the cleanest part of the room.
The first rule is isolation. The second is don't turn one bad container into airborne contamination for the whole grow.
Decide whether to isolate, rescue, or discard
Not every issue gets the same response. A contaminated agar plate might still have a clean sector worth transferring if the contamination is limited and you catch it early. A bacterial grain bag that smells wrong usually isn't a rescue project. It's a disposal job. Fruiting blocks with obvious mold generally belong nowhere near your clean area, even if the rest of the surface still looks productive.
Use a simple decision frame:
Keep and monitor when the issue is uncertain and still contained, such as a bag you suspect is stalling but not clearly contaminated.
Attempt rescue only when the contamination is localized and the material can be worked cleanly without risking the rest of the run.
Discard immediately when contamination is visible, spreading, odorous, or producing spores.
If you discard, seal first. Move it out without squeezing, dropping, or opening it. Then clean the path it traveled, not just the place it sat.
Clean the right things in the right order
After a contamination event, growers often deep-clean everything except the actual source pathway. That wastes time. Clean where the contaminated item lived, where it was handled, and the tools or gloves involved. Then ask what upstream failure allowed it in.
A calm remediation workflow looks like this:
Quarantine the suspect item away from sterile work.
Review the batch record. Same culture, same grain lot, same inoculation day, same shelf?
Inspect nearby containers for similar lag, condensation, smell, or discoloration.
Clean surfaces and tools that directly contacted the item.
Reset the workflow before the next run instead of rushing to replace losses.
Trace the root cause, not just the symptom
Most recurring contamination falls into one of a few buckets: substrate prep, airflow, handling, or room defects. If multiple containers from different cultures fail after the same sterilization cycle, look hard at prep and processing. If only work from one inoculation session fails, review technique and movement. If problems cluster by room or shelf, suspect airflow, dust, or traffic patterns.
The useful habit is writing a short failure note every time:
What failed
When it showed up
What batch it belonged to
What the likely entry point was
What you changed before the next run
That turns contamination from a frustrating surprise into an auditable event. Once you can trace failures, you stop repeating them as often.
Keeping Your Contamination Control Strategy Working Long Term
A contamination control strategy only works if it survives normal life. Busy week, rushed inoculation session, one skipped note, one reused assumption. That's how clean systems drift. The fix isn't more intensity. It's a review rhythm you can keep.
The strongest small-lab setups I've seen are not the most elaborate. They're the ones where the grower checks the same few signals every run and updates the process when those signals change.
Build a review cadence you can maintain
Review your process on a schedule, not just after a failure. Go back through sterilization notes, culture performance, incubation outcomes, and any environmental plates or room observations you're tracking. If one problem keeps recurring, revise the step that allows it instead of adding random extra cleaning.
A simple long-term cadence can include:
Per batch. Record culture source, prep date, inoculation date, and outcome.
Weekly. Walk the clean zone, incubation area, and dirty zone for drift in organization or handling.
Monthly. Review failure notes and look for repeats tied to one culture type, one prep method, or one room habit.
When changing anything. New grain, new storage spot, new workflow, new season. Note it, then watch the next runs closely.
Use criteria instead of vibes
A lot of hobby grows run on feel. That works until it doesn't. It helps to define what “acceptable” means for your own system: clean agar growth, grain that finishes the same way batch to batch, no off odors during colonization, and no repeated contamination from one workflow step. If you want a broader quality mindset for setting pass-fail rules, the discussion of acceptance criteria in cleaning validation is useful because it pushes you to define what success looks like before you judge the result.
Shelf life belongs in this review too. Old substrate, old grain, or poorly stored supplies can undermine an otherwise solid process. If you're troubleshooting supply age or storage conditions, this guide on how long mushroom substrate lasts gives a practical baseline for what to watch.
Small grows stay clean when the process is simple enough to repeat and strict enough to trust.
The long game is consistency. Not paranoia. Not endless sanitizing. A real contamination control strategy gives you a stable way to make decisions, catch drift early, and tighten the workflow without turning your hobby or lab into chaos.
If you want help building a cleaner, more repeatable workflow, Colorado Cultures offers rigorously sterilized grain bags, all-in-one bags, practical grow guidance, and classes that make sterile technique easier to learn in real life. For Denver-area growers and home cultivators who want supplies and education that fit this kind of system, visit Colorado Cultures.
Comments