
Sterile Technique Principles Made Simple for Growers
Your first grain bag can look perfect for days. Then a green patch appears, the smell changes, and you're left wondering whether the problem was the syringe, the bag, the room, or one quick movement you barely noticed. That experience is frustrating, but it doesn't mean you're bad at growing mushrooms.
Sterile technique principles become much easier once you stop treating them as a collection of mysterious rituals. The practical question isn't whether your home workspace can match a hospital operating room. It's which moments expose a vulnerable culture, which actions carry contamination into that culture, and how carefully each risk deserves to be controlled.
The guiding idea is simple: prevent contamination before it enters prepared grain, agar, substrate, or liquid culture. Joseph Lister's antiseptic surgery, introduced in 1867, provided a historic demonstration of what contamination control could accomplish. His early amputation mortality reportedly fell from about 46% to about 15% within the next two years after antiseptic methods were introduced, as described in this review of Lister and the development of aseptic practice.
By the end, you'll be able to distinguish sterile work from ordinary cleaning, identify the highest-risk handling mistakes, choose sensible precautions for each cultivation stage, and build a calmer workflow for growing at home in Denver.
Why Sterile Technique Matters for Every Grower
A beginner often blames contamination on bad luck. In practice, contamination usually enters through a chain of small opportunities. A lid stays open while someone answers a text, a needle touches the table and returns to the port, or a filter becomes damp during handling. Each action may seem harmless by itself, but a prepared culture gives competing organisms a food-rich place to grow.
Mushroom mycelium also needs time to establish itself. During that vulnerable period, bacteria, yeasts, and molds can compete for the same nutrients. A sealed, properly prepared container gives the intended culture a protected starting point. A careless transfer can give an unwanted organism the same advantage.
Lister's historical work matters because it established a principle that still applies in cultivation: controlling microbial contamination before it reaches a vulnerable site is more dependable than trying to rescue contamination afterward. In mushroom work, rescue attempts often involve opening a container, cutting away material, or transferring a questionable culture. Those steps create fresh exposure and make diagnosis harder.
Practical rule: Treat every opening, transfer, and re-entry as a contamination decision.
Sterile technique doesn't require panic or perfection. It requires a repeatable process. Wash and prepare your hands, organize tools before opening anything, keep sterile items away from questionable surfaces, and make deliberate movements. You're reducing opportunities for microbes to travel, not trying to create an impossible vacuum.
If your first grow failed, review the workflow rather than judging yourself. Write down where the container was opened, what touched each transfer point, whether tools were exchanged between transfers, and whether air was moving around the workspace. The guide to preventing mushroom contamination can help you turn that review into practical changes.
After learning these principles, you'll have a clearer answer to the questions beginners ask most: what must be sterile, what only needs to be clean, and which small mistakes deserve the most attention.
What Sterile Technique Really Means
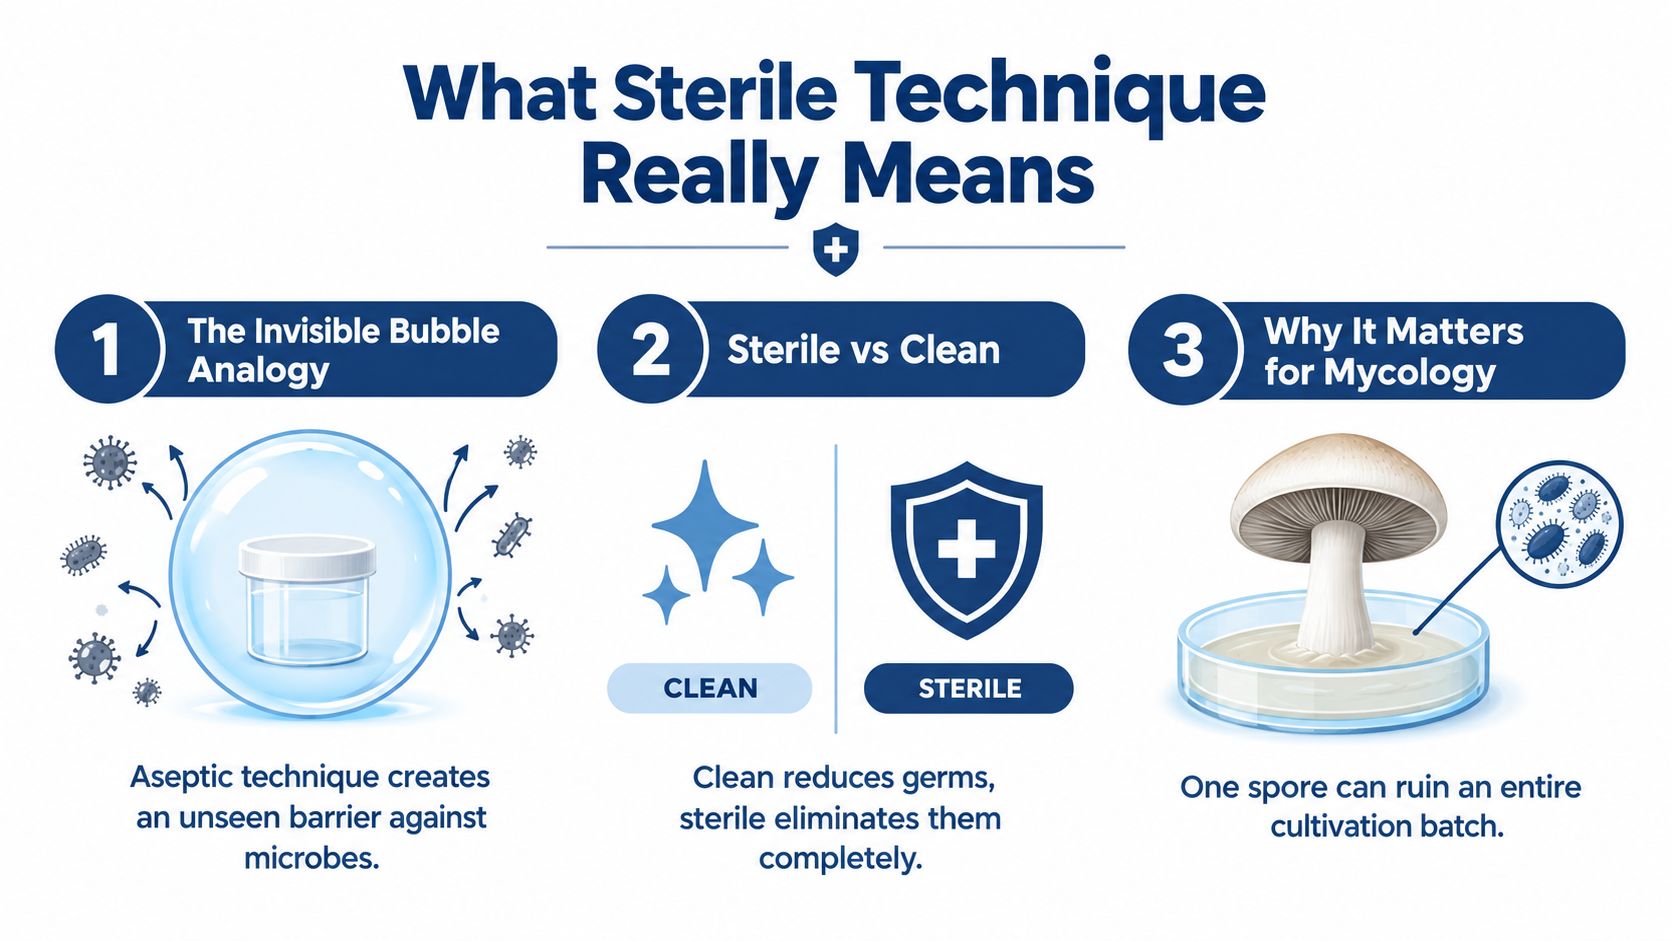
A prepared agar plate sits open while you reach for a tool. In that brief moment, dust, droplets, or microbes can cross into the culture. Aseptic technique is the set of choices that keeps those unwanted visitors away from vulnerable material during handling.
The protected area is not a magical bubble, and the room does not need to contain no microbes. It is a risk-control system. Keep exposed material open only as long as practical, keep non-sterile objects away from sterile contact points, and limit movements that stir air near the work.
Clean and sterile describe different conditions. Cleaning removes visible soil and lowers contamination. Sterilization means the complete removal of vegetative cells, endospores, and viruses, as explained in this microbiology laboratory guide to aseptic technique/01:_Labs/1.07:_Aseptic_Technique). Disinfecting a tabletop can lower risk, but it does not sterilize a grain bag or replace sterilizing the grain itself.
Seeing the field
A sterile field includes the opening, the tool entering it, the hands controlling that tool, and the nearby workspace. Once a sterile transfer point touches an unsterilized surface, treat that point as compromised, even if it still looks spotless.
This distinction causes common beginner confusion. A glove may be clean but not sterile. A disinfected tabletop may be suitable for organizing supplies but not for direct contact with sterile culture. The outside of a sealed bag may be clean enough to handle while the protected contents remain isolated inside.
The VirusFAQ.com hygiene guide offers further background on the differences among cleaning, disinfecting, and sterilizing.
Why heat matters
Steam sterilization works because microbial spores tolerate more heat than ordinary vegetative cells. A commonly cited autoclave benchmark uses saturated steam at 121°C and about 15 psi for 15 to 20 minutes. Some cycles use 121 to 132°C at 15 to 20 psi, while higher-temperature cycles such as 134 to 137°C can shorten the cycle to about 3 minutes, depending on the equipment and validated process.
For a hobby grower, the practical lesson is simple: a clean-looking surface is not automatically sterile. Protect the sterile field from the end of sterilization until the culture is sealed, and treat every exposed contact as a decision about contamination risk.
The Five Pillars That Keep Your Work Sterile
Sterile work behaves like a chain. A sterile tool doesn't help if it passes through moving air into an open jar. Clean gloves don't help if they touch a non-sterile transfer port. Strong preparation can be undone by one unplanned contact.
Aseptic transfer
Transfer cultures with a clear path from source to destination. Lay out the syringe, scalpel, receiving bag, tape, and waste container before opening the culture. The less you pause with an open vessel, the fewer chances airborne particles have to settle into it.
For agar work, plan where the lid will rest and how you'll hold it without placing the inner surface on the table. For grain bags, protect the injection port and filter, and don't let the needle or syringe barrel drag across the bag.
PPE and hand hygiene
Wash your hands before preparing gloves. Tie back hair, avoid loose sleeves, and use a mask if your procedure and workspace call for one. Gloves create a barrier, but they don't grant permission to touch phones, door handles, hair, or the floor and then return to sterile work.
The practical habit is to decide what your gloved hands are allowed to touch. If you must reach outside the workspace, change or re-sanitize according to your procedure before returning.
Tool and surface sterilization
Use the right method for the tool. A scalpel, syringe, transfer loop, and jar lid each have different surfaces and handling requirements. Disinfect the work surface before arranging materials, and follow the contact instructions for the product you use.
Never assume that a quick wipe substitutes for heat sterilization when the tool penetrates a sterile container. Tool sterilization and surface disinfection solve different problems.
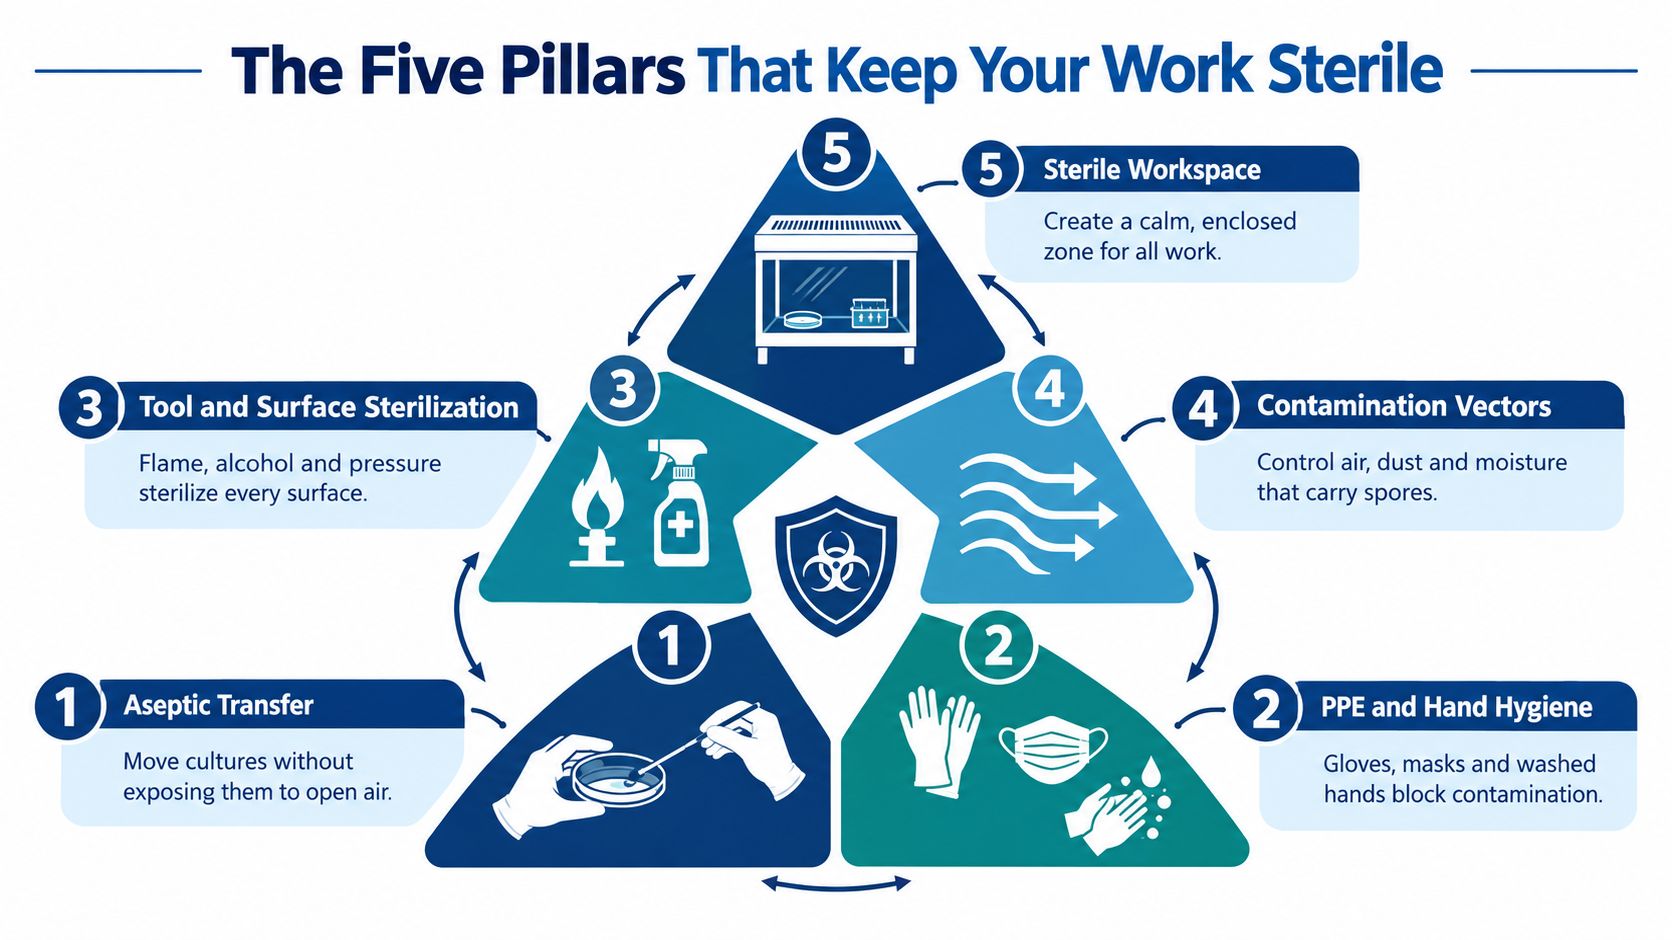
Contamination vectors and airflow
Air carries dust, spores, droplets, and particles shed from clothing or skin. Fans, open windows, heating vents, and people walking nearby can disturb the air around an open culture.
You don't need to fear every air current. You do need to stop creating unnecessary ones. Turn off moving-air sources, limit traffic, and work with your hands slowly rather than sweeping them across open containers.
The workspace
A still air box or a properly used flow hood creates a more controlled area for vulnerable work. A still air box reduces drafts through enclosure. A flow hood supplies filtered air across the work zone, but it still requires good hand positioning and disciplined movement.
The choice depends on your work volume, budget, and tolerance for setup. This flow hood guide explains the equipment concept without turning it into a requirement for every beginner.
The five pillars support one another. Sterile technique is process discipline, not a single product, glove type, or dramatic flourish.
When Strict Sterility Matters Most and When Clean Is Enough
Not every cultivation task deserves the same level of control. Risk rises when a vulnerable nutrient-rich material is exposed, when a culture is small or weak, and when an opening remains available for longer. Risk falls when the material stays sealed and the mycelium has already colonized its environment.
This doesn't mean you can treat high-risk work casually. It means you can direct your effort where it changes the outcome instead of spending energy trying to sterilize every object in the room.
A recent evidence review in clinical practice found no universal winner between different sterile or aseptic methods. In the cited review of parenteral nutrition administration, structured education and standardization mattered more than one supposedly perfect ritual, including whether gloves were sterile or non-sterile. That principle transfers well to home cultivation. A consistent, sensible workflow often matters more than buying one expensive item and ignoring the rest of the process.
Sterility Level Decision Matrix for Home Cultivation
Cultivation Task | Risk Level | Recommended Precaution |
|---|---|---|
Inoculating sterilized grain | High | Use a prepared clean workspace, controlled airflow, clean gloves, disinfected surfaces, and a sterile inoculation tool. Protect the injection port and filter. |
Agar to grain transfer | Very high | Use the most controlled workspace available, minimize open-air exposure, sterilize the cutting tool between transfers, and avoid touching transfer surfaces. |
Pouring or handling sterile agar | High | Prepare the work area first, keep vessels covered as much as practical, and protect cooled media from air and contact. |
Handling a sealed grain bag | Low | Keep the bag sealed, protect the filter from moisture and damage, and use clean hands and a clean work surface. |
Mixing a colonized bag | Moderate | Keep the container closed, inspect for damage, and avoid squeezing or moving it in dusty or drafty conditions. |
Fruiting a fully colonized block | Moderate | Use clean hands, clean tools, and a tidy fruiting area. Strict sterile-field technique usually isn't necessary once the block is opened for fruiting. |
Cleaning the fruiting space | Low to moderate | Remove debris, wipe surfaces, manage moisture, and prevent standing water or stagnant residue. |
Spend effort where exposure happens
A sealed all-in-one bag doesn't need the same handling as an open agar plate. You still need clean habits, because damage to the seal, filter, or exterior can create trouble, but you aren't performing a transfer while the internal substrate sits exposed.
A grain inoculation or agar transfer is different. The target material is vulnerable, and the opening or transfer point gives outside organisms a direct route in. That's where gloves, a still air box or flow hood, careful tool handling, and rehearsed movements become worthwhile.
Risk-based technique doesn't mean cutting corners. It means matching protection to the consequence of exposure.
Common Mistakes That Invite Contamination
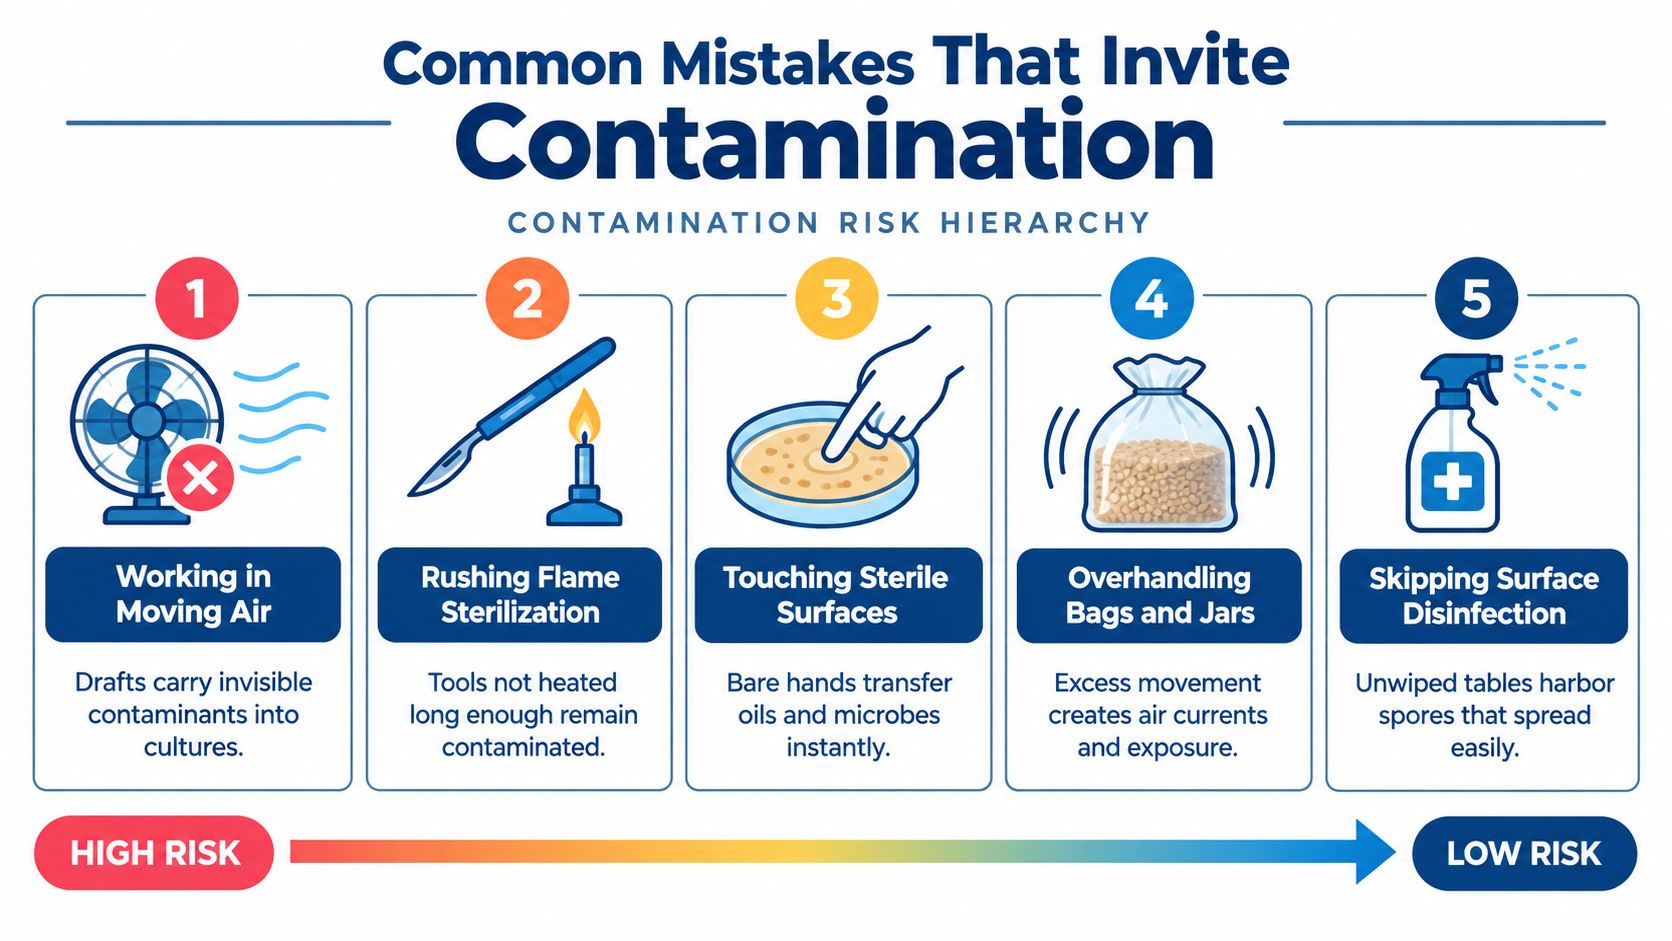
The most useful troubleshooting question isn't “Did I wipe everything with alcohol?” It's “Which action gave contamination the easiest route into the culture?” A disinfected table can't compensate for an open jar sitting in moving air while you search for a tool.
A 2025 in vitro study using next-generation sequencing detected small contamination signals even when sterile technique was used. In that simulated work, deliberately aspirating 10 mL of ambient air raised the positive detection rate to 10%, compared with 0.8% in the other simulated techniques, as reported in this study on contamination during fluid transfer.
Highest-risk mistakes
Working in moving air ranks near the top because drafts can transport particles directly toward an open culture. Turn off fans and avoid working beside an active vent. Set up the workspace before opening anything so you don't need to reach across the field.
Keeping a needle or tool in use across multiple transfer points creates another avoidable route. The same study advocated needle exchange at every fluid transfer point. For a home grower, the practical lesson is to avoid carrying material from one questionable zone into another and to use a fresh sterile connection when the procedure calls for it.
Touching transfer points is a classic hidden failure. The outside of a bag may be clean enough to handle, but an injection port, jar mouth, agar surface, or syringe tip has a different risk profile. If a glove touches a non-sterile surface, treat that glove as compromised for sterile contact.
Lower-risk habits that still matter
Dragging a tool through a non-sterile zone can undo careful preparation. Keep sterile tools above or within the intended work area, and don't rest them on the table unless the procedure says that surface is suitable.
Overhandling bags and jars also creates unnecessary movement. Move containers only when you need to, keep filters dry, and protect seals from crushing or tearing. For a visual example of how ordinary wet areas can support visible microbial growth, this background resource on bacteria in Miami bathrooms is useful, although a bathroom environment isn't a direct model for a cultivation workspace.
A rushed flame sterilization step is another common problem. Give the tool the treatment required by your method, let it cool appropriately, and avoid touching the sterilized portion before use.
Sterile Technique in Action for Mushroom Cultivation
A beginner inoculating a sterilized grain bag should first rehearse the sequence with the materials closed. Place the syringe, alcohol wipe, tape, waste container, and bag where each item can be reached without crossing over the filter or injection port. Once the bag is ready, disinfect the port, sterilize the needle according to the procedure, make the transfer, and seal the port promptly.
The bag's filter deserves special attention. Keep it dry, don't press it against dirty surfaces, and don't handle the bag in a way that stresses the seal. A professionally sterilized substrate gives you a controlled starting point, but your handling determines whether that advantage survives inoculation.
For a detailed walkthrough, use this guide on how to inoculate sterilized grain bags. Read it before beginning, then arrange your materials so you aren't learning the sequence while the bag is open.
Agar transfers demand even more control. The culture is exposed on a small surface, and a scalpel can carry material from one plate to another. Open the source and receiving plates only as much as necessary, cut a clean transfer section, and sterilize or replace the tool between transfers as your method requires.
The setup changes with your workspace. A still air box helps reduce drafts and gives your hands a defined working zone. A flow hood can provide filtered airflow across the work area, but it doesn't remove the need to keep sterile objects in the clean air path and avoid reaching from dirty areas into the field.
This video can help you visualize the movements involved before you practice them:
An all-in-one bag is more forgiving during the sealed stages. Keep it closed, inspect the filter and seal, and handle it on a clean surface. Once you open it for fruiting, shift from strict transfer sterility to clean environmental management. Remove debris, use clean tools, and limit contact with the growing surface.
Colorado Cultures offers sterilized grain bags, all-in-one grow bags, substrates, grow kits, and cultivation tools for home and lab use. Those supplies can reduce preparation variables, but they don't replace controlled handling after the package arrives.
Building Confidence With Sterile Technique Principles
Confidence grows when you can explain the reason behind each action. You aren't wiping a surface because someone told you to. You're reducing the number of contaminants near an opening. You aren't moving slowly for ceremony. You're limiting air disturbance and preventing accidental contact.
Use this checklist before your next grow:
Map the vulnerable point: Identify the bag filter, injection port, jar mouth, agar surface, or transfer tool that must remain protected.
Prepare before opening: Put every required item within reach, including waste disposal and sealing materials.
Separate clean from used: Decide where sterilized tools and untouched supplies will stay, and keep used items out of that area.
Control movement: Turn off drafts, limit interruptions, and avoid unnecessary handling of bags and jars.
Treat doubt seriously: If a sterile contact point touches an unknown surface, pause and replace or reprocess the affected item instead of hoping it will be fine.
Review the workflow: If contamination appears, look first at openings, air exposure, repeated entries, tool paths, and damaged seals.
The biggest mindset shift is moving away from all-or-nothing thinking. A sealed bag doesn't require the same precautions as an agar transfer, and a colonized block entering fruiting doesn't demand the same sterile field as inoculated grain. Good growers scale their technique to biological vulnerability.
Practice the sequence with empty containers. Watch your hands, not just your tools. Denver growers can also build confidence through hands-on instruction, where an experienced cultivator can point out awkward reaches, exposed openings, and habits that are difficult to notice alone.
Sterile technique is learnable. With organized preparation and attention to the highest-risk actions, your workspace becomes calmer, your decisions become clearer, and each grow gives you better information for the next one.
Colorado Cultures offers sterilized grain bags, all-in-one grow bags, substrates, grow kits, tools, classes, and practical cultivation guidance for beginners and experienced hobbyists. Visit Colorado Cultures to choose supplies that match your cultivation stage and build a cleaner, more consistent workflow.
Comments