
Mushroom Kit Instructions: Step-by-Step Fruiting Guide
You've unpacked your mushroom kit, found a bag of substrate, and started wondering whether you should open it, water it, or leave it alone. The bag might already look white, or it might look almost unchanged. Neither appearance tells you what to do until you know which stage the kit has reached.
Good mushroom kit instructions separate colonization from fruiting and explain what healthy progress looks like. The most useful habit is simple: check the temperature, moisture, and airflow before reaching for the mister. A wet kit isn't necessarily a well-hydrated kit.
Kit Stages and Timing at a Glance
Mushroom kit stages, actions and timing
Stage | What You Do | On Track When | Typical Timing |
|---|---|---|---|
Inspect and activate | Check the sealed bag; inoculate through the port only if instructed | Substrate shows no suspicious growth or leaking liquid | At setup |
Colonization | Keep the unopened kit in a clean location at the sheet's temperature target | Healthy mycelium spreads through the substrate | No fixed length; judge by sight |
Fruiting trigger | Make the prescribed opening and introduce indirect light and fresh air | The block has reached the kit's readiness benchmark | Once sufficiently colonized for that kit |
Pinning | Maintain the prescribed environment; mist according to surface conditions | Small mushroom pins form | Our written kit guidance gives 7-20 days |
Harvest | Watch maturity cues and pick before spores drop | Caps reach the species-appropriate harvest stage | Full Flush guidance gives 10-20 days after fanning starts |
Use this as a checklist, not a promise. Our guide to the stages of mushroom growth helps distinguish the changes you're watching for, but the printed sheet determines where your particular kit begins.
A ready-to-fruit block skips the inoculation work that a grain-bag kit requires. Don't inject a colonized block just because another kit's instructions mention a syringe. Likewise, don't cut an uncolonized bag because a ready-to-fruit tutorial begins with opening the packaging.
Read progress rather than counting days
Room conditions, species, and the kit's starting condition affect progress. Expanding healthy mycelium is more useful than a deadline copied from someone else's grow.
Start here: Find the printed sheet and circle the stage where your kit begins. Leave the bag closed until you know whether opening it is actually the next step.
We publish written instructions for our different kit workflows. Keep the correct sheet beside the kit, rather than combining steps from several methods.
How to Start and Colonize Your Kit
A clean setup protects the substrate before the mushroom mycelium has established itself. Utah State University Extension's beginner guidance emphasizes workspace cleanliness, sterile inoculation, and monitoring mycelial growth before fruiting.
Prepare before touching the port
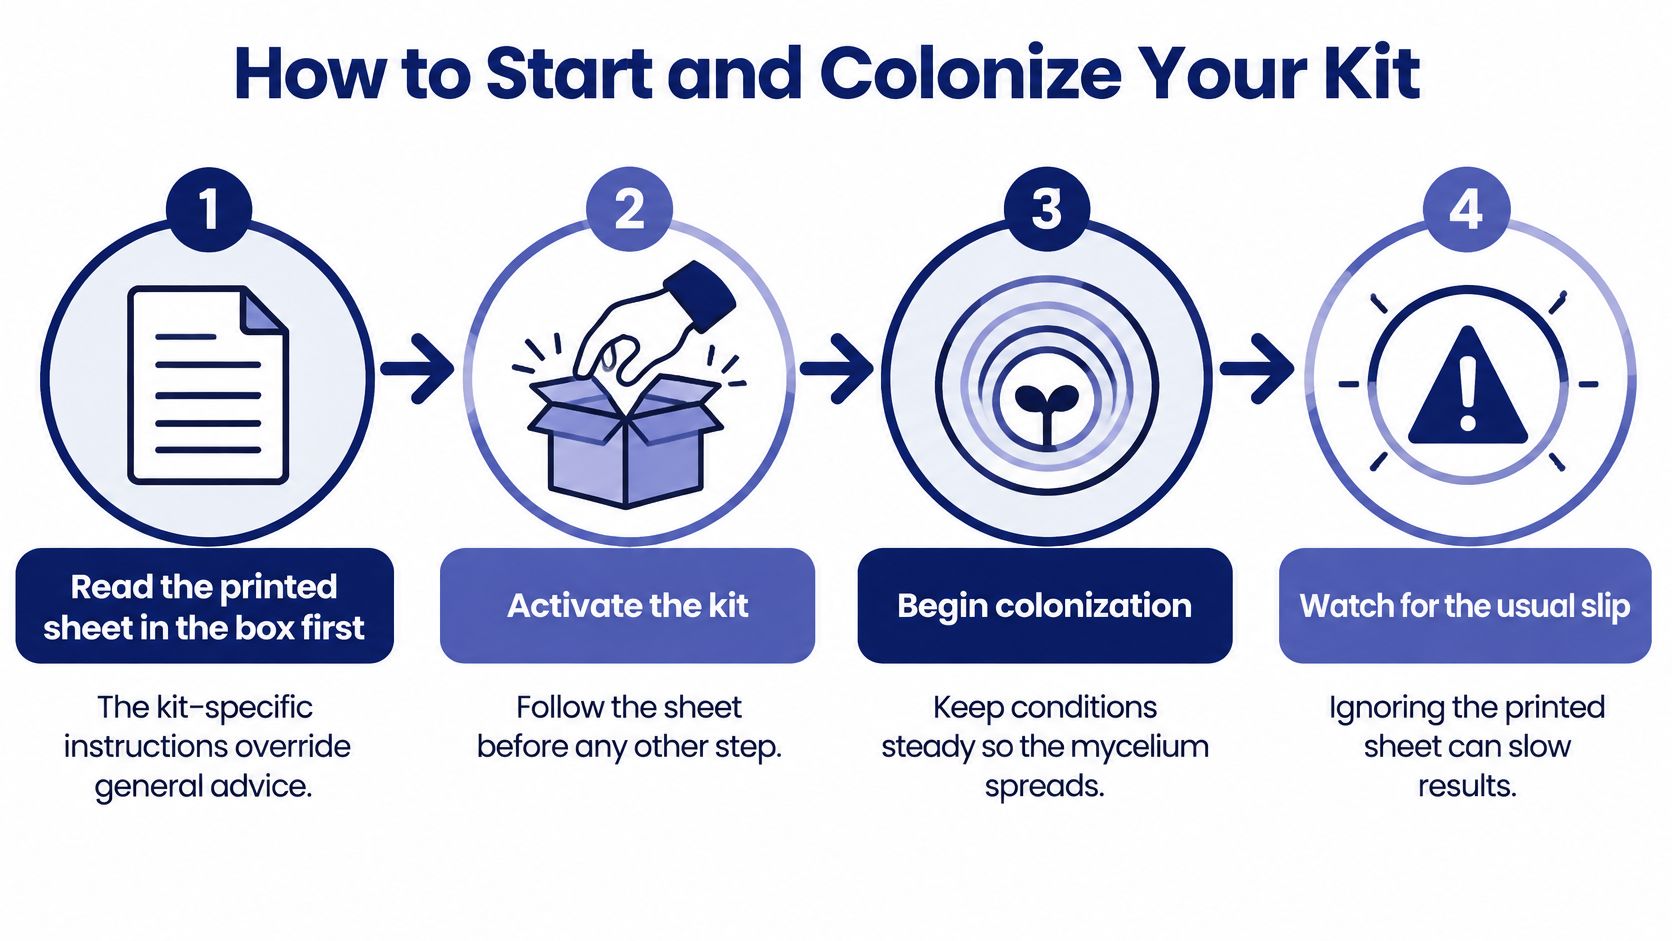
Read the printed sheet completely. Identify whether you have an uninoculated kit or a colonized block. Lay out the required tools before starting so you won't need to search through drawers with an exposed needle.
Wash and dry your hands, clean the work surface, and disinfect the injection port and relevant tools. Alcohol pads are useful for contact surfaces, but they don't make a dirty workspace sterile. Let disinfected surfaces dry before proceeding.
Activate only as directed. If the kit requires a syringe, inoculate through its designated port rather than opening the bag. Our Gro Magik procedure calls for 5 ml of spore/LC solution into each grain bag through its injection port. Keep the needle from touching the bag exterior, your fingers, or the countertop; wiping the port doesn't make a contaminated needle clean.
Use this setup sequence as a reminder while keeping the kit-specific sheet within reach.
Give the mycelium a stable environment
Keep the bag closed and its filter unobstructed. Place it away from direct sunlight, heating vents, and appliances that repeatedly warm the surrounding air. Don't put it inside another airtight container.
Leave it alone unless the sheet specifically calls for mixing or another intervention. Repeated squeezing, shaking, and relocating won't substitute for suitable conditions. Inspect through the plastic rather than opening the bag for a closer look.
Proceed on healthy growth, not impatience. Look for mycelium occupying the substrate as described in the kit's instructions. A white patch near the injection point isn't the same as a colonized block.
Photographing the bag from the same angle helps you judge slow changes without handling it. Keep the filter patch dry and avoid placing supplies against it.
Rapidly spreading green, black, or pink growth, especially with a foul smell, calls for isolation and disposal, not an attempt to fruit the remaining clean-looking portion. Don't open a suspect bag beside healthy cultures or deliberately sniff through its opening.
Fruiting Conditions by Species
High humidity must coexist with fresh air. The aim is a humid growing environment without persistent water sitting on the mushrooms. A humidity reading alone can't tell you whether the caps are staying wet or the fruiting opening is drying out.
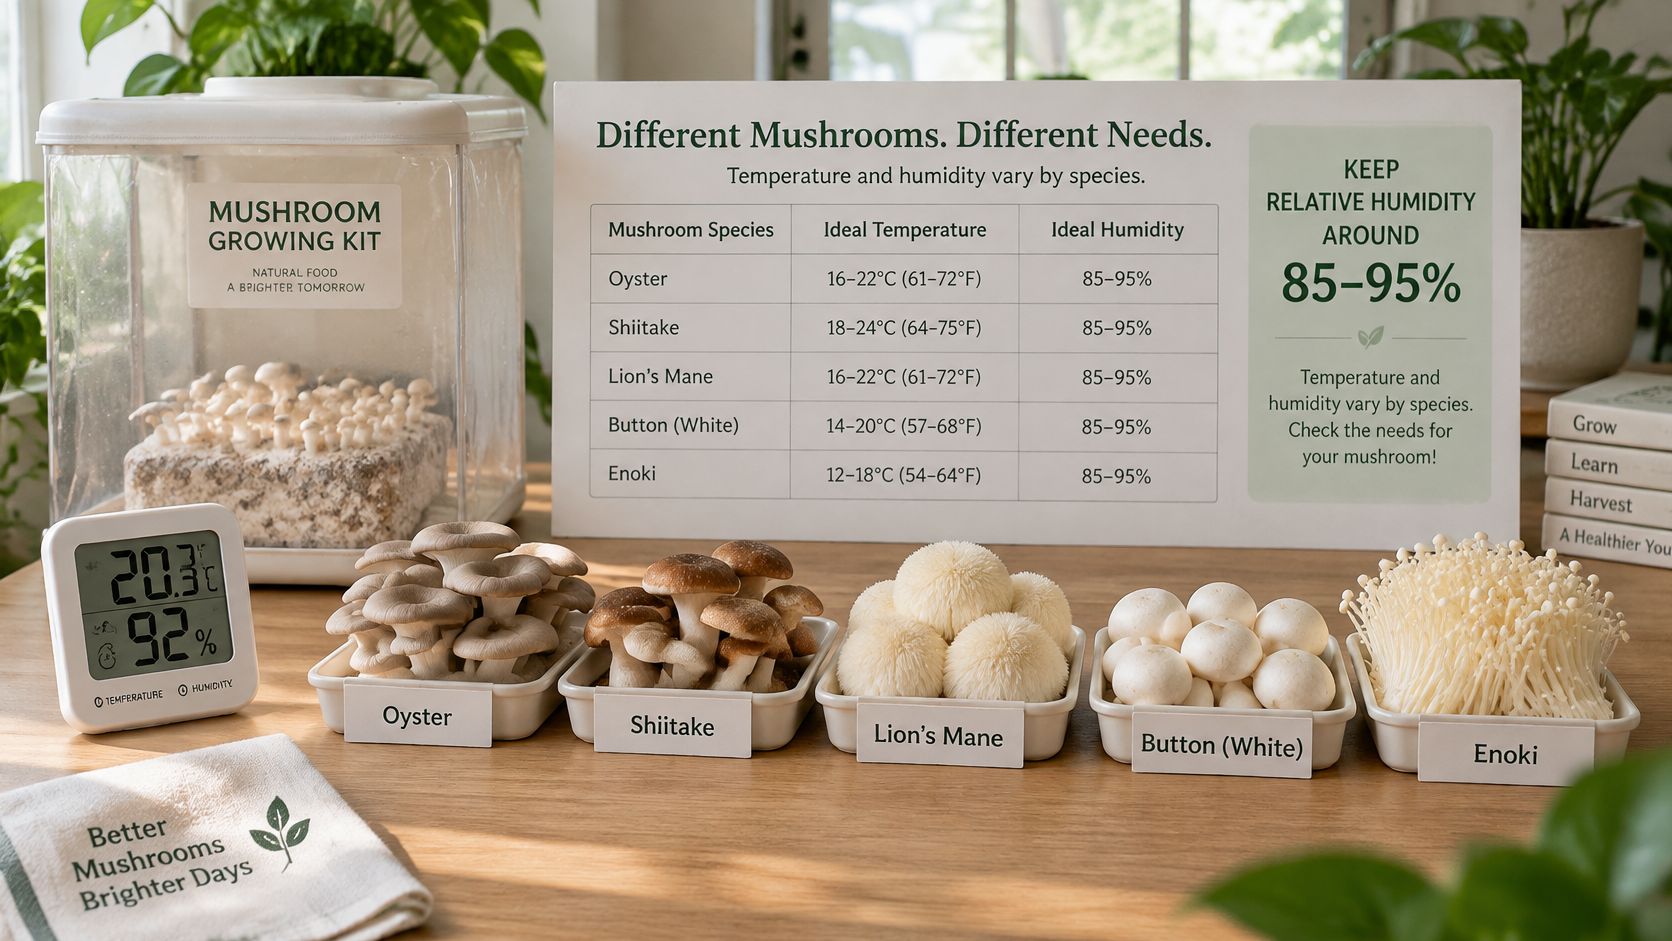
Use the following as a starting lookup, then give the species and strain instructions priority. Our mushroom growing requirements guide is a useful companion when choosing a location for the kit.
Fruiting temperature and humidity by species
Species | Fruiting Temperature | Relative Humidity | Note |
|---|---|---|---|
Blue oyster | 55-65°F | 85-95% | Prefers cool air |
Pink oyster | 70-85°F | 85-95% | Suits warmer conditions |
Shiitake | 60-70°F | 85-95% | Follow the block's maturity and opening instructions |
All-in-one kit with no species named | 68-71°F | 85-95% | General home-kit starting point, not a substitute for identifying the species |
These are starting conditions, not a reason to keep every kit at maximum humidity throughout its grow. Established mushrooms and newly forming pins don't always need identical handling.
The visual below provides a quick reference while you choose the growing location.
Measure beside the kit
Put a thermometer and hygrometer near the fruiting area, away from direct spray. A room thermostat can miss the warmer shelf above a radiator or the cool draft beside a window.
Check the instruments alongside the mushrooms themselves. Damp enclosure walls with drying cap edges suggest a different problem from uniformly wet caps in stagnant air.
If the room is unsuitable for the species, change the location before changing your watering routine. Extra misting won't turn a warm room into a suitable cool-fruiting environment, and a fan isn't a substitute for temperature control.
How to Trigger Fruiting
Fruiting begins when a prepared block receives the environmental changes appropriate to its species and kit design. Don't treat opening the bag as an isolated action. The opening, light, moisture, and ventilation need to work together.
Make the transition deliberately
Confirm readiness. Check that the substrate has reached the colonization benchmark on the sheet and has no suspicious patches. For a kit expected to become white throughout, exposed uncolonized areas mean it needs more time.
Make the prescribed fruiting opening with a clean blade or scissors. For a window-fruiting bag, start with the specified cut rather than tearing away the plastic. The remaining bag helps protect the block from drying.
Set the temperature and light together. Utah State University Extension's home-growing guide gives approximately 60-80°F for home cultivation, a fruiting environment around 68-71°F, and roughly 6-8 hours of indirect light daily. Species-specific instructions take priority over that general starting point.
Introduce gentle fresh-air exchange through the kit's intended openings. Don't aim a desk fan at the block. You need replacement air, not a constant breeze across developing pins.
Fine-mist enclosure surfaces until visibly moist, not dripping, generally once daily under the clean, still-air conditions described in the same extension guidance. Treat that schedule as a starting routine and inspect before adding more water.
Watch the exposed surface
A light moisture film and standing water aren't equivalent. Stop spraying when droplets begin running down and collecting around the block.
A larger opening gives you more air exchange, but it also gives moisture more opportunity to escape. Open only as much as the kit requires.
Keep the growing area out of direct sun even if the room feels cool. Sunlight through glass can heat the bag and change conditions at the block.
If nothing happens immediately, resist changing every setting. Check readiness first, then verify the environment. An incompletely colonized block needs time, while a drying fruiting surface needs moisture management, not a larger opening.
Pack-Specific Timing and Settings
The useful question isn't how long mushrooms take to grow. It's which event starts your kit's clock. Record the actual trigger rather than counting from delivery.
Workflow | Starting Point | Timing or Setting | Harvest Cue |
|---|---|---|---|
H2Shroom | Light and airflow begin | Pins appear 10-14 days later; recommended starting airflow is 1-3 minutes once an hour | Watch for the veil to drop, then harvest before spores drop |
Full Flush | Fanning begins | Ready to pick 10-20 days later | Pick before spores drop |
Grain-bag workflows | Colonization reaches the prescribed endpoint | Use the printed transfer or fruiting procedure | Follow the species and kit's maturity cues |
These are our written process settings, not interchangeable promises. A timer setting from a tank workflow doesn't tell you how far to open a passive fruiting bag.
Keep settings separate from symptoms
Start a timed system at its recommended setting. Stretched stems can justify more fresh air, but dry caps alone don't: increasing airflow onto an already drying crop can make matters worse.
For grain-bag workflows, don't improvise a fruiting cut because another bag looks similar. Some methods require a transfer or substrate-mixing step before fruiting.
Write down the trigger date, initial settings, and harvest date. Add a brief note whenever you change the environment. That record gives your next grow a useful baseline without pretending the next block will follow an identical schedule.
Common Problems and How to Fix Them
More misting isn't the default fix for slow growth. Stagnant air, unsuitable temperature, and uneven drying can all leave a kit struggling while its enclosure looks wet.
NCAT's mushroom cultivation guidance supports roughly 85-95% relative humidity during fruiting alongside airflow, with species-specific temperature ranges of approximately 55-65°F for blue oysters, 70-85°F for pink oysters, and 60-70°F for shiitake. Use those conditions as diagnostic context, not as permission to keep adding water.
Match the adjustment to the symptom
Symptoms, likely causes and fixes
Symptom | Likely Cause | Fix |
|---|---|---|
Green, black, or pink spots spreading | Contamination | Isolate and discard; don't open near other cultures |
Foul or sour smell | Bacterial or other contaminant growth | Discard without opening near healthy kits |
Water pooling or persistent wet caps | Excess misting or inadequate evaporation | Pause misting first; reassess ventilation if wetness persists |
Caps drying, cracking, or pins aborting | Excess airflow or inadequate surface moisture | Reduce direct airflow first, then restore gentle humidification if needed |
Long thin stems and deformed caps | Insufficient fresh air | Increase ventilation modestly while monitoring moisture |
Pins stall without obvious damage | Unsuitable temperature, drying, or incomplete readiness | Check instruments and the block's condition before selecting a correction |
Condensation needs context. Water on the enclosure can reflect a temperature difference, so it isn't proof by itself that the kit has enough usable moisture. Look at cap surfaces, the fruiting opening, and any pooling before deciding what to change.
Long stems and small or distorted caps are more useful ventilation clues than a vague impression that the enclosure feels stuffy. Fuzzy stem bases can accompany humid or low-airflow conditions, but fuzz alone doesn't prove contamination.
Change the controllable variable
Say the enclosure walls are wet and the caps remain glossy with water. Pause spraying before opening everything wider. If surfaces stay wet, adjust ventilation modestly rather than adding a fan pointed at the crop.
If cap edges are cracking beside an air vent, move the kit out of the draft first. Increasing spray frequency while leaving the draft in place can produce alternating wet and dry conditions.
Diagnostic rule: Make a single adjustment, note it, and judge the response before making another.
Surface wetness can change before mushroom shape does. Existing malformed stems won't necessarily straighten, so assess new growth rather than expecting damaged tissue to reverse.
Don't assign a recovery deadline to an unhealthy-looking kit. Colonization responds more slowly than enclosure moisture, and contamination isn't a condition to troubleshoot indefinitely. When you're uncertain about suspicious growth, keep the kit closed and separate while seeking identification help.
Harvest Before Spores Drop and Repeat the Flush
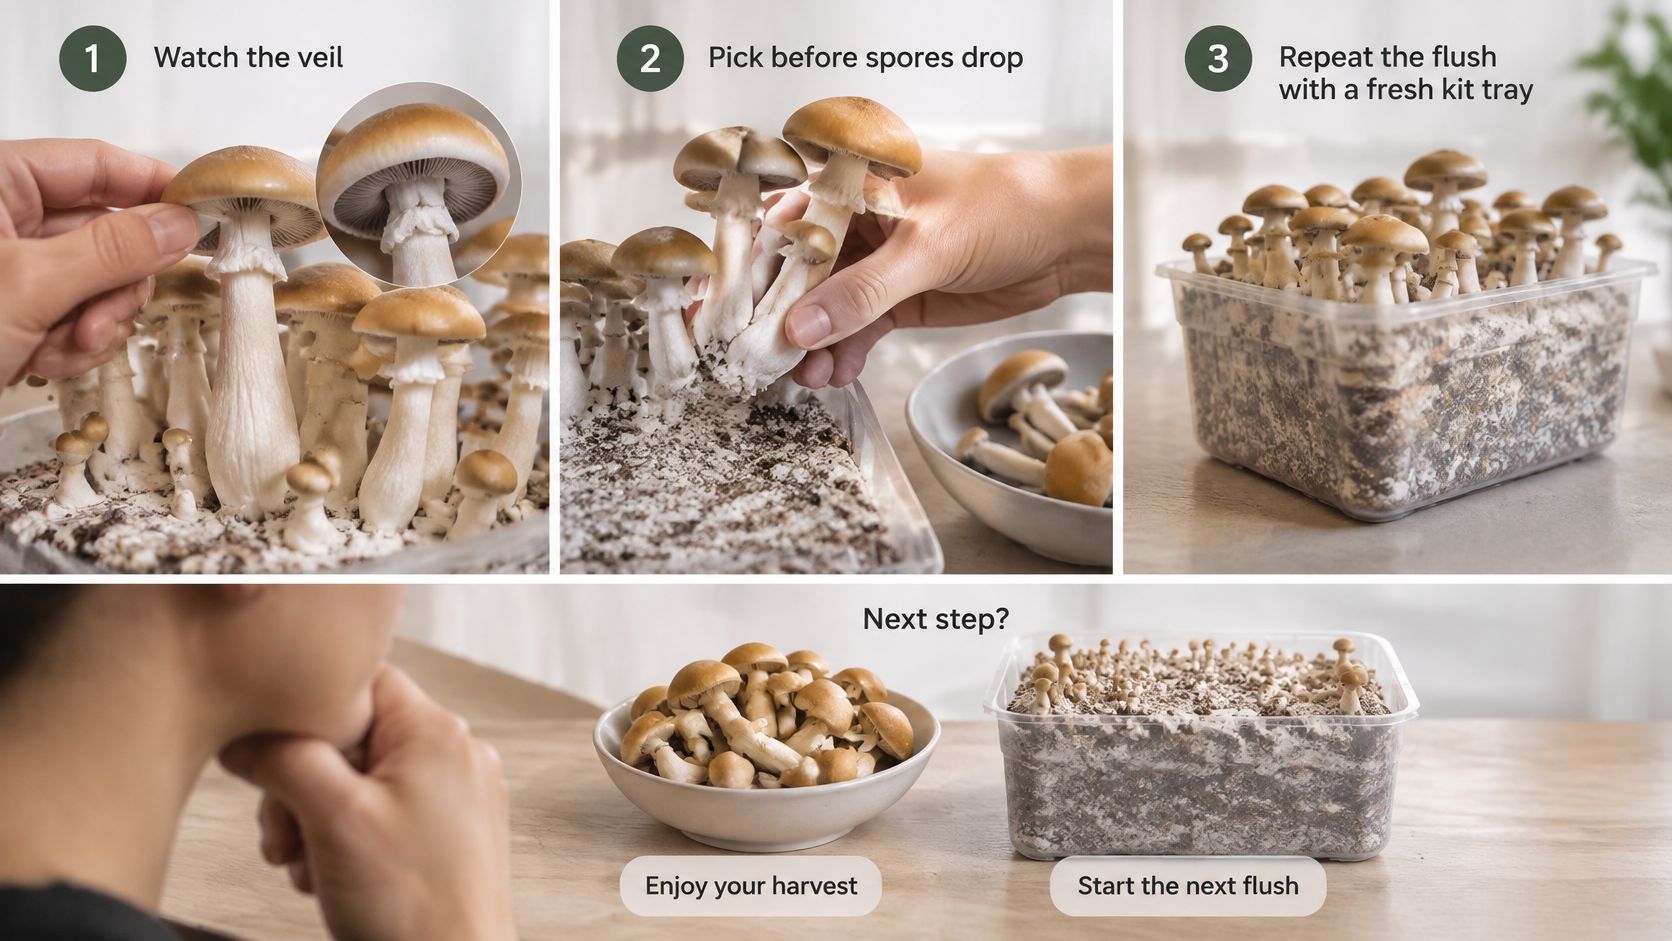
Harvest by maturity cues, not size alone. Our mushroom harvesting guide explains the gentle turning method used to remove mushrooms without pulling up the substrate.
Keep the block intact while you work.
Remove the crop without excavating the block
Check the species-appropriate harvest cue. Veil development matters only for mushrooms that form a relevant veil. Don't wait for oysters to show a feature they don't have; use their cap development and kit instructions.
Gently turn the stem or cluster base until you feel a small break. Support the block if needed, and stop pulling if substrate starts lifting with the mushrooms.
Harvest a mature cluster together. Avoid repeatedly handling the same cluster while picking individual mushrooms. Keep your hands and any cutting tool clean.
For a visual demonstration, use the harvesting video alongside the written directions.
Decide whether the block is worth another flush
Rehydrate according to the kit's soak instructions. Don't invent a soak duration or leave the block standing in old water. Drain it as directed before restoring its fruiting environment.
Return the block to suitable light, temperature, and ventilation, then watch for new pins. Our specified soak-and-fruit workflows repeat 3-5 times, stopping when no more mushrooms grow or other mold appears. That's a process range, not a guaranteed number of harvests.
Record the result. Note the harvest date, yield, and adjustments that helped. Compare the block's condition with the effort needed to maintain it before choosing another flush.
A clean but exhausted block and a contaminated block need different decisions. You can stop maintaining an exhausted kit without trying increasingly aggressive treatments; seal and discard a moldy one without opening it around other grows.
We offer mushroom grow kits, sterilized grain, substrates, and tools, with printable instructions and video help for getting the steps right. Visit Colorado Cultures to choose supplies for your next grow or get help matching your kit's stage to the right next action.
Comments