
The 8 Stages of Mushroom Growth Explained
You're looking at a grow bag that has turned completely white. The mycelium appears healthy, the substrate looks fully colonized, and yet there isn't a mushroom in sight. That pause can feel like a failure, but it often means the fungus has finished one job and is waiting for the right signal to begin another.
The stages of mushroom growth aren't governed by a universal calendar. They're a sequence of biological changes that you can learn to recognize through texture, shape, color, moisture, and response to environmental cues. Once you stop asking only “How many days has it been?” and start asking “What is the mycelium showing me?”, the process becomes much easier to manage.
Why Your Fully Colonized Bag Is Not Fruiting Yet
A grow bag can be completely white and still remain without mushrooms. That white, connected surface shows that the fungus has established a vegetative network through the substrate. Fruiting requires a separate physiological transition, prompted by changes in conditions around the block. Research on mushroom cultivation describes this transition as a distinct stage requiring shifts in cues such as temperature, humidity, fresh-air exchange, light, and watering.
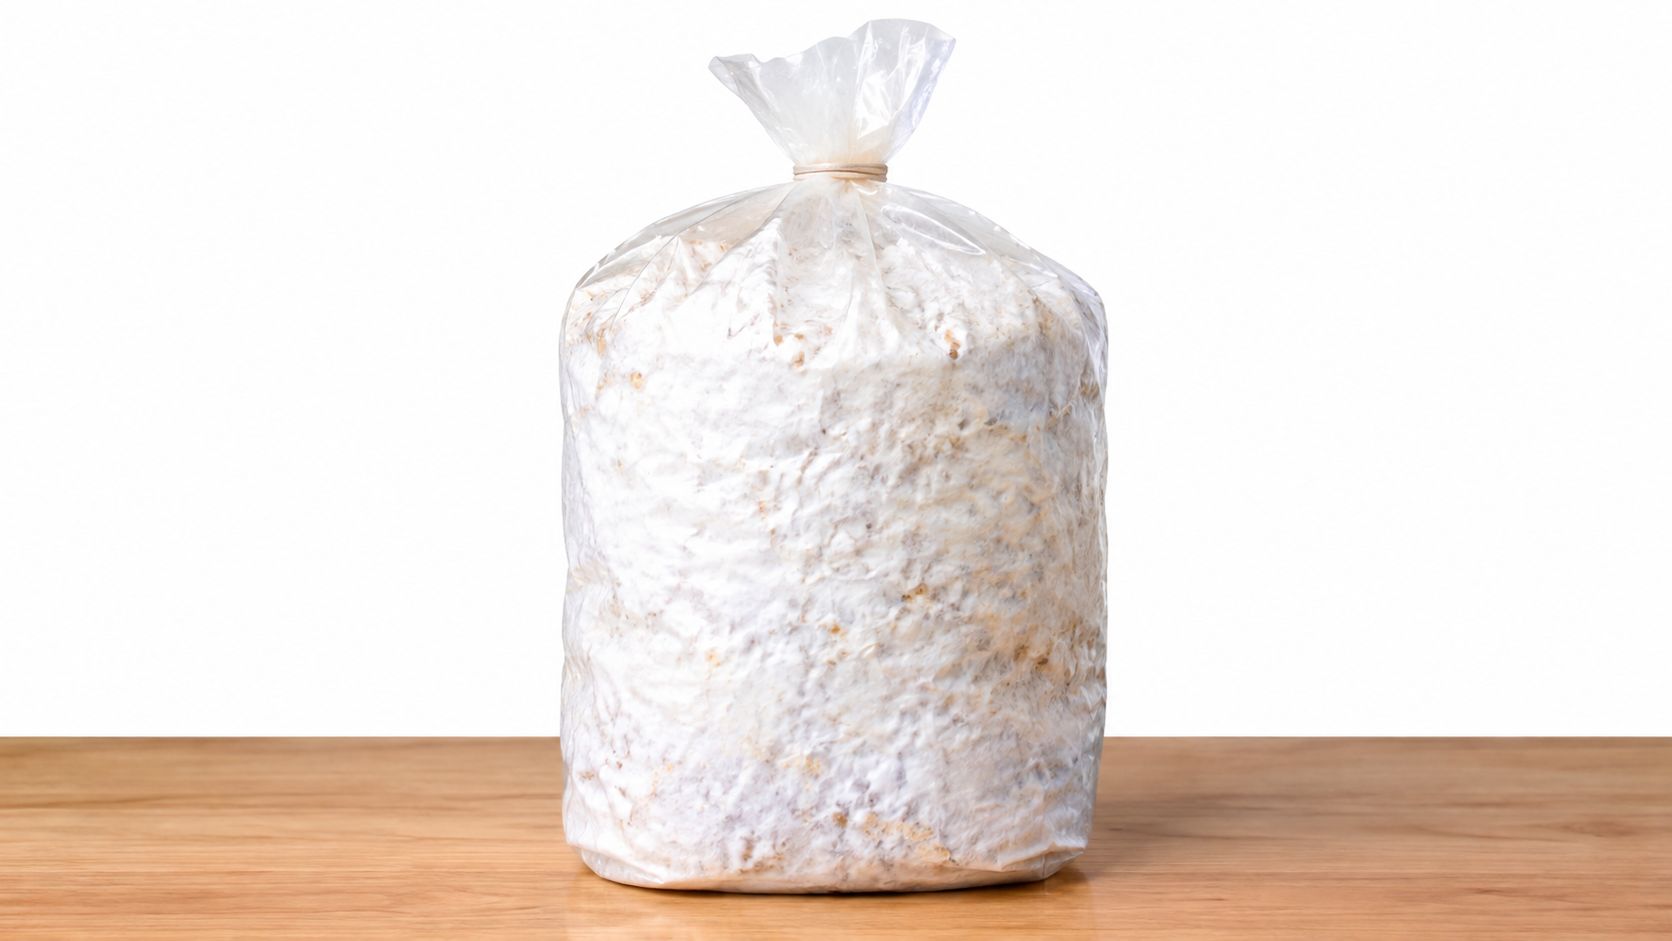
Compare two colonized bags. One remains enclosed, holding steady moisture with limited gas exchange. The other is exposed at a suitable fruiting site, where fresh air, light, and a carefully managed humid surface provide different cues. Both may contain vigorous mycelium. The second has received a clearer signal that the surrounding conditions have changed.
Colonization is success, not a finish line
A white block can look stalled because the fungus has completed substrate colonization but has not yet begun investing energy in primordia and fruit bodies. Repeatedly opening, spraying, or relocating the bag can add stress while making the environment less consistent. Watch the surface and adjust one condition at a time.
For a practical reference after colonization, compare your setup with this guide to a fully colonized monotub. Examine surface moisture, air exchange, light, and the intended fruiting site instead of counting days.
Instructor's rule: A colonized block is ready for a decision about conditions, not a harvest date.
Some growers also explore cultivation alongside ways to incorporate functional mushrooms in your routine. Keep that use separate from the growing assessment. Determine now whether the bag is still colonizing, entering its transition, or beginning reproductive development.
Spore Germination and Early Mycelial Networks
Before white growth appears, a spore must leave its dormant state and begin producing a microscopic filament called a hypha. It helps to think of a spore as a seed, although the comparison is only an analogy. A germinating spore sends out a fine thread that searches for moisture and nutrients, much like a tiny root system extending through soil.
At first, the hyphae produced by an individual spore carry one nuclear condition. When compatible hyphae meet and fuse, they can create the more complex dikaryotic mycelium that drives vigorous mushroom development. You won't see this exchange directly, but the quality of your early culture depends on it.
What the first growth is telling you
The earliest visible growth may look delicate and uneven. That isn't automatically a problem. A clean culture can begin with small white points before those points expand into a connected network. The important observations are whether the growth remains consistent, whether the substrate stays appropriately moist, and whether unfamiliar colors or odors appear.
Sterile technique matters most when the fungus has little established biomass. A contaminated grain jar or agar plate gives bacteria and molds access to the same nutrients the developing mycelium needs. Once contamination takes hold, it can be difficult to distinguish a slow mushroom culture from a culture that is just being outcompeted.
Protect the invisible foundation
Work with clean tools, clean surfaces, and a controlled transfer process. Avoid repeatedly opening a container to inspect it, because every opening creates another opportunity for unwanted organisms to enter. Excess water can also create a weak, poorly aerated environment, while a dry culture may struggle to extend its hyphae.
If you're starting from spores, learn how a mushroom spore print is made and handled before you begin. The goal at this stage isn't speed. It's to give the emerging network a clean, stable environment in which compatible growth can establish itself.
Substrate Colonization and Vegetative Growth
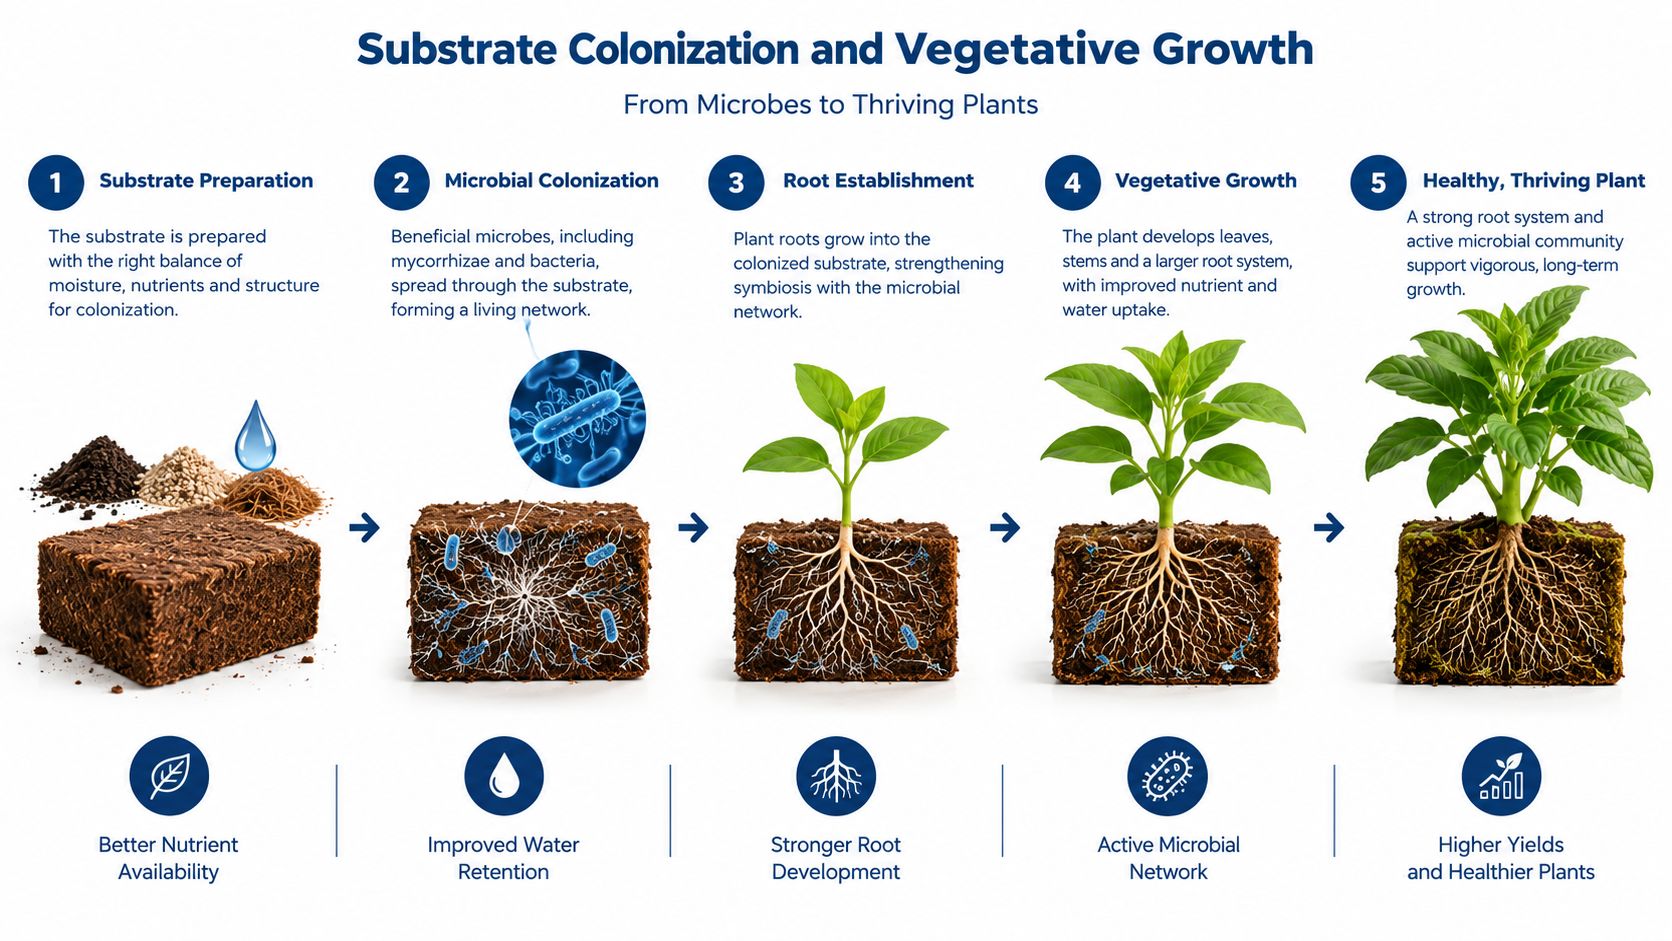
A fully colonized block can look ready while the fungus is still building strength. During colonization, white mycelium spreads through grain, sawdust, straw, or another prepared substrate, breaking down complex organic material with enzymes and absorbing the released nutrients. The visible network is the fungus assembling the food supply it may later draw on for fruiting.
Read the surface as a pattern, not a calendar. Healthy growth usually appears dense and coherent, gradually joining separate patches into one continuous structure. Some species produce fine, wispy strands, while others form thicker mats. Compare the appearance with the culture and substrate you are using, since mushroom mycelium does not look identical across species.
Keep the incubation environment steady
In an enclosed bag, stable substrate temperature and appropriate moisture are the main conditions to protect. Research on the environmental requirements of mushroom development indicates that light and fresh-air exchange generally have less influence while the substrate remains fully enclosed. A sealed incubation bag therefore needs different handling from an exposed fruiting chamber.
Avoid frequent handling. Moving the bag can break developing strands and shift moisture into uneven pockets. Set it in a clean, stable location and inspect the colonization through the plastic. If the substrate itself needs preparation or adjustment, this guide to substrates for growing mushrooms explains how material choice relates to the species.
Use these visual checkpoints:
Dense, connected growth: Mycelium is forming a continuous network through the available food source.
Thin or stalled patches: Examine moisture distribution, compaction, and how the culture is responding to the material.
Unusual colors: Green, black, or brightly colored growth suggests contamination rather than normal variation.
Wet spots or pooling: Excess water reduces air space and can support bacterial problems.
Wait for the block to establish itself before changing conditions for fruiting. A well-developed vegetative network provides a stronger supply line for future fruit bodies, so let the visible state of the substrate guide each adjustment.
The Hidden Transition and Primordia Formation

A fully colonized block can look unchanged while its next developmental stage is already beginning inside the surface. “Pinning” describes a sequence, not a single event: mycelial growth gives way to hyphal aggregation, primordia, buttons, and eventually recognizable fruiting bodies. Work on mushroom development also shows that environmental changes, rather than elapsed time alone, can control these transitions.
Look closely at the block rather than counting days. The surface may become slightly denser or develop compact white areas. These knots form as hyphae gather together. Some later organize into primordia, the early structures that can differentiate into fruit bodies.
Read the surface before changing conditions
Use the following visual sequence:
Uniform colonization: Established mycelium occupies most of the available substrate.
Environmental shift: The fruiting area receives a new balance of air exchange, light, temperature, and surface moisture.
Hyphal aggregation: Dense knots or compact points begin to appear.
Primordia: The knots become more organized and develop a clearer shape.
Visible pins: Small structures show the first suggestion of a cap and stem.
Fruiting often follows a combination of cooler conditions, increased fresh-air exchange, light, and high surface humidity. Many species fruit within approximately 15–27°C and 80–95% relative humidity, while temperatures around 29–30°C or higher may suppress fruit-body formation. These ranges vary by species, so follow the culture's recommendations and judge the surface response rather than treating the figures as a schedule.
Change one main condition at a time. Make the intended transition clear, then watch how the surface responds.
Dense white knots can be normal development, even though they are not yet mature pins. A white surface that changes slowly also does not prove failure. Look for organization: compact areas should become more defined, while successful primordia gradually gain structure. If the surface remains static, review the environmental shift before making several adjustments at once.
Pinning and Fruit Body Differentiation
A small knot can change quickly once it begins to organize. In Pleurotus, for example, the developing structure separates into a lower stipe, or stem, and an upper pileus, or cap. A visible narrowing between these regions shows that the primordium is developing beyond a shapeless knot. Read that change as a visual checkpoint rather than as a calendar event.
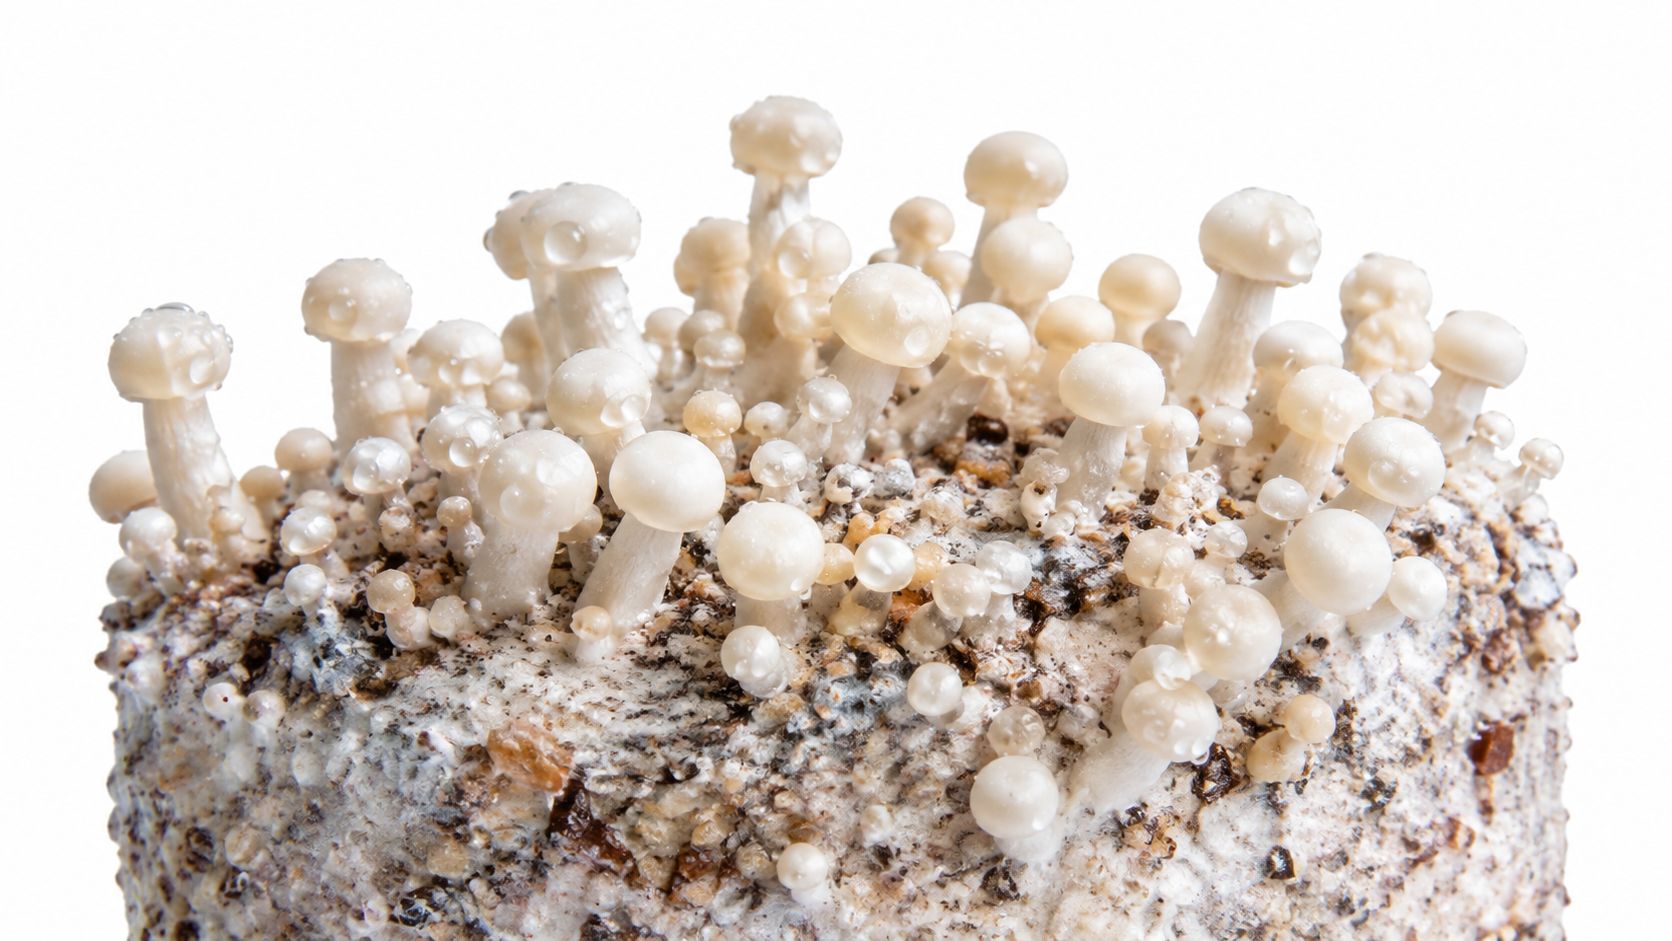
Young pins can fail because they hold little stored water and expose a large surface area for their size. A dry surface, sudden airflow, or fluctuating humidity may stop expansion. A healthy pin stays firm and gradually develops clearer cap and stem features. An abort may darken, shrivel, or remain unchanged during successive checks.
Balance humidity with fresh air
Keep the fruiting surface humid while preventing standing water. The 80-95% relative humidity range noted earlier applies to many species, although the suitable setting depends on the culture and fruiting structure. Observe the surface after each adjustment, since its condition reveals whether moisture is being retained or lost too quickly.
Dry, matte, shrinking pins: Increase surface humidity or reduce drying airflow gradually.
Bright, wet droplets sitting on pins: Stop direct misting and add gentle air exchange.
Long stems and small caps: The culture may need more fresh air, though species naturally differ in shape.
Firm pins with visible cap development: Keep conditions steady and avoid unnecessary changes.
Mist the surrounding surface lightly when needed. Directly spraying young mushrooms can damage them and leave excess water in delicate folds. Fresh air should clear stale air while preserving the humid boundary layer around developing fruit bodies.
The following demonstration helps new growers visualize how a fruiting setup is managed:
A pin that pauses briefly may still recover. Keep conditions stable, then compare its firmness, size, and organization during later checks. Judge the mushroom by whether it stays firm and organized over successive checks rather than by any fixed schedule.
Maturation Harvesting and Senescence
Maturation is the stage in which the fruit body expands rapidly and develops the form associated with its species. Cap shape, veil position, firmness, color, and spore-bearing surfaces all help identify the harvest window. There isn't one visual rule for every mushroom, so learn the expected mature structure of the species you're cultivating.
Button mushrooms offer a clear example of why morphology matters. They can be distinguished through stages such as pinheads, buttons, closed cups, and progressively opening cups, with changes in cap and veil providing useful harvest clues. A closed or partially closed veil often signals a different harvest point from a cap that has opened and exposed its spore-bearing surface.
Harvest by structure, not by the calendar
Inspect the cluster from several angles before touching it. Ask:
Has the cap reached the form expected for the species?
Is the stem firm rather than collapsing?
Is the veil changing in a way that signals maturity?
Are neighboring mushrooms crowded enough to affect their shape?
Is the surface still fresh, or has the fruit body begun drying or releasing spores?
Harvest cleanly and handle the block gently. Removing mature mushrooms can give the remaining structures more room, but rough handling can damage the surface and create openings for contamination.
Preparing for another flush
The end of one harvest isn't necessarily the end of the culture. After fruiting, the substrate has lost moisture and available nutrients, and the mycelium may need a recovery period. Rehydration should be controlled and clean, because the post-harvest block is exposed to handling and environmental contaminants.
Senescence is the natural decline of an aging mycelial network. You may see slower recovery, fewer new primordia, or weaker fruit bodies over successive flushes. That change doesn't mean you did something wrong. It reflects the biological limits of the culture and the resources remaining in the substrate.
A second flush begins with sanitation and patience, not with aggressive watering.
Remove old debris, inspect for unusual odors or colors, and return the block to suitable conditions. If contamination appears during this transition, isolate the block rather than allowing it to contact clean cultures or equipment.
Troubleshooting Common Issues Across All Stages
Good troubleshooting begins by separating symptoms that appear similar. A slow colonizer, a stalled transition, a drying pin, and bacterial contamination need different responses. Start with the visible change, then check the stage and environment before disturbing the culture.
Match the symptom to the stage
What you observe | More likely interpretation | Sensible response |
|---|---|---|
White growth is spreading slowly | The culture may be adapting to the substrate, or moisture and structure may be uneven | Check the substrate condition and observe the trend without unnecessary handling |
The bag is fully white but unchanged | Vegetative growth may be complete, while fruiting cues are missing | Review species-specific initiation conditions and make one controlled environmental shift |
Pins shrivel or darken | The surface may be drying, or airflow may be too direct | Raise surface humidity gently and keep air from blowing across young mushrooms |
Heavy condensation and wet patches | Moisture may be excessive or unevenly distributed | Reduce direct misting and improve gentle air movement |
Sour or unpleasant odor | Bacterial contamination is possible | Isolate the culture and keep it away from clean work |
Green growth appears | Mold contamination is a concern | Separate the affected material and follow safe disposal practices |
Contamination can enter during spawning, casing, cultivation, harvesting, or post-harvest handling. Poor sterilization, weak hygiene, and unsuitable environmental conditions can each contribute to failure, as discussed in this review of contamination risks and environmental control. Treat every white patch and every pause as a question to investigate, not a verdict.
Use observation before intervention
A camera or short written log lets you compare surface changes without repeatedly opening the container. Record texture, moisture, odor, airflow, and new structures. These observations work like checkpoints on a trail. They show whether the culture is progressing, holding steady, or responding poorly to a recent change.
Sensors can help track temperature, humidity, air quality, and light, but visual inspection still matters. A reading may look acceptable while the surface dries, pools water, or develops an unusual texture.
Colorado Cultures offers sterilized grain bags, all-in-one grow bags, substrates, grow kits, and cultivation guidance through printable instructions and video tutorials. These supplies support a stage-by-stage approach from clean inoculation through fruiting and harvest. Responsible cultivation and applicable laws remain your responsibility.
Start your first grow with a species-appropriate kit or substrate. Track what the mycelium shows at each transition instead of counting down to a fixed harvest date. Visit Colorado Cultures to explore grow bags, substrates, kits, and practical resources for reading mushroom growth stages with greater confidence.
Comments