
Morel Mushroom Grow Kit Indoor Guide for Beginners
The most popular advice about a morel mushroom grow kit indoors is also the most misleading: treat it like an oyster kit, keep the surface damp, and wait for mushrooms. Morels don't follow that simple script. They need the right species, a healthy period of mycelial development, mature sclerotia, and carefully managed conditions before fruiting can begin.
That doesn't make indoor cultivation impossible. It makes it specialized, experimental, and less predictable than growing common gourmet mushrooms. If you approach the kit as a small cultivation project rather than a guaranteed harvest, you'll know what to monitor, what healthy progress looks like, and when a problem calls for patience instead of panic.
Why Morel Kits Are Not Like Other Mushroom Kits
An oyster or lion's-mane kit usually arrives close to its fruiting stage. You open the package, expose a prepared block to suitable conditions, and look for mushrooms at the cut surface. A morel kit may require you to support several biological stages before the fungus is ready to produce a fruiting body.
The important difference is sclerotia formation. Sclerotia are dense survival structures made by the morel mycelium. They store resources and help the organism handle changing conditions. A bag can show healthy white growth and still fail to produce sclerotia, or form sclerotia without later fruiting. Colonization is progress, not proof of a harvest.
Morels also respond to triggers that aren't interchangeable with the routine used for ordinary mushroom blocks. Moisture changes, temperature shifts, substrate biology, airflow, and the timing of any induction step can all matter. The exact response varies with the species and culture, which is why a kit should identify its Morchella species rather than just promise “morel genetics.”
Practical rule: Treat visible mycelium as one checkpoint, not the finish line.
For a first attempt, success can mean several things: keeping the culture clean, documenting the spawn run, observing sclerotia, learning how the substrate responds, or producing fruiting bodies. A harvest is the most exciting outcome, but it isn't the only useful one. This mindset prevents a slow phase from looking like immediate failure.
Before opening the kit, read a beginner-friendly overview of how grow kits work for first-time cultivators. You should also confirm that the supplier provides sterile components, species information, handling instructions, and a way to ask questions. Anonymous kits with no culture identity or environmental guidance deserve caution.
What the Research Says About Indoor Morel Success
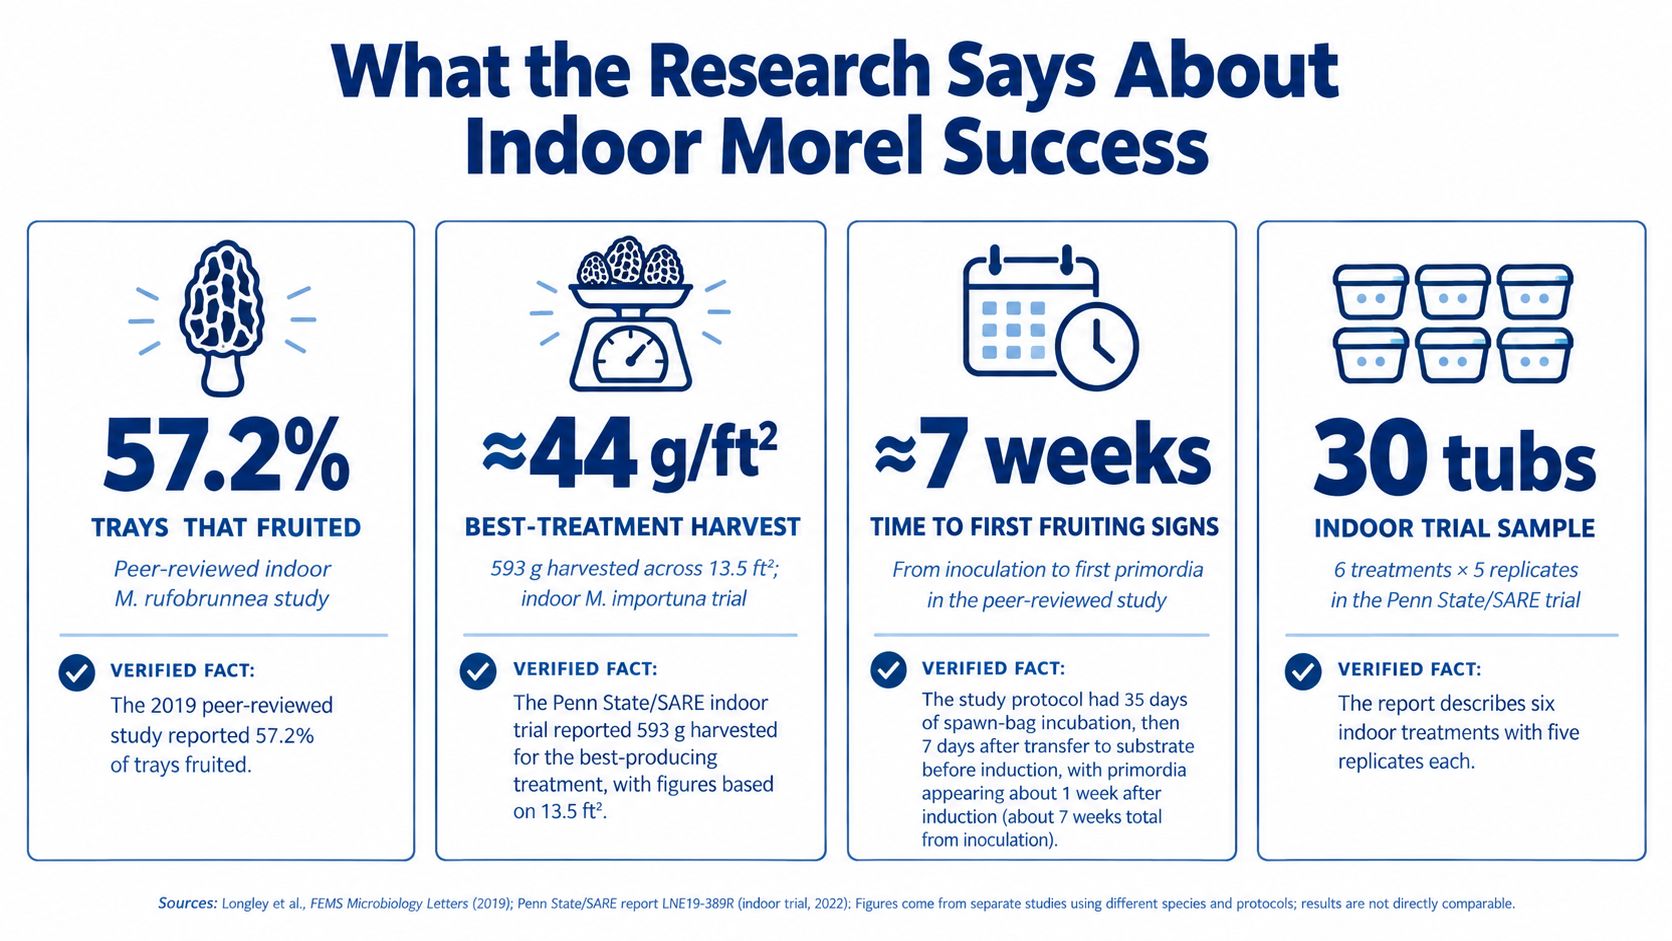
Published research offers a better benchmark than a product listing promising an easy harvest. A 2019 peer-reviewed study of indoor Morchella rufobrunnea cultivation found fruiting bodies on only 57.2% of inoculated trays, while yield per tray reached 46% of the researchers' anticipated production. The full findings appear in the original peer-reviewed report on indoor Morchella rufobrunnea cultivation.
These figures do not predict the result from every household kit. They show, however, that even a controlled research protocol can produce mycelial growth without reliable fruiting or the expected output. A consumer kit may use a different strain, substrate, container, or fruiting procedure. Comparing its marketing claims directly with the study would be like comparing two recipes that share an ingredient but use different kitchens and cooking methods.
Species identity changes the picture
Scientific reviews identify only a limited number of Morchella species as having reached commercial cultivation, including M. rufobrunnea in the United States and M. importuna in China. A protocol developed for one species or strain may therefore transfer poorly to another. The name on the kit is not a minor label. It helps determine whether the instructions match the organism.
Commercial history also shows the infrastructure behind successful production. China began large-scale commercial morel development in 2012, and cultivated area grew from approximately 200 hectares initially to 16,466 hectares during the 2021–2022 period, according to a 2023 review of morel cultivation development. For a home grower, that expansion signals how much testing, space, and environmental control commercial production requires.
Some Chinese farms achieved yields above 1,500 grams per square meter. That figure reflects optimized strains, substrates, facilities, and management, not a kitchen shelf. It can show what coordinated production has achieved, but it should not serve as a promised kit result.
The review also describes early United States factory efforts ending around 2006 because production was unstable and unprofitable. The Danish Morel Project recorded its first indoor black morels in 2005, then reported 4.2 kilograms per square meter over a 22-week cultivation period. These milestones show that controlled production can work, while leaving household reliability unresolved.
Before buying, ask which species you will receive, whether the culture is identified, which growth phase the kit supports, and how the seller explains possible failure. Be cautious with fixed high success rates, guaranteed harvest language, and commercial farm yields presented as ordinary home-growing expectations.
Setting Up Your Kit and Preparing the Substrate
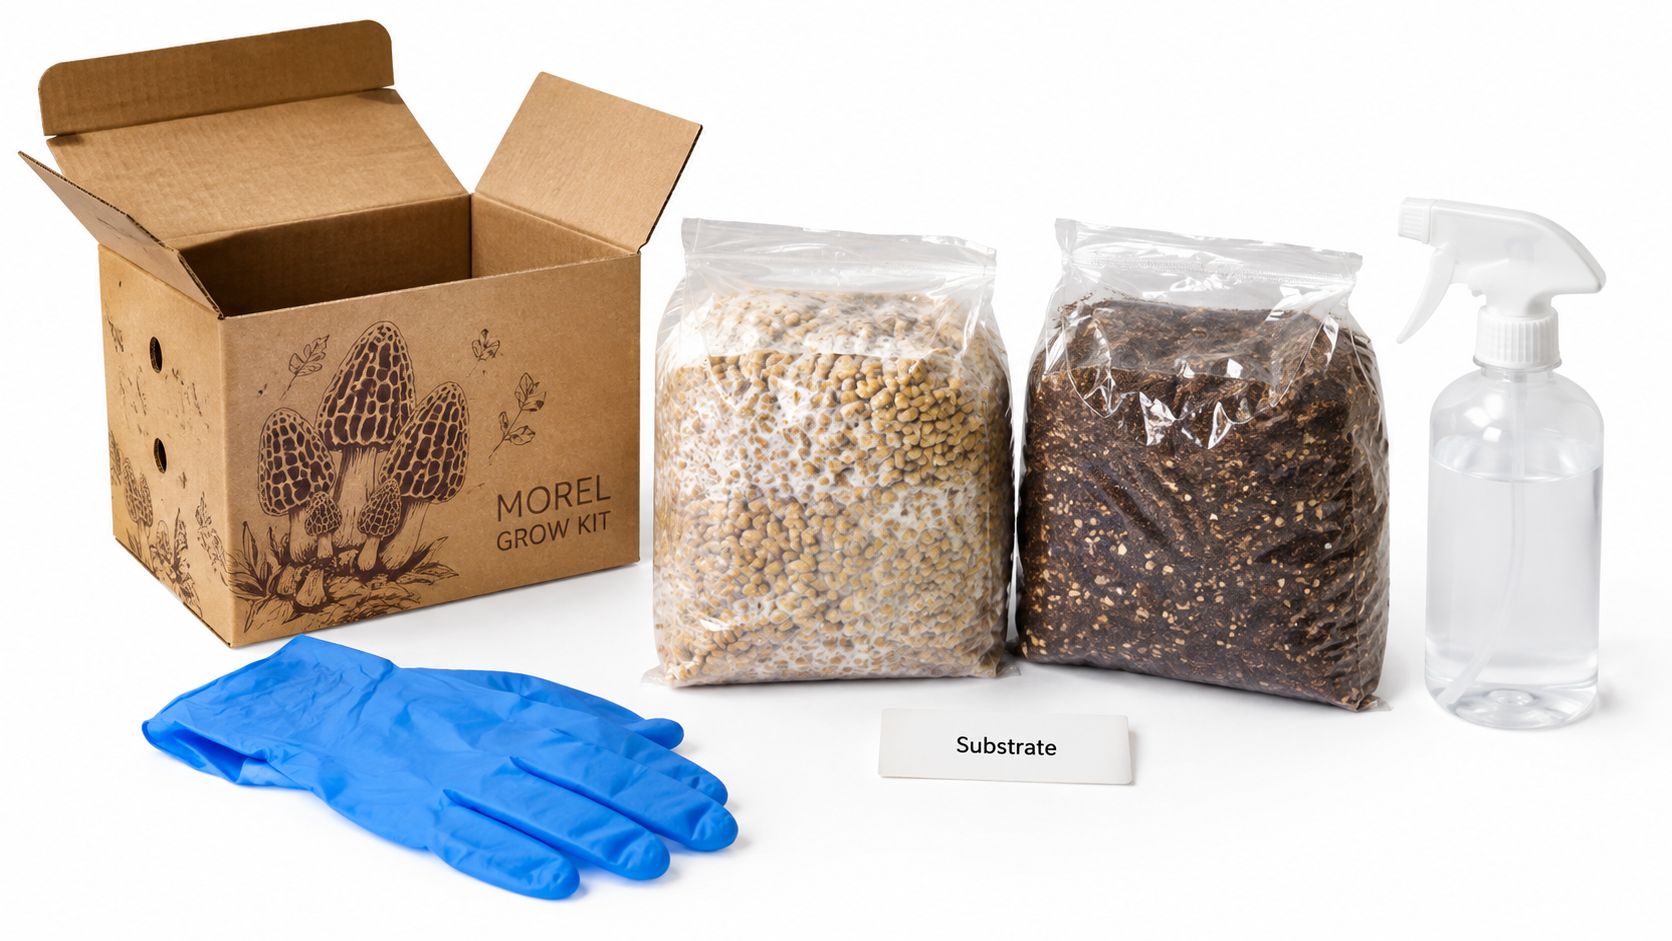
A morel kit rewards preparation before inoculation. Clear a washable surface, clean it thoroughly, wash your hands, and gather sterile gloves, labels, alcohol wipes, a thermometer, and every kit component before opening anything. A tidy workflow reduces the chance of touching the wrong surface or leaving a container exposed while you search for supplies.
Check the culture before handling it
Read the label first. Confirm the stated Morchella species or strain, storage guidance, and whether the package contains grain spawn, colonized substrate, or a separate culture. An unidentified culture leaves you without a reliable basis for choosing the right handling method.
Inspect sealed bags without opening them. Morel mycelium can appear wispy or uneven rather than forming the thick white mat familiar from oyster mushrooms. Sour or rotten odors, leaking liquid, and clearly colored mold indicate that you should contact the supplier instead of trying to rescue the material.
Prepare the substrate gently
Follow the kit instructions for moisture. Do not add water to sterilized grain unless the instructions call for it. Excess moisture can make grains sticky and create oxygen-poor pockets. If the kit includes a soil-based layer, hydrate it evenly until it holds moisture without becoming muddy or compressed.
The substrate has a job beyond merely holding the culture. Grain provides a food-rich surface for expansion, while a more mineral layer can support the conditions associated with later development. Use the supplied materials as intended, and avoid casually replacing them with untreated or chemically treated wood. For background on suitable wood-based materials, read this guide to hardwood mushroom substrate.
Clean handling matters more than elaborate equipment. A careful transfer in a clean workspace is safer than a rushed transfer beside an open window or household sink.
Open sterile bags only when you are ready to inoculate. Keep the bag opening away from surfaces, avoid touching filter patches or inner openings, and seal the container immediately after adding the culture. Handle each bag once, then return it to its intended location.
Record the date, species, and substrate type on the label at inoculation. If a bag stalls weeks later, those details give you a starting point for tracing its handling and comparing it with other bags.
This video demonstrates the kind of careful handling and kit workflow beginners should study before starting:
For the wider sequence of indoor cultivation, consult a technical guide to indoor morel cultivation. It places preparation within the larger process, helping you treat the kit as a managed experiment rather than a guaranteed harvest.
Controlling Temperature, Humidity, and Airflow
Morel cultivation needs different environmental decisions at different stages. A sealed or nearly sealed container may suit early colonization, but fruiting requires a balance between moisture retention and fresh-air exchange. High humidity without airflow creates a wet, stagnant environment, not a healthy fruiting chamber.
Use instruments rather than your fingertips. Place a digital thermometer and hygrometer near the substrate, not directly against a heating source or mist nozzle. Check them at the same time each day and write down the readings, along with visible changes in the substrate.
Match the environment to the phase
The broad sequence is spawn run, sclerotia development, and fruiting. Your kit's instructions should provide species-specific targets, because a generic chart can mislead you when the culture or protocol differs.
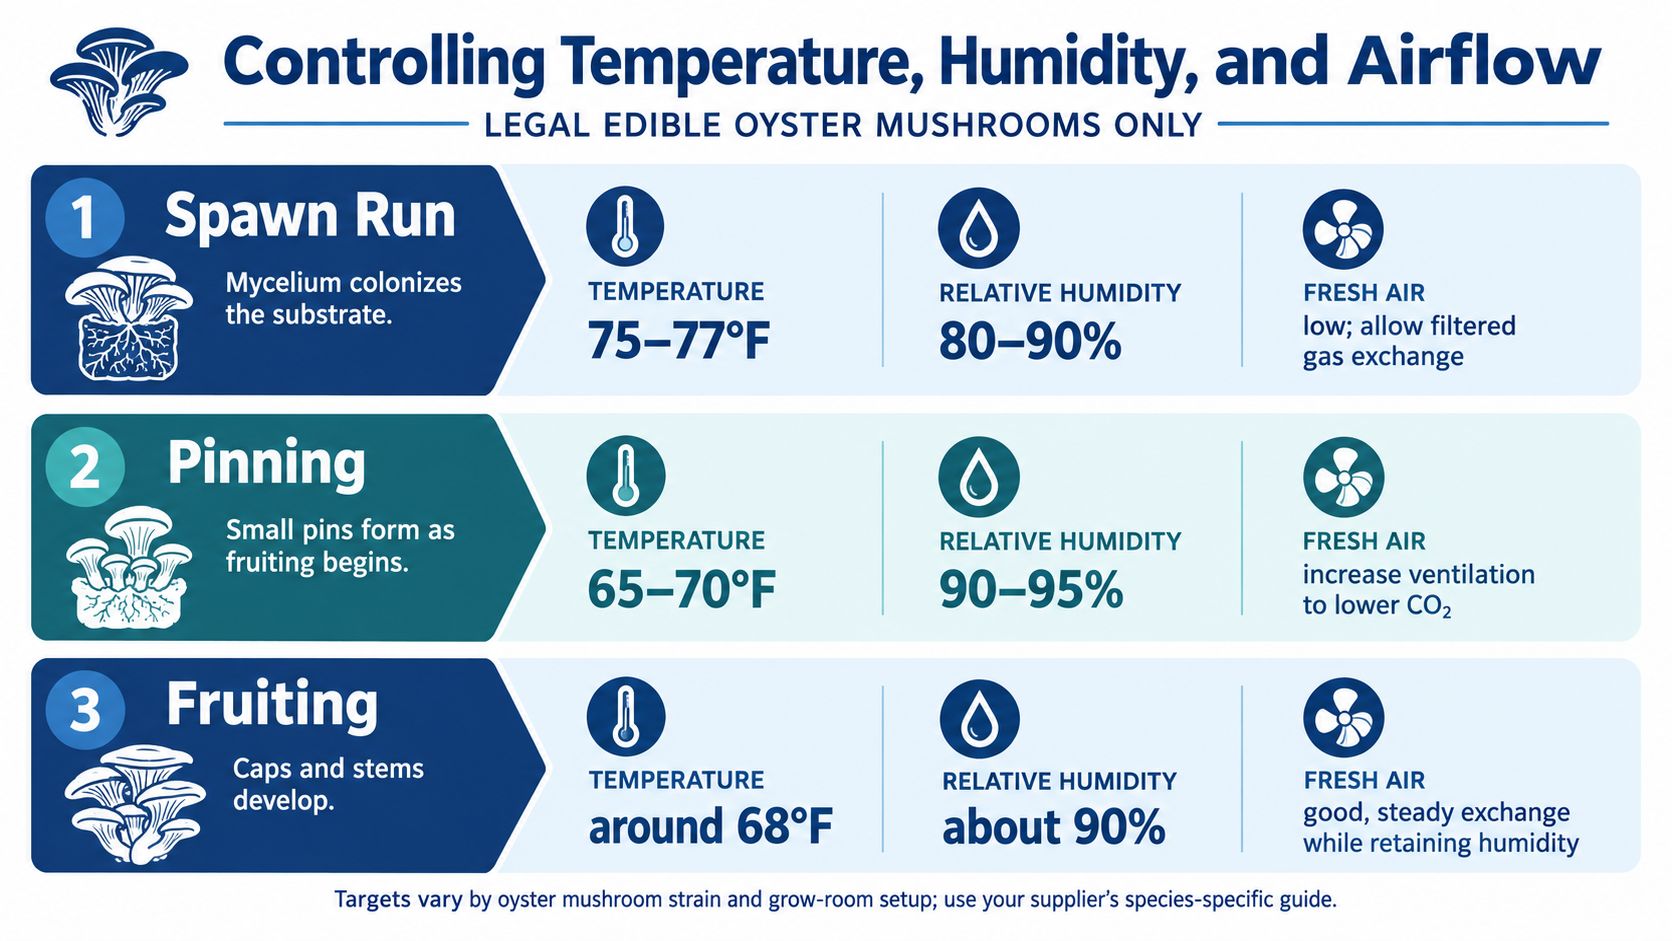
During the spawn run, protect the bag or container from direct sun, heat vents, and large temperature swings. Don't open it repeatedly to inspect growth. Morel mycelium can look sparse while remaining active, so time and consistent conditions are more useful than frequent handling.
Sclerotia development deserves patience. The substrate should remain moist, not waterlogged, and the container should not be treated like an open fruiting block. If you see condensation, don't assume the substrate needs more water. Condensation reflects a temperature difference and doesn't tell you how much usable moisture exists inside the substrate.
Build a simple monitoring routine
A workable home setup can be modest. Use a clean tote, a small tent, or the container recommended by the supplier, provided it allows you to observe the culture and make controlled airflow adjustments. Keep the setup away from kitchens, dusty workshops, pets, and direct drafts.
Mist the walls or surrounding air only when the instructions call for it. Spraying the developing surface repeatedly can disturb delicate growth and create standing water. Once fruiting begins, fresh-air exchange becomes more important, but strong fans can dry the surface quickly.
A two-minute daily check is enough to catch many changes early:
Read the instruments: Note temperature and relative humidity before opening anything.
Inspect the surface: Look for drying, pooling water, unusual colors, or collapsed growth.
Check the container: Make sure filters, vents, and seals aren't blocked.
Record adjustments: Write down misting, ventilation, or location changes.
Don't chase a perfect number with constant corrections. Stability, clean observation, and a response suited to the current phase are more valuable than dramatic swings caused by overcorrection.
Your Grow Timeline From Spawn to Harvest
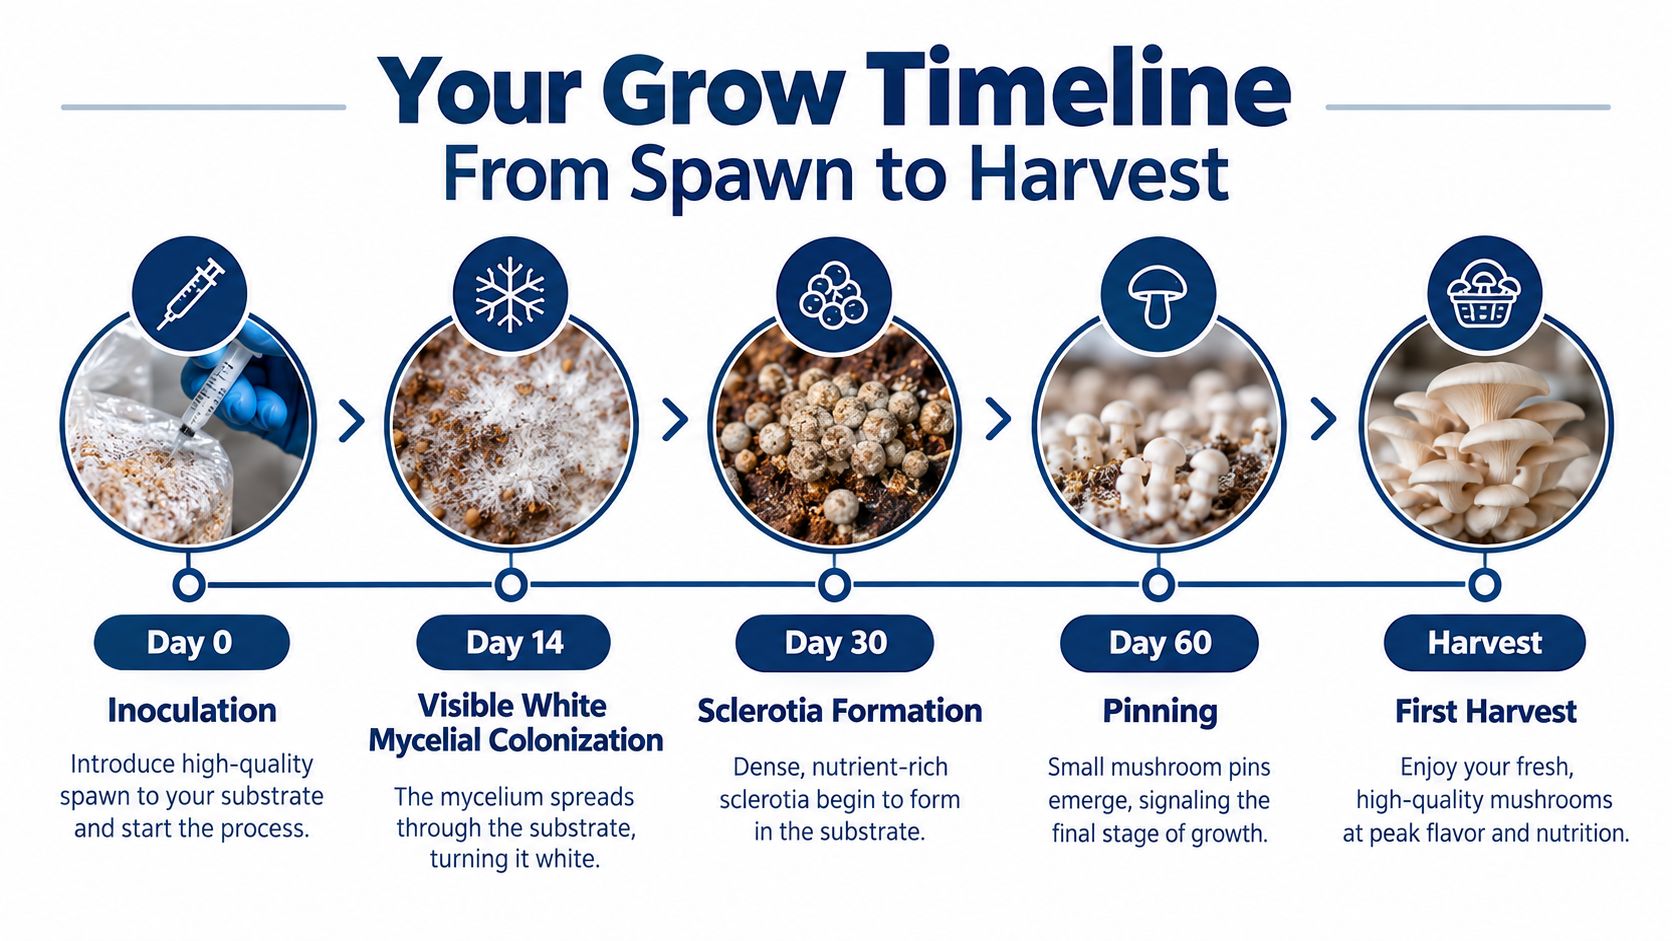
A morel kit follows biological checkpoints rather than a simple countdown. Inoculation starts the process, but fruiting depends on what develops inside the substrate. One controlled indoor protocol reported primordia roughly 7 to 10 days after flooding, with harvestable mushrooms appearing over the following 2 to 4 weeks under optimized conditions. Those figures describe a research-oriented procedure, not a guaranteed schedule for a consumer kit. For the full technical context, see this technical summary of indoor morel cultivation.
The early phase
After inoculation, keep the culture clean and the container undisturbed. During the first part of the spawn run, white or gray-white growth may spread through the grain or substrate. Wispy growth is not automatically a problem, particularly with morels. A foul smell or sharply colored mold is a different warning, so isolate the container and seek supplier guidance.
The approximately 35-day spawn phase gives the culture time to develop beyond surface colonization. A substrate can look well occupied while still lacking the internal structures needed for fruiting. Follow the kit's timing instead of flooding as soon as white growth appears.
Sclerotia are the decision point
Mature sclerotia may look like denser structures or compact areas within the growth. Compare what you see with the supplier's description or request a photo comparison before changing the moisture regime. Early flooding can interrupt development and leave the culture unable to fruit.
Because the 7-to-10-day window assumes a completed sclerotial phase, a kit flooded early may show no primordia during that period. That outcome points to a protocol problem rather than proving the culture is dead.
Keep the substrate hydrated during the waiting period without saturating it. Excess drying can weaken developing structures, while standing water can reduce aeration and increase contamination risk.
After induction
Apply flooding or another fruiting trigger only when the kit's protocol calls for it. Once induction is complete, handle the container gently and avoid unnecessary movement. Pins can be fragile, and a sudden change in moisture or airflow may stop them before they develop.
Keep conditions steady and inspect the surface for drying. A first harvest may be small, uneven, or absent even when the earlier stages appeared healthy. For a home grower, a clean cycle, careful records, and a clear understanding of where development stopped are useful results. The timeline helps you interpret changes, not promise a harvest.
Troubleshooting the Most Common Morel Kit Failures
Diagnose the symptom before changing the setup. Altering moisture, temperature, airflow, and light together makes the result impossible to interpret. Photograph the container, record the date, and compare its appearance with the supplier's instructions.
Symptom | Likely Cause | What to Do |
|---|---|---|
Colonization has stalled | The culture may be stressed, the substrate may be too wet or too dry, or conditions may be unstable | Check the instruments, limit opening, and provide steady conditions before making another change |
Green, black, pink, or orange growth appears | Contamination entered during preparation or handling | Isolate the container and contact the supplier. Do not open it near clean cultures |
The substrate looks shrunken or cracked | It dried excessively before induction | Follow the kit's rehydration guidance carefully, and do not flood unless the protocol says the culture is ready |
White growth is present but no sclerotia develop | The culture may need more time, a different substrate balance, or a strain-specific condition | Do not induce fruiting early. Document the appearance and request species-specific support |
Pins appear and then collapse | The surface dried, airflow changed sharply, or moisture conditions fluctuated | Stabilize the environment, reduce disturbance, and avoid spraying pins directly |
The container smells sour or rotten | Waterlogging or contamination is likely | Treat the grow as compromised and avoid transferring contaminated material into a new container |
Use the failure pattern to choose the next action. Slow colonization in a clean-smelling container calls for patience and stable conditions. A sour odor, leaking container, or clearly colored growth points to contamination, not a stage that needs more water.
A grower who reaches fruiting but sees no pins should compare the kit's progress with its stated schedule before deciding that the culture has failed. Morels can require a long, carefully timed development period, and early induction may create a problem that looks like biological failure. As the commercial history discussed earlier shows, even professional operations have faced unstable production. One unsuccessful home cycle is therefore unremarkable.
Restart when contamination is clear. Saving a questionable container can spread the problem and gives you less useful information than starting again with a documented, clean setup.
If the culture remains clean, record changes and wait through the expected development window. If contamination is unmistakable, discard the grow according to local waste guidance, then review the preparation or handling step that allowed it in. Change one variable at a time on the next attempt. That turns a disappointing result into a clearer test of the kit's conditions.
Legal, Safety, and Realistic Wrap-Up
Verify the species before you discuss eating anything produced by a kit. Morels are distinct from dangerous lookalikes in the wild, and a product with unclear labeling shouldn't be treated as an edible food source. Even a correctly identified morel should be prepared according to reliable culinary safety guidance, not sampled raw.
Legal rules can vary by location and may affect the sale, possession, transport, or use of cultures and cultivated fungi. Check local requirements before purchasing or distributing material, especially if you're working with a school, community group, or shared laboratory. Suppliers should state their intended use, handling expectations, and age or jurisdiction restrictions clearly.
A responsible kit seller also provides more than a bag. Look for species information, sterile handling instructions, environmental guidance, video support, and a responsive contact channel. Those resources won't remove biological variability, but they can help you distinguish a normal slow phase from contamination or a protocol error.
Your first indoor morel project is successful if you finish with a clean culture, a documented timeline, a clear understanding of sclerotia, and realistic expectations about fruiting. If mushrooms appear, treat the harvest as an excellent outcome rather than an entitlement. If they don't, your notes can make the next attempt more informed, especially if you change only one part of the process.
Colorado Cultures offers sterilized grain bags, substrates, grow kits, tools, and practical mycology education for beginners working with gourmet and specialty mushrooms. Visit Colorado Cultures to find supplies, tutorials, classes, and support for approaching an indoor morel project with cleaner technique and realistic expectations.
Comments