
Mushroom Culture at Home: How to Start and Keep It Clean
The vial is on the counter, the label is short, and you are not sure whether to refrigerate it, inject it, or wait for mushrooms to show up on their own. That pause is the right instinct. Most beginner pages rush toward fruiting and skip the part that decides whether fruiting will ever be clean: the culture itself.
Mushroom culture at home means keeping living mycelium healthy, named, and uncontaminated before you ever ask it to make mushrooms. A clean-looking jar can still carry a bad stock. The pages below treat that stock as the asset: what it is, which form to start with, what the law and the inputs allow, how to move it without wrecking it, and when to stop and throw it out.
What a Culture Is and Which Form to Start With
Say you bought a small vial and you are staring at it. That liquid is not a mushroom. It is a culture: living mycelium held in a medium so you can move it on purpose. The mushroom you eat is only the fruit, like an apple on a tree. The mycelium is the network running through the food. A culture is only as good as its purity, because a contaminated stock spreads problems into every batch made from it, and strain genetics shape how the fruit looks and behaves.
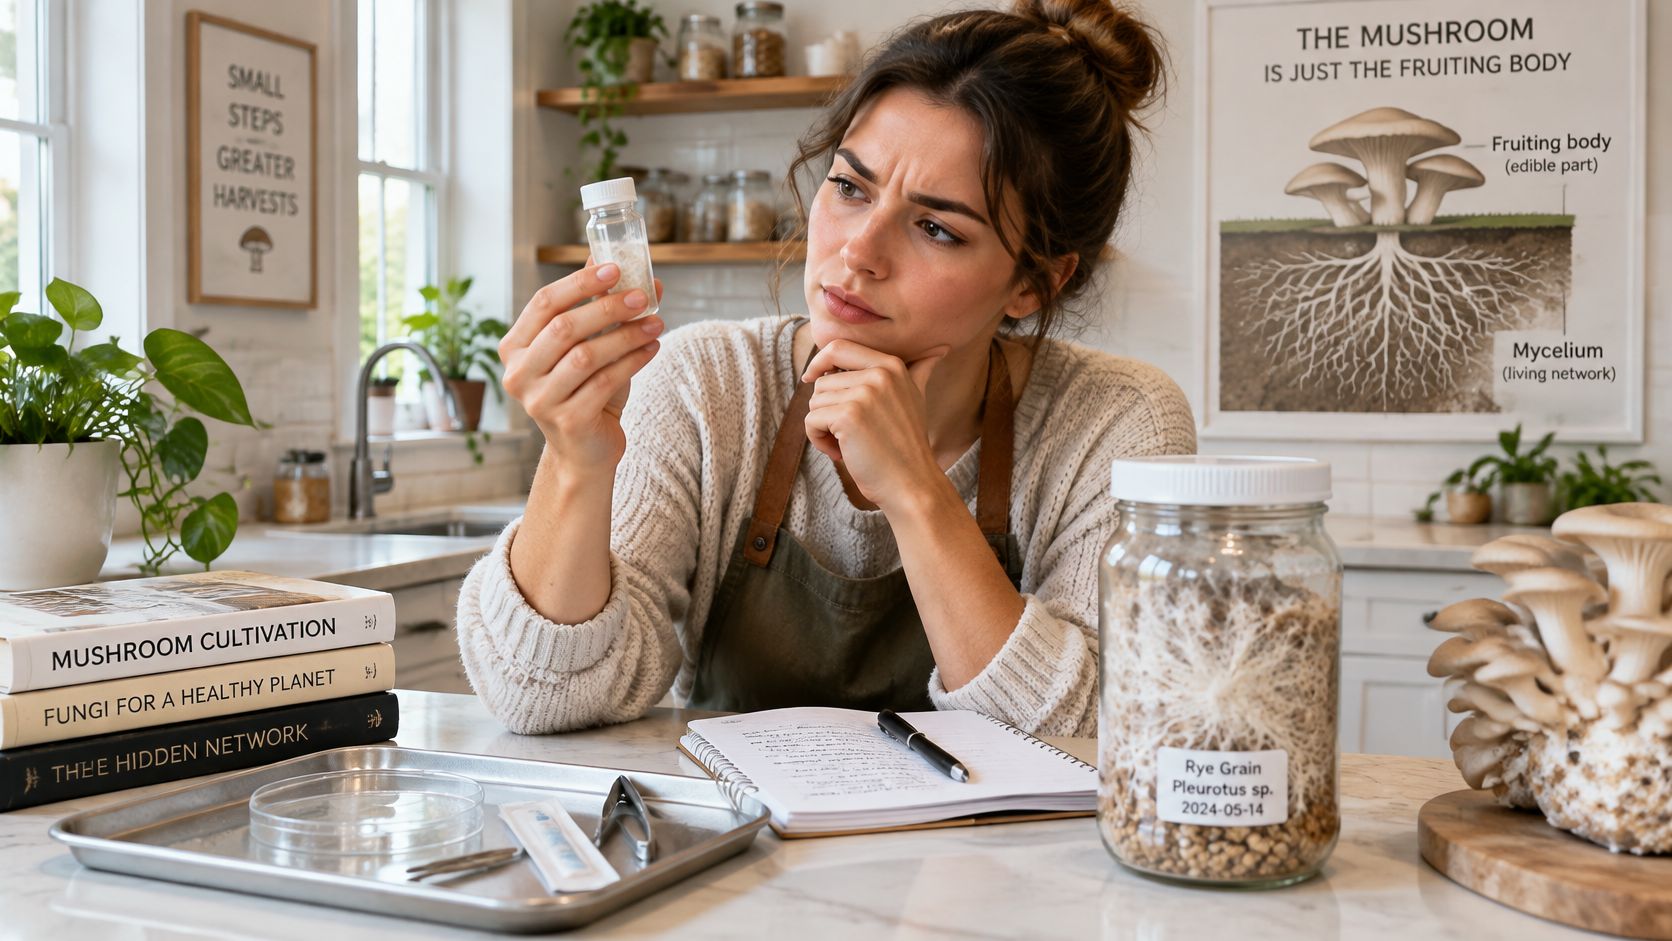
Today's home practice comes from a long shift away from waiting for wild spores to land on cut logs. By the mid-1940s, growers were already using pure tissue cultures, mycelium kept on a prepared wooden medium, to inoculate logs, a change the Cornell Small Farms Program traces as the move toward known cultures and prepared substrates.
Three forms and what each is for
You will meet three forms. They are not interchangeable, and jumping ahead is how beginners lose a clean line.
Culture form | Medium | Main job at home | Colonization time | Storage |
|---|---|---|---|---|
Agar plate or slant | Agar with malt extract | Isolate and inspect a pure strain | 7-14 days | Refrigerated, refresh every few weeks |
Liquid culture | Sterile sugar-water solution | Quick, even inoculation of grain | 5-14 days | Refrigerated, use within weeks |
Grain spawn | Sterilized rye, millet or oats | Inoculating bulk substrate | 10-21 days | Use fresh or refrigerated |
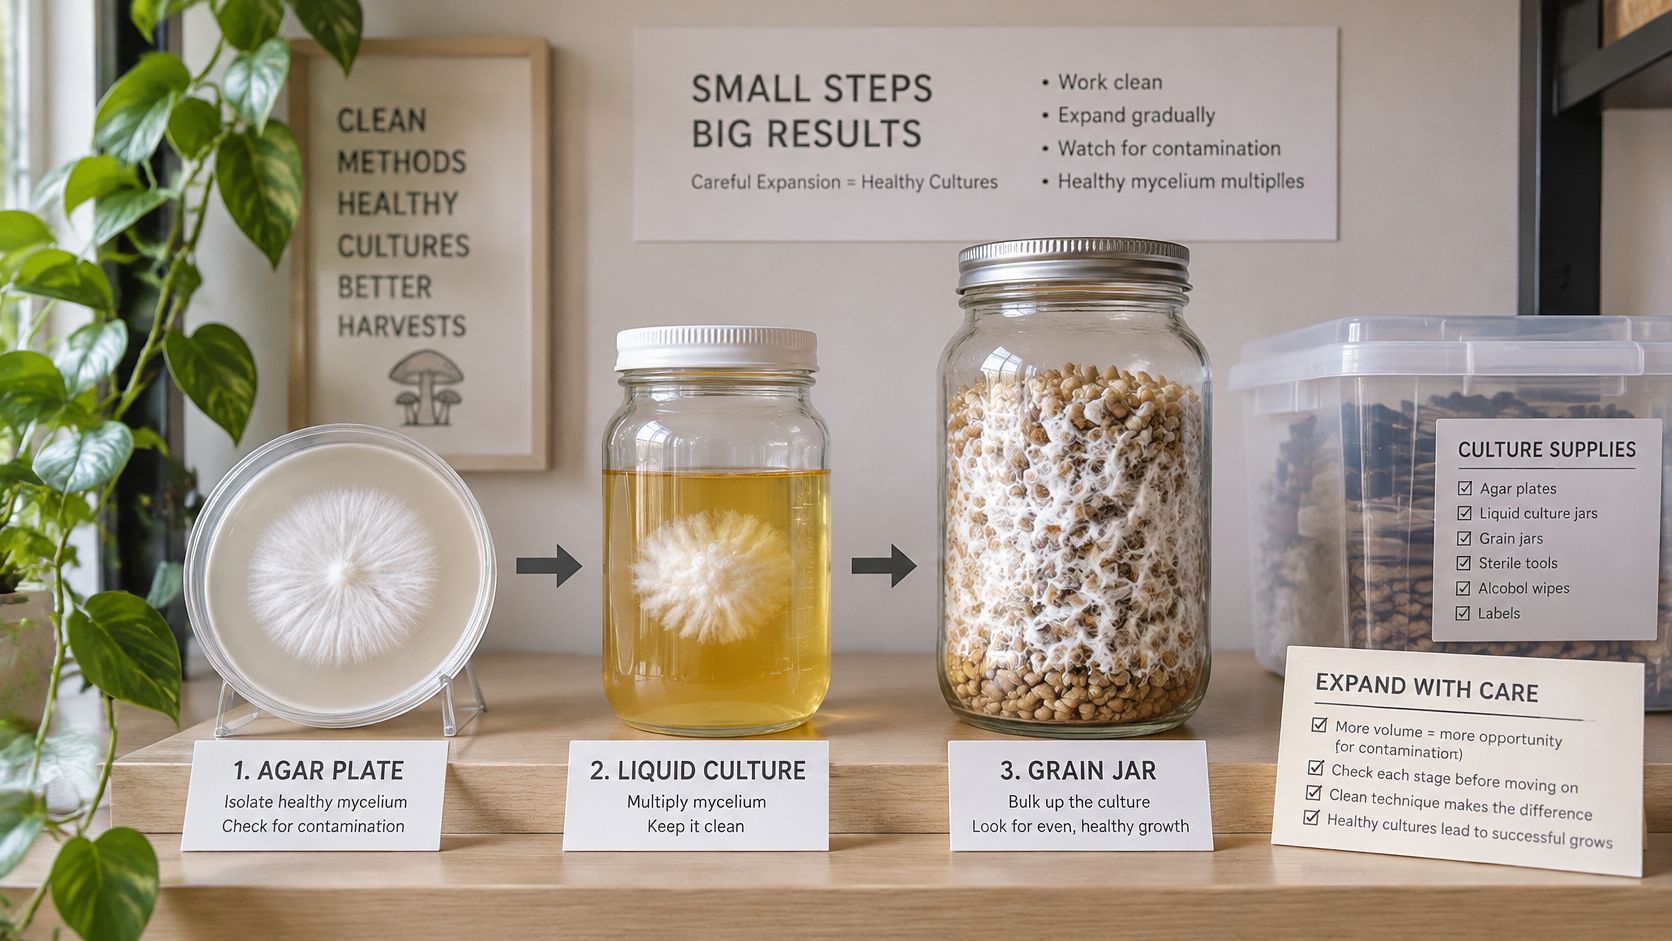
Agar is the inspection bench. Growth sits on a flat surface, so you can see a clean white leading edge and cut it away from anything that does not belong. Liquid culture multiplies a culture you already trust, so a syringe can dose grain evenly. Grain spawn is the carrier that takes that mycelium into a bulk substrate such as sawdust, straw, or a supplemented block.
The order is the logic. Agar gives you the pure starting point. Liquid culture multiplies it. Grain carries it into the bulk food. If you are still checking that the strain is clean, stay on agar. If you are scaling a line you have already inspected, move to liquid culture or grain. A spore syringe is not the same thing as a living culture, and the difference is worth reading before you buy either: liquid culture versus a spore syringe.
Practical rule: Do not inoculate grain from a culture you have never seen grow cleanly on agar.
Treat the stock the way you would treat a living ferment you plan to keep. People who keep a tea culture already know the habit of storing your kombucha SCOBY safely: a clean container, a clear label, and no casual opening. Mycelium asks for the same discipline, with sterile tools instead of a jar lid.
Use the words precisely from here on. Mycelium is the living network. A culture is that mycelium maintained in a medium. Spawn is mycelium grown onto grain so it can colonize a larger batch. Substrate is the bulk food the spawn moves into. Fruit is what you harvest. It is not the culture.
Legal Checks and Safe Sourcing First
Before you buy or collect anything, ask a harder question than "does this jar look clean?" A clean-looking culture is not automatically safe to grow, eat, or keep in a kitchen.
Two checks come first: local law and source. Rules differ by country, state, and city. Possession, cultivation, and sale can each be treated differently, so a species that is fine to own as a culture may still be restricted to sell. Gourmet species such as oyster, lion's mane, and reishi are generally not in the same legal category as psilocybin-containing species, which are controlled in many places. Some jurisdictions have changed their rules recently. Check current local law before you order. Do not assume last year's article still matches your city.
Identity is the first safety problem
A wrong species name is the first safety failure, before mold ever shows up. Every culture you keep should carry a recorded name: species, strain if you have it, and the date it arrived. If a seller cannot name what is in the vial, do not take it. Wild collection adds a second problem, because a look-alike can sit next to a gourmet species and a home grower has no lab to sort them. Prefer suppliers who document strain names, dates, and sterile handling.
Recent food-safety literature goes past the fuzzy patch most guides warn about. A review in Sustainable Microbiology identifies hazards that a healthy-looking mushroom can still carry: biological contamination, mycotoxins, heavy-metal accumulation, radioactivity, poisonous species, and allergenicity. Coffee grounds, straw, wood pellets, and locally scavenged material can bring those risks in with them. Pasteurization is not enough when the input itself is dirty, salted, treated, or unidentified. Maximizing yield is not the same as maximizing safety. A smaller run on traceable inputs beats an improvised "waste substrate" that you cannot explain.
That matters in a Denver apartment or a family kitchen, where cultures sit near food, children, pets, and people with allergies. Safety also continues after fruiting. Hygienic handling, and a real preservation or sanitation step, cuts microbial risk that a pretty cluster will not show you.
Use a simple go or no-go before anything enters your workspace:
Legal where you live: You have checked current rules for possession and, if relevant, sale.
Named: Species and strain are written down, not guessed from a photo.
Traceable: The culture and the substrate come from a documented source, not an unlabeled bag.
If any line fails, do not start. We serve adults 21 and over, and we position our products for research use, so confirm your age and your intended use before you order. A culture that fails the identity or input test does not get a second chance in the fruiting room. Discard decisions based on how growth looks belong with the symptom checks later, not with a hopeful sniff at the jar.
How to Transfer a Culture Safely
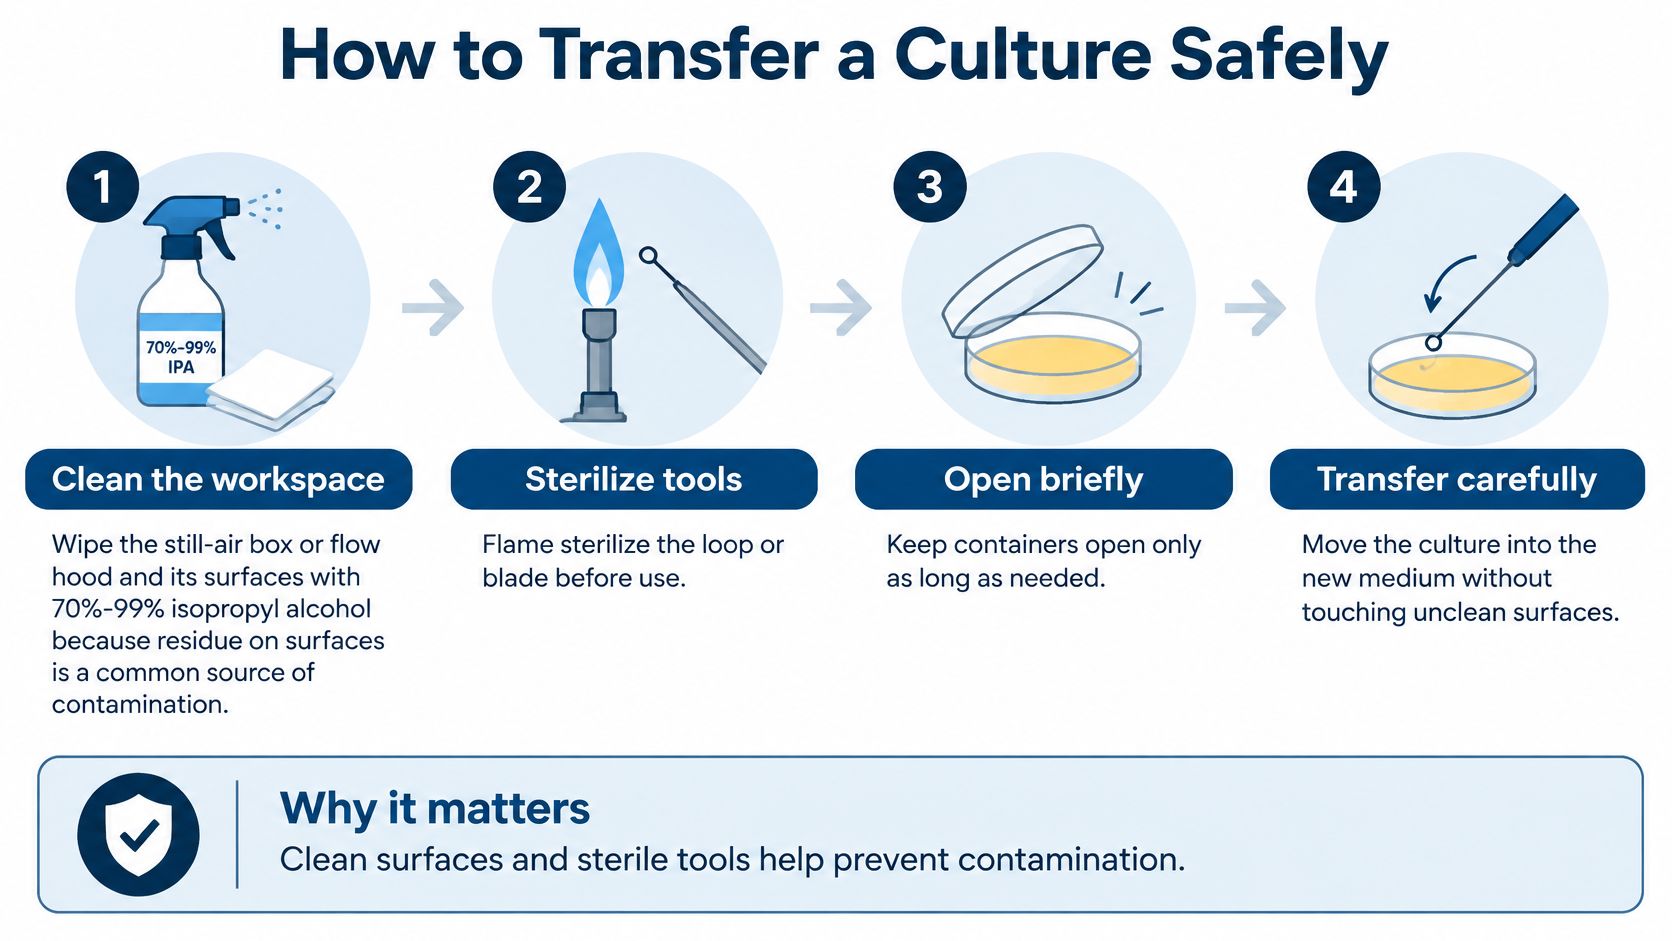
A transfer is a short open window between two sterile spaces. Anything that floats in during that window becomes part of the next generation. Sterilize agar or grain media in a pressure cooker at 15 psi (about 121°C) for 60-90 minutes, let it cool while it is still sealed, and set out a still-air box or flow hood, 70%-99% isopropyl alcohol, a lighter, and labelled containers before you open anything.
The same alcohol range is what we use on growing hardware. The H2Shroom growing chamber should be cleaned with 70%-99% ISO alcohol before a run, because residue on plastic is a common way contaminants hitch a ride into an otherwise clean culture.
Clean the workspace. Wipe the still-air box or flow hood, and the surfaces inside it, with 70%-99% isopropyl alcohol. Residue and dust are a common source of contamination. The slip is a quick pass that leaves the corners wet with yesterday's spill.
Sterilize the tool. Flame the inoculation loop or scalpel until it is red-hot, then let it cool for a few seconds before it touches mycelium. A hot tool kills the culture you meant to save. The slip is transferring the moment the metal stops glowing, while it is still hot enough to cook the piece.
Prepare yourself. Wash your hands, put on gloves, and keep your arms and your breath away from open containers. The slip is talking over an open plate. Your breath is an aerosol.
Open briefly. Lift the lid of the source culture only as far as you need, and wipe the rim with alcohol. The slip is setting the lid down on the counter "for a second."
Take the transfer. Cut a small wedge of healthy mycelium from the leading edge, or draw a measured amount of liquid culture with a sterile syringe. Do not drag the tool across the whole plate. The slip is scooping from the center, where older growth hides problems.
Seal and label. Close the new medium at once. Mark the strain name, the date, and the medium on the container, not on a scrap you will lose. The slip is labelling later, after two plates look identical.
Incubate and check. Put the new culture in a dark, warm spot around 20-24°C and look again after 48-72 hours for healthy white growth. The slip is "just peeking" every few hours with the lid cracked.
Each of those moves exists to shorten the time clean air and clean mycelium are exposed. If you want the reasoning behind still air, flame, and lid discipline in one place, read our notes on sterile technique principles before your first real transfer.
Work as if the air in the room is dirty, because it is. Your job is to keep that air out of the container, not to make the whole kitchen sterile.
If growth at 48 hours is anything other than even white mycelium, stop. Do not "see if it recovers" by transferring it again. That second transfer is how a doubtful plate becomes your whole shelf.
Expanding and Storing Cultures Over Time
Expansion is multiplication with a cost. Each move from a clean agar stock into liquid culture, and from that liquid into grain, gives you more mycelium and one more chance to add a contaminant. The form comparison already tells you which medium does which job. What changes as you scale is how many times you have opened the line.
How fast the work multiplies
One healthy agar plate can seed several liquid-culture vials. Each of those vials can inoculate several grain jars. A single careless transfer near the top of that ladder shows up in every jar underneath it. That is why the master plate stays sealed and refrigerated, and why you refresh it every few weeks instead of transferring forever from an aging dish. Repeated transfers from a tired plate raise the chance of contamination and of the strain drifting away from the growth you first selected.
Keep a backup plate of the same strain, made on a different day from the last clean stock. One dropped lid should not end the line. A simple record is enough: strain, date, transfer number, and what you saw. "LC-3, 12 March, even white, no odor" beats a fridge full of unlabeled jars.
When a culture is ready to move
Move a culture only when growth is even, white, and filling the medium without bare patches, colored fuzz, or a sour smell. Thin growth that has not filled the plate is not "close enough." Leave it, or go back to the backup.
Liquid culture in a syringe has its own clock. Sugar water does not stay trustworthy on a shelf for months. Our notes on liquid culture syringe storage cover how long a filled syringe stays usable once it leaves the jar.
Stop expanding a line the moment growth looks doubtful. Restart from the last clean stock. Pushing a questionable vial "to see what happens" spends grain, substrate, and weeks, and it puts spores from a contaminant into the room where your backup lives.
This short walk-through shows the same ladder in motion, from plate to liquid to grain, so you can match what you see in your own jars to a clean example.
Spotting Contamination and Reusing Spent Substrate
You open a jar and see a patch that was not there yesterday. The useful move is to compare it with the growth you expect from that species. A cap that darkens as it matures belongs to the mushroom. A green patch on grain is a stop signal. Treat your clean stock as the asset here. Every moldy jar you open near it can send spores toward the cultures you are trying to protect.
Symptom | Likely cause | Action |
|---|---|---|
Dense, even white cottony growth | Healthy mycelium | Keep and continue |
Green, blue or black fuzzy patches | Mold contamination | Discard without opening |
Pink or orange powder | Mold contamination | Discard |
Wet, slimy or sour smell | Bacterial contamination | Discard |
Thin, patchy or slow growth | Temperature too low or weak culture | Check temperature; replace culture if no improvement |
Dark edges or drying at the surface | Age or dehydration | Assess; refresh from clean stock if unclear |
Even, dense, white cottony growth is the standard for a healthy culture. Green, blue, or black fuzzy patches, pink or orange powder, wet slime, and a sour smell mean contamination. Discard those jars. Do not open a moldy jar in the same room as your clean stock, because the spores you release will find the next plate. Thin or patchy growth is often temperature or a weak culture, not mold. Check that the spot is still within the species' preferred temperature range before you throw the line out. If a week in that range does not fill the medium, replace it from clean stock.
Spent substrate is not automatic compost
Once a clean crop is finished, the block or straw is spent mushroom substrate. It is a variable resource with its own handling question. For a home grower, the useful question is which route fits this block, this household, and this crop. Salt, leftover contamination, pesticide exposure, and how intact the material still is decide it. Garden soil after a hot compost, a worm bin, or a careful second-flush test are all on the table. So is the trash.
Contaminated material: Discard it. Do not compost moldy grain where you keep clean cultures.
Uncertain inputs: No food crop and no animal feed. You cannot see heavy metals or old treatments.
Clean, traceable material: Pick the route that fits your space and your odor limit. Urban growers should favor a sealed hot compost or a modest worm bin over an open pile.
Spent substrate is not the same as finished compost. It still needs time, moisture, and a process that fits the batch in front of you.
Choose Your First Culture and Start Clean
Start with one legal species from a traceable source, in the form that matches your goal, and set up a clean workspace before you open anything. If you are still judging purity, that form is agar. If you already trust the strain and you want speed, it is liquid culture.
Your first-run checklist is short:
Law: Confirm the species is legal to possess where you live.
Name: Write the strain on the container and in a notebook the day it arrives.
Bench: Still-air box or flow hood, alcohol, and a flame are ready before the lid comes off.
Record: Date, medium, and what you expect to see in 48 hours.
If you are new to mycology and you want help laying out a growing room, we offer personal consultation for that first setup. The site also includes classes and events, plus DIY mycology calculators for ratios and timing, alongside the store, product instructions, and the blog. We serve adults 21 and over, and the products are positioned for research use.
Pick the agar or liquid-culture stage, book the first transfer for a day when the bench can stay clean, and write the first record entry before you flame the loop.
Colorado Cultures is a Denver mycology supplier with shops in Lakewood and Englewood, built for people learning mushroom culture at home with sterile grain, substrates, and clear instructions. If you want a named culture, a clean first transfer, and a place to ask questions while you set up, visit Colorado Cultures and start with one legal strain you can label, store, and stand behind.
Comments