
How to Clean Oyster Mushrooms: The Best Methods for 2026
You've just cut a beautiful oyster mushroom cluster from its growing block, and the excitement of cooking it can make you reach straight for the faucet. Resist that reflex. Oyster mushrooms have layered caps and fine gills that hold water easily, so an enthusiastic rinse can leave them heavy, soggy, and harder to brown.
The best approach is simple: remove loose debris while the mushrooms are dry, trim the tough basal block, rinse only when grit is firmly lodged, and dry everything promptly. This routine protects texture while addressing the practical food-safety concerns that matter for home-grown and store-bought harvests.
Introduction to Cleaning Oyster Mushrooms
Set a fresh oyster cluster under the tap and you can feel the problem right away. Those thin, exposed gills and layered caps hold water fast, especially on broader blue or pearl types, while tighter clusters often trap more substrate near the base. Oyster mushrooms need a gentler start than button or shiitake mushrooms because debris settles into folds that also bruise and waterlog easily.
Clean them as close to cooking time as possible. The University of Illinois Extension's mushroom-washing guidance advises washing produce just before preparation rather than before storage, since leftover moisture can support bacterial growth in storage.
Because oyster gills are fine and open, the order matters. Start dry so loose particles come off before they turn muddy, and save water for the small share of grit that will not brush away. That approach keeps the caps lighter, protects browning, and gives both home-grown and store-bought clusters a cleaner finish without stripping away their delicate texture.
Dry Cleaning and Trimming Mushrooms
Start with the preparation area, not the mushrooms. Wash your hands with soap and running water for about 20 seconds, then sanitize the knife and work surface with a food-contact-approved sanitizer. The USDA Agricultural Marketing Service mushroom food-safety standards support this dry-cleaning-first sequence for freshly harvested mushrooms.
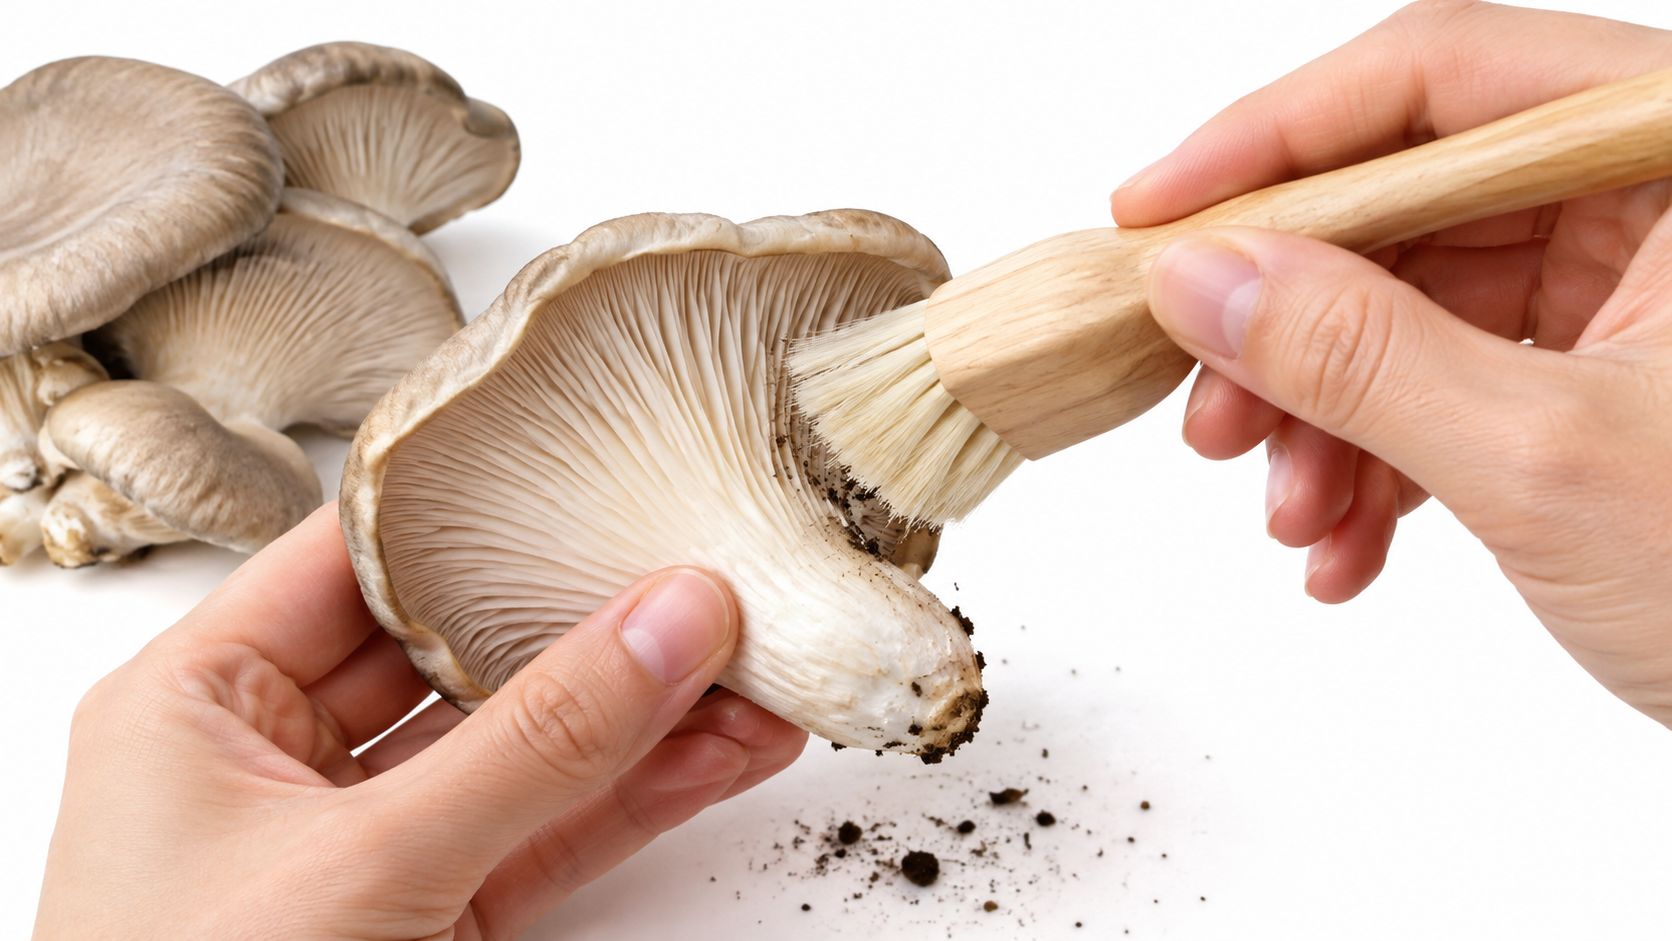
Set the cluster gill-side up and inspect the point where the mushrooms joined the growing substrate. Use a sharp, clean knife to remove the tough basal block and any material visibly attached to it. Don't shave away the tender stems unnecessarily. The small stems are useful to eat, while the firm central base is often fibrous and unpleasant.
Brush before adding water
Use a soft pastry brush, mushroom brush, or clean, slightly damp microfiber towel. Sweep across the caps with light strokes, then follow the direction of the gills rather than pushing debris deeper into them. A damp towel is useful when particles cling to the surface, but it shouldn't be wet enough to leave the mushrooms glistening.
Separate only the pieces you need for the meal. Dry brushing is especially useful when you're storing the rest, because it removes loose substrate without adding surface moisture. If you're planning a savory skillet meal, browse sausage mushroom recipes for ideas that suit cleaned, well-dried oyster mushrooms.
If a little soil remains after brushing, don't scrub harder. Move to a brief rinse under running potable water immediately before cooking, then blot the mushrooms promptly with paper towels. Never use soap, detergent, bleach, or commercial produce wash on the mushrooms.
Brushing and Gentle Rinsing Techniques
Most clean-looking oyster mushrooms need no rinse at all. Hold each frond under good light and check the gills, the underside of the cap, and the trimmed base. If the debris is loose, use a soft brush or wet paper towel. The University of Illinois Extension recommends washing mushrooms immediately before preparation and patting them dry afterward, since moisture left on the surface can encourage bacterial growth during storage.
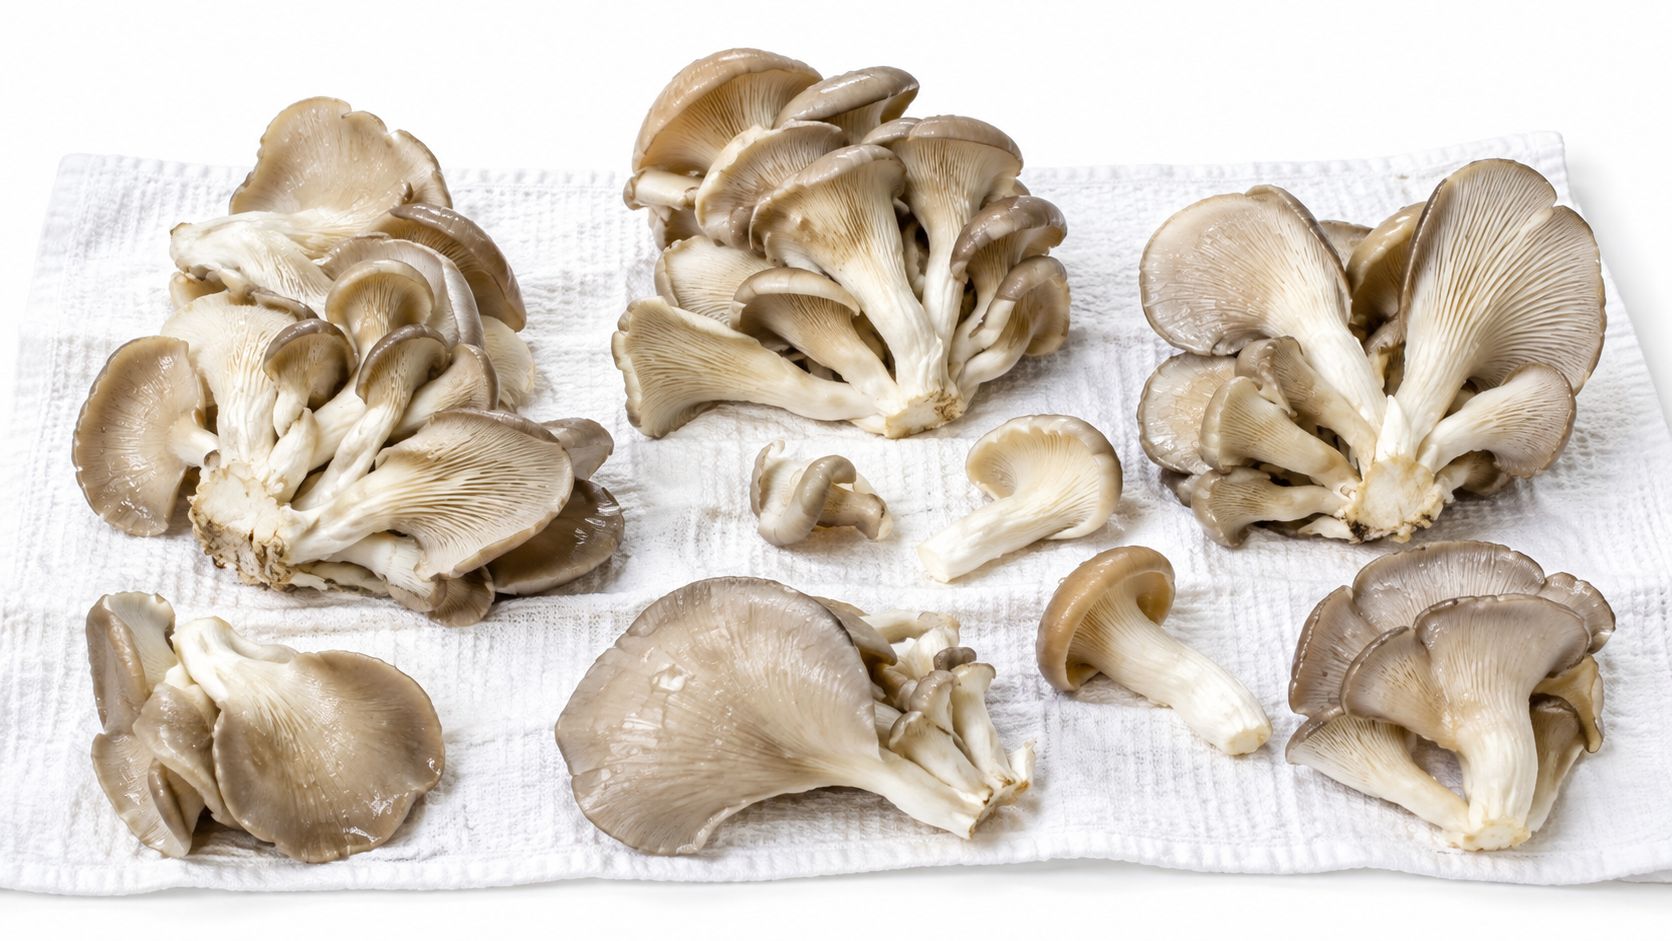
A rinse earns its place when grit is lodged deep in the gills or when brushing would tear the fronds. Separate the cluster first, because water can't reach the hidden surfaces efficiently when the mushrooms remain packed together. Hold each piece with the cap angled downward and run cold potable water over the dirty area for the shortest practical time.
Practical rule: Rinse the portion you're about to cook, never the entire harvest by default.
The distinction is important. A reported comparison found that oyster mushrooms absorbed about one-quarter cup of water after a one-minute immersion, while a pound of white mushrooms absorbed roughly one tablespoon under the same comparison. The figures appear in this comparison of mushroom-washing behavior, and they explain why soaking is particularly unhelpful for oyster varieties.
After rinsing, place the pieces on a clean towel and turn them gill-side down briefly. Blot rather than rub. If the caps still feel damp, give them a little air before they reach the pan. For related handling ideas, see this guide on how to clean shiitake mushrooms, while keeping in mind that oyster mushrooms' open fronds demand especially gentle treatment.
Drying and Separating for Optimal Texture
Cleaned oyster mushrooms should feel fresh and pliable, not wet. Water trapped between overlapping fronds can steam the mushrooms in the pan instead of allowing them to sear. It can also leave cool, slick patches that take longer to cook.
Begin by separating dense clusters along their natural seams. Tear with your fingers when the connection is tender, or use the sanitized knife for a precise cut. Keep large pieces intact when you want a meaty texture, and divide them into smaller, similar-sized pieces when you want more even browning.
A low-impact drying routine
Spread the mushrooms in a single layer on a clean, unprinted kitchen towel or paper towel. Leave space between pieces so air can reach the gills. Turn them once, then blot any visible beads of water with a fresh section of towel.
For a larger harvest, a clean wire rack helps air move beneath the mushrooms. Gentle room airflow can help, but avoid strong heat, direct sun, or aggressive fan speed that could dehydrate the caps unevenly. The objective isn't to dry the mushrooms out. It's to remove free surface water before cooking or storage.
Don't press hard on the caps. Oyster fronds bruise and tear more readily than their appearance suggests, especially after rinsing. If a piece remains visibly wet, separate it from the rest and let it air briefly rather than stacking the cluster and trapping moisture between layers.
Cook as soon as the surface is dry enough to handle. If you're holding the mushrooms for later, keep them unwashed whenever possible and follow the storage approach below.
Storage Best Practices and Shelf Life Data
Cleaning and storage should be treated as one decision. If you aren't cooking immediately, brush away loose material, trim obvious contamination, and refrigerate the mushrooms without rinsing them. Store them in breathable packaging rather than sealing wet clusters in an airtight container.
Published results show why conditions matter. A 2013 study reported that untreated oyster mushrooms held at ambient conditions lasted only 3 days, while mushrooms in unperforated plastic bags lasted 6 days. In another treatment, refrigerated mushrooms in perforated bags at 2–3°C retained acceptable quality for about 8 days, while cleaned mushrooms packed in HDPE at 3–5°C remained suitable for 18–21 days. These figures come from the published oyster mushroom storage study.
Storage Method | Temperature | Shelf Life |
|---|---|---|
Untreated, ambient storage | Ambient conditions | 3 days |
Unperforated plastic bag | Ambient conditions | 6 days |
Perforated bag, refrigerated | 2–3°C | About 8 days |
Cleaned mushrooms in HDPE | 3–5°C | 18–21 days |
The comparison doesn't mean a sealed plastic bag is automatically the best home option. Packaging, moisture, cleanliness, and temperature interact. A wet harvest in a closed container can deteriorate quickly, while a dry, sound harvest in cold storage has a better chance of staying firm.
Keep the refrigerator at or below 40°F (4.4°C) and clean only what you'll use for the meal. If you're planning longer-term preservation, consult this practical resource on how to freeze fresh mushrooms. For a different preservation route, see how to store dried mushrooms.
Food Safety Tips and Common Mistakes
A basket of oyster mushrooms can look clean enough, then hide grit in the folds and extra moisture deep in the gills. That combination causes most kitchen problems. Oyster mushrooms bruise easily, their frilled undersides trap debris, and the caps absorb water faster than firmer varieties, so rough handling and overwashing do more harm here than they do with dense button mushrooms.
The biggest safety mistake is treating rinse water as neutral. A postharvest review of mushroom handling notes that washing can shorten shelf life, and mushrooms kept at ambient conditions showed the highest disease incidence. For oyster mushrooms, that risk matters because water lingers in the gill structure unless you dry the clusters well.
Several common errors are easy to avoid once you know where oyster mushrooms hold moisture and debris:
Soaking the harvest: Immersion saturates the gills and makes the caps limp. A brief rinse under running water is enough for stubborn grit, especially on broader blue or pearl oyster clusters that have more layered folds to trap particles.
Using household chemicals: Soap, bleach, detergent, and produce wash leave residues and are not appropriate for mushrooms meant for cooking.
Washing before storage: Clean only what you plan to cook right away. Extra surface moisture speeds breakdown, especially in torn fronds and trimmed cluster bases.
Keeping damaged pieces: Discard mushrooms with slime, sour smells, wet dark patches, or fuzzy growth. If you are unsure whether discoloration is bruising or active spoilage, compare it with this mold identification guide.
Cross-contaminating the workstation: Keep cleaned mushrooms away from raw meat, eggs, dirty towels, and the untrimmed base. These raw food separation basics matter even more when you are cleaning delicate clusters by hand.
Ignoring the basal block: The dense base often carries substrate, fibers, and trapped dirt. Trim it first so you do not drag that debris across the edible caps while cleaning.
Tool hygiene matters too. Use a clean knife, a clean board, and fresh towels. For home-grown oysters, I am even more careful about separating trimmed waste from finished mushrooms because loose substrate spreads fast once the cluster is broken apart.
Cooking is your final control step, but it does not fix poor sorting. If a mushroom smells off or feels slimy before it reaches the pan, throw it out. For good mushrooms, cook until they are hot through, tender, and no longer shedding excess water. That approach fits oyster mushrooms better than chasing a raw, barely warmed texture, which tends to highlight their fragility rather than their best flavor.
Conclusion and Next Steps
The most reliable way to clean oyster mushrooms is not a single rule such as “always rinse” or “never wash.” It's a sequence matched to the condition of the harvest: brush away loose substrate, trim the tough base, rinse briefly only when grit remains, and dry the fronds before they reach the pan.
That sequence protects the feature that makes oyster mushrooms special, their delicate, layered structure. It also keeps cleaning tied to storage and food safety, rather than treating it as a cosmetic chore. Refrigerate unwashed mushrooms promptly when you aren't cooking them, use breathable packaging, and inspect every piece before preparation.
With practice, the process takes little effort. You'll recognize when a dry towel is enough, when a quick rinse is justified, and when a questionable mushroom belongs in the discard pile rather than the skillet.
Colorado Cultures offers grow kits, sterilized grain bags, substrates, cultures, and practical tools for home cultivators who want cleaner, more consistent harvests. Visit Colorado Cultures to explore supplies, classes, and guidance for growing and handling gourmet mushrooms at home.
Comments