
How to Dry Shrooms the Right Way at Home
You've got a harvest on the counter, a dehydrator humming in the kitchen, and one annoying question hanging over the whole batch: is it dry yet, or just dry on the outside? That uncertainty is where most first-time growers run into trouble. How to dry shrooms comes down to moisture control, not guesswork, and the batch that stores well is the one that reaches a real endpoint before it ever touches a jar.
Before You Start, Know What "Done" Looks Like
A mushroom can feel dry while its center still holds moisture. Caps may feel papery and stems may seem light, yet thicker pieces can retain water inside. That hidden moisture may spread through the batch after packing, causing softened pieces and increasing spoilage risk.
Set the endpoint before choosing a method. Food-preservation guidance from the Food and Agriculture Organization defines dried fungi as edible fungi with water content reduced to a maximum of 12% (FAO guidance on dried fungi). An oyster-mushroom drying study reported 9.99% moisture under its tested tray-drying conditions (oyster mushroom drying study). These figures provide a useful reference range, not a promise that every home batch will reach one identical reading.
Texture gives you the practical check. A properly dried piece should be brittle or crisp, like a thin cracker, rather than leathery. A stem that bends still contains moisture. If the surface snaps but the cooled center feels rubbery, return the pieces to the dryer. Cooling matters because warmth can temporarily make a piece seem drier and more flexible than it will be at room temperature.
Practical rule: if it bends, it's not done.
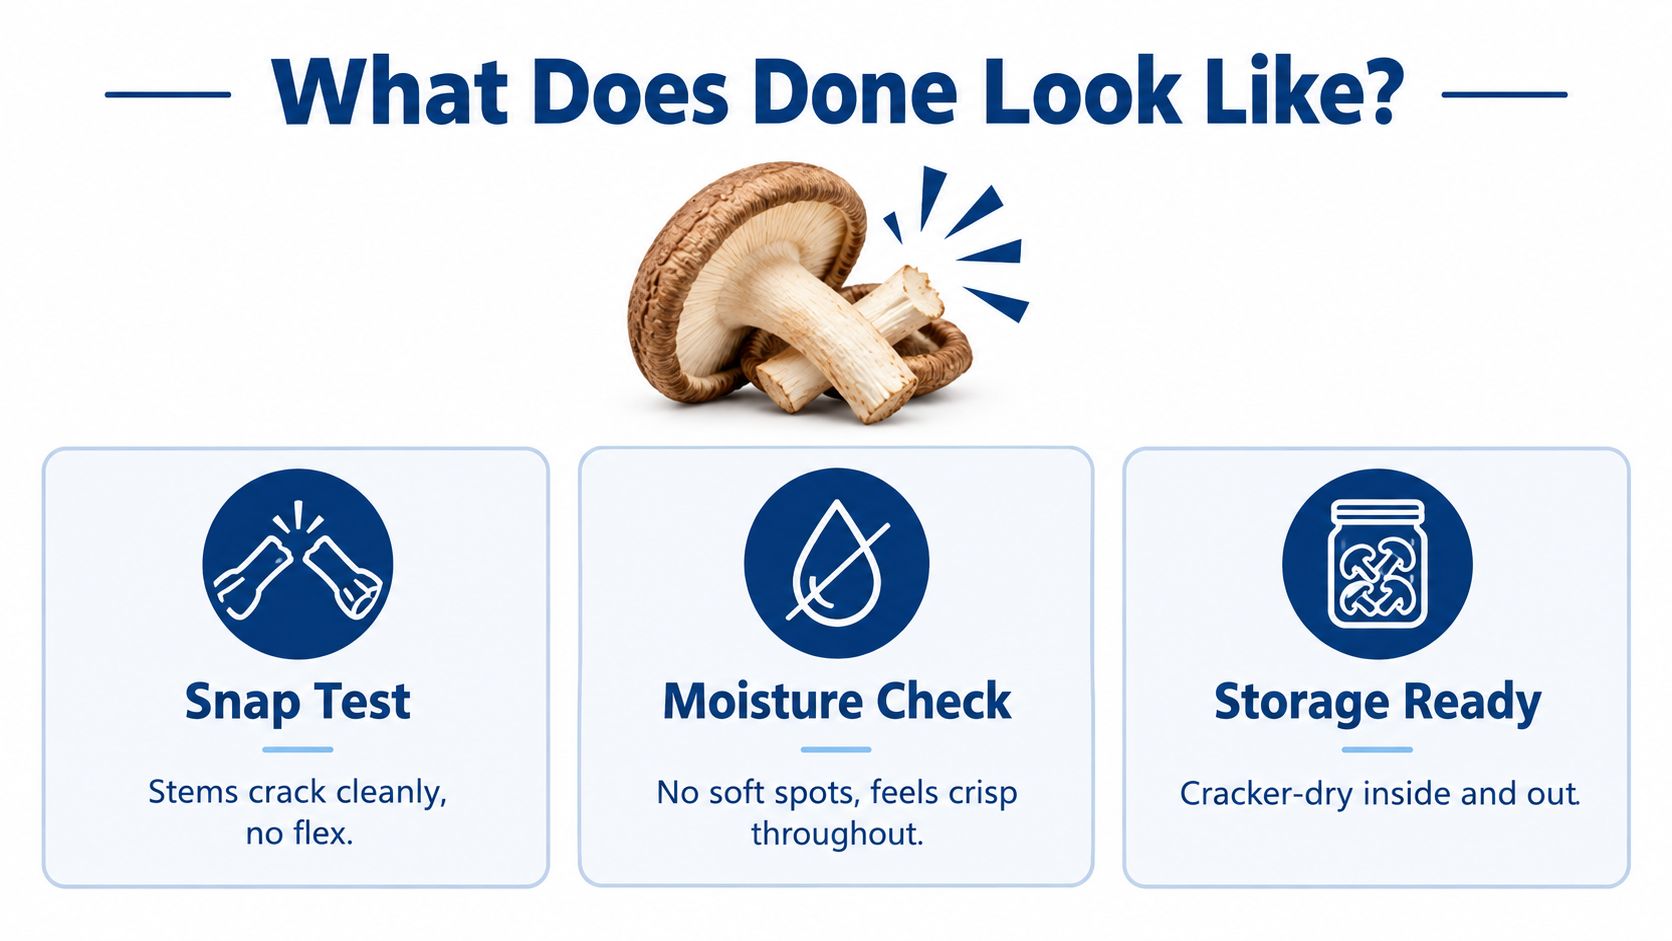
Signal | What to look for | Approx. moisture |
|---|---|---|
Snap test | Stems crack cleanly, no flex | Around 10–12% |
Moisture check | No soft spots, crisp throughout | Around 10–12% |
Storage ready | Cracker-dry inside and out | Around 10–12% |
Picking the Right Drying Method for Your Setup
A dehydrator is usually the easiest fit for a home grower because it combines steady airflow with controlled temperature. Drying works like a small climate system: warm air supplies energy, moving air carries moisture away, and the surrounding humidity affects how quickly the center catches up with the surface. Choose the method according to your batch size, equipment, and ability to monitor it.
Four workable home methods
A dehydrator offers the most repeatable starting point. Oregon State University Extension recommends about 120°F, or 49°C, until pieces are crisp or brittle, and cautions that elapsed time alone cannot confirm completion because thickness, cultivar, loading density, and humidity change the drying rate (OSU Extension). Leave space around each piece so air can reach all sides, then judge the cooled texture rather than relying only on the timer.
An oven can serve as a fallback if it holds low heat and allows moisture to escape. Ovens often cycle hotter and circulate air less evenly than dehydrators. The outside may dry before the interior, producing pieces that seem finished but soften after cooling.
A desiccant chamber suits a small, delicate batch. It removes moisture through a low-humidity environment instead of heat, which is gentle on the mushrooms. The trade-off is slower drying and the need for a container that seals well.
Passive air-drying has the fewest equipment demands, but room conditions control the result. Damp air can slow evaporation, leaving a leathery surface around a wetter center. A dehumidifier can make the surrounding air drier, and the dehumidifier drying weed guide explains why airflow and humidity should be treated as connected parts of one process.
Temperature changes the balance between speed and control. In a shiitake drying study, raising the tested temperature from 50°C to 70°C reduced drying time from 900 minutes to 420 minutes, about a 53% reduction, while reaching the same measured endpoint (shiitake drying study). That result does not make higher heat the automatic choice. It shows why a faster surface can mislead you if airflow, piece thickness, and the remaining center are ignored.
Preparing Your Harvest So It Dries Evenly
Drying starts before the trays go in. If pieces vary in size, hold extra surface water, or sit piled together, they will not dry at the same rate. The slowest piece becomes the limit for the batch, like one wet log slowing the whole fire.
Clean, slice, and space with intent
Brush off debris first. If a piece needs wiping, use a lightly damp cloth or paper towel, then let the surface dry before slicing. Soaking adds water to the tissue, and that extra moisture has to leave before real drying can begin.
Uniform cuts do more than make the tray look tidy. Thin, even slices let moving air reach the flesh at a similar rate, which helps prevent a dry edge with a soft center. For dense mushrooms, a brief pretreatment can help, though it is not needed for every species.
Keep caps and larger pieces in a thin, even profile. Trim stems so they do not create a thicker core than the cap can match. The exact thickness depends on the species and size, but the goal stays the same, each piece should be close enough in shape that no part of the tray lags far behind the rest.
Keep the load loose. If pieces touch or overlap, they dry unevenly and trap moisture between them.
Species | Slice thickness | Pretreatment | Best method |
|---|---|---|---|
Shiitake | Thin, even slices | Optional for dense caps | Dehydrator |
Button | Thin slices | Optional | Dehydrator or oven fallback |
Oyster | Thin to moderate slices | Usually none | Dehydrator |
Dense cap species | Thinner slices | Consider a brief blanch if your process calls for it | Dehydrator |
If you want a harvest-time refresher before cutting, the guide on when to harvest mushrooms is a helpful companion. Picking at the right stage reduces trimming, and less trimming usually means a more even drying load.
Prepping well also shortens the wait for the snap-test stage. A tray with similar thickness, similar moisture, and good spacing dries more predictably, so you are less likely to have one section finish while another still bends. That advantage of careful prep gives heat or dry air the same job across the whole batch.
Running the Drying Process Step by Step
A good drying run feels steady from start to finish. You are managing a small system, not just turning on a machine. Moisture has to leave the mushroom, airflow has to carry it away, and heat has to stay gentle enough that the outside does not dry far ahead of the center. Start by spreading pieces in a single layer with visible space between them. If slices overlap, they create little damp pockets and the batch slows down unevenly.
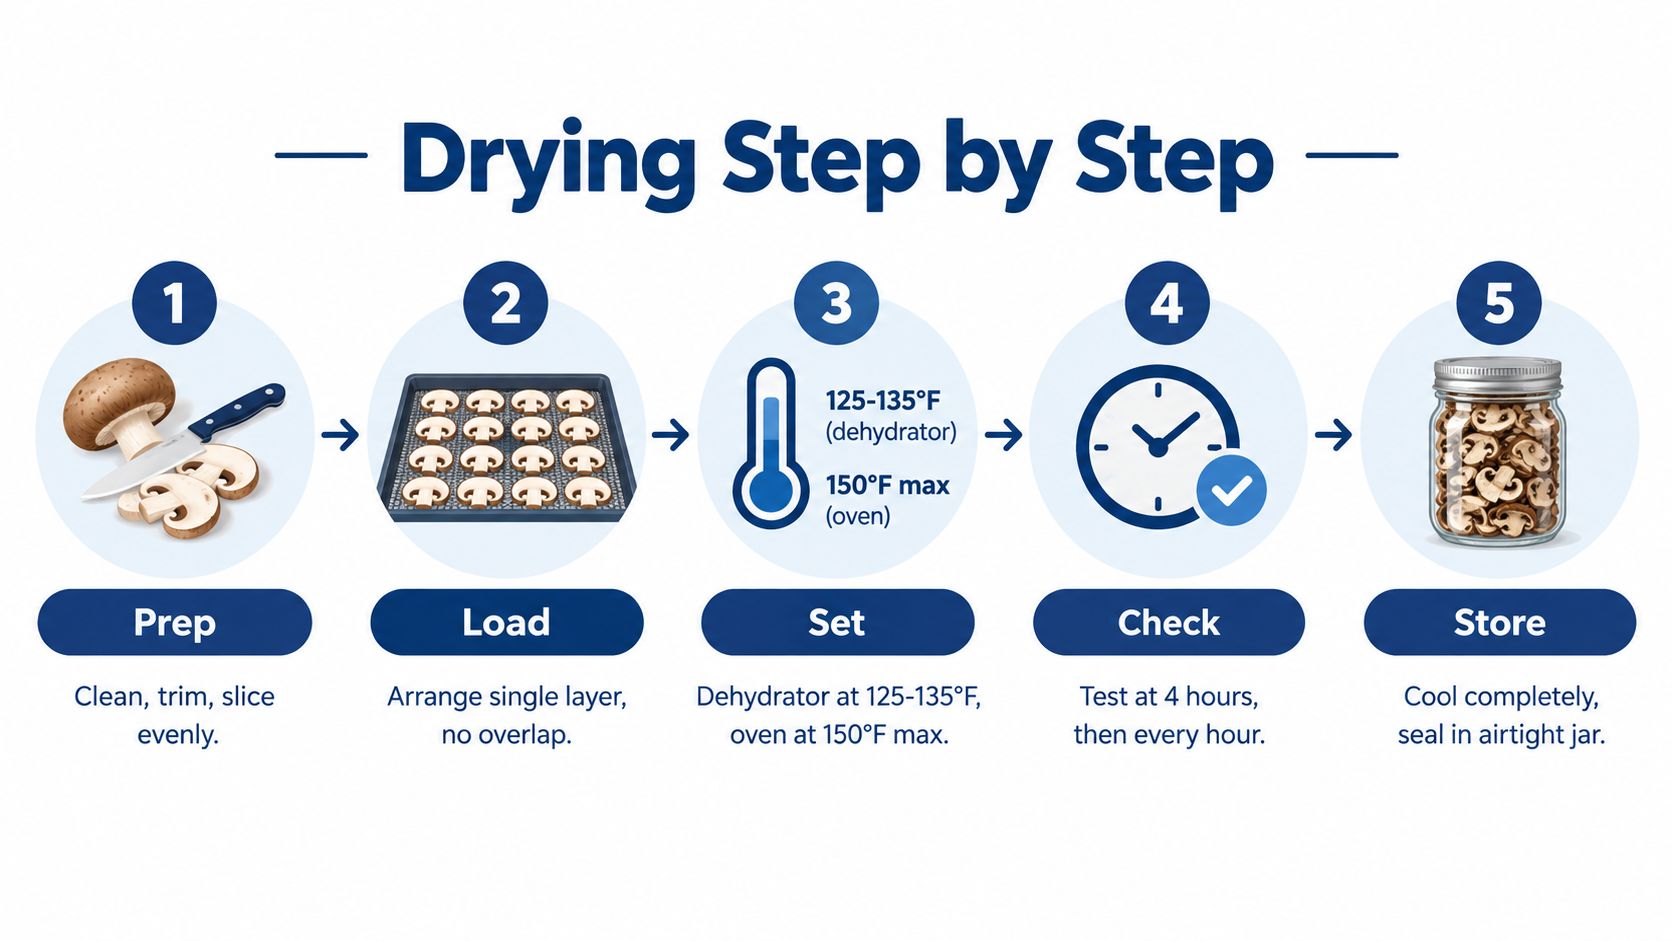
Dehydrator workflow
For most home growers, a dehydrator gives the best control because it handles heat and airflow together. As noted earlier, about 120°F, or 49°C, is a solid starting point for edible mushrooms. Set the trays, close the unit, and let the air do the work. Then keep checking the batch in rounds instead of trusting a finish time.
Tray position matters more than beginners expect. Many dehydrators run warmer near the bottom, the back, or the center column, so rotate trays during the run if your machine tends to dry unevenly. Thin caps and small slices often finish before thick stems. Pull those finished pieces as they become brittle and leave the slower ones in place. That simple habit keeps one part of the harvest from turning overly hard while another part is still holding water.
Oven fallback
An oven can work, but it takes more attention because household ovens often cycle hotter than the dial suggests. Use the lowest stable setting available and crack the door if your setup allows it, so humid air can escape instead of collecting around the tray.
Check often. Oven drying can create a misleading surface texture. The outside firms up first, while the inside still carries moisture.
Desiccant chamber
A desiccant chamber is the low-heat option. It works well when you want a very gentle finish, but it is slower because the drying power comes from dry air in a closed space rather than active heat and fan movement. Keep mushrooms off the desiccant itself, use a rack or barrier, and avoid crowding the container. If too much moisture enters at once, the chamber loses efficiency.
Air-drying
Air-drying uses the same principles, only with the least control. Put pieces on a clean mesh screen in a dry room with steady moving air. In a humid room, moisture leaves slowly and can stall.
The video below gives a useful visual reference for the rhythm of the process.
Checking That Your Batch Is Actually Dry
A timer can end before the mushrooms are ready. The outside may feel crisp while the center still holds water, and that hidden moisture can soften the batch later. Drying is complete only when the pieces stay brittle after they cool.
The snap test is the first check. A properly dried piece breaks cleanly instead of folding, and a stem should fracture without a rubbery hinge. If it bends at all, it needs more drying time.
Let the batch cool fully before judging it. Warm mushrooms can fool your fingers, because heat makes them seem drier than they really are. Once they cool, any leftover moisture becomes easier to spot.
If the texture is close but still a little leathery, put the batch back into the dehydrator or drying chamber. This is normal. Moisture moves from the center outward, so the last part of the process is often the slowest.
A calibrated water-activity meter gives the most dependable check. Missouri Extension identifies water activity below 0.85 as the level that limits pathogen growth, and it also notes that organisms such as Listeria monocytogenes, Salmonella, and Bacillus cereus can survive for months in dried mushrooms (Missouri Extension). Texture helps, but it does not tell the whole story.
Drying preserves mushrooms. It does not sterilize them.
Conditioning helps expose hidden moisture. Seal the dried pieces in a container for a short rest, then look for condensation or softening. If the lid fogs up or the pieces regain flexibility, the batch needs more time.
Smell matters too. A sour, musty, or unusually earthy odor can point to moisture that is still trapped inside. Darkening paired with softness is another warning sign. Separate those pieces and re-dry them instead of treating the whole batch as finished.
Storing Dried Shrooms So They Stay Good
Storage is where a lot of good drying work gets wasted. If the mushrooms go into a jar while they're still warm, that trapped heat can become condensation, and condensation brings moisture right back into the batch. Cooling fully before packaging is essential.
Airtight jars work well for ordinary household amounts. Vacuum-sealed bags and moisture-resistant pouches are also practical when you want extra protection from ambient humidity. The main job of the container is simple, keep outside moisture away from the product.
Make the storage routine predictable
Label each container with the species, harvest date, and drying date. That sounds basic, but it's the easiest way to avoid guessing later. A long-term study on Boletus edulis found that after 24 months of storage, vitamin C and tocopherols in air-dried mushrooms were no longer detected, which is a strong reminder that age matters and batch records matter even more (Boletus edulis storage study).
For readers comparing storage habits across other dried foods, storing white sage herbs correctly is a useful reference because it treats dryness, light, and container choice as one system. The same logic applies here, even though the crop is different.
For mushrooms specifically, Colorado Cultures also has a practical guide on how to store dried mushrooms, which fits well with the cooling and conditioning routine described above.
Keep the container in a cool, dark, dry place. Every time you open it, humid air gets a chance to move in, so it's worth storing only what you'll use in a reasonable span and keeping the rest sealed.
Common Pitfalls, Safety Notes, and Quick Answers
Three mistakes ruin most batches. Overlapping slices dry at different rates, stopping too early leaves moisture in the center, and sealing warm product traps condensation inside the jar or bag. Space the pieces out, keep drying until they feel brittle after cooling, and let the batch cool completely before you pack it.
Safety starts with the harvest itself. Use clean, sound mushrooms, and treat drying as moisture removal, not sterilization. As noted earlier, drying lowers water activity, but it does not make spoiled material safe to save. If any pieces look off, separate them from the rest before they reach the tray, because one questionable piece can add moisture and create uneven results.
Quick answers
How long do properly dried mushrooms last?They can stay in good condition for a long time if they are fully dry and stored well. Shelf life still depends on moisture, packaging, light, and room conditions.
Can you re-dry mushrooms if they soften?Yes. If they pick up moisture, return them to a dehydrator or dry chamber, then cool them again before storage.
Is freezing a substitute for drying?No. Freezing changes storage conditions, but it does not create the same low-moisture, shelf-stable product.
For a useful comparison from another dried-food workflow, the healthy dried veggie crisp tips article shows the same basic rule, crispness only lasts when the food stays dry after it comes off heat.
If you are drying legal edible or specialty mushrooms at home, Colorado Cultures can help with the upstream side of the process, from grow supplies to practical cultivation education. Visit Colorado Cultures for mushroom-growing tools, substrates, and beginner-friendly support that fits the same careful, home-scale approach used in this guide.
Comments