
Mushroom Substrate Too Wet: Fixes
You open a freshly prepared mushroom bag and find water pooled at the bottom. The substrate feels heavy, clumps like mud, and may give off a faint sour smell. The first instinct is often to inoculate anyway, hoping the mycelium will outrun the problem. That gamble usually gets worse once excess water removes the air spaces mycelium needs.
A practical target for many mushroom substrates is about 60% to 65% moisture by weight, checked with a firm squeeze. At field capacity, only a few drops should appear. If water streams freely, the batch is too wet, and if it falls below 55%, mycelium may struggle to grow, according to this substrate preparation guidance. The important distinction is that moisture percentage is only part of the diagnosis. The material may pass a visual test while still holding water in a form that favors bacteria.
Recognizing the Signs of Oversaturated Substrate
The clearest warning often appears before colonization begins. You open a sterilized bag or jar and see droplets coating the inside, with a shiny layer collecting beneath the substrate. When you tilt the container, the mass moves as one dense slab instead of shifting loosely. A handful may feel slick, sticky, or paste-like rather than springy and fibrous.
The squeeze test confirms what your eyes and hands suggest. Take a representative handful and compress it firmly over a clean surface. A few drops indicate a workable moisture level, while free-flowing water signals excess moisture. This field-capacity check is useful, but it shouldn't be treated as the entire diagnosis because a substrate can hold dangerous free water without producing an obvious stream.
Smell and texture reveal the deeper problem
Odor matters. A clean substrate may smell earthy, woody, or faintly musty depending on its ingredients. Sour, fermented, ammonia-like, swampy, or rotten odors suggest that oxygen-poor pockets have already changed the microbial balance. A slimy surface is more concerning than ordinary condensation because it points to a structural and biological failure, not just a wet container.
Watch the colonization pattern as well:
Pooling: Water remains at the bottom instead of dispersing through the material.
Compaction: Straw, sawdust, or coir has collapsed into a dense layer with few visible air spaces.
Stalling: Mycelium advances unevenly, stops at wet patches, or fails to establish around soaked areas.
Discoloration: Yellowing, slime, or suspicious fuzzy growth appears alongside a sour smell.
Practical rule: Condensation alone doesn't prove a batch is ruined. Pooling water, a foul odor, and a muddy texture together indicate a much higher-risk condition.
Oxygen is the immediate biological stake. Applied cultivation guidance describes moisture above roughly 70% as capable of creating anaerobic conditions where bacterial contamination becomes almost inevitable, while excessive water can deprive mycelium of oxygen even when the recipe otherwise looks correct. For visual examples, compare your observations with this mushroom contamination picture guide, but don't open a questionable bag repeatedly or move it through a clean growing area.
Understanding Water Activity and Material Differences
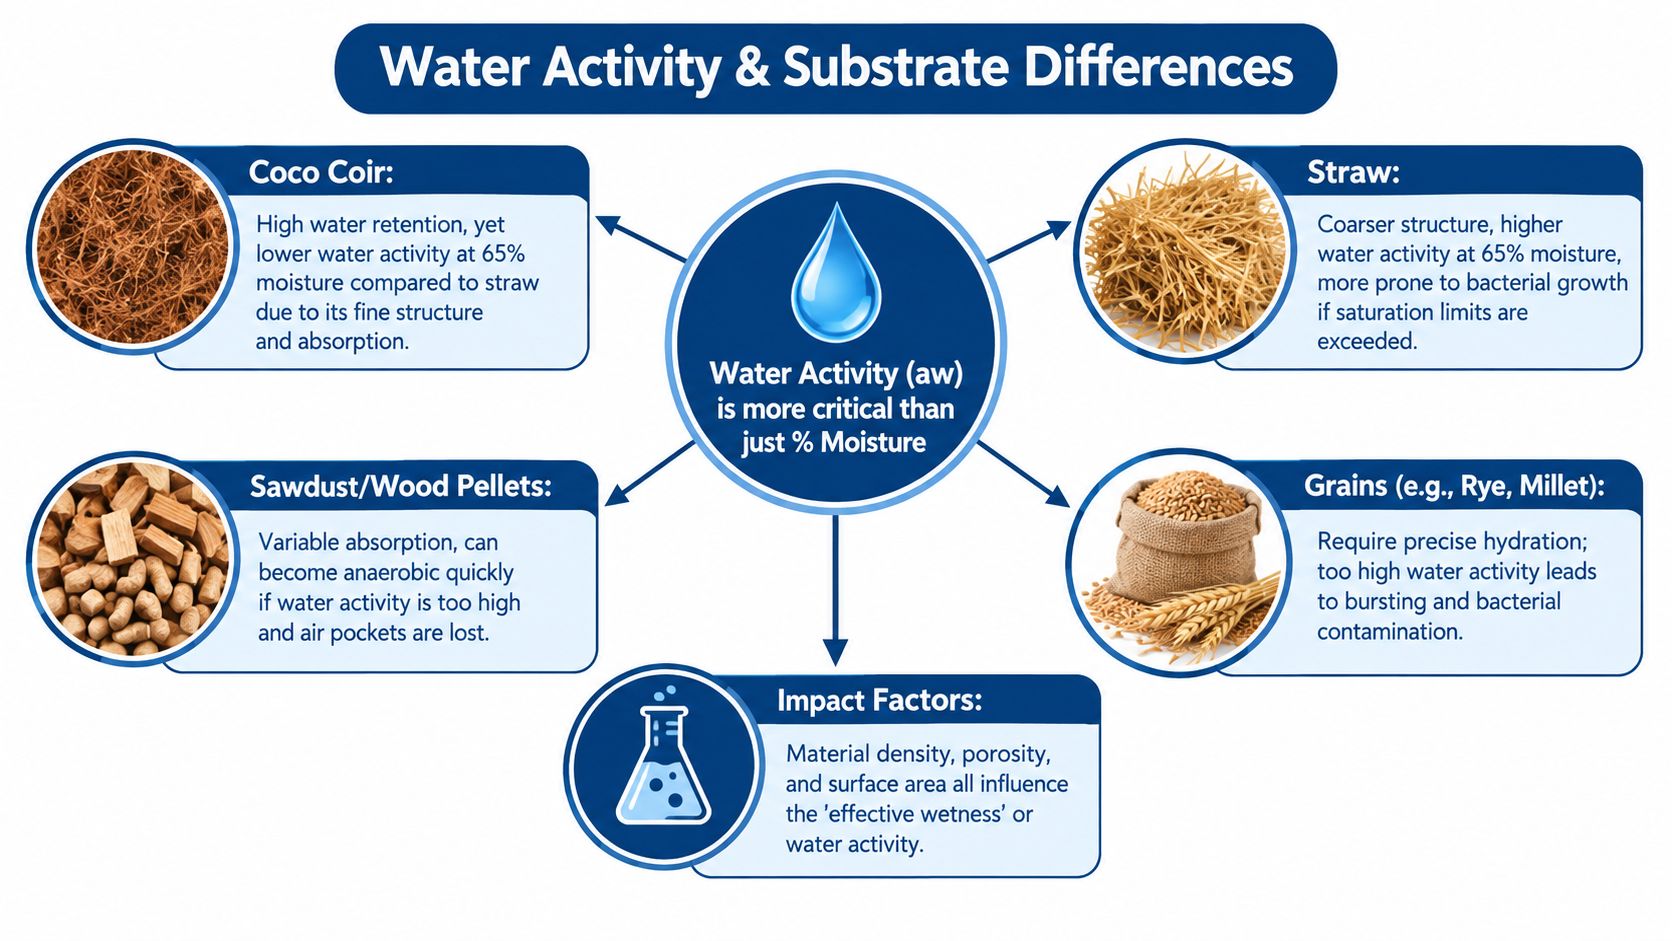
Two substrates can contain the same percentage of water and behave very differently. Moisture percentage tells you how much water is present relative to the total weight. Water activity, often written as aw, describes how available that water is for biological use. Free water in a pore or pooled at the bottom is more available to bacteria than water held tightly inside a fiber or particle.
That distinction explains why a squeeze test can look correct while colonization still fails. The test measures what your hand can force out. It doesn't measure how water is distributed across pores, how tightly a material binds it, or whether dense areas have lost their oxygen pathways. A technical discussion of water activity in mushroom substrates highlights why the same apparent hydration can produce different contamination outcomes across coir, straw, sawdust, and mixed materials.
Structure changes the microbial contest
Coco coir has a fine, absorbent structure that can retain water without always releasing much during a squeeze. Straw contains larger channels and hollow sections, so saturation can leave more free water around the fibers and reduce oxygen diffusion. Hardwood sawdust and wood pellets vary with particle size and density. Once they pack together, they can create compact, low-air zones even when the surface looks merely damp.
This is why the phrase “mushroom substrate too wet” needs a material-specific response. Adding dry material may correct a coir mix, but it can also create uneven hydration if you stir poorly. Fluffing straw may restore air space, while aggressively pressing it back down recreates the problem. Sawdust often needs careful mixing because dense pockets can remain wet after the exterior seems ready.
The useful question isn't only “How much water did I add?” It's “Where is that water sitting, and can mycelium still reach oxygen?”
The practical moisture band for oyster mushroom substrates is often described broadly as 50% to 75%, with cultivation guides commonly narrowing the working target to 60% to 65%. Another published reference places optimum substrate water content for oyster mushrooms around 65% to 75%, while warning that excessively high initial water content can produce misshapen fruiting bodies and reduce oxygen availability. These ranges overlap, but they don't eliminate the need to judge texture, porosity, and free water in the actual material.
Step-by-Step Fixes for Wet Bulk Substrate and Grain
The fix depends on whether you're dealing with bulk substrate or grain spawn. Bulk material can often be remixed before inoculation. Grain is less forgiving because water on the kernel surface creates a ready-made environment for bacteria before the mycelium has established.
Bulk substrate
If the substrate hasn't been inoculated, spread it into a clean, shallow container or mesh bag so excess water can drain and steam can escape. Break apart compacted sections with a clean tool, turn the material, and let the surface release moisture before testing again. Don't leave it exposed longer than necessary, because every open handling step adds contamination opportunities.
If draining isn't enough, mix in a compatible dry component gradually. Dry coir, vermiculite, chopped straw, or another ingredient already used in the recipe can absorb or redistribute excess water. Add a small amount, mix thoroughly, and repeat the squeeze test from several areas. A dry layer at the top doesn't solve a saturated core.
For a pasteurized bulk mix, restoring porosity matters as much as removing water. Loosen compressed straw, separate clumps, and avoid packing the finished substrate tightly into its container. If the mix smells sour or feels slimy, don't try to dilute the odor with dry material. That addresses texture, not the established contamination.
Grain spawn
Grain requires a different response. Drain excess water thoroughly, then spread the kernels in a clean layer so surface moisture can evaporate. The goal isn't to dry the grain internally. It's to remove the sheen and free water that makes kernels stick together and encourages bacterial growth.
Avoid shaking wet grain aggressively if kernels are bursting or releasing starch. Broken grains create a sticky nutrient film that binds the jar or bag into a dense mass. Once the surface is dry enough for kernels to separate, restore appropriate gas exchange without exposing the grain unnecessarily.
Don't inoculate grain that has visible pooling, a sour smell, heavy starch paste, or widespread burst kernels. Slightly damp grain may be recoverable before inoculation, but grain that has become anaerobic is a poor candidate for a rescue attempt. The cultivation science discussion of wet grain and bulk substrate is useful here because it distinguishes excess free water from the broader consequences of restricted respiration.
The rescue boundary: Fix physical hydration before inoculation. Once odor, slime, or bacterial discoloration appears, treat the problem as contamination rather than a recipe adjustment.
When to Salvage Your Grow and When to Discard
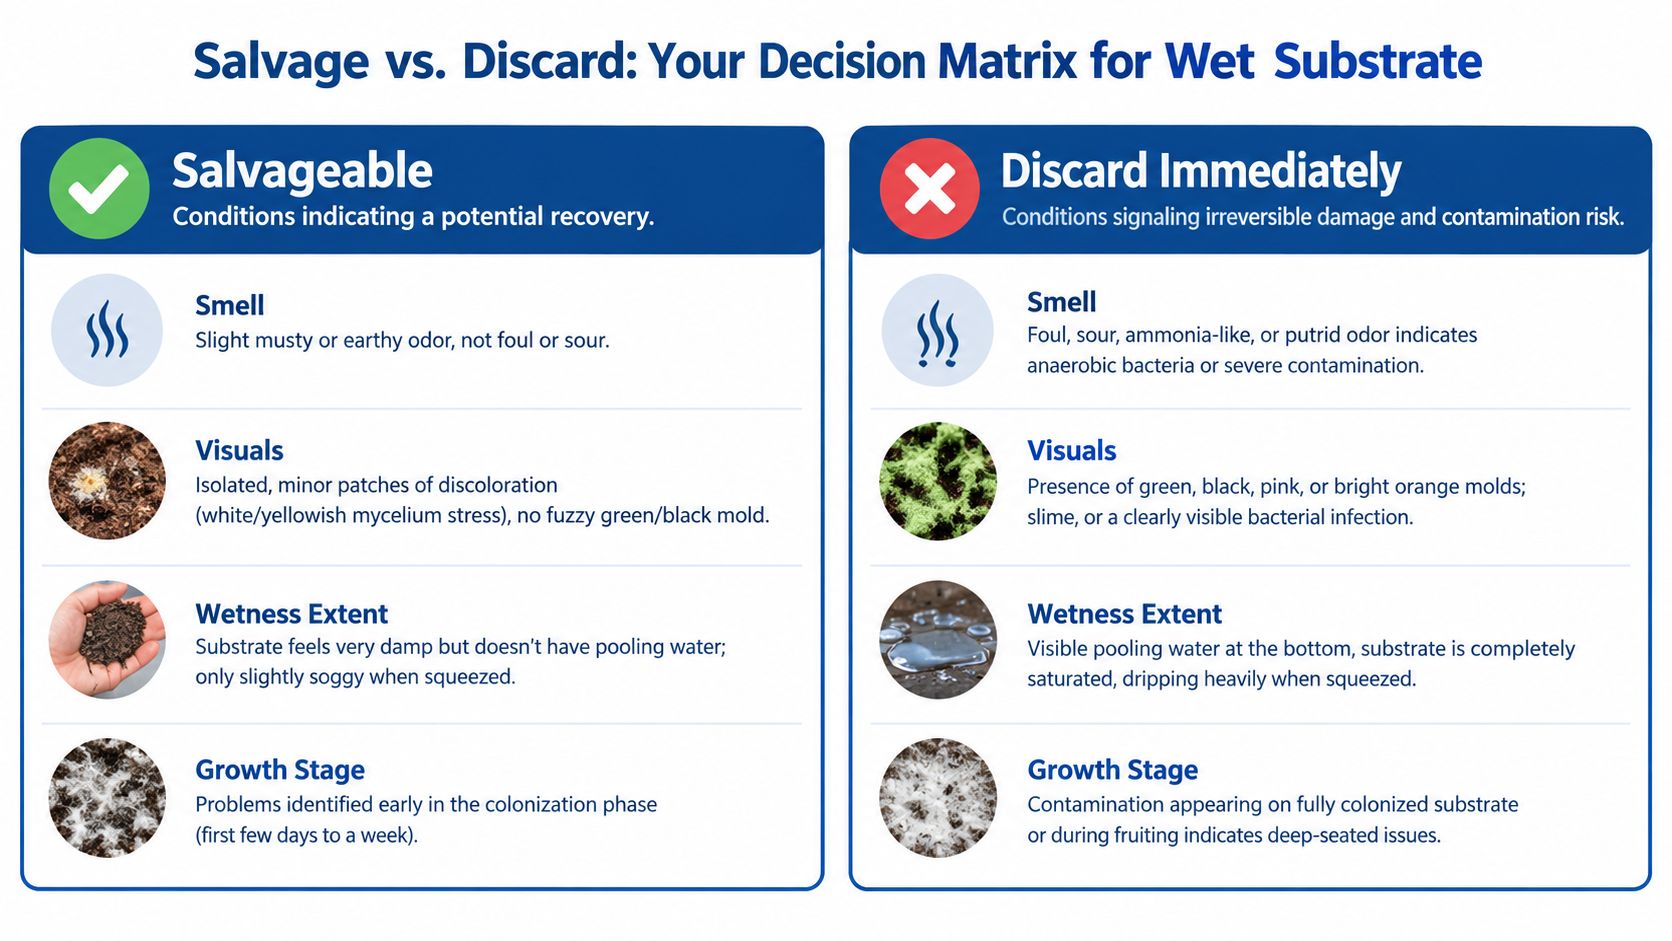
Salvaging makes sense only when the problem is primarily physical. A damp bulk substrate with no foul odor, no visible mold, and no pooling may be corrected through draining, loosening, and careful rebalancing. A wet grain bag deserves more caution because its compact surface area and nutrient-rich kernels can favor bacteria before colonization becomes visible.
The decision changes as the batch ages. Early in preparation, you can spread, drain, remix, and retest. After inoculation, every intervention breaks the protective environment and increases exposure. A batch that has already developed an unpleasant odor or slimy texture should not be opened in the same space where you handle clean cultures.
Compare the signals before you act
Salvage may be reasonable | Discard immediately |
|---|---|
The substrate smells earthy or mildly musty. | The odor is sour, rotten, ammonia-like, or putrid. |
The material is damp but has no standing water. | Water pools at the bottom or runs out heavily. |
A small stressed or discolored area is isolated. | Green, black, pink, or bright orange mold is visible. |
The problem appears before or near the start of colonization. | Contamination appears on fully colonized material or during fruiting. |
The structure can be loosened without turning slimy. | The substrate feels gelatinous, greasy, or decomposed. |
A controlled study of Pleurotus ostreatus illustrates why wetness deserves respect. In that study, contamination was 1% at 43.5% moisture in a sawdust control, 7% at 50.89% moisture in coconut husk peat, and 15% at 74.91% moisture in narrow leaf cattails, as reported in the published cultivation study. The materials weren't identical, so the figures shouldn't be treated as a universal recipe. They do show that wetter starting material can coincide with sharply higher failure rates.
Don't move a questionable bag into the fruiting chamber to “see what happens.” If it develops a foul smell, spreading slime, or aggressive mold, seal it before removal and clean any surface it contacted. Losing one batch is cheaper and safer than exposing clean blocks, tools, and cultures to a problem that was already obvious.
Adjusting Pasteurization and Hydration Techniques
Most wet-substrate failures begin before heat treatment. Growers add water until the material looks saturated, then assume draining or cooling will remove the excess. A better method is to hydrate gradually, mix fully, and reserve the final adjustment until the material has absorbed water evenly.
Bulk materials need a drainage phase
After pasteurization, let fibrous material drain while it cools. Stirring during this phase redistributes moisture and exposes trapped free water. Test several handfuls, not just the surface, because straw and coir can produce dry-looking exteriors while retaining saturated pockets inside.
The guide to pasteurizing mushroom substrate can help you separate heat treatment from hydration control. Pasteurization doesn't automatically create field capacity. You still need to inspect the cooled material, remove pooling water, and restore a loose structure before inoculation.
Avoid compressing wet substrate while it drains. Pressure forces water into smaller pores and removes the air channels you're trying to preserve. Use a clean mesh bag, colander, or perforated container when appropriate, and allow gravity to do the first part of the work.
Grain needs controlled cooking and cooling
Grain preparation has a narrower margin for error. Hydrate kernels until the interior is prepared but the exterior remains dry enough to separate. Excessive cooking can burst kernels and release starch, while inadequate draining leaves surface water that makes the grains clump.
After heating, spread or drain grain until the outside no longer looks glossy. Cool it fully before loading or inoculating, and inspect the bottom of the container for liquid that has migrated during settling. A few wet kernels can be managed during preparation. A layer of free water beneath the entire batch is a warning to stop and correct it.
Keep notes on the material, water addition, heating method, drain time, and final texture. You don't need a complicated laboratory system to improve consistency. Recording how a particular coir brand, straw cut, or sawdust blend behaves gives you a repeatable baseline that a generic formula can't provide.
Core Moisture Management Rules for Future Harvests
Moisture control works best as a routine, not a last-minute rescue. Use the squeeze test, but pair it with smell, texture, drainage, and an honest look at the material's structure. A few drops is a useful target. A stream, pooling, slime, or foul odor is a warning.
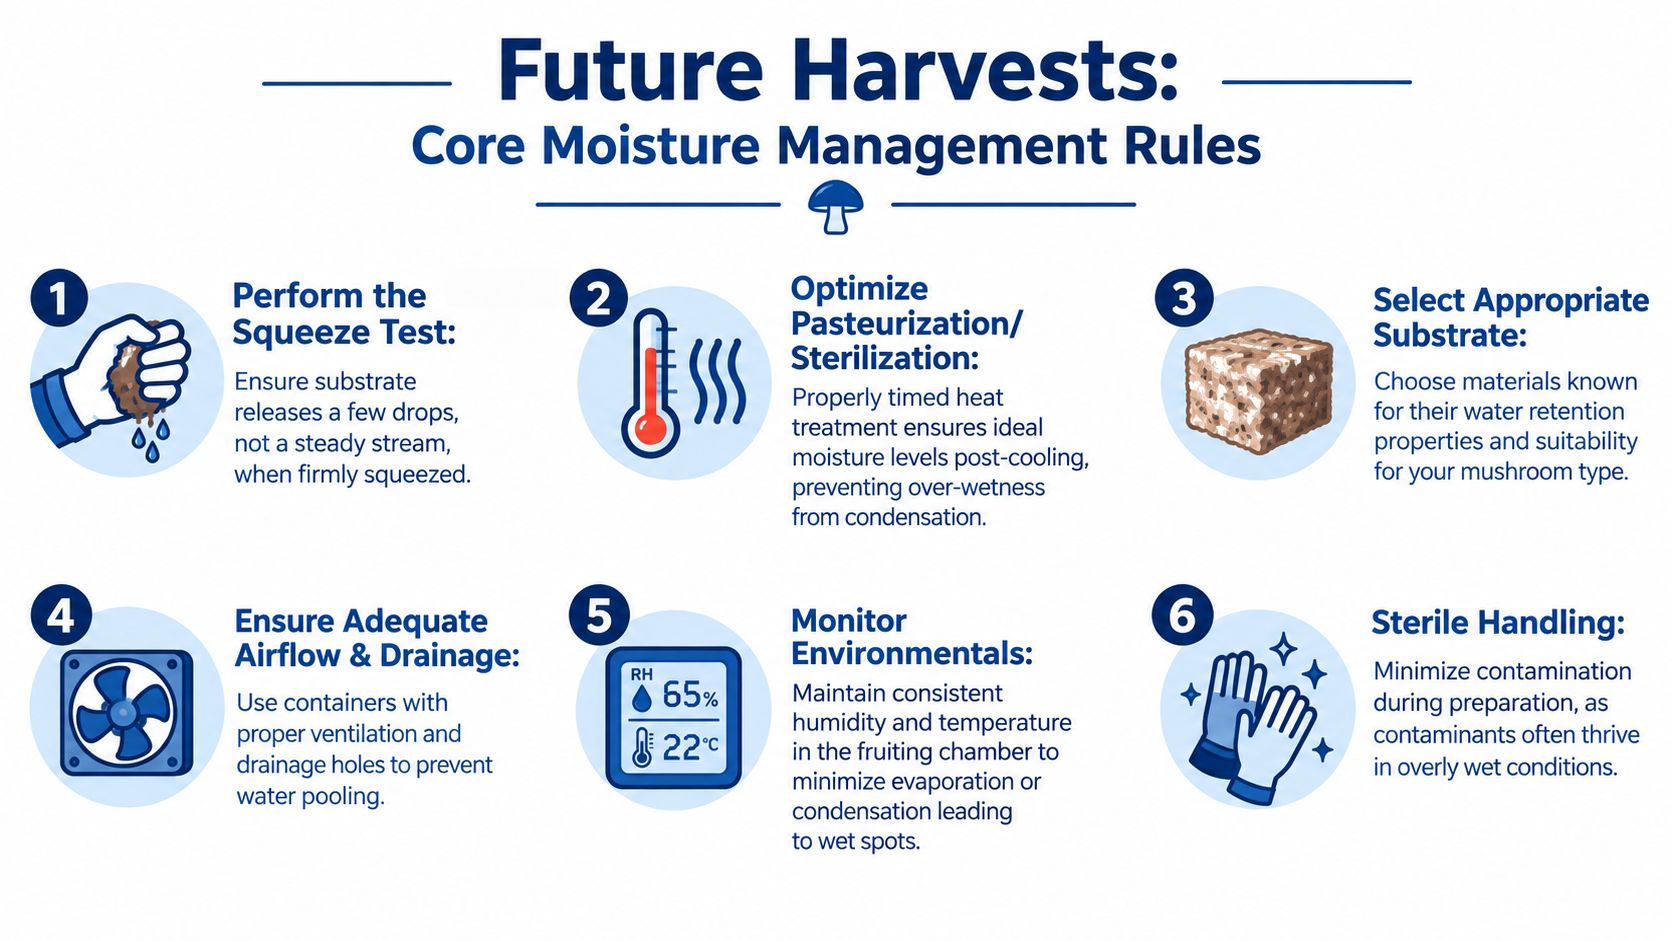
Use this quick checklist:
Hydrate gradually: Add water in stages and mix between additions.
Test the center: Sample from the bottom and middle, not only the surface.
Preserve air space: Keep straw fluffy and avoid packing sawdust or coir.
Separate grain from bulk: Drain grain surface moisture carefully, while bulk substrate often needs broader remixing.
Cool before inoculation: Condensation and heat can distort your final moisture assessment.
Record the batch: Use the mushroom substrate calculator to make preparation more consistent, then verify the result physically.
The best batch isn't the wettest one. It's the one that holds enough water for steady growth while keeping open pathways for oxygen and limiting free water that microbes can exploit.
Colorado Cultures provides sterilized grain bags, substrates, all-in-one grow bags, grow kits, and moisture-focused preparation guidance for home and laboratory cultivators. If you're tired of guessing whether your mushroom substrate is too wet, visit Colorado Cultures for prepared supplies and practical support that can help you start with a more consistent hydration baseline.
Comments