
How to Grow Mushroom Spawn at Home: Step by Step
You've got a bag of grain, a culture syringe, and a cleared kitchen counter. Then the doubts start: how wet should the kernels be, will your pressure cooker do the job, and does that white patch mean the batch is healthy? Learning how to grow mushroom spawn means controlling those decisions, not waiting for grain to turn white.
Grain spawn is grain colonized by mushroom mycelium, which you'll later use to inoculate a fruiting substrate. Start with a known gourmet mushroom culture and keep a batch record. When something goes wrong, the preparation history is often more useful than the color of the growth.
Spawn Targets You Need to Know First
Core spawn targets for grain spawn
Stage | Target | Reference point |
|---|---|---|
Sterilization | 121°C (250°F) at 15 psi for 120 minutes | Home grain-spawn procedure, subject to cooker and load requirements |
Liquid culture dose | No more than 1 cc per 0.5 lb of grain | Distribute across the grain, not one spot |
Spawn rate | 4–5% of substrate weight | Oyster-trial starting range, with the weight basis recorded |
Incubation temperature | 22–24°C (72–75°F) in darkness | Home grain-spawn reference range |
Grain colonization time | 2–4 weeks | Inspect for complete colonization before use |
Treat these as reference targets, not a universal recipe. Container size, grain preparation, species, and equipment affect whether a procedure works. The sterilization, dosing, and incubation targets describe the home grain-spawn method detailed below, not every commercial production system.
Spawn rate becomes important when you move colonized grain into bulk substrate. In a controlled pink oyster trial published in BioResources, 4% spawn produced 324 g of mushrooms per kilogram of dry paddy straw, equivalent to 32.4% biological efficiency, outperforming the lower and higher rates tested. More spawn wasn't automatically better.
A separate oyster mushroom cultivation study found that 8% spawn completed substrate colonization fastest, in 10.50 days, supporting a practical 4–5% starting range when balancing inoculum cost against colonization speed. That faster result concerns inoculated substrate, not the time needed to manufacture your grain spawn.
Practical rule: Record whether a spawn percentage uses dry or hydrated substrate weight. A percentage without its weight basis isn't a reproducible recipe.
Before starting, label each container with the species, grain, culture identity, preparation date, and intended incubation conditions. Leave space for the actual sterilization record and inoculation date. You'll then compare the batch with a written plan rather than memory.
Grain and Gear to Gather Before You Start
Choose grain you can buy consistently and hydrate without splitting. Sorghum, millet, and wheat can all serve as carriers, but a grain that performs well in a controlled trial won't compensate for poor preparation at home.
The pink oyster grain comparison gives a useful purchasing reference:
Average days to full spawn by grain
Grain | Average days to spawn | Difference from wheat |
|---|---|---|
Sorghum | 12.2 | 3.4 days faster, about 22% |
Pearl millet | 13.8 | 1.8 days faster |
Wheat | 15.6 | Baseline |
These are results from the controlled pink oyster trial, not promised completion dates for your bags. I would choose locally available, intact grain before paying extra to chase a small timing advantage. Keeping the same grain while learning hydration makes troubleshooting easier.
Small kernels offer many distribution points when mixed into substrate, but they can also be awkward to drain and handle. Larger kernels are easier to inspect individually. Whichever grain you choose, reject insect-damaged material and remove cracked kernels, loose husks, and excessive dust.
Build a complete working setup
Containers: Pressure-compatible mushroom bags with filter patches, or jars with appropriate filtered lids. Liquid-culture injection requires a suitable injection port.
Sterilization equipment: A pressure cooker or pressure canner approved for the operating pressure your procedure requires, plus its rack and operating manual.
Measuring tools: A kitchen scale, thermometer, labels, and a notebook or batch spreadsheet.
Transfer space: A still-air box or properly operating clean-air hood.
Cleaning supplies: Isopropyl alcohol, clean wipes, soap, and gloves.
Culture tools: A sterile syringe for liquid culture, or a scalpel and agar culture for solid transfers.
Tool sterilization: A suitable flame source used away from alcohol vapor and outside a still-air box.
Lay everything out before processing grain. Rehearse the transfer with closed containers: can you reach the culture, open the receiving container, inoculate, and close it without crossing over exposed sterile material?
A clean zone isn't the same as a sterile room. Your goal is a short, deliberate transfer with no searching for missing supplies.
How to Hydrate and Sterilize Grain Spawn
Hydration puts water inside the kernel. Draining removes water from its surface. Those are separate jobs, and skipping the second produces sticky grain even when the first went well.
Use this visual as a preparation checklist before loading containers.
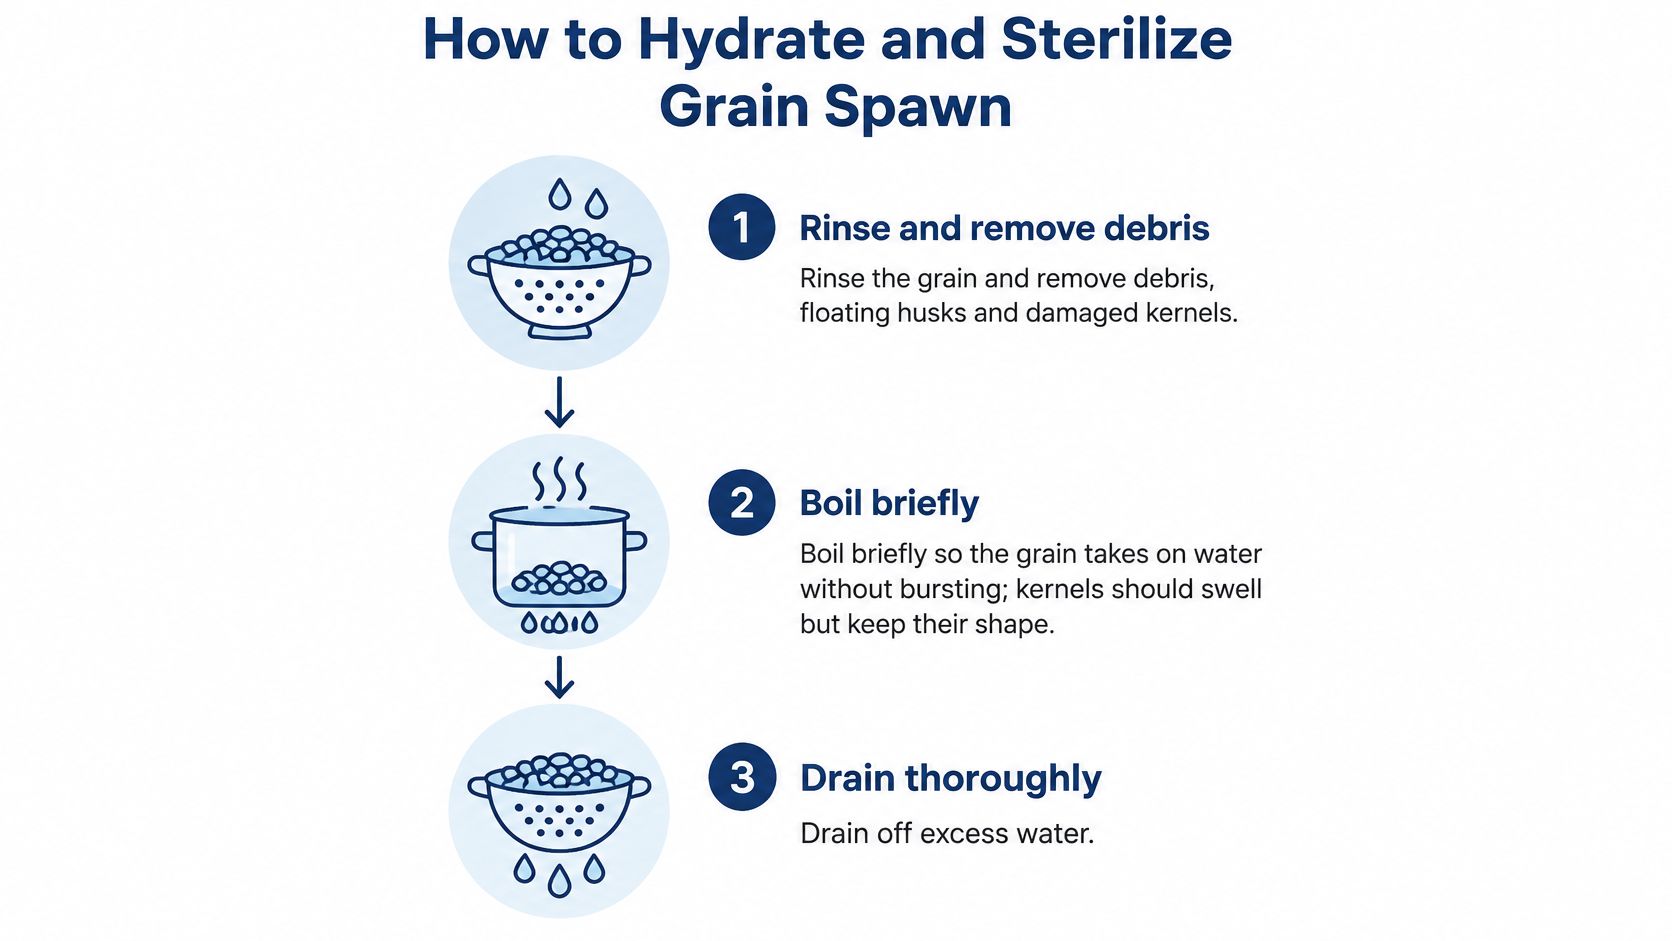
Prepare and process the batch
Rinse and sort the grain. Wash away loose dust and remove debris, floating husks, and damaged kernels. Don't try to rescue poor-quality grain by cooking it longer.
Heat gently until hydrated. Briefly boil or simmer while checking the kernels, stopping before widespread splitting. Cut a cooled sample kernel to inspect its interior rather than relying on a fixed cooking time for every grain.
Drain thoroughly and cool. Spread the grain in a clean strainer or suitable draining surface so excess water can escape. Test a cooled sample: it should be hydrated internally without leaving free water when pressed or shaken.
Load pressure-compatible containers. Leave enough headspace to redistribute the grain later, and keep kernels away from sealing surfaces and filters. Packing a container tightly makes handling harder and changes how heat reaches the center.
Run the sterilization cycle. Utah State University Extension's home mushroom guide specifies approximately 121°C (250°F), 15 psi, and 120 minutes, followed by full cooling; its home grain method also gives the table's 1 cc per 0.5 lb liquid-culture limit and 22–24°C (72–75°F), 2–4 week incubation reference. Start timing only after the equipment reaches operating conditions, and don't assume that this cycle validates oversized or tightly packed loads.
Allow natural depressurization and complete cooling. Never force the cooker open or bypass its safety lock. Keep the grain container protected, and inoculate only when the grain has reached room temperature throughout.
Avoid preventable processing failures
Read the cooker manual before loading, particularly its instructions for water level, venting, rack placement, and cooling. Our pressure cooker guide helps you organize the workflow, but it doesn't replace the equipment manufacturer's safety requirements.
Denver-area growers should also account for altitude. Gauge pressure alone doesn't establish an identical processing temperature everywhere, so use equipment guidance appropriate to your elevation rather than improvising a pressure adjustment.
Don't use extra cooking time to compensate for burst, waterlogged grain. Correct hydration before the grain enters the cooker.
Before sterilization, good grain looks plump and mostly separate, without a puddle beneath it. After processing, some condensation can occur; a wet container wall alone doesn't establish contamination.
This video provides another view of the grain-spawn preparation workflow.
Match Moisture and Temperature to the Species
Write the species and growing medium on the label before choosing incubation conditions. Grain spawn, straw substrate, and mushroom compost are different materials. Copying a compost moisture target onto a grain jar is an easy way to create an unsuitable batch.
For Agaricus, Penn State Extension's seeding and substrate guidance gives normal moisture ranges of 65–72% for horse manure compost and 65–75% for synthetic compost, with optimum spawn growth around 75–76°F. Those figures describe compost production, not a recommended water content for your sorghum jar.
Separate the medium from the timetable
Oyster mushrooms also respond differently to different substrate preparations. In a 2024 Springer oyster cultivation study, the fastest substrate colonization took 19.00 days in treatments using blackjack straw. That result doesn't set a deadline for grain spawn or for another straw recipe.
For grain: Judge hydration by the kernel interior and absence of excess surface water.
For compost or bulk substrate: Use a preparation method and moisture target developed for that material.
For incubation: Measure conditions near the containers rather than trusting the room thermostat.
Our mushroom growing requirements guide provides context for separating colonization requirements from fruiting conditions.
Record a temperature band and a moisture specification appropriate to the material. If you can't measure grain moisture directly, record the preparation method and drained weight instead of inventing a percentage. Consistency is more useful than false precision.
Inoculating and Incubating Without Contamination
The critical moment is when sterile grain meets your culture. A good pressure cycle can't protect a batch from a dirty needle, an exposed jar mouth, or a tool that touches the bench before entering the grain.
Prepare your work area before bringing in the cooled containers. Understanding why aseptic technique matters helps you distinguish surface cleaning from protecting sterile contact surfaces.
The photograph shows controlled tool handling at the transfer bench.
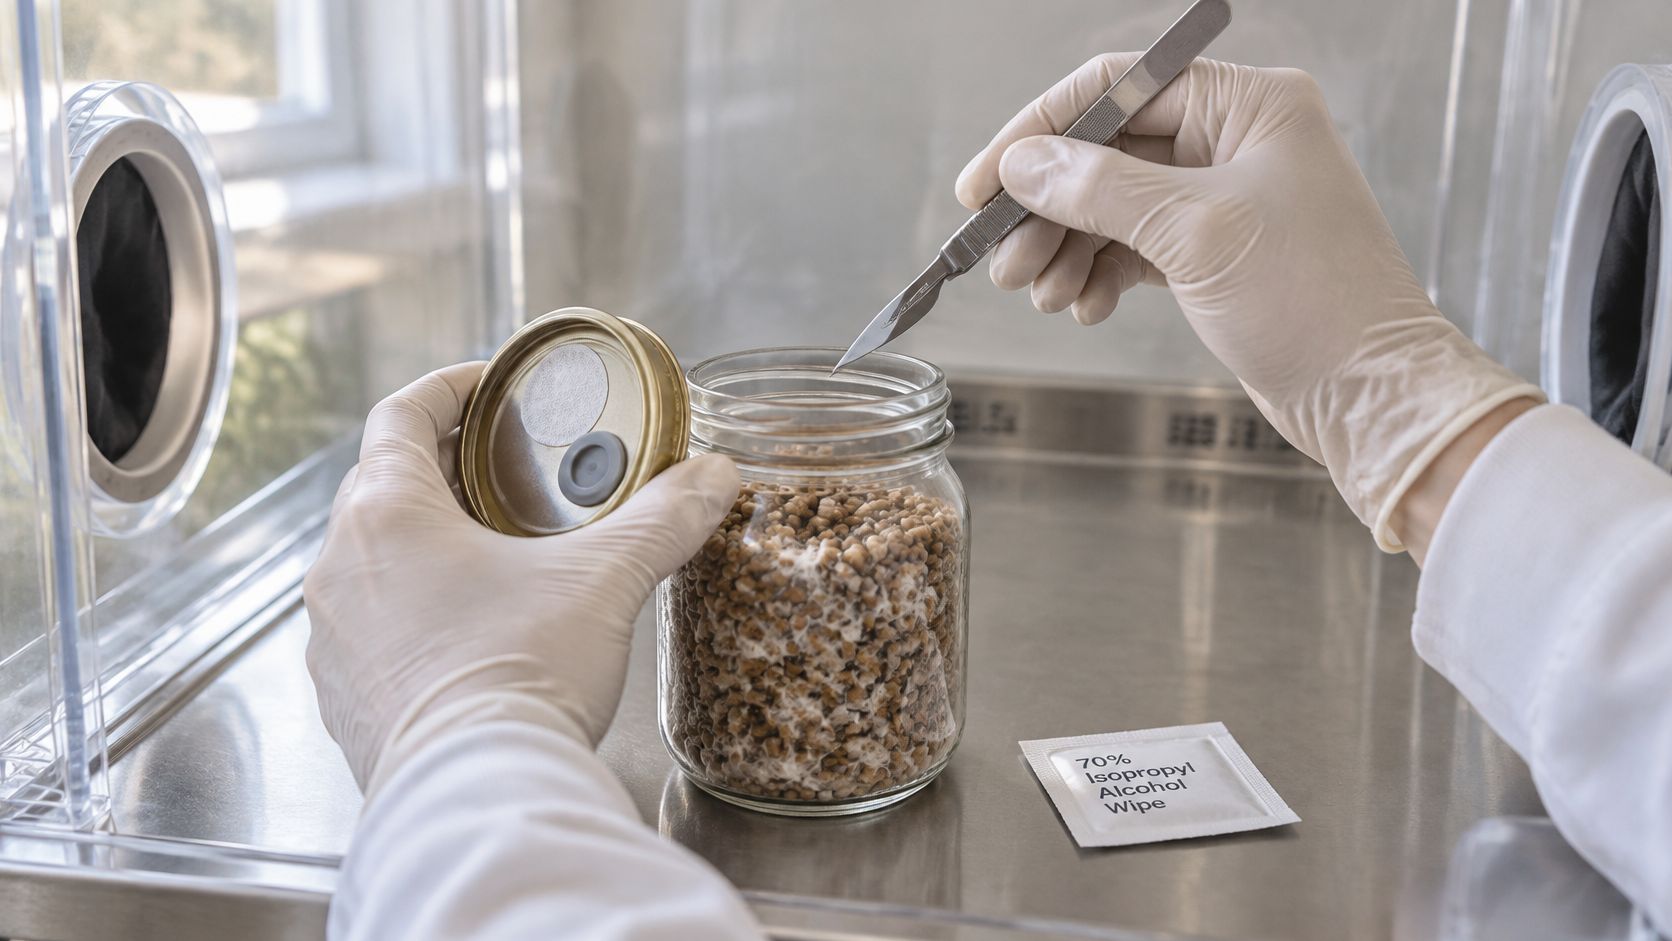
Make the transfer deliberate
Clean first, then arrange the bench. Wash your hands, wipe the work surface and container exteriors, and allow alcohol to evaporate. Gloves don't make your hands sterile, so keep them away from needles, blades, jar rims, and other critical contact points.
Choose a transfer method before opening anything. For liquid culture, mix the syringe contents gently, clean the injection port, and use a sterile needle. Distribute the measured inoculant through the grain without adding extra liquid because the culture looks thin.
For agar, University of Florida cultivation guidance recommends transferring small pieces of pure mother culture with a heat-sterilized tool and incubating in darkness at about 23°C (73°F) until colonized, generally 10–20 days. Let the sterilized tool cool without touching an unclean surface before contacting living mycelium.
Close the receiving container promptly. Sterilize the tool again before another transfer, and never use an open flame inside an alcohol-treated still-air box.
Bench discipline: Move deliberately, but don't leave a container open while deciding what to do next.
Incubate without unnecessary handling
Place sealed containers where temperatures remain steady and filters stay unobstructed. Don't put grain directly against a heater to accelerate growth; the container can experience conditions quite different from the surrounding room.
A stable shelf and thermometer are often enough for a small grow. If room temperatures fluctuate substantially, compare the controls and usable space of lab incubators from Material Handling USA before deciding whether dedicated equipment solves your actual problem.
Label at sealing: Record the inoculation date, culture identity, and transfer method.
Inspect through the container: Look for advancing growth, wet pockets, and abnormal patches without opening it.
Track changes: Photograph questionable areas from the same angle and record temperature disturbances.
Don't open a bag to check its smell. If an off odor is apparent during ordinary handling, isolate it rather than bringing it closer to your face.
Diagnose the Batch and Decide If It Is Ready
Isolate, sample, or discard. Those are different decisions, and the right choice depends on both the symptoms and the batch history. White mycelium alone doesn't prove purity, while a little condensation alone doesn't prove failure.
Contaminants can enter during preparation, sterilization, transfer, incubation, storage, or transport. The academic discussion of cultivation contamination and process control supports treating purity as something to verify through culture handling and fresh-media transfers, not merely by inspecting the surface of a bag.
Read symptoms alongside the preparation record
Contamination signs, likely causes and responses
Symptom | Likely cause | Response |
|---|---|---|
Sour odor | Suspected bacterial growth, potentially associated with wet grain or unsuitable handling | Isolate and discard; don't reuse |
Pooling liquid | Excess hydration, with bacterial contamination also possible | Isolate; review hydration for the next batch |
Green, black, or gray growth | Suspected competing mold | Isolate; keep away from bulk spawn |
Pink or other unexpected colored growth | Possible bacteria or competing fungus | Photograph through the container, then discard |
Colonization stalls beyond the expected window | Cold or dry grain, weak culture, or hidden contamination | Check conditions; test the source culture on fresh media |
Small localized patch that stays put | Possible sectoring or hidden contamination | Verify the source culture on fresh media before expanding |
These are working diagnoses, not organism identifications. Color and odor can't reliably tell you which bacterium or fungus is present. Don't open a suspect container in a living area or attempt to remove a bad patch and use the rest.
Pooling needs context. Distinguish droplets on a wall from persistent liquid collecting around sticky, uncolonized kernels. Yellowish exudate can accompany stress, but it isn't a reliable clean-or-contaminated test on its own.
Follow the failure backward
If a batch stalls, check its thermometer record and compare the grain's appearance with your preparation notes. Widespread wet kernels suggest a hydration problem; failures concentrated around transfer sites justify examining inoculation technique. These patterns guide your investigation but don't prove where contamination entered.
A culture check belongs on fresh agar under controlled conditions. For a beginner, testing the retained source culture is safer and more informative than opening a visibly contaminated grain bag to rescue it. Repeated clean growth on fresh media provides stronger evidence than a white surface.
Use this decision sequence:
Go: The expected mycelium has colonized the grain throughout, growth is consistent with the species, and the batch has no unexplained warning signs.
Wait: Growth is still advancing normally, but exposed grain remains.
Isolate: Growth stalls, liquid accumulates, or an abnormal patch develops.
Discard: The batch has clear spoilage, unexpected mold, or a persistent off odor.
Don't open otherwise healthy spawn solely to perform a smell test. When you eventually transfer it in the appropriate workspace, an unexpected odor is a reason to stop.
Change one preparation variable at a time while retaining a complete record. Correct a drainage problem without simultaneously switching grain, culture, and container size, or you won't know which change helped.
We publish written instructions for the Microppose Mark 1 Grow Kit, Gro Magik Grow Kit, All in One Grow Bag, and Full Flush Grow Kit. Use the instructions for your exact setup rather than blending unrelated procedures.
We carry spawn, substrates, and liquid culture recipes to support your grain-spawn workflow. Visit Colorado Cultures with your species choice, equipment list, and batch notes so we can help you choose supplies and a practical next step.
Comments