
Pink Oyster Mushroom Spawn: What It Is and How to Use It
Why does one bag of pink oyster mushroom spawn race white across a grow bag in five days, while another from the same supplier sits half colonized for three weeks?
Most growers blame contamination or a weak culture. Temperature explains more of it. Pink oysters are a tropical species, and the incubation numbers they need run warmer than the numbers printed on most oyster growing guides.
Spawn is straightforward once you've handled it: grain that Pleurotus djamor mycelium has already colonized, packed so you can carry that living network into a much larger batch of straw or hardwood. What's worth learning is how fast a healthy bag should move, what a good one looks like, and how to store and deploy it without wasting the vigor you paid for.
Pink Oyster Spawn Benchmarks at a Glance
Pink oyster mushroom spawn is grain, occasionally another material, that Pleurotus djamor mycelium has fully colonized and that you use to inoculate a bigger batch of substrate. The seedling comparison holds up well. A seed has to build a plant from nothing, while a seedling arrives with roots already working and needs room to grow. Spawn is the seedling: a running mycelial network that needs a bigger home and the right conditions to keep expanding.
The reference values below come from a controlled cultural-parameter study that tested temperature, pH, carbon sources, nitrogen sources, grains, and spawn doses against each other instead of guessing at them (the BioResources study on pink oyster cultural parameters). Its strongest mycelial growth came at 28°C, where the colony reached 50.8 mm of radial growth after seven days, and its broader favorable window was 24–28°C.
Factor | Reference value | What it tells you |
|---|---|---|
Species | Pleurotus djamor | Warm-weather oyster species behind most pink oyster spawn |
Best tested growth temperature | 28°C | 50.8 mm radial growth after seven days |
Favorable temperature range | 24–28°C | Benchmark range for incubating grain spawn |
Optimal pH in tested conditions | 7.5 | Optimum within the tested study conditions |
Fastest spawn grain | Sorghum | Fastest spawn development in a comparative study |
Spawn dose with highest yield | 4% on paddy straw | Highest yield among tested dose and substrate combinations |
Reported yield, West Bengal study | 324 g, 32.4% biological efficiency | Study conditions, not a guaranteed home-grower result |
The Two Numbers to Remember First
You don't need to memorize a table to start well. Two entries do most of the work for a first grow.
Temperature, 24–28°C. Incubate warm. A cool basement shelf that suits blue oysters will slow pink oysters down and hand the advantage to competing molds.
Spawn rate, about 4%. That's the dose that produced the top yield on paddy straw, which for a home grow means roughly 40 g of spawn for every kilogram of prepared substrate.
The rest, including pH 7.5 and the specific carbon and nitrogen preferences the study identified, matters when you're mixing your own media or troubleshooting a culture that won't move. Treat all of it as benchmarks recorded under controlled conditions, not promises about your shelf, because your strain may sit at a slightly different point on the curve.
What Spawn Does Inside a Grow Bag
Spawn is to a grow bag what a sourdough starter is to a loaf. A small living mass spreads through something much bigger and sets the pace for everything that comes after. A starter carries active yeast into flour and water; colonized grain carries active mycelium into straw or sawdust.
A colonized grain bag is the visible half of that process, and the part you can judge before any money changes hands.
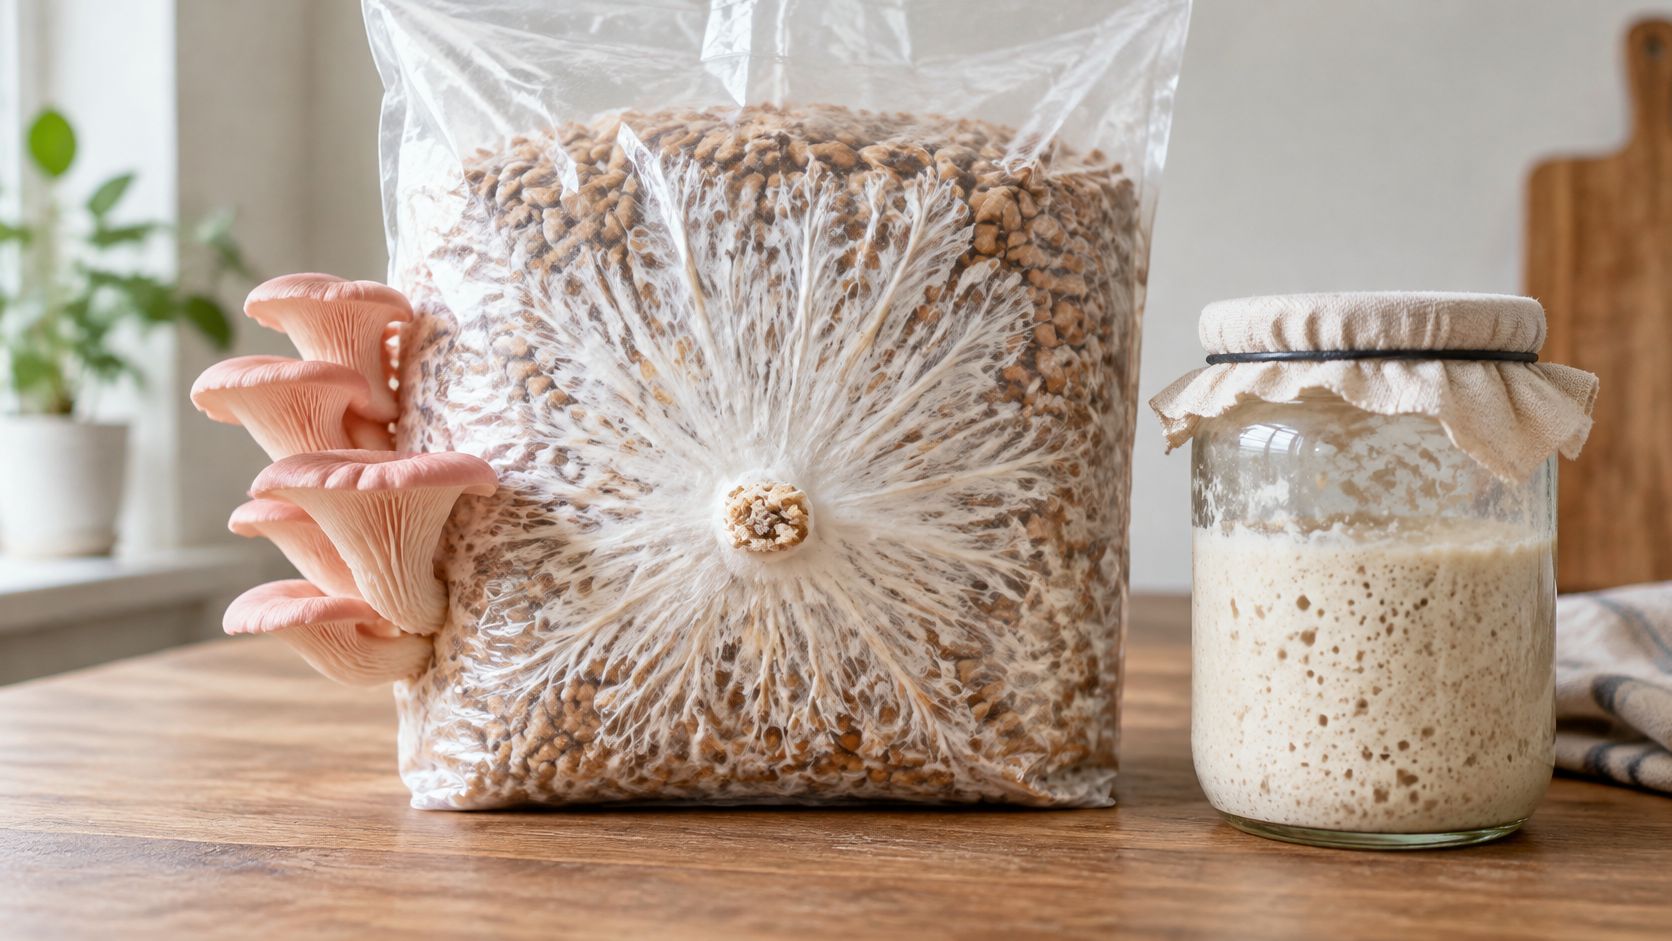
Every grain arrives coated in mycelium, which makes each one a separate starting point. Scatter spawn evenly through a bag and you get thousands of small colonies growing toward each other until the substrate knits into one white sheet. It works like lighting a room with many small candles instead of a single lamp: coverage comes faster and no corner stays dark for long. Clump the spawn in the middle and the mycelium must travel the full distance to the edges on its own. That distance costs days, and days are exactly the resource competing molds are waiting for.
What Biological Efficiency Actually Measures
Biological efficiency expresses fresh mushroom weight as a percentage of the dry substrate weight, which is why values above 100% show up so often in cultivation research. In one cultivation trial of Pleurotus djamor, paddy straw reached a biological efficiency of 120.07% with a reported yield of about 600.37 g (the IMS Kolkata cultivation paper). The figure clears 100% because mushrooms are mostly water pulled from the substrate and the humid air, not dry mass created from nothing.
Economic studies of oyster cultivation in India report real commercial potential for the crop, but no study figure transfers directly to a home bag. Strain, spawn vigor, substrate moisture, contamination control, and fruiting humidity all shift the result, so read any percentage as a report card on one specific system rather than a promise about yours.
The working rule: spawn sets the starting line; substrate and conditions set the finish.
How to Choose Healthy Spawn Before You Buy
A listing that says only "oyster mushroom spawn" tells you almost nothing useful. Different oyster species want different incubation temperatures, so a vague label can send you home with a culture whose needs you never planned for.
Species, spelled out. The label should name pink oyster or Pleurotus djamor. Without it, you can't tell whether the culture wants tropical warmth or the cooler conditions another oyster prefers.
The grain, named. In the 2024 West Bengal comparison published by BioResources, sorghum grains produced the fastest spawn of pink oyster mushroom (the BioResources cultural studies and yield attributes paper). Faster colonization means less time for a competitor to move in, so sorghum-based spawn is a strong default, and other grains are workable if the supplier tells you what they used.
The bag itself. Fully colonized, even white mycelium, no green, black, orange or red patches, no sour or foul smell, no pooled water or heavy condensation, and an intact seal. Any single failure is a reason to walk away.
A production date. Spawn doesn't keep forever, and the date tells you how much of its usable window is left. A bag with no date is a bag you can't schedule.
How it was made. Spawn prepared under sterile technique carries far less latent contamination than grain inoculated on an open bench, and you can't spot the difference in a product photo.
Ask those points as three questions, by email or at the counter, and keep them short enough that you'll use them.
What species and strain is this, and what is its production or lot date?
Which grain did you use, and how long ago was it fully colonized?
How was it stored and shipped, and was it prepared under sterile conditions?
When you're browsing mushroom spawn for sale, have those three questions written down before you open a product page, so a convincing description can't talk you out of them.
Storing Spawn Without Losing Viability
Spawn is a perishable living product, and its clock starts when the grain is colonized, not when it reaches your door. A study of P. djamor spawn recorded retained viability for roughly three months at 25°C and four months at 4°C, with refrigeration extending the usable window (the CREAM journal spawn storage study). Cold storage slows respiration and nutrient consumption, so the mycelium ages more slowly while it waits.
Storage condition | Usable window | Handling before use |
|---|---|---|
Room temperature, about 25°C | About 3 months | Use first and inspect the bag before inoculation |
Refrigerated, about 4°C | About 4 months | Warm to room temperature before shaking or opening |
Past the stated window | Treat as a sample, not a batch | Test regrowth on a small portion before committing substrate |
What Cold Storage Can't Do
Refrigeration slows aging. It doesn't sterilize a contaminated bag, and it doesn't reverse damage from a wet bag or a heat spike. A green patch that goes into the fridge comes out green, just slower.
Three habits keep a shelf organized:
Date every bag. Write the arrival date on the bag itself, because "sometime in March" is how usable spawn turns into waste.
Use room-temperature bags first. They're burning through their window fastest, so they go into substrate before anything refrigerated.
Warm before you shake. Let a cold bag sit sealed until it reaches room temperature. Shaking cold spawn stresses the mycelium and drives condensation inside the bag, which is the last thing you want near an inoculation point.
The Test That Settles It
Judge viability by regrowth, not by whiteness alone. Push a small sample into fresh substrate and watch for active expansion over the next several days, because a bag can look perfectly white and still hold latent contamination or mycelium too weak to run. Under optimized conditions the same storage study reported a mean yield of 410.6 ± 41.9 g per bag and biological efficiency of 91.6 ± 9.3%, a benchmark to compare against rather than a number your shelf has to hit.
How to Inoculate and Incubate Pink Oyster Spawn
Good inoculation comes down to warm spawn and clean hands. Cold spawn stalls, dirty spawn spreads contamination through an entire batch, and both problems cost less to prevent than to repair.
Two moves come first, before any substrate is opened.
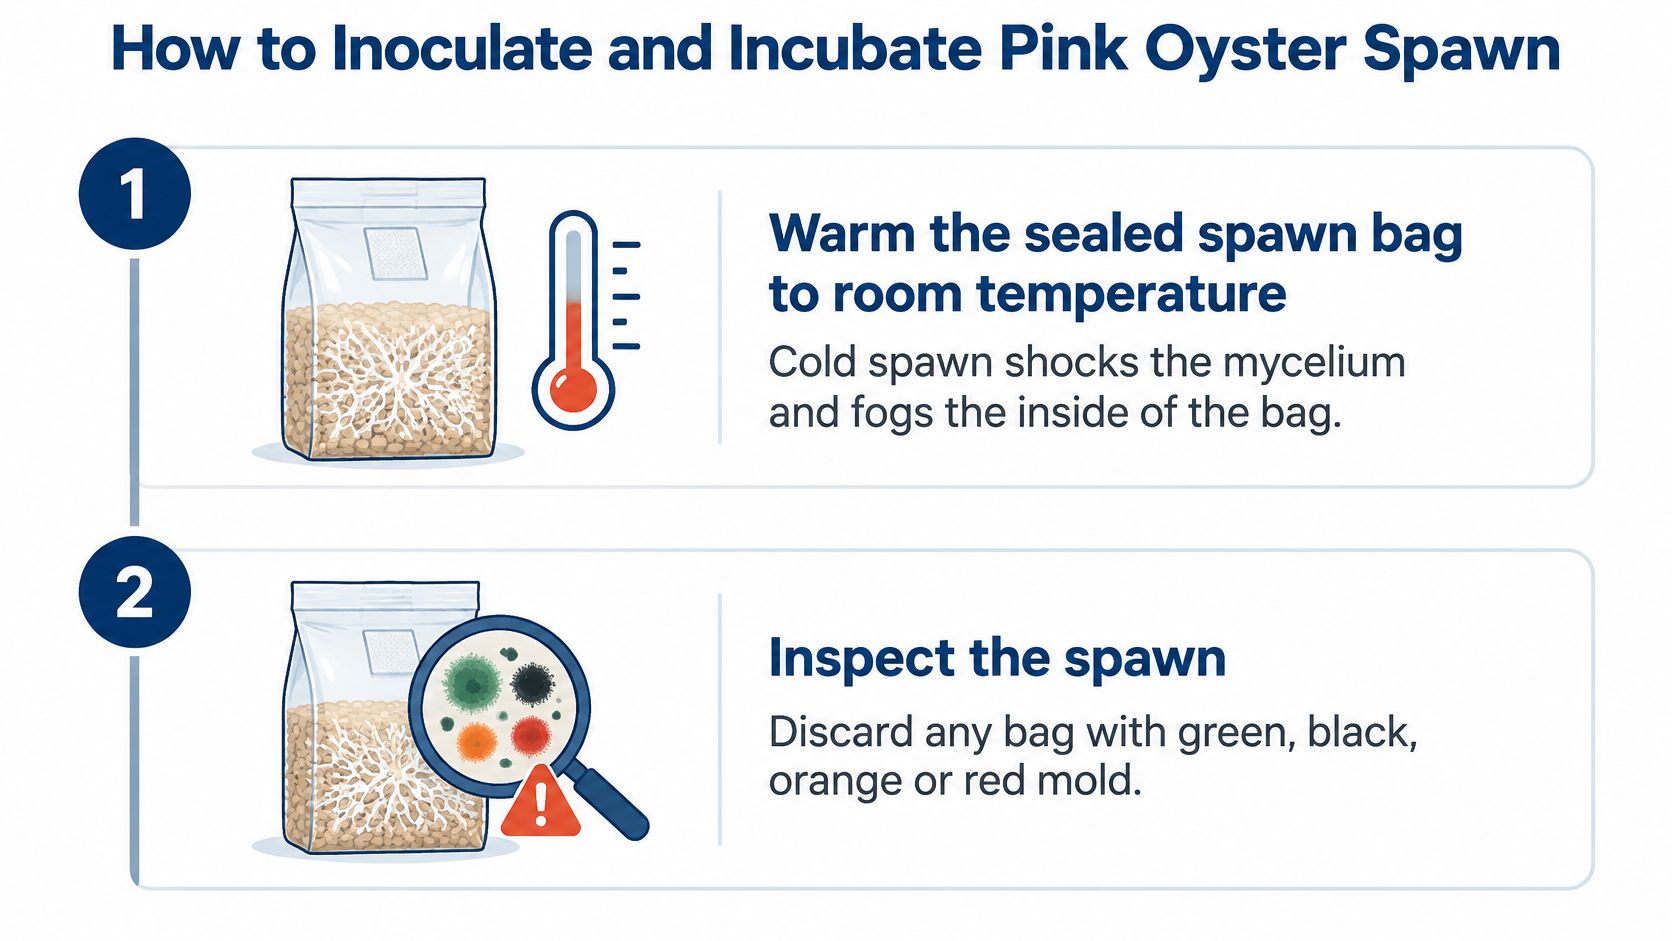
Warm the sealed bag to room temperature. Cold grain shocks the mycelium and fogs the inside of the bag with condensation. Leave it sealed on a counter for a few hours rather than parking it near a heater.
Inspect before you open it. Discard any bag with green, black, orange or red mold, a sour smell, or pooled liquid. Contamination that goes into a fresh batch multiplies instead of disappearing.
Clean your work area and hands with 70%–99% ISO alcohol. Most contamination enters at this stage, and alcohol is the cheap barrier that stops it. Our H2Shroom chamber gets the same 70%–99% isopropyl treatment between cycles, and the habits in basic sterile technique carry over to a kitchen table just as well.
Prepare the substrate and let it cool. Paddy straw or chopped wheat straw, soaked and drained to a workable moisture, then cooled to room temperature. Warm substrate cooks spawn before it can establish.
Add spawn at about 4% of the substrate's weight. Weigh the substrate dry, then weigh the spawn against it. Too little slows colonization and opens a window for mold, while a heavy dose spends spawn without buying much speed.
Mix evenly and break up clumps. Every grain should end up surrounded by substrate, because distribution is what turns scattered colonies into one advancing front.
Seal the container and incubate it warm and dark. Check the bag's own temperature with a probe, since actively colonizing grain runs warmer than the room and a hot shelf can push a bag past comfort.
Track white coverage, not the calendar. In a monotub, keep the tub at 70–80°F in a dark spot for 5–10 days until it's 80%–100% white.
Healthy colonization between days three and five looks steady and unremarkable: white spread moving outward from each grain, a neutral mushroom smell, no colored patches, and no water pooling at the bottom. Leave the bag alone until the white is nearly complete, because every shake and peek slows a process that rewards patience.
That timing matters more than most first-timers expect, so here is how the whole sequence runs end to end.
Spotting and Fixing Spawn Problems Early
The most common problem isn't mold. It's a bag that colonizes for three days and then seems to stall, usually because the incubation spot is too cool or the spawn sat clumped in one corner instead of spreading through the substrate. Both are fixable within a few days. Contamination isn't.
Symptom | Likely cause | Fix |
|---|---|---|
Colored mold (green, black, orange or red) | Contamination in spawn or substrate | Discard the bag and sanitize the area before any other batch |
Sour or foul smell | Bacterial contamination | Discard; don't try to salvage |
Slow or patchy colonization | Cold incubation or uneven spawn distribution | Move it somewhere warmer and remix to spread spawn evenly |
Pooled liquid or heavy condensation | Excess moisture or overheating | Check bag temperature and vent or adjust moisture next batch |
No regrowth after storage | Viability window passed or weak spawn | Discard the batch if a test sample also fails to regrow |
A slow bag and a contaminated bag look different if you check two things. Slow bags stay white and smell neutral, while contaminated bags show colored patches or an odor you notice before you see anything. Give a slow bag a few warmer days and a remix first, and only then start doubting the culture.
Published optima also move with strain and medium. One study found strain PN2 growing most vigorously on yeast-malt agar and Raper medium at 25°C (the Journal of Applied Biology study), which is a reminder that no single temperature number transfers perfectly between strains. A small side-by-side test at two incubation temperatures, on the same grain and moisture, tells you more about your own culture than any published figure.
When in doubt, discard. A bag of spawn costs a few dollars; a contaminated batch takes your substrate, your time, and the clean reputation of your growing space with it.
If a tub does go wrong after spawning, the troubleshooting steps in oyster mushroom growing problems cover the fruiting side of the same story.
Decide Whether Your Spawn Is Ready to Use
Every check in this article funnels into one decision, so make it deliberately rather than by mood.
Use it now. The bag is fully and evenly colonized, its date sits inside the window for its temperature history, no contamination signs show, and a regrowth sample is actively expanding. Warm it and inoculate.
Hold it in the refrigerator. The spawn is healthy but you can't inoculate within the next few weeks. Keep it sealed, dated, and warm it to room temperature before shaking or opening.
Discard it. Colored mold, a sour smell, pooled liquid, or a failed regrowth test means the batch leaves the house. Nothing you do to a contaminated bag makes it safe to open beside your other cultures.
For a first grow, hold any supplier to the same three questions about species, lot date, and storage history. Colorado Cultures carries spawn, substrates, and liquid culture recipes, and each of those products can be measured against those checks before you commit.
Log the date, incubation temperature, and result of every batch you run. Three lines in a notebook turn your next purchase from a guess into a comparison, and after a few cycles you'll know your own shelf's numbers better than any published table.
Pink oyster spawn rewards growers who plan the warm end of the process before the bag arrives, and Colorado Cultures stocks the sterilized grain, substrates, and all-in-one bags that make that plan easy to run at home in the Denver area. Whether you're buying your first pink oyster culture or restocking grain for a shelf of monotubs, you can pick up supplies in Lakewood or Englewood or order online with printable instructions and video walkthroughs alongside them. Visit Colorado Cultures to compare spawn, substrate, and grow kit options, and start your next batch with a culture you've already checked against every benchmark in this guide.
Comments