
Oyster Mushroom Growing Problems: Colorado Fixes
You check the hygrometer in your Denver basement and see a comfortable reading. The grow bag looks healthy, the room feels damp, and nothing seems obviously wrong. A few days later, the pins have stopped, the stems are slimy, or a green patch is spreading across the block.
That experience is common because oyster mushroom growing problems rarely come from one isolated mistake. In Colorado homes, a small grow tent or plastic cabinet can collect carbon dioxide, swing in temperature, hold water against the substrate, or let pests enter before the grower notices. The useful question isn't “What did I do wrong?” It's “Which environmental condition changed, and what evidence does the crop show?”
Why Oyster Mushroom Growing Problems Happen
A humidity gauge can tell you the air is moist, but it can't tell you whether the mushrooms are receiving enough fresh air. It also won't reveal a warm pocket near a heater, stagnant air inside a crowded tent, or fungus gnats entering through a gap around a zipper. That's why a setup can look correct on paper while the crop declines in front of you.
The first-time grower usually reacts by misting more, replacing the spawn, or throwing away every bag. Those responses often miss the chain reaction. Poor air exchange raises carbon dioxide, excess misting leaves wet surfaces, wet surfaces encourage bacterial and fungal problems, and stressed blocks become easier targets for pests.
Start with the room, not the bag
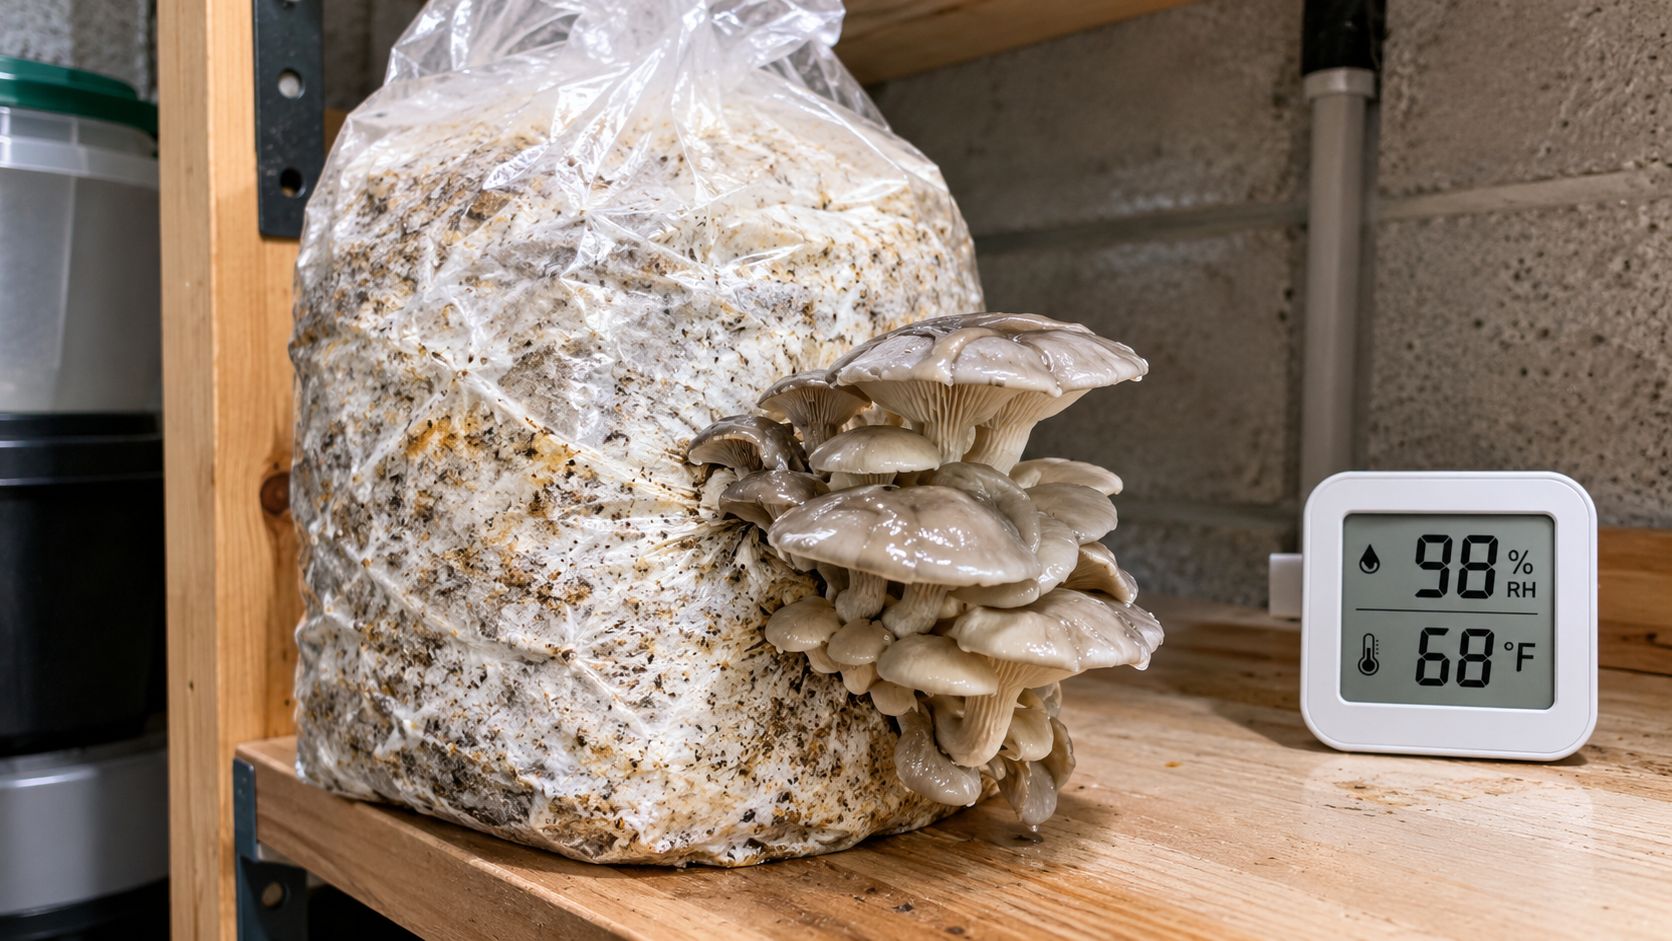
During fruiting, oyster mushrooms need a balance that small indoor spaces often disrupt. Cultivation guidance places stable fruiting conditions around 20–30°C and 75–85% relative humidity, while warm, overly wet rooms with poor aeration favor bacterial rot, green mold, and other fungal disease. The practical sequence is to verify sanitation first, then fresh-air exchange, then temperature and humidity with a calibrated meter. This cultivation troubleshooting guide connects stretched or deformed fruit bodies with insufficient light and ventilation, chemical vapors, and overheated substrate during spawn run.
Colorado adds its own complications. Heated homes can dry the room quickly, while a basement corner may stay cool and damp around the block. A garage can shift sharply between day and night. Plastic cabinets and compact tents magnify each change because there's little air volume to buffer it.
Before changing your substrate, inspect the growing area. Check whether air can enter and leave, whether condensation is pooling, whether the block sits near a heat source, and whether insects can reach the fruiting surface. For broader moisture and building-surface precautions, these expert tips to prevent mold provide useful context, although mushroom cultivation still requires its own sanitation and airflow controls.
Your substrate choice matters too, but it can't compensate for a poorly managed fruiting room. Compare the material, moisture level, and preparation method in this guide to the best oyster mushroom substrate, then troubleshoot the environment before blaming the block.
Diagnosing Contamination and Mold Issues
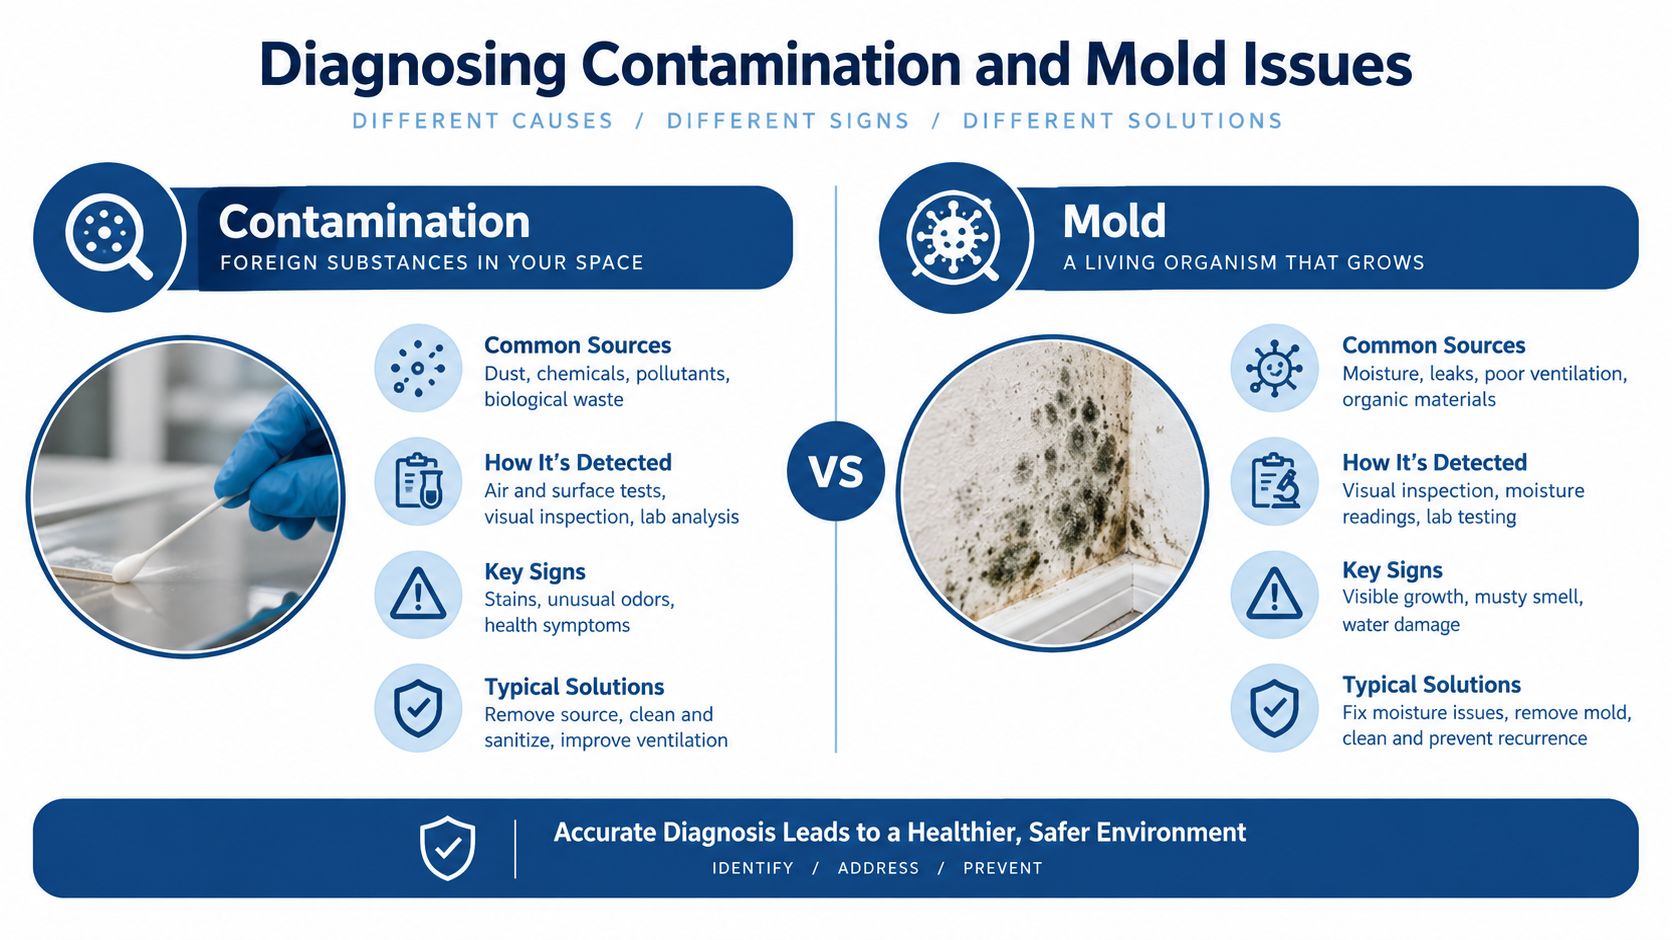
Green mold and bacterial blotch can both make a grow bag look ruined, but they don't point to the same failure. Green mold usually appears as olive-green or bright-green fuzz, often spreading across exposed substrate after a weak spawn run or inadequate pasteurization. Bacterial blotch looks wet and discolored, with slimy patches developing where water remains on the mushroom surface.
That distinction changes the response. Green mold indicates a contamination problem inside or around the substrate, so cutting away a visible patch rarely solves the underlying issue. Bacterial blotch is more closely associated with surface water, aggressive misting, poor drainage, and limited drying between moisture events.
Read the pattern before taking action
Contamination can become a production-level loss rather than a minor cosmetic defect. One cultivation study reported that up to 50% of Pleurotus ostreatus crops were contaminated by green fungi in a farmer's mushroom house in northeastern Thailand. The same body of field reporting described 84.4% nematode infestation in surveyed mushroom farms, with severe nematode pressure capable of causing total crop failure. These figures come from the cultivation report on microbial and nematode problems.
At home, isolate a suspicious bag from clean fruiting blocks. Don't open a contaminated bag beside healthy bags, and don't carry tools from the suspect area back to your inoculation or storage space without cleaning them. If green growth is expanding, the safest practical choice is usually to seal and remove the bag rather than trying to rescue it indoors.
Blotch requires a different correction. Stop spraying the mushroom bodies directly, improve drainage, and increase gentle air movement so surfaces can dry without desiccating the entire room. A separate report found bacterial blotch on only about 5–10% of fruiting bags, while identifying Trichoderma green mold as a distinct major threat. This contamination comparison supports treating water pooling and mold prevention as related but separate problems.
For visual reference, use mycelium contamination pictures to compare normal colonization with suspicious growth. A photo check is useful, but it shouldn't replace smell, texture, spread rate, and the condition of neighboring bags.
Identifying Pests and Insect Damage
Pests often leave a subtler trail than mold. You may see failed pins, hollow stems, damaged primordia, or caps with cavities before you ever see the insect itself. In a warm, humid fruiting room, a small fly population can build quickly, especially when the grow space sits near soil, houseplants, drains, or an open garage.
The major suspects include sciarid flies, phorid flies, mites, and springtails. A review of oyster mushroom pest pressure reports yield losses ranging from 17% to 46% in Pleurotus cultivation, and a mycology handbook identifies five kinds of flies and two types of mites as major oyster mushroom pests. The agricultural pest review also describes larvae feeding on mycelium, damaging primordia, and creating cavities in caps and stems.
Match the damage to the pest
Start with a flashlight and inspect the block, bag opening, shelf edges, and floor. Sticky traps won't catch every pest, but they can confirm flying insect activity and show whether numbers are rising.
Fungus gnats and sciarids: Look for tiny dark flies and larvae near moist substrate. Damage can include weak colonization, pinning failure, and feeding on mycelium.
Phorid flies: Watch for small, quick-moving flies around openings and damaged fruit. Their larvae can attack developing tissue and leave malformed or hollow areas.
Mites: Search slowly for tiny moving specks on the block, stems, or casing material. Mites can weaken mycelium and damage young growth.
Springtails: These small jumping insects favor wet areas and organic debris. Their presence often tells you the room stays persistently damp, even if the hygrometer reading looks acceptable.
Physical exclusion works better than spraying a fruiting room with an unapproved chemical. Keep bags closed until they're ready to fruit, repair torn plastic, fit screens over vents, remove spent blocks promptly, and keep the shelf area free of standing water and organic scraps. Place sticky traps outside the immediate fruiting surface, where they can monitor activity without touching the mushrooms.
Practical rule: If insects keep appearing, find the entry route first. Killing visible adults won't solve a gap, drain, plant, or contaminated bag that continues supplying them.
Season matters in Colorado, but the room matters more. A basement with damp floor edges creates a different risk from an upper-story apartment beside houseplants. The same inspection logic used in this guide to common pests in Northwest Indiana can help identify general insect patterns, but mushroom growers must connect those patterns to substrate moisture and fruit damage.
Fixing Humidity and Airflow Mistakes
Many growers see yellowing pins or dry caps and immediately add water. That can make the problem worse. Oyster mushrooms need moisture, but they also need moving fresh air. A wet surface in stagnant air is not a healthy fruiting environment.
Carbon dioxide is the hidden failure in many small tents. During spawn run, oyster mushrooms can tolerate carbon dioxide up to about 20,000 ppm, or 2%, but during cropping the target should be below 600 ppm. Some cultivation references use a practical ceiling of 800–1000 ppm to reduce long stems, small caps, and poor cluster shape. These stage-specific targets are outlined in the oyster mushroom training manual.
Read the mushrooms as an airflow gauge
Long stems and undersized caps usually indicate that the crop is reaching for better air, not that it needs more light. Fuzzy feet also point toward inadequate fresh-air exchange. If pins stall while the humidity gauge looks fine, check gas movement and temperature before increasing misting.
Blue oyster kits have a narrower comfort zone than many beginners expect. They fruit best around 10–18°C, can stall above 24°C, and show fuzzy feet when fresh-air exchange is too low, according to this blue oyster growing guide. In a Colorado home, a tent near a furnace, sunny window, or warm appliance can drift outside that range even when the room itself feels comfortable.
Use this order when a flush looks stretched, wet, or stalled:
Open the fresh-air path. Increase passive exchange or use a gentle fan arrangement that doesn't blast the fruiting surface.
Reduce sealed humidity buildup. Remove trapped condensation and make sure the tent isn't functioning like a closed bag around the open block.
Measure temperature at block height. A room reading can miss a hot shelf or cold basement corner.
Adjust misting last. Add moisture only after air exchange and temperature are stable.
Watch the next growth response. New pins and cap development tell you more than one isolated hygrometer reading.
Don't confuse airflow with aggressive drying. Strong direct wind can shrivel caps, while no exchange allows carbon dioxide and moisture to accumulate. If you're choosing equipment, compare a humidifier's output and placement with the guidance in this mushroom-growing humidifier guide, then keep the humidifier from soaking the mushrooms directly.
Building a Daily Grow Room Checklist
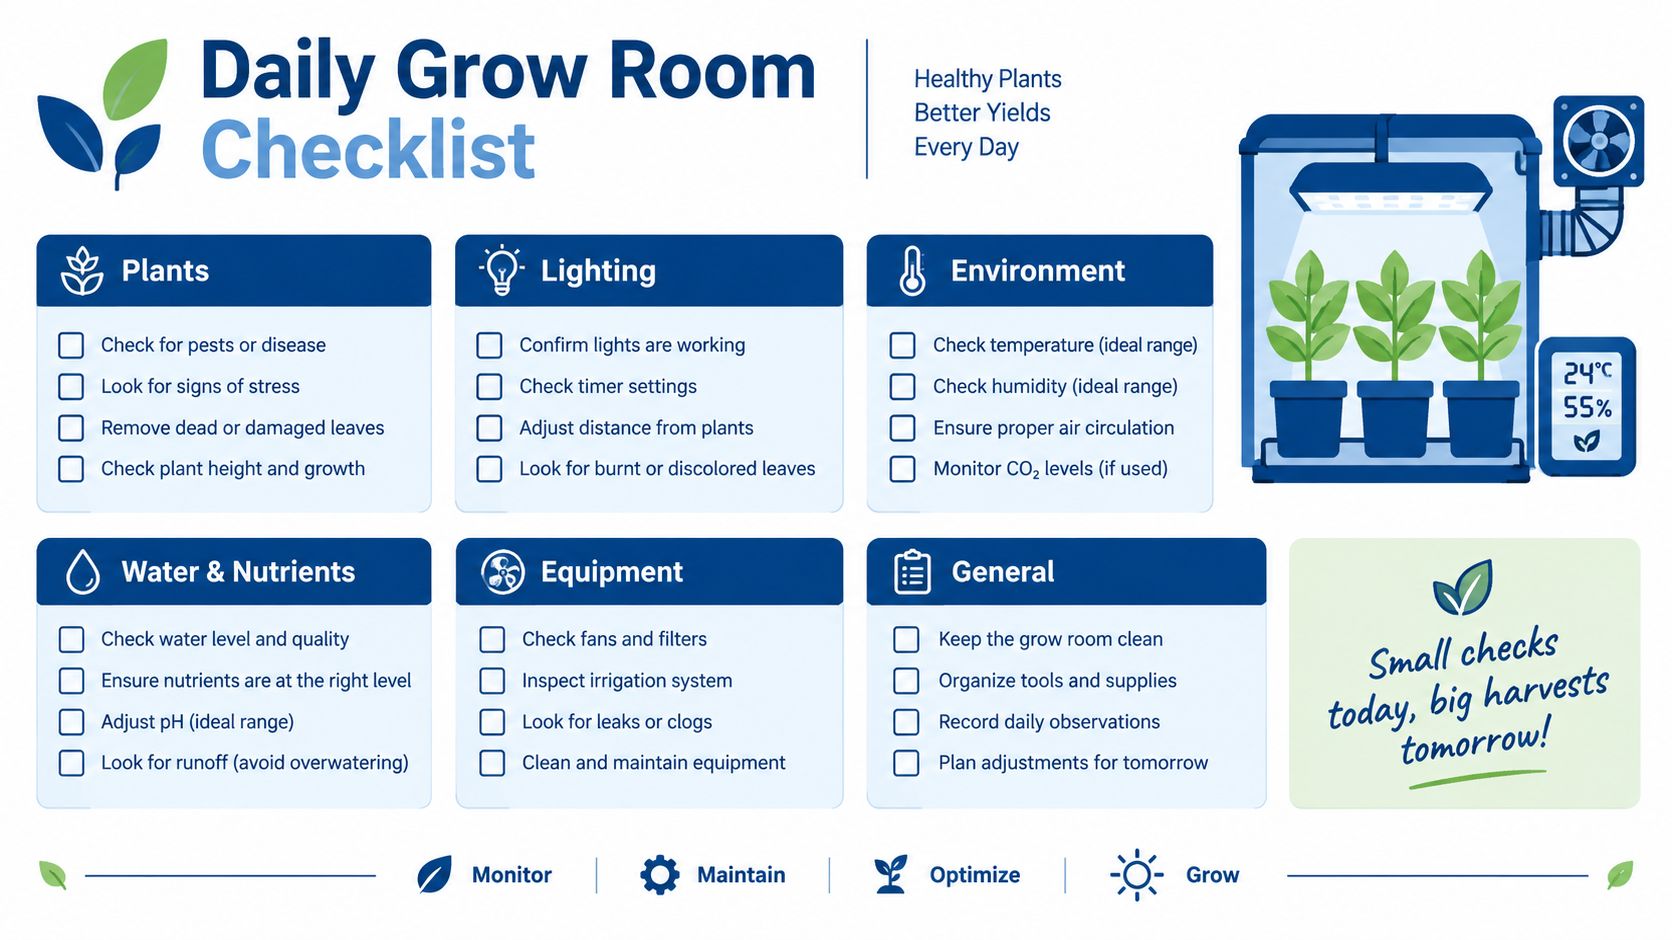
A reliable grow room doesn't depend on memory. It depends on short observations recorded consistently, so you can identify drift before the crop shows irreversible damage. A notebook beside the shelf works as well as a spreadsheet. Record the date, room condition, temperature, humidity, fresh-air adjustment, and anything unusual about the bags.
Morning inspection
Start without touching the mushrooms. Look for condensation, pooled water, new green growth, insects on the shelf, and changes in pin shape. Check whether caps are developing normally or whether stems are stretching while caps remain small.
Then inspect the equipment. Confirm that the hygrometer and thermometer are positioned near the fruiting blocks, not against a wall or directly in the humidifier plume. Check that vents aren't blocked by plastic, shelving, or a pile of supplies.
Use a simple daily record:
Environment: Note temperature and relative humidity at the growing shelf.
Air exchange: Record whether vents are open and whether the room feels stale.
Crop condition: Mark new pins, elongated stems, wet spots, dry edges, or discoloration.
Pest evidence: Check traps and inspect bag openings for flies, mites, or springtails.
Water control: Remove standing water and confirm that mist isn't collecting on caps.
Evening check
Colorado homes can change after heating turns on or outdoor temperatures fall. Take a second quick look for condensation and temperature drift, especially if the grow room is in a garage, basement, or enclosed cabinet. You don't need to make a dramatic adjustment every evening. You do need to notice whether the room repeatedly crosses the same environmental boundary.
Keep the log boring and specific. “Mushrooms looked bad” won't help tomorrow. “Long stems, small caps, wet shelf, vents closed” gives you a testable correction.
If a block shows green mold, isolate it before the next inspection. If a block shows slimy spots, stop direct misting and improve drying airflow. If pests appear, check the room perimeter, nearby plants, drains, and discarded substrate instead of treating only the visible insects. A broader pest management checklist for dining venues offers useful exclusion habits that also apply to a home grow area, particularly around cleanliness, entry points, and waste removal.
The point isn't to create a laboratory. It's to build a repeatable response. When your notes show rising temperature, stale air, and stretched stems together, you have a ventilation problem. When you see pooled water followed by slimy spots, you have a moisture-management problem. That diagnosis is far more useful than adding humidity and hoping.
If you're dealing with recurring oyster mushroom growing problems, Colorado Cultures offers grow kits, sterilized grain bags, substrates, all-in-one bags, and practical cultivation tools for home growers. Visit Colorado Cultures to choose supplies suited to your setup and get guidance for building a cleaner, better-ventilated Colorado grow.
Comments