
Basic Sterile Technique for Mushroom Cultivation
You've inoculated a row of grain jars, cleaned the counter, and followed the instructions as carefully as you could. At first, the white mycelium looks promising. Then a green patch appears in one jar, followed by a sour smell in another, and suddenly you're wondering whether the syringe was faulty or whether mushroom cultivation simply demands a laboratory.
Basic sterile technique is less mysterious than that. It's a ranked set of controls that reduces the chances of unwanted organisms reaching your culture. The most useful question isn't “Did I disinfect everything?” It's “At which point did I give contamination an opportunity to enter?” Once you learn to see the workflow that way, your setup becomes calmer, more repeatable, and easier to troubleshoot.
When Clean Work Saves Your Mushrooms
A beginner often loses a batch in a way that feels random. Four jars colonize quickly, while the remaining jars develop colored patches, cloudy areas, or unpleasant odors. The natural reaction is to blame the culture source, the grain, or the sterilization equipment.
Those may be possible causes, but contamination usually has a route. A jar may have been opened beside a running fan. A sterile tool may have touched a glove, paper towel, or counter after heating. A lid may have stayed open while the grower searched for supplies. The container may have been closed only after the operator had moved an arm, spoken over the opening, or reached across the exposed material.
The useful question: Don't ask whether the room felt clean. Ask which surfaces, movements, and open containers were connected during the transfer.
This distinction matters because antisepsis and asepsis aren't the same thing. Antisepsis reduces or destroys microorganisms on living tissue or surfaces, while asepsis aims to prevent microorganisms from entering a process in the first place. The historical work of Ignaz Semmelweis showed how powerful a consistent prevention step could be. In 1847, he required attendants at Vienna General Hospital to disinfect their hands with chlorinated lime before examining obstetric patients. Recorded mortality from puerperal fever in the hospital's First Clinic fell from 11.4% in 1846 to 1.3% in 1848, an approximately 89% relative reduction (historical review of asepsis and antisepsis).
Mushroom cultivation isn't obstetric care, but the lesson transfers directly. Contamination control begins before you handle the culture, substrate, tool, or container. Clean hands, a prepared work area, fewer unnecessary movements, and prompt closure often matter more than buying a more advanced piece of equipment.
A useful contamination control strategy for mushroom cultivation treats each action as part of one connected chain. Your goal isn't to create a magical contamination-proof room. Your goal is to remove avoidable opportunities, then notice where a breach could have happened when a culture fails.
The Five Core Controls of Basic Sterile Technique
A transfer can fail because a clean glove touched a phone, a lid stayed open too long, or a tool carried material from one culture to another. Basic sterile technique prevents these small breaks from lining up. It works as a set of controls, with the highest priority on anything that can directly reach an exposed culture.
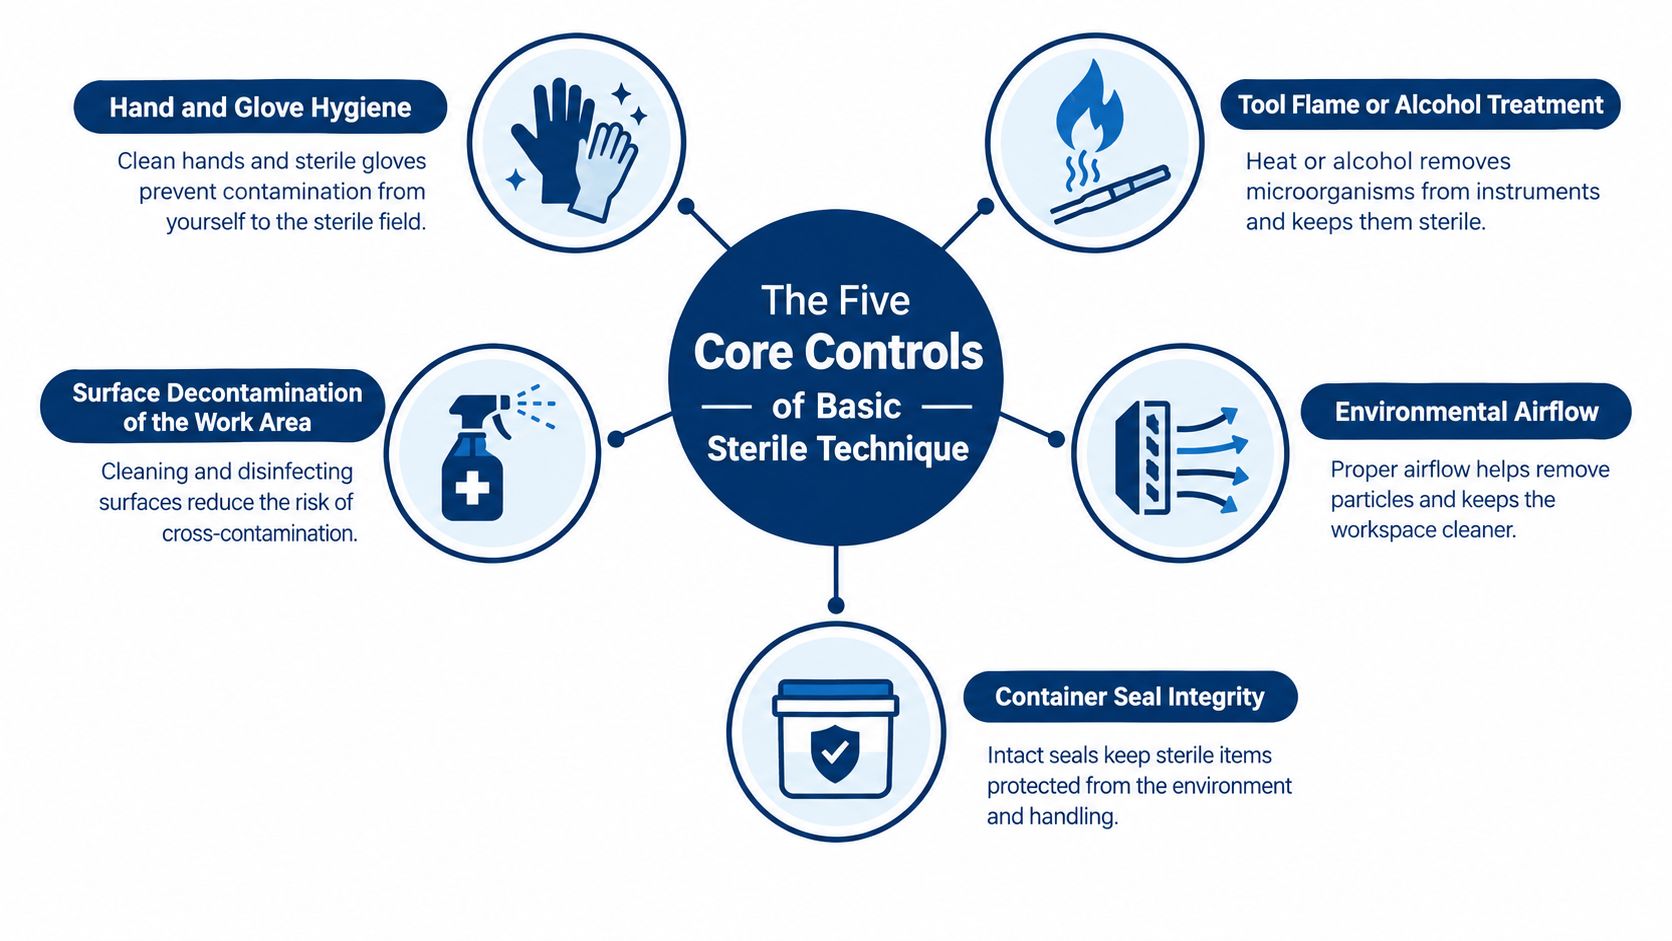
Start with hands and surfaces
Hand hygiene comes first. Wash with soap and running water for at least 20 seconds when your hands are visibly soiled. Cover the palms, backs, finger webs, fingertips, thumbs, and wrists, then dry them completely. Before aseptic handling, apply an alcohol hand rub and work it across every hand surface until dry. CDC guidance specifies vigorous rubbing for at least 15 seconds (CDC disinfection and sterilization guidance).
Gloves add a barrier, but they do not make contaminated behavior safe. A glove that touches a phone, faucet, door handle, or hair can carry that contamination straight to a sterile item.
Prepare the work surface before opening anything. Remove clutter, apply a disinfectant whose label states the required wet contact time, and leave the surface wet for that full period. Some hospital disinfectants require at least 1 minute, while some EPA-registered products require 1 to 3 minutes of contact time. Wiping immediately reduces effectiveness. Follow the product label instead of choosing a preferred number of seconds.
Protect tools, air, and openings
Tools need a reliable treatment step between cultures. Flame a metal tool when the equipment and material allow it, or use a validated disinfecting method suited to the tool and procedure. A heated tool must cool before it touches living culture. After treatment, keep it away from untreated surfaces.
Air control mostly means controlling movement. Work in a low-traffic area, close each container as soon as the necessary action is complete, and keep sterile openings turned away from the work surface. Do not pass hands or sleeves over exposed media. Fans, open windows, and unnecessary movement can create drafts that carry particles toward the work.
Your own behavior is another control. Tie back hair, secure loose sleeves, keep supplies within reach, and avoid talking over an open container. A practical guide to sterilizing cultivation equipment can help you plan the tool stage before opening a bag, jar, or plate.
These controls reinforce one another. If a glove brushes a nearby object, careful container handling may keep the glove away from the culture. If a lid remains open longer than planned, clean tools and a quiet workspace still reduce exposure. The goal is risk reduction through workflow, not a performance of laboratory ritual.
Matching Sterile Effort to the Task at Hand
Not every cultivation task deserves the same level of preparation. A sealed container with a self-healing injection port presents a different exposure risk from an open agar transfer. Treating both activities as identical either wastes effort or creates dangerous overconfidence.
Task Tier | Example Activity | Required Controls | Common Mistake |
|---|---|---|---|
Tier 1 | Inoculating a sealed grain bag through a self-healing port | Clean hands, prepared surface, sanitized access point, prompt closure and labeling | Handling the bag after touching household objects |
Tier 2 | Agar-to-grain or grain-to-grain transfer | All five controls, controlled airflow, treated tools between cultures, minimal opening time | Opening several containers at once |
Tier 3 | Making agar plates or transferring into open media | Strict control of hands, tools, surface, airflow, openings, and personal movement | Using a casual kitchen workflow for an exposed medium |
Tier 1 work is comparatively contained. You still need clean hands and a prepared surface, but the sterile interior remains protected when the port and container seal are handled correctly. A pre-sterilized bag can simplify this stage because you're managing the access point rather than opening the entire vessel.
Tier 2 demands more discipline. A transfer exposes both the source and destination, so every extra movement creates another opportunity. A still-air box can reduce air movement, while a flow hood provides a different type of controlled work area. Learn what a flow hood does before treating it as a substitute for hand hygiene or careful container handling in this explanation of flow hoods.
Tier 3 is where shortcuts become especially costly. When media is open, the container opening, tool, operator, and surrounding air all become part of the contamination pathway. Wearing gloves won't compensate for reaching across an exposed plate, and alcohol on a surface won't compensate for leaving the lid open while you prepare the next step.
Match the barrier to the exposure: The more of the sterile interior you expose, the more carefully you must control movement, tools, air, and time.
The right question is not “How much equipment do experienced growers use?” It's “What is exposed during my task, and which control prevents contact at that point?”
Setting Up a Realistic Home Workspace
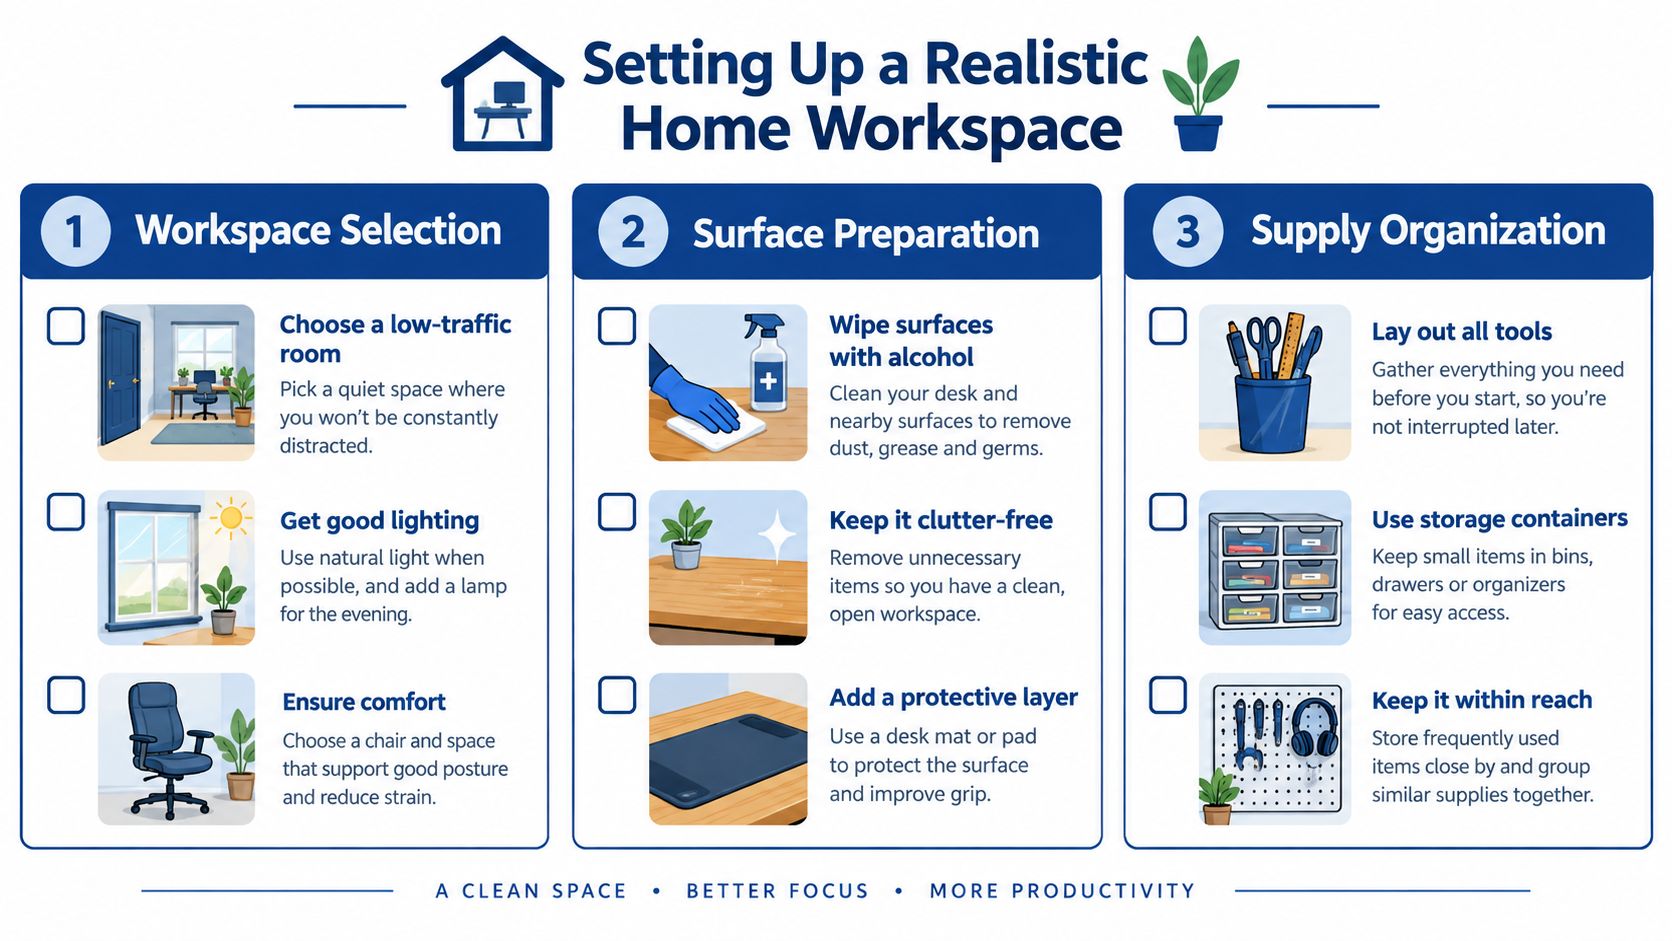
A home workspace doesn't need to look like a hospital room. It does need to be predictable. Choose a low-traffic room where you can pause interruptions, such as a kitchen counter during a quiet period, a clear bedroom table, or another smooth area away from household activity.
Before arranging supplies, remove clutter, loose fabric, food, and objects you won't use. Close windows and turn off fans or other sources of moving air. Wipe the work surface with a suitable disinfectant and respect the product's labeled wet contact time. Alcohol can be useful for appropriate surfaces, but it isn't a replacement for removing visible soil or for following the label of the product you're using.
Build a touchpoint map
The sink area may look clean while still containing frequently touched surfaces. A 2025 study found significant microbial contamination in handwashing infrastructure, including tap-water delivery handles, which means the faucet area shouldn't automatically be treated as a clean zone (study of contamination in handwashing infrastructure).
Before starting, either clean or avoid the items you may otherwise touch mid-process:
Faucet handles: Finish washing before touching prepared supplies, or use a deliberate way to operate the faucet without recontaminating clean hands.
Door handles: Close doors and gather everything before beginning so you don't need to leave the workspace.
Phone screens: Put the phone away, or disinfect it using a method suitable for the device.
Lighters and spray bottles: Position them before hand hygiene so you aren't reaching for them during an open transfer.
Jewelry and sleeves: Remove or secure them because they can brush gloves, lids, and openings.
A still-air box, made from a clear plastic tote with arm openings, can help with transfers by reducing air movement. It doesn't sterilize the workspace, so you still need clean surfaces, treated tools, controlled movements, and closed containers.
If airborne particles are a concern in a shared home, you can research options such as buying a mold air purifier while remembering that air cleaning doesn't replace aseptic handling.
Set out the tools before you begin: alcohol suitable for the surfaces and procedure, fresh gloves, a scalpel or other approved tool, a safe flame source where appropriate, sterile water if your protocol requires it, labels, and a clean trash bag for waste. A tidy layout prevents the most common mid-transfer mistake, reaching across an open container to find something.
Common Mistakes During Transfers and How to Fix Them
A transfer can fail in a few seconds, often while the grower is reaching for a tool or deciding what to do next. These mistakes are useful to study because each one crosses a particular clean boundary. Fix the highest-risk boundary first: protect unopened material, then control transfers, and apply the strictest handling to media that must stay open.
Common Mistake | Fix | Warning Sign |
|---|---|---|
Working beside drafts or household traffic | Choose a quiet room and use a still-air box when appropriate | Sleeves, hair, or tissue moving near open material |
Heating a scalpel, then placing it on an untreated surface | Heat it, let it cool safely, and transfer without setting it down | The tool touches a towel, counter, or glove |
Opening a bag or plate widely | Make the smallest opening that allows the task, then close it promptly | The interior stays exposed while you prepare |
Breathing or talking over open media | Angle your face away and pause conversation during the transfer | Speaking directly above the opening |
Reusing a loop without proper treatment | Flame a reusable metal loop until appropriately sterilized, then cool it before contact | Residue remains on the loop or the next culture changes |
Skipping hand or glove hygiene between stages | Re-clean hands or replace gloves after touching non-sterile items | You move from a household object or waste to sterile supplies |
Ignoring suspicious growth | Isolate the container and keep it away from clean cultures | Discoloration, off-odors, wet bacterial slime, or unusually slow growth |
Tool handling deserves close attention because a clean-looking instrument may still carry material from the previous culture. A heated tool also becomes unsafe to use if it touches an untreated surface. Treat it between relevant transfers, let it cool in a protected position, and avoid creating an extra contact point while you wait.
Container handling follows the same hierarchy. An unopened bag needs protection from unnecessary handling. A transfer requires controlled openings and a prepared next movement. Open media needs the shortest possible exposure. Keep lids and sterile openings away from the work surface, and do not pass hands or sleeves over them. If a mistake involves a disinfected surface, remember that the result depends on applying the product correctly and allowing the needed contact time, not on whether the surface merely looks clean. This practical distinction is consistent with CDC guidance on disinfection and sterilization.
A suspicious unit changes the task. Do not open it beside healthy cultures. Isolate it, record the odor, appearance, and growth pattern, then discard it according to local rules. An uninoculated control container from each preparation batch can help separate a sterilization problem from contamination introduced during transfer. That record turns a vague failure into a traceable process problem.
Bad Technique Versus Good Technique in Practice
Two growers can start with the same liquid culture and the same type of receiving medium, yet create very different conditions for success.
The first works on an open kitchen counter beside a running sink. They flame a scalpel once, place it on a paper towel, and keep a dish open while chatting and fanning the lid. The receiving medium later develops wet, discolored growth and an unpleasant sweet or sour odor. The culture source may have been sound, but the workflow connected the open medium to several uncontrolled touchpoints and air movements.
The second grower prepares the area before opening anything. They work in a wiped still-air box, keep the source and receiving container positioned for a short transfer, treat the tool between cultures, and open the lid only as much as needed. They avoid talking over the work, close the container as soon as contact is complete, and label it before moving on.
The difference isn't mystical. The second workflow limits the number of opportunities for organisms to reach the medium. It also makes a failure easier to investigate because the grower knows which tools, surfaces, and containers were involved.
Learn to inspect cultures using several cues rather than color alone:
Color: Healthy growth should match the expected appearance of the species and medium. Unusual green, black, orange, or strongly contrasting patches deserve isolation.
Texture: Wet slime, unusually thin growth, or a spreading film can indicate contamination rather than ordinary mycelium.
Smell: Sour, sweet, or otherwise unexpected odors are warning signs. Don't repeatedly open a suspect container to check it.
Growth rate: Unusually slow or irregular growth can point to a problem with the culture, substrate, conditions, or handling.
A clean result doesn't prove that every organism was excluded. It shows that your process gave the intended culture a better opportunity to establish itself than its competitors.
Putting It All Together With a Final Checklist
Use this checklist as a practical pause point before every transfer. It's short enough to keep beside the workspace, but each item protects a different part of the process.
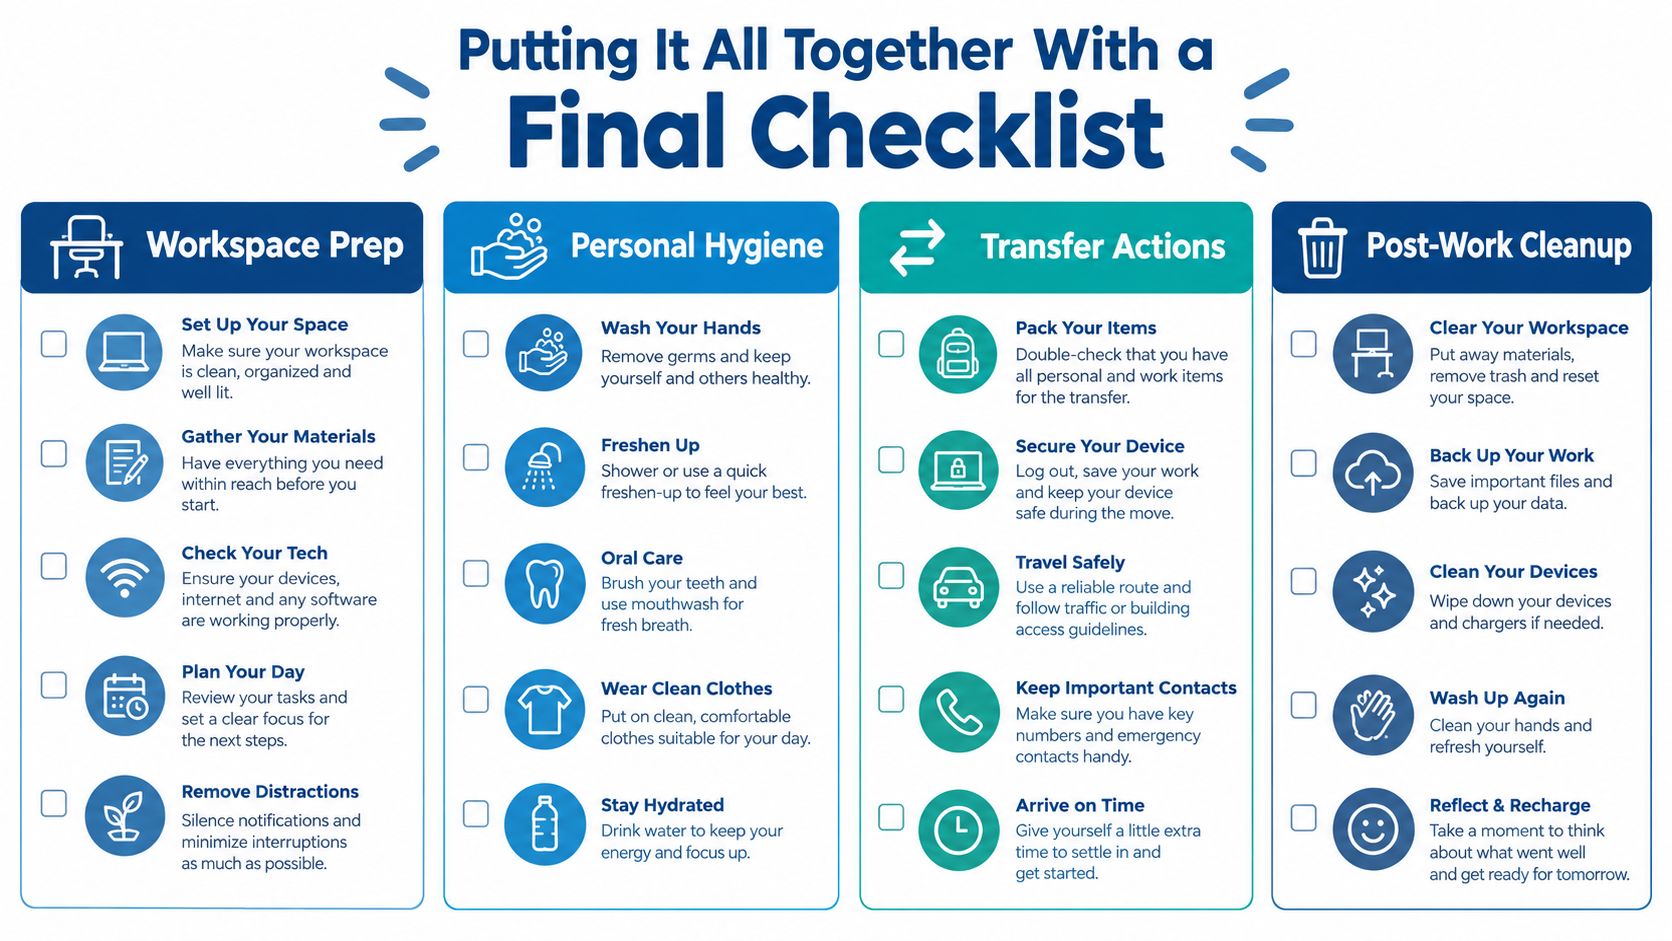
Workspace preparation
Choose a low-traffic room: Fewer interruptions mean fewer doors, objects, and air movements to manage.
Remove clutter and fabric: Smooth, clear surfaces are easier to disinfect and inspect.
Prepare every supply first: You won't need to reach across an open container.
Map household touchpoints: Deal with phones, faucets, handles, jewelry, and spray bottles before hand hygiene.
Personal hygiene
Wash visibly dirty hands: Use soap and running water for at least 20 seconds, following the hand coverage described in CDC hand-hygiene guidance.
Dry completely, then use hand rub: Rub every surface until dry before aseptic handling.
Use fresh or properly managed gloves: Gloves are barriers only while they remain uncontaminated.
Secure hair and sleeves: Keep clothing and hair away from openings and tools.
Transfer actions
Treat tools between cultures: Don't let a sterilized tool touch an untreated surface.
Open the smallest possible area: Keep lids and ports protected, then close them promptly.
Minimize talking and movement: Your behavior is part of environmental control.
Label immediately: Record the batch, sterilization cycle, inoculation date, and culture source.
Include an uninoculated control when preparing a batch: Growth in that control can point toward sterilization or handling rather than the intended culture.
Post-work cleanup
Separate suspicious units: Keep discoloration, off-odors, slime, or abnormal growth away from clean cultures.
Bag waste before leaving the workspace: Don't carry contaminated materials through the home uncovered.
Clean tools according to their material and protocol: Protect the next session from residue and carryover.
Record the outcome: Notes turn a disappointing result into process-control information.
Mushroom cultivation laws differ by region. Use spore and culture sources only where lawful, choose reputable suppliers, and follow local rules for possession, cultivation, and disposal. For equipment, supplies, printable sterile-work checklists, and beginner cultivation courses, Colorado Cultures provides resources for people building practical mycology skills.
Colorado Cultures offers sterilized grain bags, substrates, all-in-one grow bags, grow kits, tools, and educational classes that support careful handling from setup through inoculation. Visit Colorado Cultures to find supplies and learning resources that can help you practice basic sterile technique with a more consistent workflow.
Comments