
Oyster Mushroom Substrate Recipe That Actually Fruits
You've probably got a bale of straw in the garage, a bag of pellets or sawdust in the corner, and a fresh bag of spawn on the counter. That's where most oyster growers start. The usual mistake is thinking the spawn is the hard part and the substrate is just filler.
It isn't.
With oysters, the substrate recipe decides whether the bag runs clean, stalls wet, or fruits hard. Good spawn helps. A dialed-in substrate recipe does the heavy lifting. If the material holds moisture well, keeps enough air space, and matches your cleanup method, oysters move fast. If it compacts, sours, or carries too much contamination load for your setup, even good spawn can't save the run.
That's why a useful oyster mushroom substrate recipe isn't a single magic formula. It's a match between your local waste stream, your prep tools, and how cleanly you can handle the bag after heat treatment.
Why Your Oyster Mushroom Substrate Recipe Matters More Than Spawn
A first grow usually fails in a very ordinary way. The grower buys healthy grain spawn, mixes it into whatever plant waste seems close enough, adds too much water, then wonders why the bag smells off a week later. Another grower uses simpler material, drains it properly, keeps the bag airy, and gets a clean white block.
Same species. Similar spawn. Different substrate decisions.
Oysters forgive a lot, but not everything
Pleurotus is more flexible than many gourmet species. That's one reason beginners love it. But “forgiving” gets misunderstood. It doesn't mean every substrate performs the same, and it definitely doesn't mean every wet bag will fruit.
What matters most is the combination of three things:
Structure: The substrate needs enough texture to avoid packing into an airless mass.
Moisture behavior: It has to hold water without turning swampy.
Nutrition level: It needs enough food for strong fruiting, but not so much rich supplement that contamination outruns the mycelium.
If one of those is off, the whole bag suffers. I've seen beginners blame weak spawn when the issue was a substrate that stayed too dense and too wet.
Practical rule: If the substrate is wrong, the spawn spends its energy surviving instead of colonizing.
The recipe has to fit your equipment
This is the part most generic guides skip. A straw recipe that works in a stockpot and mesh bag doesn't behave like a supplemented sawdust bag that really wants sterile handling. A garage grower with a simple hot-water setup should make different choices than someone running pressure sterilized blocks.
That's also why it helps to understand your spawn format before you mix your substrate. If you need a refresher on clean inoculation material, this grain spawn guide from Colorado Cultures is a solid companion read.
Local waste usually beats imported dogma
In practice, the best oyster mushroom substrate recipe is often built from what you can get consistently and cheaply nearby. In Denver, that might mean straw is easy, clean enough, and worth building around. Somewhere else, corncob, bagasse, cotton waste, or another agricultural residue may be the obvious base.
That local approach matters because oyster performance can swing sharply based on feedstock. A substrate isn't “good” because it's fashionable. It's good when it fruits reliably in your actual setup.
So don't start by asking, “What's the best substrate?” Start by asking, “What can I source consistently, hydrate correctly, and heat treat with the tools I already own?” That question leads to better bags almost every time.
Choosing Your Base Material and When to Supplement
You can see this decision play out before the first bag is sealed. One grower has clean chopped straw, a drum for hot-water pasteurization, and decent airflow in the grow space. Another has fine sawdust, a pressure cooker, and a habit of pushing bran too high. The first grow usually colonizes clean. The second can produce heavier blocks, but only if the prep and sterile handling are tighter.
That is why the base material has to match your local waste stream and your equipment. A good oyster recipe is the one you can source every month, hydrate evenly, and heat treat the same way every time.
Straw is still the safest starting point
Straw keeps showing up in oyster production for practical reasons. It is cheap in many regions, easy to chop, easy to wet, and it leaves enough air space for fast colonization. Comparative work on lignocellulosic byproducts also found strong performance from straw-based substrates, including wheat straw and paddy straw, in this comparative substrate study.
For a Denver-style small grow with basic pasteurization gear, straw is usually the easiest way to get consistent results. It forgives small mistakes better than fine woody mixes do.
Sawdust works, but it asks more from your process
Sawdust can fruit oysters well, especially if you want denser blocks and are already set up for sterilization. It also changes the failure points. Fine particles pack tighter, wet spots linger longer, and supplements become much riskier if your sterile workflow is sloppy.
I use sawdust mixes when the grower has the right tools for them. That usually means a pressure sterilization setup, filter patch bags, and a clean inoculation routine. If you are still comparing common base options, this guide to mushroom substrate materials gives a useful overview of what each material does well.
Local residues often beat the default recipe
The best base is often the agricultural waste you can get clean and cheap near you. Research on Pleurotus substrates found excellent results from corncob and sugarcane bagasse, with a mixed bagasse and corncob formula also performing well for biological efficiency and mushroom quality in this Pleurotus substrate study.
That lines up with what growers see in practice. A local residue that has good structure and decent water handling will usually beat an imported “ideal” material that arrives inconsistent, moldy, or overpriced.
Use the material that fits your area. Then tune the process around it.
Base Substrate Performance Comparison
Substrate Type | Yield Example | Best Use Case |
|---|---|---|
Wheat straw | 694.38 g/kg straw | First-time growers using pasteurization |
Paddy straw | 619.72 g/kg | Regions where paddy straw is abundant |
Maize stalk and leaves | 425.30 g/kg | Farm waste repurposing where maize residue is easy to source |
Rice straw | 151.8 g in one comparative trial | Low-cost local option when processed well |
Fresh sawdust | 13.0 g in one comparative trial | Usually poor choice unless the system is dialed in |
Cotton-cake substrate | 270.60 g/bag | Higher-output residue option where available |
Supplement only when your heat treatment can support it
Supplementation is where a lot of home growers get into trouble. Bran, spent brewery grains, and other nitrogen-rich additives can push yield up, but they also feed bacteria and molds fast if the substrate is only lightly pasteurized or the inoculation area is dirty.
A review of oyster substrate trials noted strong results from wheat straw supplemented with spent brewery grains or wheat bran at 70/30%, while some richer maize-based formulas in related work ran into severe contamination problems, including reports as high as 75%, in this supplementation and contamination research summary.
The trade-off is simple.
Use plain or lightly supplemented straw if you are hot-water pasteurizing.
Use supplemented sawdust or richer mixes if you can sterilize properly and inoculate cleanly.
Keep supplements conservative at first until you know how your room, bags, and spawn behave.
Richer substrate can produce better blocks. It can also produce a pile of green bags if your process is not ready for it.
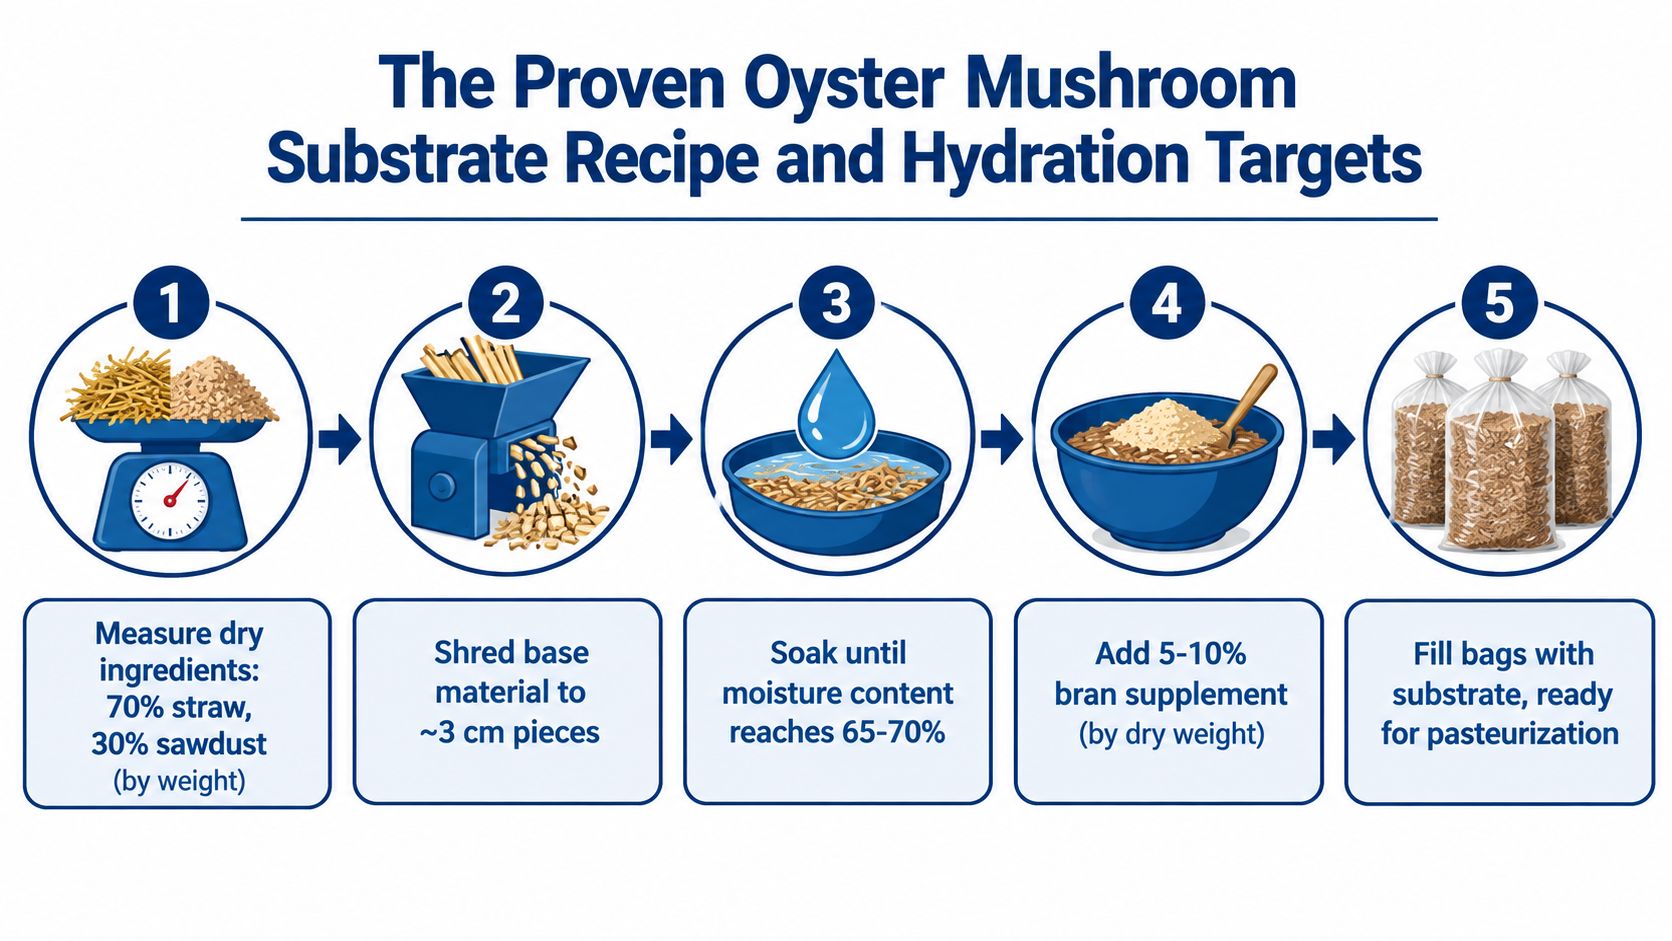
The Proven Oyster Mushroom Substrate Recipe and Hydration Targets
A bag can look perfect on paper and still fail if the substrate went in uneven, soggy, or half dry. That is the part growers miss. Recipe matters, but batch discipline is what makes the recipe repeatable.
For oysters, I keep this section simple. Pick a base your equipment can handle, then hit the same texture and moisture every batch.
Build the recipe around the material in front of you
The best-performing mix in one shop is not always the best choice in another. If you have clean wheat straw, a drum or stock tank for hot-water pasteurization, and a basic inoculation space, plain chopped straw is hard to beat for reliability. If you have hardwood fuel pellets, a pressure sterilizer, and clean bagging habits, supplemented sawdust usually gives denser blocks and cleaner bag shape.
As noted earlier, richer formulas can pay off. They also punish sloppy prep faster than plain straw.
A practical starting point:
Plain straw recipe
Use this if your local waste stream gives you decent straw and your setup is built around pasteurization.
Base: Chopped straw
Cut size: Short enough to pack evenly, usually around 2 to 4 cm
Hydration target: Wet all the way through, with only a few drops released on a hard squeeze
Best fit: Buckets or poly bags, small to mid-size batches, growers who want a forgiving process
Supplemented sawdust or straw recipe
Use this if you can sterilize and inoculate cleanly. As noted earlier, the common supplemented lane is a 70/30 base-to-supplement approach by dry weight.
Base: Hardwood sawdust or pellets, or chopped straw if that is what you can source consistently
Supplement: Bran or another nitrogen source kept measured and uniform
Hydration target: Slightly looser than “muddy,” fully hydrated, no free water pooling in the bag
Best fit: Filter patch bags, denser blocks, higher-yield runs with better contamination control
What matters here is not memorizing one magic formula. What matters is matching the recipe to your local materials and the way you heat-treat them.
Hydration is a technique, not a number
The moisture target gets repeated so often that people treat it like a guess-by-feel step. That is where bags drift batch to batch.
I check hydration two ways.
First, hydrate by weight so the batch starts in the right range. Then confirm by hand. A hard squeeze should give a few drops, not a stream. If water runs between your fingers, the bag is too wet. If the handful springs apart and feels dry in the center, it needs more soak time or better mixing.
Sawdust and straw behave differently here. Straw often looks wetter on the surface than it really is, especially in Denver's dry air. Pellets and fine sawdust can hide wet pockets in the middle if you rush the mix. Both problems slow colonization.
The batch routine that keeps results consistent
This is the workflow that saves the most bags:
Weigh the dry material first. Dry-weight batching keeps recipes consistent even when one bale or pellet batch arrives drier than the last one.
Add water, then wait. Give straw time to absorb. Give pellets time to break down fully. Rushing this step creates a wet outside and dry core.
Mix until the whole batch matches. Break up clumps by hand. Dig into the center, not just the top.
Drain before bagging. Surface water at the bottom of a bag is where bacterial trouble starts.
Spot-check multiple handfuls. One good squeeze test from the top of the tote means nothing if the bottom is soaked.
Colorado growers run into one extra problem. Dry air tempts people to overcompensate with more water. That usually backfires. Better absorption time and better mixing solve more problems than extra soaking.
If you want to size batches before you start, this mushroom substrate calculator for bag volume and hydration planning helps cut down the math.
Here's a good visual walkthrough to pair with the recipe:
Common misses that wreck otherwise good substrate
Leaving straw too long. Long fibers bridge inside the bag, trap dry pockets, and make even spawn distribution harder.
Judging moisture from the top layer only. The center of the batch is what matters.
Adding supplements by scoop instead of weight. Density changes from batch to batch. Scoops drift.
Bagging hot substrate. Warm, wet substrate gives contaminants a head start.
Changing two variables at once. If you switch base material and supplement rate in the same run, you will not know what caused the result.
Boring substrate prep wins. Once the cut size, hydration, and batch routine stop changing, oyster bags become much easier to read and improve.
Pasteurization and Sterilization Methods That Prevent Contamination
A lot of contamination starts earlier than growers think. The usual pattern is simple. Someone copies a recipe built for a pressure cooker, then runs it through a straw pasteurization setup and wonders why the bags sour. The heat treatment has to fit the substrate, the supplement load, and the gear in the room.
Match the method to the recipe
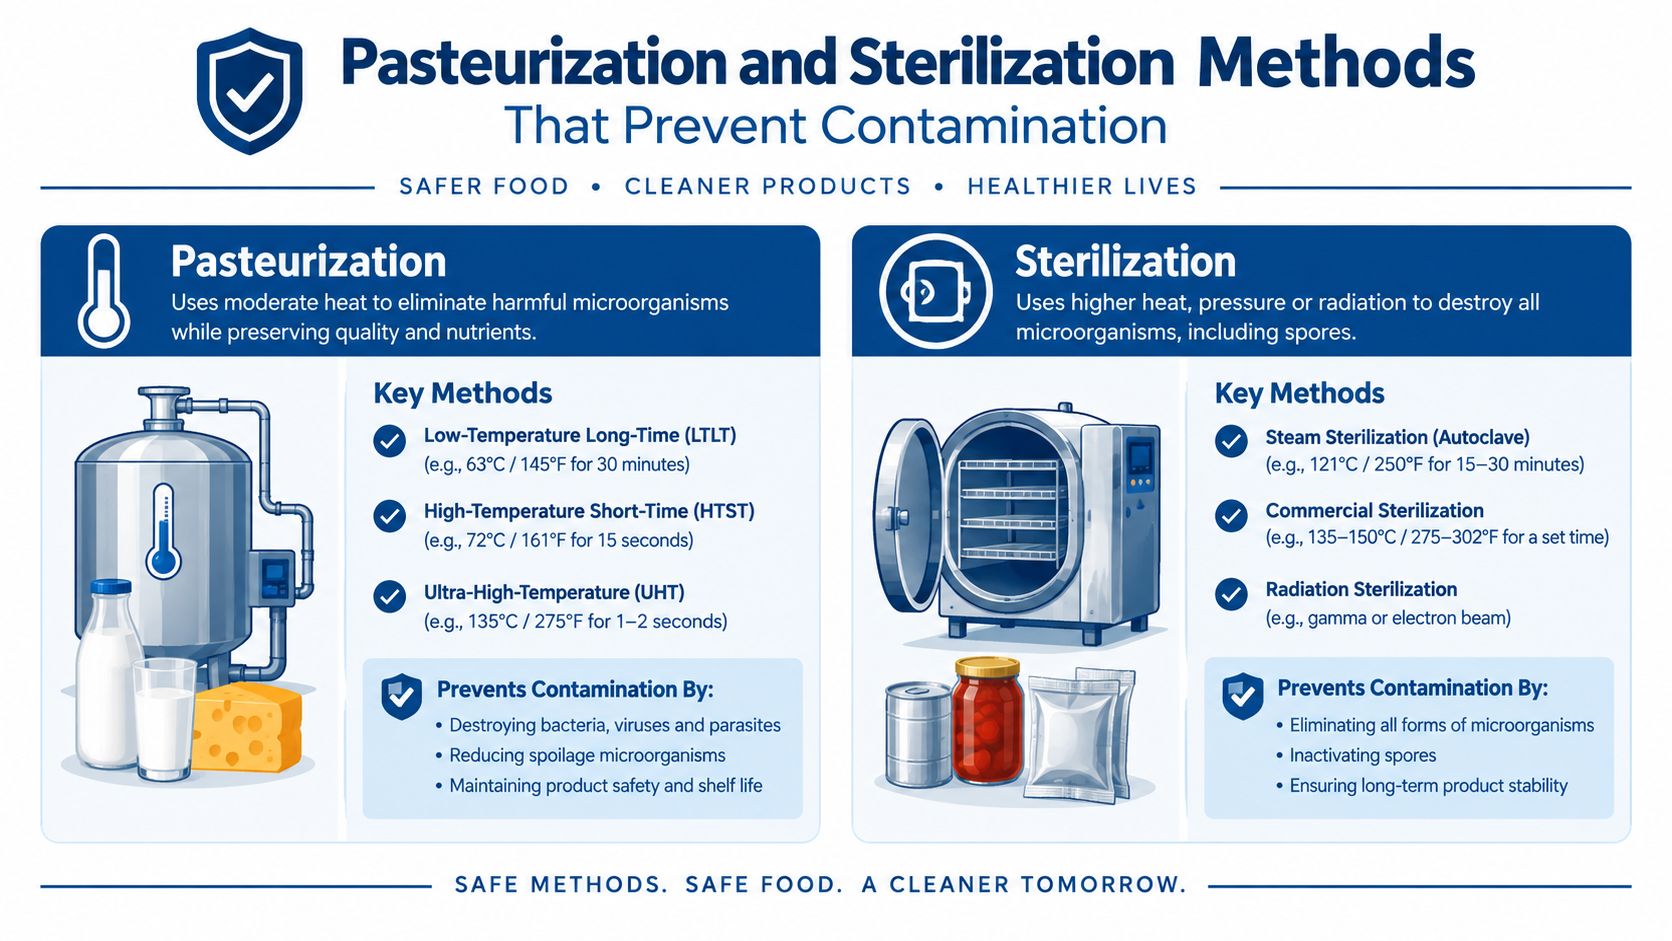
Oyster growers usually have four workable heat lanes: hot water pasteurization, steam pasteurization, atmospheric steam for longer runs, and full pressure sterilization. The right choice depends less on theory and more on what is in the bag.
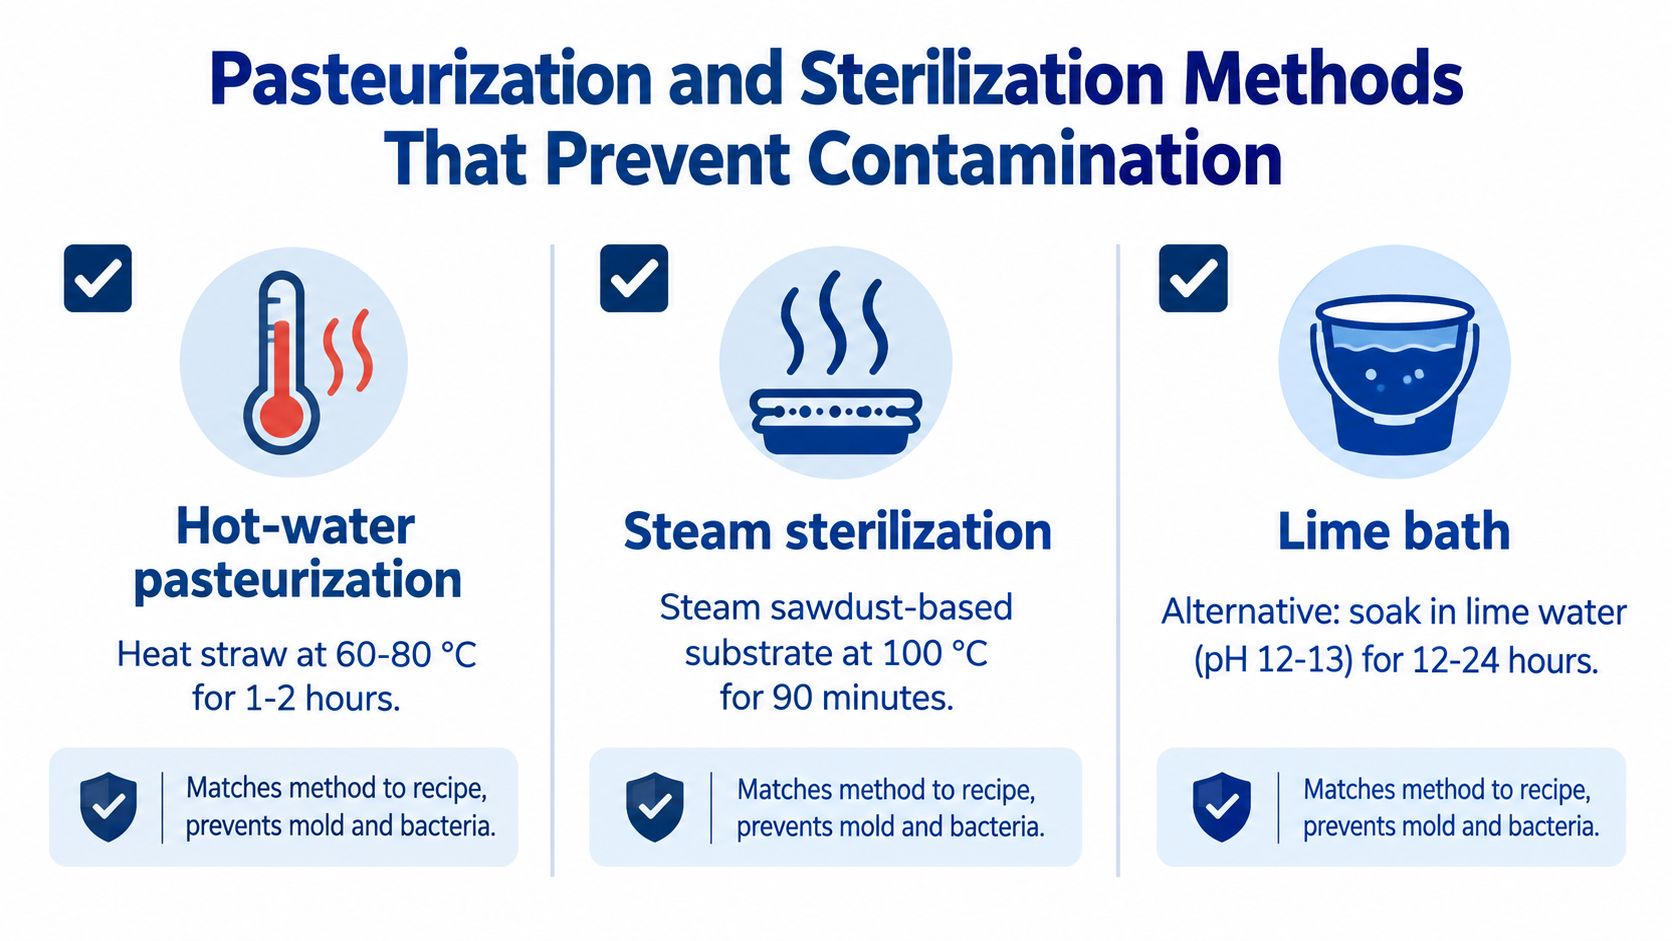
Plain straw is forgiving. Chopped straw with little or no supplement usually does well with pasteurization because oysters colonize fast and can outrun a moderate background load. Supplemented hardwood sawdust is less forgiving. Add bran, soy hulls, or spent brewery grain and contamination rates climb fast unless the bag is fully sterilized.
That trade-off matters if you are building around local waste streams. In Denver, straw is easy to source and easy to process in volume with simple equipment. Clean hardwood fuel pellets are also widely available, but once you start enriching sawdust, a pressure cooker or autoclave stops being optional if you want consistent bags.
Pasteurization for plain straw
For low-nutrient straw, pasteurization is usually the highest-return option. It is cheaper, faster, and easier to scale with basic tools. A stock pot, drum, or insulated vessel can carry a small farm a long way if the process stays consistent.
What works in practice:
Keep the straw fully submerged. Floating sections pasteurize unevenly and often stay dry inside.
Hold pasteurization temperatures, not a hard boil. Boiling beats up the straw and does not fix poor handling later.
Drain until the straw stops dripping freely. Straw that goes into bags waterlogged usually turns into a bacteria problem.
Cool on clean surfaces only. Freshly treated straw picks up contaminants fast from dirty tarps, bins, or floors.
I prefer straw when the goal is low-cost production from simple gear. It gives more room for small mistakes.
Sterilization for richer bags
Supplemented sawdust gives better structure, denser blocks, and often better yields, but it asks for tighter process control. That is the trade.
If the mix contains meaningful supplementation, sterilize it under pressure. That includes pellet-based sawdust mixes with bran, soy hulls, or other nutrient boosts. Longer atmospheric steaming can work for some growers, especially if that is the only equipment available, but it is less forgiving than true pressure sterilization and usually shows more batch-to-batch variation.
One product option in that lane is prepared sterile material. Colorado Cultures sells sterilized grain bags and all-in-one grow bags, which can remove part of the prep burden for growers who want a cleaner starting point without mixing every batch from scratch.
Heavy supplementation raises the upside and the risk at the same time. Rich bags reward clean technique. They also punish shortcuts.
Cooling and post-heat handling decide a lot of runs
Good heat treatment gets wasted all the time during the handoff. I see this more with sawdust than straw, because growers assume the sterilization step solved everything. It did not.
Watch the weak points:
Bagging or spawning warm substrate. Warm cores stress spawn and favor competitor growth.
Letting treated substrate sit too long. The longer it waits, the more chances something unwanted gets in.
Using dirty tubs, scoops, or counters. Clean substrate plus dirty tools still ends in contamination.
Opening and closing bags repeatedly. Every extra handling step adds exposure.
The practical rule is simple. Use pasteurization for plain straw and similar low-nutrient materials. Use sterilization for supplemented sawdust and richer farm byproducts. If your local waste stream changes, your heat treatment probably needs to change with it.
Bagging Inoculation Timing and Incubation Conditions
Once the substrate is ready, speed and cleanliness matter more than fancy technique. This stage should feel organized, not improvised.
Bag the substrate so it colonizes evenly
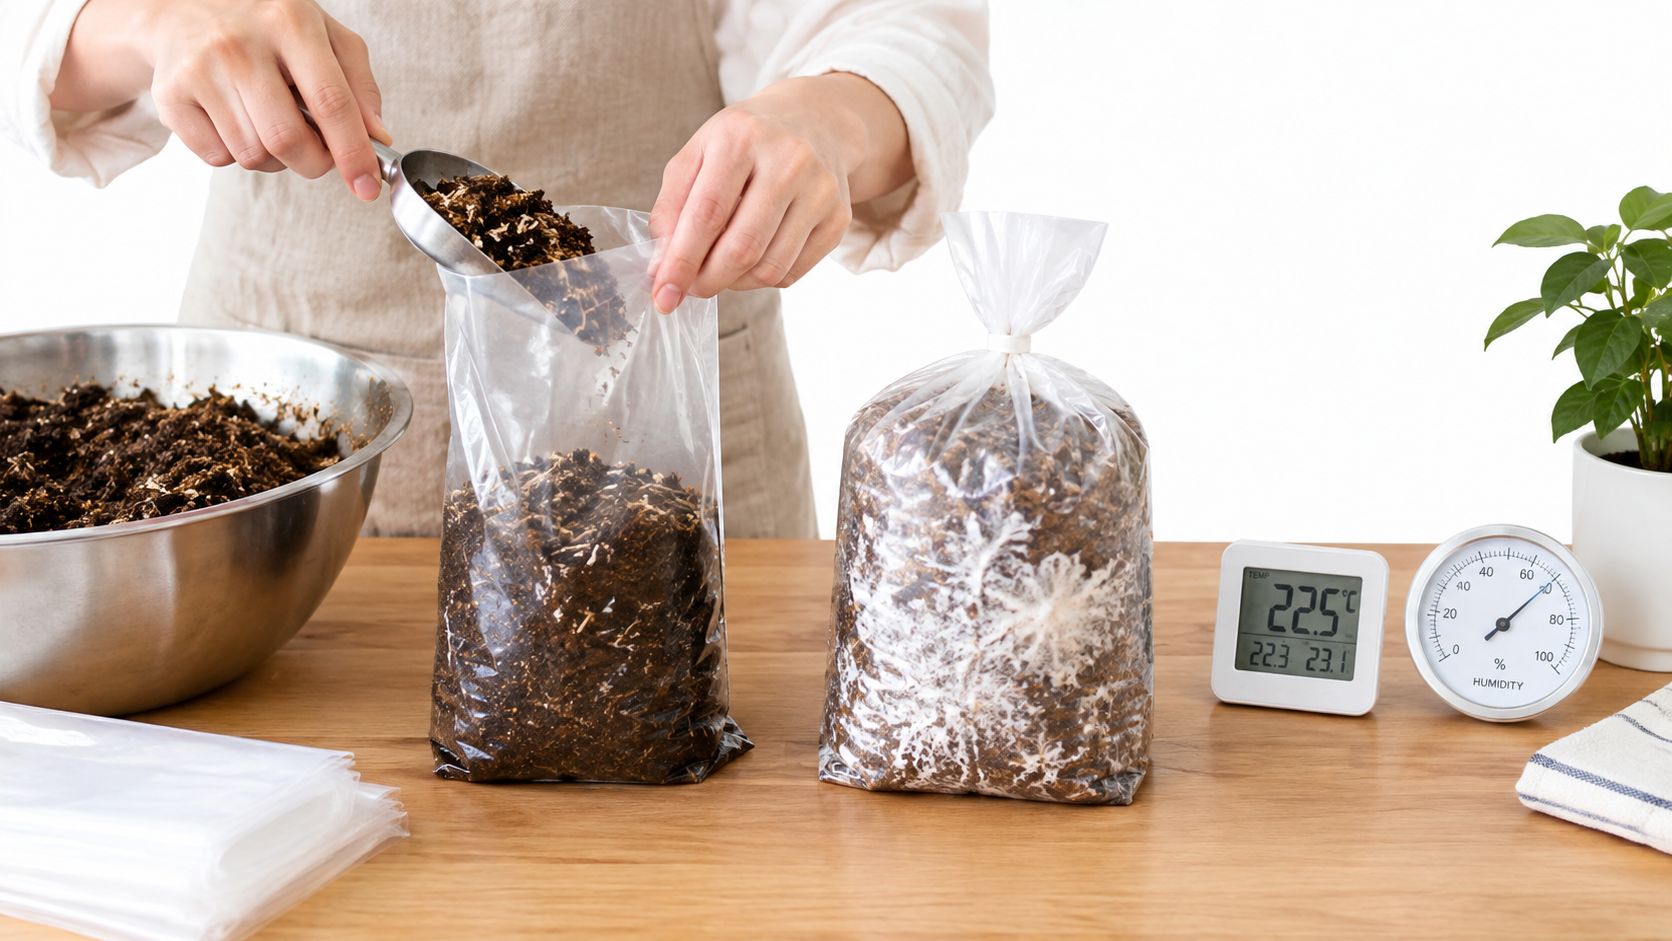
Use bags or containers that give you enough volume for a decent block but still let the mycelium move through the substrate without huge dead zones. Overstuffed bags colonize unevenly. Loose, sloppy fills leave empty pockets that dry out.
A clean pack should feel firm but not brick-hard. You want contact between substrate particles, just not compression.
Inoculate as soon as the substrate is fully cooled
Don't let prepared substrate sit around longer than necessary. Once it's cool enough and drained properly, mix in spawn and seal the bag. That timing reduces the window where the substrate is just waiting for something else to land in it.
A few habits make a real difference:
Break spawn up well: Clumped grain slows spread.
Mix more thoroughly than you think you need to: Even spawn distribution gives even colonization.
Seal promptly: Open bags on the bench collect trouble.
What healthy incubation looks like
During incubation, oysters usually tell you pretty clearly whether things are on track. Healthy bags move from scattered white points to thicker patches, then to a solid white block. Uneven growth often points back to uneven moisture, bad mixing, or bacterial stress.
Good incubation habits are simple:
Keep the bags out of direct sun: Colonization likes stability.
Avoid constant handling: Every squeeze compacts the substrate a bit more.
Give them a steady place to rest: Shelving, tubs, or a clean corner all work if the environment stays consistent.
A bag that smells fresh and earthy can still be slow. A bag that smells sour is already telling you something went wrong.
Fruiting cues start during incubation
You don't need to micromanage early bags, but you do need to watch them. Once a block is fully colonized, oysters often look ready before the grower is ready. If the block is dense, bright white, and beginning to show the first push toward pinning, it's time to move into fruiting conditions.
Common incubation mistakes include:
Opening bags to “check progress”
Stacking warm bags too tightly
Leaving excess condensation pooled at the bottom without noticing
Waiting too long after full colonization before fruiting
The main job here is patience with attention. Let the mycelium work, but don't ignore the cues.
Pro Tips and Troubleshooting for Higher Success Rates
You mix a batch that looked fine on the bench, seal the bags, and a week later half of them are lagging. One smells sour. Another is wet at the bottom. A third is patchy and thin. That usually points back to recipe fit, not bad luck.
With oysters, the best recipe is the one your local material supply and your equipment can handle cleanly. A clean straw run with modest supplementation will often beat a richer sawdust mix that your pasteurization or sterilization setup cannot fully support.
Read the failure correctly
Start with the symptom, then trace it back to the process.
Soggy substrate: Too much water, weak drainage, or particles packed too tight. This shows up a lot with chopped straw that was not drained long enough, and with fine sawdust mixes pushed past what filter patch bags can breathe through.
Slow colonization: Usually a recipe issue before it is a spawn issue. The substrate may be too dense, too dry in spots, or too low in air space.
Sour smell: Bacteria. In practice, this often comes from overhydrated supplemented substrate or grain-heavy formulas that were only pasteurized when they really needed full sterilization.
Green mold: The recipe outran the sanitation level. Rich supplements raise yield potential, but they also shrink your margin for error.
Dry uncolonized corners: Uneven mixing, poor bag fill, or surface drying from airflow hitting the same spot every day.
One pattern matters more than growers expect. If plain straw does well but supplemented batches fail, the problem is usually process intensity, not oyster genetics.
Tune one variable at a time
Keep the species, spawn source, and bag size the same. Then change one thing.
Good variables to test:
Base material: Straw, hardwood sawdust, or a local residue like seed hulls or clean agricultural byproducts
Particle size: Coarser mixes usually breathe better. Finer mixes usually colonize evenly until they compact
Supplement level: Start low, then increase only after you get repeatably clean bags
Drain time: Extra minutes here often fix problems that growers try to solve with new recipes
Heat treatment: Pasteurization may be enough for low-supplement straw. Supplemented sawdust usually asks for sterilization
Local waste stream matters. In Denver, one grower may have cheap clean straw nearby and no pressure sterilizer worth mentioning. Another may have steady hardwood fuel pellets, bran, and a proper sterilization cycle. Those growers should not be running the same recipe.
Keep supplementation conservative until your process is repeatable
Rich substrate can raise production. It can also turn a decent workflow into a contamination factory.
A simple rule works well: the cleaner and more controlled your setup, the more supplementation you can use safely. If you are working with pasteurized straw in a basic setup, stay modest. If you are running sterilized sawdust in bags with reliable sterile technique, you have more room to push bran or other nutrients.
As noted earlier, balanced supplementation often performs better than piling on extras. I see the same thing in bag prep. A moderate formula that colonizes cleanly will usually produce more usable mushrooms over time than an aggressive mix that loses bags every run.
Match the recipe to the equipment
Use straw when you want speed, lower cost, and a forgiving process. It fits small growers well, especially if your local straw is clean and you are set up for pasteurization.
Use supplemented sawdust when you want denser blocks, steadier moisture, and you can sterilize properly. It asks more from your workflow, but it gives you more control once the process is tight.
If your contamination rate jumps every time you add nutrition, step back to the last clean recipe. Then build up again in small steps.
A short checklist before your next batch
Keep the recipe simple enough for your setup to run it clean.
Before the next mix, ask:
Is this material consistent batch to batch, or does it change with every pickup?
Does my heat treatment match this formula?
Am I choosing straw because it fits my setup, or choosing sawdust because it sounds more advanced?
Did the last failure come from moisture, density, or contamination pressure?
Can I test this on a few bags before I commit a whole run?
That habit saves money.
If you want to skip some trial and error, Colorado Cultures offers sterilized grain bags, substrates, all-in-one grow bags, and mycology classes that fit this exact kind of oyster workflow. For Denver-area growers building cleaner substrate habits or dialing in bag prep, visit Colorado Cultures and use their supplies and education as a practical next step.
Comments