
Sterile Mushroom Grow Bags: A Home Grower Guide
You've waited weeks for a promising jar or tub to colonize. Then one morning, a green patch appears, the smell changes, and the whole batch becomes a frustrating lesson in contamination. For a home grower working without a laboratory, the hardest part often isn't choosing a species or maintaining humidity. It's keeping a nutritious substrate clean from preparation through inoculation.
Sterile mushroom grow bags reduce that risk by combining heat-resistant material, a filtered gas-exchange patch, and a sealed growing environment. They don't replace careful technique, but they remove several difficult preparation steps and make contamination easier to diagnose. The important detail is that sterility doesn't end when a manufacturer completes the autoclave cycle. It continues through shipping, inspection, storage, and handling at your workspace.
Why Sterile Mushroom Grow Bags Changed Home Cultivation
A beginner often starts with a pressure cooker, a few jars, and a substrate recipe found online. The process looks simple on paper. Prepare the grain, load the containers, sterilize everything, inoculate carefully, and wait. In practice, each stage creates another opportunity for a weak seal, uneven heating, poor gas exchange, or accidental exposure to mold spores.
That's why a clean-looking batch can fail after a long wait. The contamination may have entered during preparation, survived an incomplete sterilization cycle, slipped through a damaged closure, or arrived on an inadequately cleaned syringe. By the time the problem becomes visible, the original mistake can be difficult to identify.
A professionally prepared bag changes the starting point. Instead of asking whether your homemade container sealed correctly or whether steam reached the center of a dense substrate, you begin with a product designed for sterilization and sealed before it reaches your workspace.
Practical rule: A sterile bag lowers the number of variables you have to control, but it doesn't make careless inoculation safe.
From industrial breakthrough to home counter
The development of filter patch bags helped commercial growers sterilize substrate inside polypropylene packaging while still allowing gas exchange after inoculation. A review of mushroom-growing history records that the first industrial sterile method for oyster mushroom cultivation was patented in 1966, using steam sterilization in autoclaves above 120°C. Adoption stayed limited until autoclaves became more broadly available in the 1990s, while bag-based cultivation research in the late 1980s helped transform shiitake production in Asia. The same history of sterile mushroom cultivation describes these bags as a mainstay of mushroom farms worldwide.
For a home cultivator, the significance is practical rather than historical. You can inoculate a sealed bag on a clean counter, monitor growth through the transparent plastic, and avoid opening the substrate during colonization. That makes the bag a useful buffer between your living environment and the nutrient-rich material your mushroom culture needs.
What the bag can and can't solve
A sterile bag can't correct a contaminated culture. It can't repair a puncture created by rough handling, and it can't protect the contents after you cut or open the packaging in a dirty workspace. It also won't compensate for choosing grain when you need a fruiting substrate.
What it does provide is a controlled beginning. For beginners, that matters because a failed grow becomes easier to investigate. If the bag arrived intact, stayed sealed, and was inoculated with clean technique, you can focus your troubleshooting on the culture and environment instead of questioning every part of substrate preparation.
The Anatomy and Sterilization Standards of Grow Bags
A sterile grow bag has three working parts, the polypropylene body, the filter patch, and the closure or injection area. Each part protects a different stage of cultivation. The plastic must survive saturated steam, the filter must permit gas exchange without leaving a large opening, and the closure must remain intact while the bag cools and moves through handling.
Ordinary food-storage plastic isn't designed for this job. Under autoclave conditions, unsuitable plastic can soften, deform, or fail. Autoclavable polypropylene is used because it can withstand saturated steam sterilization at about 121°C, or 250°F, and 15 PSI, as described in this guide to mushroom grow bag use and sterilization.
How the filter patch works
The filter patch is not a decorative label. It's a microporous section heat-sealed into the bag wall. Mycelium consumes oxygen and releases carbon dioxide as it grows, so a completely airtight container would eventually create an unsuitable internal atmosphere. The patch lets gases move while keeping the bag closed.
A useful analogy is a screened window. Air can pass through, but the screen prevents larger unwanted material from entering. The patch isn't an absolute guarantee against contamination. A torn filter, a wet filter, or a filter buried under substrate can undermine the protection.
Keep the patch clear during filling. If substrate presses against it, moisture and particles can interfere with gas exchange and make the seal area harder to inspect.
Why heat and time work together
Sterilization depends on both temperature and exposure time. One review reports that mushroom substrate bags are commonly sterilized at 121°C for 60 to 90 minutes under 15 to 20 PSI in a high-pressure autoclave. Another study filled polypropylene bags with 1,000 grams of rice straw and sterilized them at 121°C for one hour at 15 PSI. The research report on substrate bag disinfection also describes contamination falling to less than 2% by October 2017 after improvements that included steroclavable plastic bags, better drainage, and maintained air space inside the sterilizer.
Those figures apply to specific equipment, substrates, and procedures. They aren't a universal home recipe. Dense, wet, supplemented substrates need heat to reach their center, so they generally require a longer hold than less dense grain. Bags must also cool gradually. Rapid depressurization can rupture the plastic or damage the filter patch, turning a successful heat cycle into a contaminated package.
For growers who prepare their own bags, this guide to sterilizing grain bags can help organize the process around equipment, loading, cooling, and handling rather than temperature alone.
The Chain of Custody and Inspecting Bags on Arrival
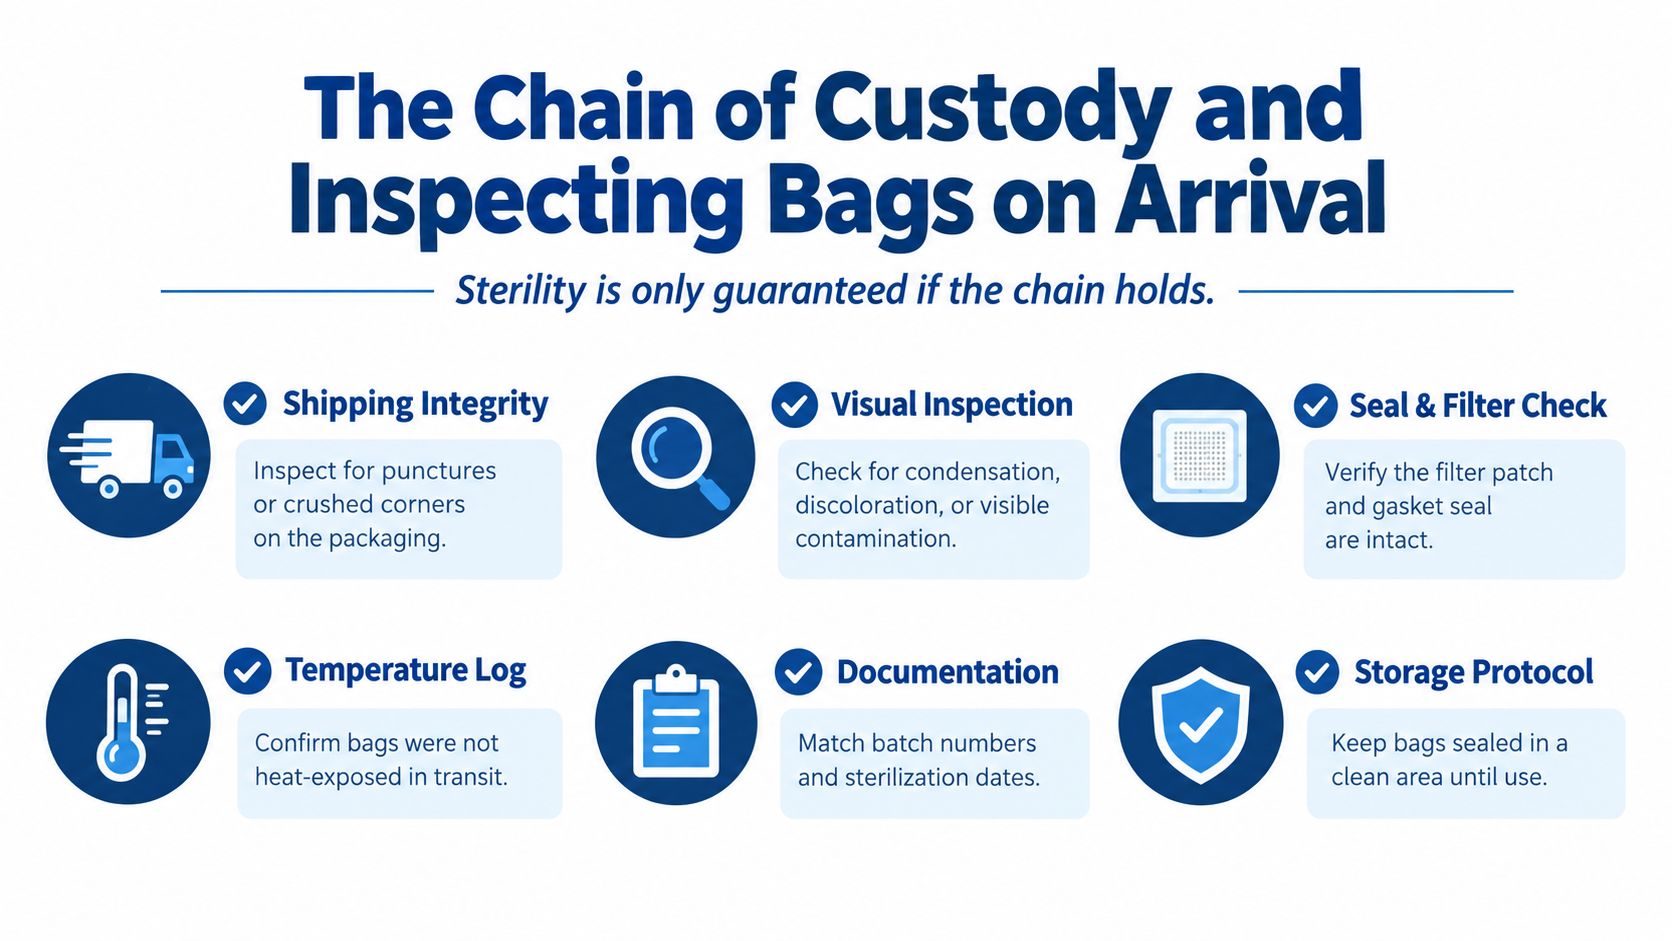
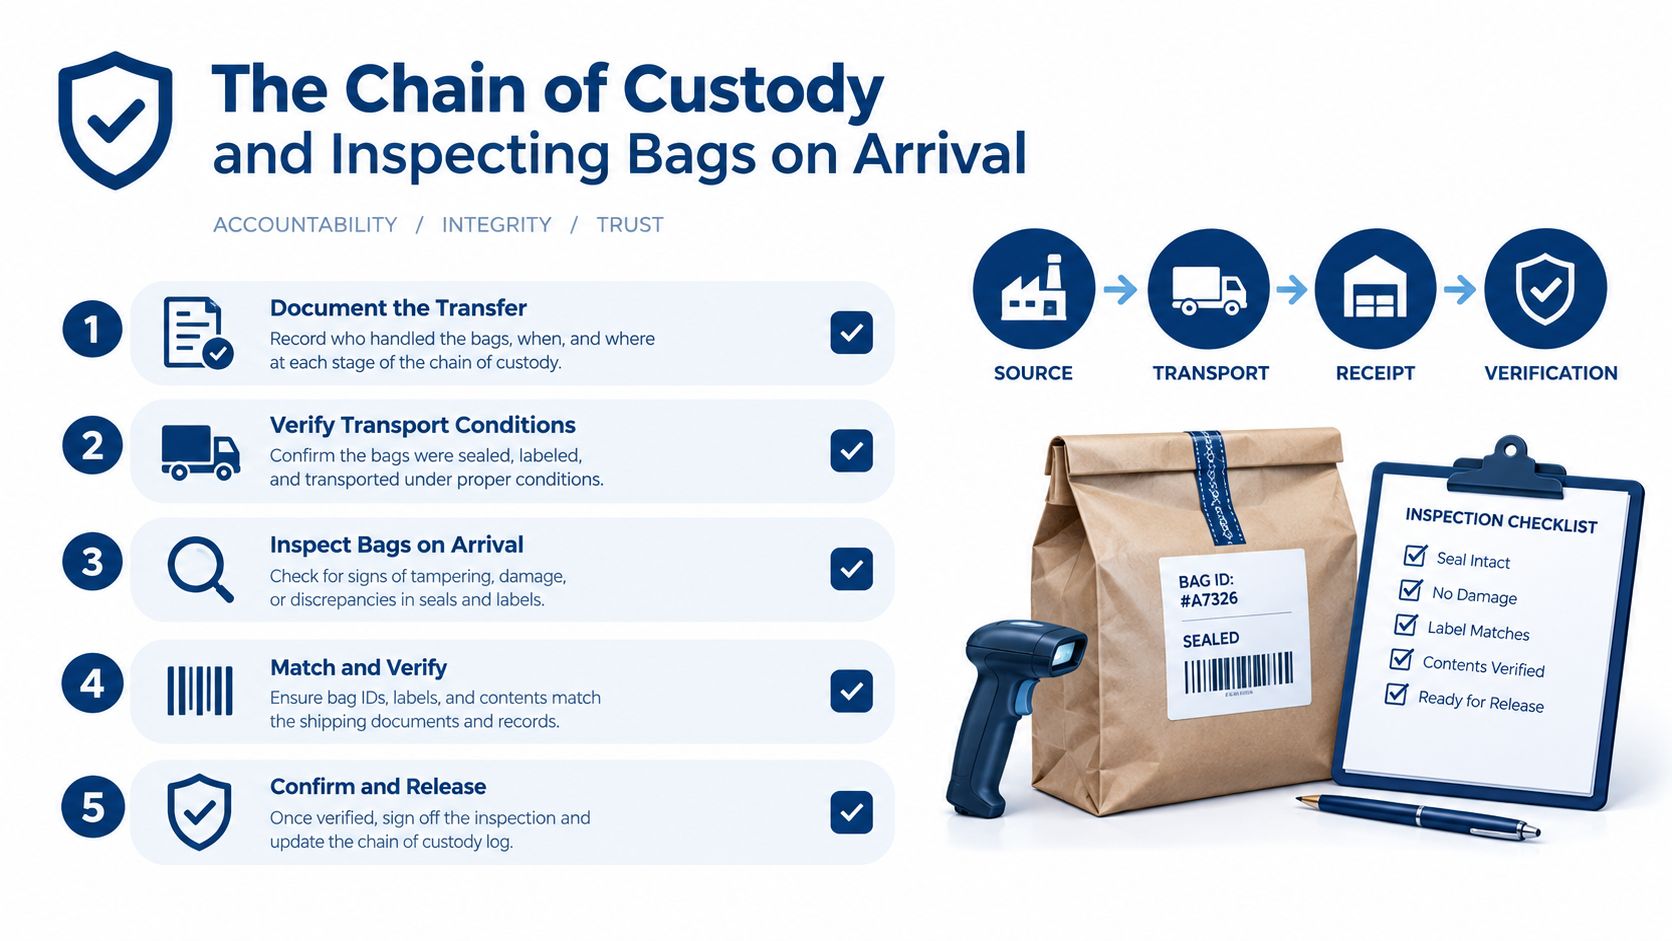
A bag can leave a sterilization facility in good condition and arrive with a problem. Shipping subjects flexible packaging to compression, vibration, and contact with rough surfaces. A crushed corner may create a small puncture. A weak seal may separate under pressure. A filter patch can look normal at first glance while carrying a tear or crease.
That's why the word sterile describes a condition that must be preserved, not just a process that happened earlier. Treat delivery day as a quality-control checkpoint.
Use your eyes before you use your culture
Inspect each bag under bright, neutral light. Don't squeeze it aggressively, since rough handling can create damage that wasn't there when the package arrived.
Start with the outer packaging. Look for crushed areas, torn cardboard, water exposure, or signs that the shipment was compressed against a sharp object.
Inspect the bag body. Check corners, folds, seams, and the bottom panel for punctures, scuffs, or stretched plastic.
Examine the filter patch. It should lie flat and remain attached around its edges. Reject a bag with a visible tear, lifted section, or heavy crease across the filter.
Study the contents. Unusual condensation, discolored material, or visible growth deserves attention. A little moisture isn't automatically proof of contamination, but unexplained changes are a reason to pause.
Check the closure. The seal should look continuous, without channels, gaps, or peeling sections.
Storage is part of sterile technique
Place accepted bags in a clean, dry location away from direct sunlight, heat sources, pets, dust, and sharp shelving. Keep them in their protective packaging until you're ready to inoculate. Don't stack heavy objects on top, and avoid repeatedly moving the bags just to check them.
Some instructional guidance recommends holding newly received sterile grain bags for 1 to 2 weeks to watch for latent contamination before inoculation. That waiting period isn't a replacement for supplier quality control, and it may not suit every schedule, but it reflects a practical concern. A bag can be sterilized correctly and still become unreliable if shipping or handling compromises the seal, filter, or plastic.
If a bag fails inspection, photograph the issue before opening it and contact the supplier. Don't inoculate questionable material just because you've already prepared your syringe or culture. A clean culture is too valuable to introduce into a package you don't trust.
Choosing the Right Format for Your Cultivation Goals
Sterile bags aren't interchangeable. The right choice depends on what you want the mycelium to do next. Grain expands culture, bulk substrate supports fruiting, and an all-in-one bag combines those stages so the grower can avoid a transfer.
Product listings often group these formats together, even though they may use different filter sizes, ports, grains, and substrate blends. A recent comparison of mushroom grow bag formats points to this crowded field and the lack of neutral comparisons focused on contamination risk, inoculation speed, and species fit.
Sterile Bag Formats Compared
Bag Format | Primary Purpose | Best For |
|---|---|---|
Sterile grain bag | Expanding a mushroom culture into spawn | Growers who plan to transfer colonized grain into a separate bulk substrate |
Sterile bulk substrate bag | Providing a prepared medium for fruiting | Cultivators working with species that fruit from substrates such as supplemented sawdust |
All-in-one grow bag | Combining grain expansion and bulk substrate colonization | Beginners and hobbyists who want to avoid a grain-to-substrate transfer |
A grain bag is a strong choice when you want flexibility. Once colonized, the grain can be used to inoculate multiple substrate containers. The tradeoff is that you'll perform another transfer, and every transfer creates another opportunity for contamination.
A bulk substrate bag is more direct, but it isn't designed to replace grain spawn. If you inject a small amount of culture into a large, dense block, colonization may be uneven or slow because the culture has fewer expansion points. Match the substrate to the species, especially when working with wood-loving gourmet mushrooms.
Why all-in-one bags appeal to beginners
An all-in-one bag places grain and bulk substrate in the same sealed package. The culture first colonizes the grain, then the grower mixes the colonized grain into the surrounding substrate without opening the bag. That removes a major handling step, but it doesn't remove the need to wait for the grain to establish before mixing.
Built-in injection ports and filter patches can make inoculation simpler. They also introduce another inspection point, so check that the port is attached securely and that the surrounding plastic hasn't been stressed during shipping. Choose the format that matches your next action, not the format with the most features.
Inoculation Techniques and the Break and Shake Method
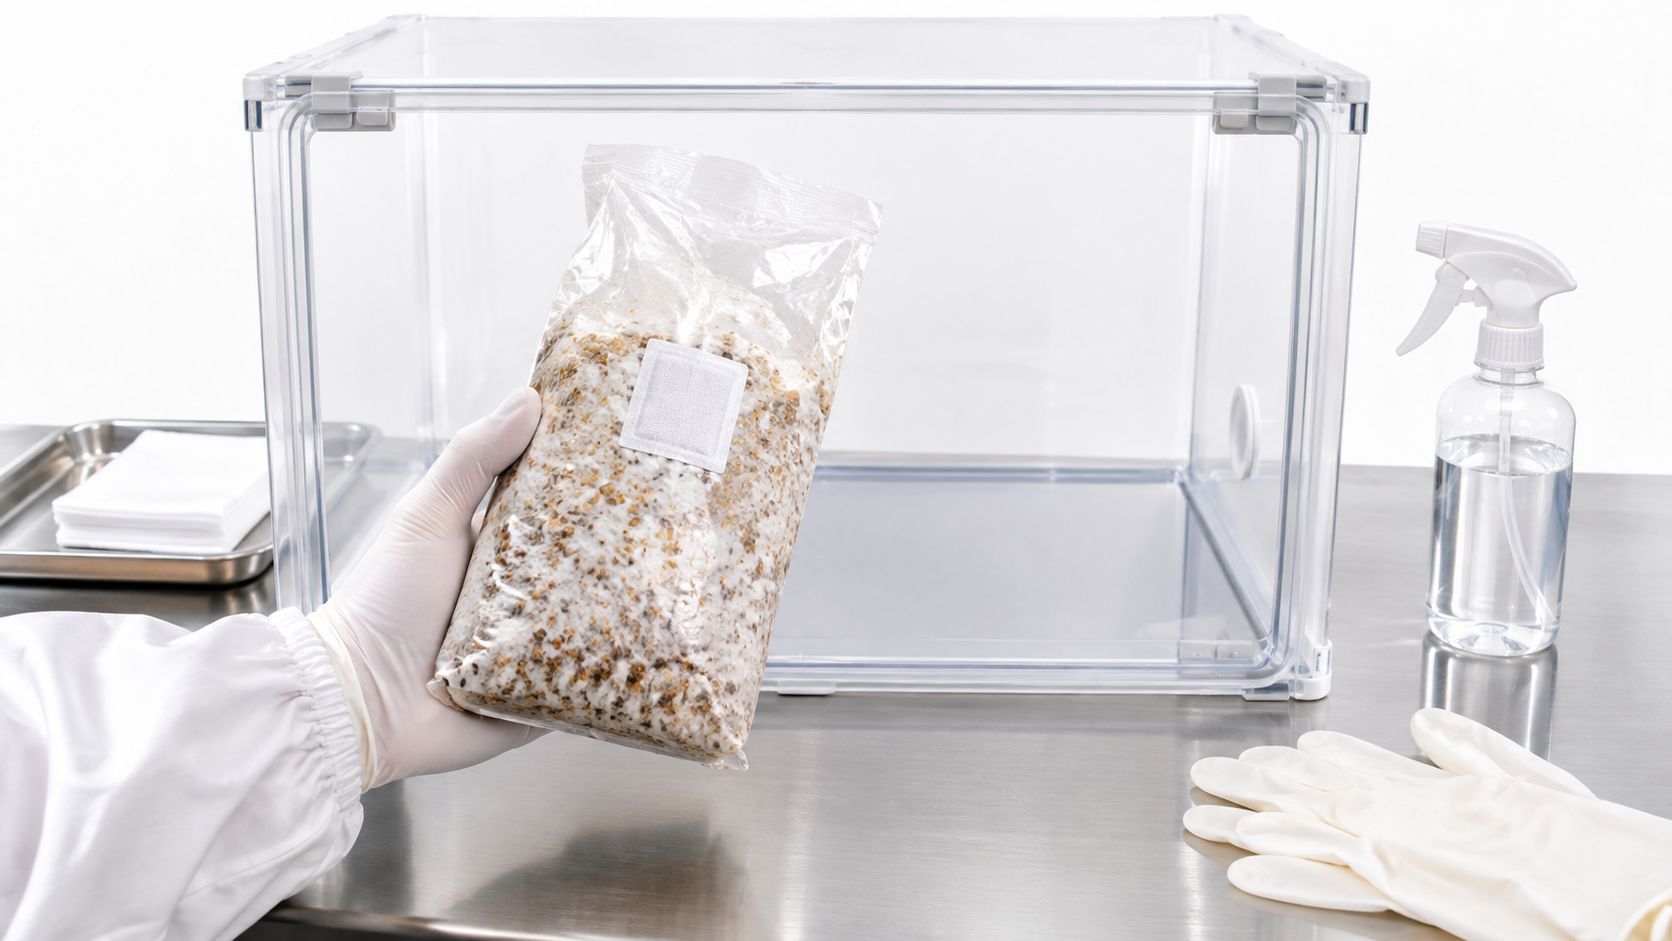
A sterile bag only stays useful if the inoculation is clean. Before opening a culture or handling a syringe, clear the workspace, wash your hands, disinfect the work surface, and reduce drafts. A still-air box can help limit air movement around the injection point. Work deliberately, because rushed movements create turbulence, touch points, and accidental contact.
Inoculate through the intended access point
If the bag has a self-healing injection port, disinfect the port and allow the surface to dry before inserting the sterile needle. Keep the needle and port from touching the table, your gloves, or the outside of the bag. Inject the culture into the grain area when the bag is designed as an all-in-one format, rather than immediately flooding the bulk substrate.
If the bag has no injection port, follow the supplier's instructions for opening and resealing it. The opening should be as controlled as possible, and the bag should remain closed after the culture is introduced. Detailed instructions for inoculating mushroom bags can help beginners prepare the workspace before they begin.
Watch the bag through the plastic instead of opening it to check progress. Healthy colonization usually appears as clean, consistent mycelial growth spreading from the inoculation area. Unusual colors, wet-looking patches, or unpleasant odors should stop the process while you investigate.
The video below demonstrates a practical bag inoculation workflow and handling sequence.
Breaking and shaking without damaging the bag
The break and shake method redistributes colonized grain through the uncolonized portion of a grain bag. Growers gently massage the bag from the outside, breaking compacted grain clusters and spreading the established mycelium across fresh grain.
Don't perform this step immediately after inoculation. The culture needs time to establish visible growth first. At the same time, waiting until the entire bag has formed a hard, compressed mass makes redistribution more difficult and can encourage rough handling.
Use a visual cue rather than a rigid calendar. Look for several established colonized areas with enough uncolonized grain remaining to benefit from redistribution. Support the bag with both hands, press gradually, and stop if the plastic stretches, the filter folds sharply, or the grain feels unusually hard.
After shaking, return the bag to a stable location and avoid repeated manipulation. The goal is to create more contact points, not to pulverize the grain or force growth through damaged packaging.
Troubleshooting Contamination and Environmental Failures
When a bag fails, don't immediately blame the sterilization cycle. Contamination can enter through a damaged filter, a compromised seal, a dirty needle, an exposed injection point, or an opening made in an unsuitable environment. It can also become more noticeable after the colonized material leaves the bag and enters a fruiting space.
Start with isolation. Move a suspicious bag away from healthy cultures, avoid opening it near your other supplies, and record what you see. A simple timeline helps. Note when the bag arrived, when you inoculated it, when the first unusual sign appeared, and whether the problem began at the injection point or elsewhere.
Read the visible and sensory clues
Green mold often becomes obvious as a colored patch that expands across otherwise healthy material. A sour, sweet, or otherwise unpleasant smell can indicate bacterial activity, particularly when the substrate looks excessively wet or slimy. Thin, wispy growth can be mistaken for healthy mycelium, so compare its texture and spread with the expected appearance of your species.
These signs don't identify every contaminant with certainty. They do tell you to stop treating the bag as healthy. Don't open a suspicious package indoors just to get a closer look.
Growth near the port or injection site: Review the cleaning and inoculation procedure first.
Growth beside a seam or filter patch: Inspect for shipping damage, a weak seal, or a filter problem.
Changes throughout the bag soon after arrival: Question the bag's condition before inoculation and contact the supplier.
A healthy bag that fails after fruiting begins: Examine handling, air movement, surface moisture, and cleanliness in the fruiting area.
Decide whether to discard or investigate
A sealed bag with obvious contamination should usually be discarded according to local waste-handling practices rather than opened for salvage. Removing it protects nearby cultures and keeps spores from spreading through your workspace. Don't reuse packaging that held a contaminated batch.
For future runs, change one variable at a time. Use a fresh bag, a trusted culture, a cleaned workspace, and a written inoculation routine. The guide to preventing mushroom contamination can help you turn a vague failure into a checklist of specific technique and environmental checks.
The best diagnosis follows the chain. If the bag was damaged on arrival, the supplier or shipping process deserves attention. If it arrived intact but failed around inoculation, review technique. If colonization looked healthy until fruiting, investigate the new environment rather than assuming the original bag was defective.
Sourcing Reliable Supplies and Continuing Your Mycology Journey
A dependable supplier should make the product's intended use clear. Look for the bag format, substrate type, access method, filter placement, storage guidance, and instructions for reporting damage. Clear documentation matters because beginners need to know what they're buying before they introduce a culture.
Ask practical questions when product information is incomplete. How should the bag be stored? What should the seal look like? Which species and substrate combinations are appropriate? What evidence should you provide if a shipment arrives punctured or compromised?
Local mycology shops can add another layer of support. A knowledgeable staff member may help you compare grain spawn with an all-in-one bag, identify a substrate mismatch, or review a contamination photo. Classes and community workshops also give new growers a chance to practice sterile movements before working with a valuable culture.
Keep a simple grow log. Record the bag format, culture source, inoculation date, observations, and environmental changes. Over time, those notes will show whether your recurring issue comes from handling, storage, culture quality, or fruiting conditions.
The central lesson is simple: sterility is a chain, not a label. Inspect the bag when it arrives, store it carefully, inoculate through the intended access point, handle it gently, and isolate anything suspicious. That discipline will serve you whether you're growing one hobby bag on a shelf or building a more organized home cultivation workflow.
Colorado Cultures offers sterilized grain bags, all-in-one grow bags, substrates, grow kits, cultures, and practical cultivation guidance for home growers and researchers. Visit Colorado Cultures to choose a bag format, find instructions, and explore classes or local support for your next grow.
Comments