Search Results
118 results found with an empty search
- Using Kava and Kratom Drinks to Ease the Come Down from a Psilocybin Trip
For many people exploring the world of psilocybin mushrooms, the experience can be profound, healing, and sometimes intense. While the peak of a mushroom trip is often filled with insight and emotion, the come down —that transitional period as the effects begin to wear off—can leave you feeling drained, overstimulated, or mentally unsettled. This is where natural, plant-based allies like kava and kratom can offer gentle support. Why Consider Kava or Kratom After a Trip? Kava and kratom are traditional herbal remedies known for their calming, grounding, and mood-balancing properties. When used responsibly, they can help smooth the transition back to baseline after a psychedelic experience, making the integration process more comfortable and mindful. Benefits of Kava Post-Trip Kava is a root from the South Pacific that has been used for centuries in ceremonial and social settings. It's known for its calming effects, stress relief, and muscle relaxation—without impairing mental clarity. Key post-trip benefits of kava: Reduces anxiety and restlessness Promotes physical and mental relaxation Encourages grounded reflection and integration Non-addictive and non-habit forming when used in moderation Kava can be especially helpful if your trip ended with lingering energy, emotional intensity, or difficulty sleeping. A chilled kava drink can help you reconnect with your body and ease gently into rest. Benefits of Kratom Post-Trip Kratom, a tropical tree native to Southeast Asia, works a bit differently. Depending on the strain and dosage, it can be either stimulating or sedating. For the purpose of a post-psilocybin wind-down, red vein or green vein kratom is typically preferred due to its more relaxing and euphoric effects. Key post-trip benefits of kratom: Mild euphoria and mood support Muscle relaxation and pain relief Helps ease body load or fatigue after intense trips Supports a smooth return to normal functioning Kratom may be particularly useful if your body feels sore, your mind is still racing, or you’re having a hard time letting go of the trip's emotional intensity. Best Practices for Use Hydration is key. Make sure you’re drinking plenty of water before and after your trip. Start small. Everyone reacts differently, especially after psychedelics. A low dose of kava or kratom is usually enough. Use clean, quality products. Look for reputable sources with lab-tested ingredients. Avoid mixing with alcohol or other substances. Use these herbs as a support tool—not a crutch. They’re best used mindfully, as part of a broader self-care and integration plan. Final Thoughts Kava and kratom aren’t a “fix” for a difficult trip, but they can be wonderful plant-based allies to help ease the come down and begin the process of integration. When used responsibly, they offer a gentle bridge between the psychedelic world and the everyday one, giving your body and mind time to decompress, reflect, and rest. At Colorado Cultures , we’re all about supporting intentional, mindful use of sacred medicines—and that includes what comes after the journey. If you’re curious about trying kava or kratom drinks, stop by either of our locations or visit us online to explore our rotating stock of premium, ready-to-drink options. Stay safe, stay grounded, and happy tripping!
- Psilocybe Natalensis is Now Psilocybe Ochraceocentrata: Understanding the Name Change
The world of mycology is always evolving, and as scientific methods advance, so too does the classification of species. One recent change catching attention in the mushroom community is the renaming of Psilocybe natalensis to Psilocybe ochraceocentrata . If you’ve grown or worked with this beloved South African strain, you might be wondering what this change means and why it happened. Let’s break it down. The Origins of Psilocybe Natalensis Originally discovered in the Natal province of South Africa, Psilocybe natalensis gained a reputation for its unique characteristics: rapid colonization, high resistance to contamination, and impressive potency. It became a favorite among cultivators and researchers for its robust nature and visual similarities to Psilocybe cubensis , though it was a distinct species in its own right. Why the Name Change? Scientific names are not just labels—they reflect our understanding of a species’ genetic and morphological identity. In recent years, advances in DNA sequencing and phylogenetic analysis have led to more accurate categorization across many biological kingdoms, fungi included. In 2024, researchers revisited the classification of Psilocybe natalensis and determined that its original name didn’t align with the standardized rules of fungal taxonomy. The epithet natalensis was deemed problematic for two main reasons: Preexisting Confusion : There were other fungi historically associated with similar names, causing confusion in the scientific community. Morphological Distinction : With more detailed morphological and genetic data now available, mycologists determined that this species warranted a more specific and unique name. Thus, the species was reclassified as Psilocybe ochraceocentrata , a name that better reflects its defining characteristics and phylogenetic placement. What Does “Ochraceocentrata” Mean? The name ochraceocentrata is derived from Latin, referencing the ochre (yellowish-brown) coloration found at the center of the mushroom’s cap—a distinct and identifying feature of the species. It’s a fitting nod to the visual traits that help differentiate this mushroom from its close relatives. What Does This Mean for Cultivators? For most growers and enthusiasts, not much will change in terms of how the mushroom is cultivated or consumed. However, when searching for spores, genetics, or educational material, expect to start seeing “ Psilocybe ochraceocentrata ” used in place of “ Psilocybe natalensis .” At Colorado Cultures, we’re updating our listings and labels accordingly to reflect the most accurate and current taxonomy. Embracing the Evolution of Mycology The renaming of Psilocybe natalensis to Psilocybe ochraceocentrata is a reminder of how dynamic and evolving the field of mycology truly is. As science continues to peel back the layers of fungal life, we gain a deeper understanding—and greater appreciation—for these incredible organisms. Whether you’ve known it as Natalensis or are just discovering Ochraceocentrata, this species remains one of the most fascinating and resilient psilocybin-producing mushrooms in the world. Source: https://www.biorxiv.org/content/10.1101/2024.12.03.626483v1.full
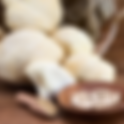
- Why Popcorn Is Poppin’: The Benefits of Using Sterilized Popcorn for Mushroom Cultivation
When it comes to growing mushrooms, your choice of grain spawn can make or break your grow. While many cultivators swear by tried-and-true options like rye berries or millet, sterilized popcorn is steadily gaining traction as a powerful—and sometimes underrated—alternative. So, what makes popcorn pop in the world of mushroom cultivation? Let’s dig into the unique benefits of using sterilized popcorn over other grain types. 1. Superior Resistance to Contamination One of the biggest advantages of popcorn is its low surface area compared to smaller grains like millet or rye. Less surface area means fewer nooks and crannies for contaminants to cling to, giving popcorn an edge when it comes to maintaining a clean, contaminant-free grow. Plus, because the kernels are large and sturdy, popcorn holds up well under high-pressure sterilization, making it easier to achieve a truly sterile grain bag or jar. 2. Easy to Shake and Break Up Colonized popcorn grain has a soft, spongy texture that makes it incredibly easy to break up after colonization. This is a major plus for cultivators using spawn bags or jars, as it allows for efficient grain-to-bulk mixing or spawn expansion. Whereas denser grains like wheat or brown rice can clump or get mushy, popcorn stays springy and separates easily with a good shake. 3. Excellent for Thick, Ropey Mycelium Many growers report that mushrooms—particularly Psilocybe cubensis —develop thick, rhizomorphic mycelium on popcorn. This means quicker colonization, more aggressive growth, and a stronger foundation for fruiting. This quality makes popcorn a great choice for cloning high-performing genetics, or for running new cultures where vigorous mycelial growth is desired. 4. Great for Large Species or Isolates Because popcorn grains are physically bigger, they leave more air pockets and space for airflow within the substrate. This can be especially beneficial for species or isolates that appreciate looser substrate structure—such as Penis Envy varieties, or certain gourmet species like King Oyster . While smaller grains pack tighter, which may slow gas exchange, popcorn maintains good oxygen flow through the jar or bag, which supports healthier colonization. 5. Longer Shelf Life When Sterilized and Stored Properly Sterilized popcorn can be vacuum-sealed or stored in myco bags for longer periods without significant degradation. Unlike rye, which can sour or ferment quickly if not used soon after sterilization, popcorn tends to stay fresher longer if kept sealed in a sterile environment. This makes it ideal for growers who prep spawn in bulk, or who want to ship grain bags to customers or partner farms. What Are the Downsides? While popcorn is a strong contender, it’s not without trade-offs: Lower nutrient density than rye or millet, but high amounts of carbohydrates which mycelium love. Higher cost per pound in some regions, but well worth the investment. That said, for many growers—especially small-batch cultivators, hobbyists, or those focusing on specialty genetics—the trade-offs are well worth the consistency and reliability popcorn brings. Final Thoughts Sterilized popcorn is a simple, effective, and beginner-friendly grain that performs surprisingly well across a variety of mushroom species. Whether you’re dialing in a new genetic line or just want a forgiving spawn option with minimal contamination risk, popcorn is absolutely worth trying. It's not just for movie night anymore— it's for mushroom nights too.
- Mushroom Myths Busted: Separating Fact from Fiction
The world of fungi is full of mystery, wonder... and a fair amount of misinformation. Whether you're a seasoned cultivator or just starting out, you've probably heard a few tall tales about mushrooms along the way. At Colorado Cultures, we’re here to clear the air — or at least your fruiting chamber. Let’s dig into some of the most common mushroom myths and the real science behind them. ❌ Myth #1 : "All mushrooms are dangerous unless you're an expert." ✅ Truth: While wild foraging does require serious knowledge, growing mushrooms at home from trusted cultures is completely safe. When you start with clean liquid culture or spores and a sterile substrate, there’s no guesswork involved. Our grow kits and supplies are designed for success — no foraging degree required. ❌ Myth #2: "Mushrooms need sunlight to grow." ✅ Truth: Unlike plants, mushrooms don’t photosynthesize. They don't need sunlight — but they do respond to indirect light as a signal to fruit. A simple 12/12 light cycle with ambient room light or an LED grow light is plenty to guide their development. ❌ Myth #3: "More humidity is always better." ✅ Truth: High humidity is important, but too much can lead to mold, bacterial blotch, or suffocated pins. Most mushrooms prefer 85–95% humidity with fresh air exchange. That balance is key, and our humidifiers, monotubs, and FAE systems are designed to hit that sweet spot. ❌ Myth #4: "All mushrooms grow the same way." ✅ Truth: Each species has its own quirks. Lion’s Mane prefers to fruit from a small cut in the bag, while oysters love wide-open airflow. Reishi grows like a coral reef. The more you learn, the better your results — and we’ve got species-specific tips in every grow kit we offer. ❌ Myth #5: "Contamination means total failure." ✅ Truth: Contamination is frustrating, but it's also part of the learning curve. Spotting green mold or bacterial slime? That’s a sign your sterile technique or environmental conditions need tweaking — not a reason to give up. We provide sterile tools, clean cultures, and guides to help you dial it in. ❌ Myth #6: "Mycelium is the same as mold." ✅ Truth: They look similar in early stages, but mycelium is the living root system of your mushroom. It’s fuzzy, white (sometimes even rhizomorphic), and a sign of success. Mold, on the other hand, is usually green, black, or oddly colored. Need help identifying contamination? Shoot us a photo — we’re happy to help. ❌ Myth #7: "You can’t grow mushrooms without expensive lab equipment." ✅ Truth: You don’t need a flow hood or commercial autoclave to grow mushrooms. A still air box, a pressure cooker, and some basic sterilization techniques can go a long way. That’s why we offer affordable, DIY-friendly supplies — so anyone can start their mushroom journey without breaking the bank. Ready to Grow Smarter? Now that we’ve busted some of the most common mushroom myths, you're already ahead of the game. Whether you're fruiting your first Lion’s Mane block or prepping agar plates for a new genetic, our goal is to equip you with the right tools — and the right information — to succeed.
- Understanding the Substrate and Grain Spawn Relationship
In the world of mushroom cultivation, understanding the relationship between substrate and grain spawn is crucial for successful growth. This blog will break down these concepts and how they work together to create an ideal environment for mycelium to thrive. What is Grain Spawn? Grain spawn is essentially the seed for mushroom cultivation. It's the inoculated grain that contains mycelium. Understanding its composition and purpose is crucial for anyone starting in mushroom cultivation. When we talk about grain spawn, we talk about more than just grains. It’s the heart of your mushroom-growing operation! The mycelium present in the grain spawn is what will eventually lead to the production of delicious mushrooms. This makes choosing quality grain spawn paramount. One of the most fascinating aspects of grain spawn is its diversity. You can use various types of grains such as rye, wheat, or millet. Each type brings its unique benefits and might be better suited for specific mushroom species. Exploring these options is essential for any mushroom enthusiast. Understanding Substrate and Its Importance The substrate is the material on which mushrooms grow. It provides the necessary nutrients and environment for the mycelium to develop. Knowing how to choose or create a suitable substrate can make or break your mushroom-growing endeavors. In essence, the substrate acts like a buffet for your mycelium. It’s where the action happens, and it needs to be just right. Common choices include straw, sawdust, and coffee grounds, each offering different levels of nutrients and moisture retention, key factors in successful mushroom cultivation. Choosing a substrate isn’t just about what’s available; it’s also about finding the perfect fit for your grain spawn. For instance, if your grain spawn is designed for growing gourmet mushrooms, the substrate must complement its needs to ensure robust growth. How Substrate and Grain Spawn Work Together The relationship between substrate and grain spawn is symbiotic. The grain spawn colonizes the substrate, breaking it down and extracting nutrients, which in turn supports the growth of the mushroom fruit bodies. Understanding this interplay is essential for successful cultivation. As the mycelium from your grain spawn spreads through the substrate, it effectively transforms what may once have been inert material into a thriving ecosystem. During this process, the mycelium not only feeds itself but also prepares the substrate to support the mushrooms that will eventually grow. A balanced understanding of this relationship could significantly impact your yields. If the substrate is fortified with the right nutrients and properly hydrated, it empowers your grain spawn to work its magic, resulting in healthier and more abundant mushrooms. Choosing the Right Substrate for Your Grain Spawn There are many types of substrates available, including straw, wood chips, and compost. This section will explore how to choose the right substrate based on the type of mushrooms you are growing and what your grain spawn requires. When selecting your substrate, consider your desired mushroom species. For example, while oyster mushrooms thrive well on straw, lion’s mane mushrooms prefer a blend that includes hardwood sawdust. Matching your substrate to your grain spawn’s preferences can dramatically enhance your results. It’s also important to consider the preparation of your substrate. Pasteurization or sterilization can help eliminate unwanted organisms that may compete with your mycelium. Ultimately, a well-prepared substrate can significantly increase the success rate of your cultivation journey. Common Mistakes to Avoid New growers often make mistakes when pairing substrate with grain spawn. This section will highlight common pitfalls and how to avoid them, ensuring a smooth start to your mushroom cultivation journey. One of the most common errors is using a substrate that is not suitable for the type of grain spawn. Each mushroom species has specific requirements, and ignoring those can lead to disappointing results. Before diving in, take the time to do a little research about your chosen mushrooms. Another mistake is neglecting the importance of moisture content in your substrate. Too dry, and your mycelium may stall; too wet, and you risk creating conditions ripe for contamination. Striking the right balance is crucial, so always monitor moisture levels closely. Tips for Successful Mushroom Cultivation In this final section, we’ll provide practical tips and best practices to help you successfully cultivate mushrooms, from preparing your substrate to caring for your grain spawn. First, always source high-quality grain spawn. This single step can improve your cultivation experience drastically. Well-prepped spawn significantly improves colonization rates and overall health of the resulting mushrooms. Next, don’t underestimate the importance of cleanliness. A clean working environment when handling substrates and grain spawn will help minimize contamination risks. Simple practices, such as sanitizing tools and using gloves, can go a long way in ensuring the health of your mushrooms. Finally, be patient! Cultivating mushrooms is not just a science; it’s an art that requires time and care. Don’t rush through your processes, and enjoy watching your mushrooms grow from humble beginnings into something rewarding and delicious. Wrapping Up the Relationship By now, you should have a clearer idea of how substrate and grain spawn interact and support each other in the growth of mushrooms. By carefully selecting your materials and understanding their roles, you can optimize your mushroom cultivation process for healthier yields.
- How Do You Properly Store a Spore Syringe?
Storing a spore syringe correctly is essential for maintaining the viability of your spores. In this guide, we’ll walk you through the best practices to ensure your spore syringe stays fresh and ready for use. Step 1: Choose the Right Storage Environment Select a cool, dark place to store your spore syringe, away from direct sunlight and temperature fluctuations. Light and heat can degrade your spores over time. Therefore, a closet or drawer in a climate-controlled room often works best. If your home tends to warm up considerably during the day, consider a location that stays consistently cool. Many people overlook humidity levels, but this factor is also crucial. Ideally, you want an environment with low humidity to prevent condensation from forming inside your syringe. A desiccant pack in the storage area can help to absorb excess moisture. Moreover, be mindful of where you place your spore syringe. Avoid areas near ovens, heaters, or windows, as these can expose your spores to harmful temperature spikes. Step 2: Use a Sterile Container Consider placing the syringe in a sterile, airtight container to protect it from contamination and moisture. Using an airtight container not only minimizes exposure to air but also limits the risk of bacteria or mold finding their way into your spore syringe. A glass jar with a tight-sealing lid is particularly effective for this purpose. When selecting your container, ensure that it’s been sterilized properly, either by boiling it in water or by using a pressure cooker. This prevents any unwanted contamination and helps to maintain the integrity of your liquid culture syringe. Remember that the container should be large enough to accommodate the syringe comfortably. Avoid cramped spaces where the syringe can be easily jostled or damaged. Step 3: Avoid Freezing Do not freeze your spore syringe, as this can damage the spores. Instead, keep it refrigerated if necessary. While refrigeration is sometimes acceptable, it's essential to ensure that you're not subjecting the syringe to extreme temperature changes. Frequent opening and closing of the fridge can expose the syringe to warmer air, which is detrimental. If your spore syringe must be stored for an extended period, remember that cool temperatures, around 34°F to 40°F, are ideal. This preserves spore viability much better than freezing. Additionally, if you find yourself in a situation where you must store it outdoors in cooler climates, ensure it's insulated. Protection against frost or extreme temperatures is vital to preserve your spores for future use. Step 4: Label Your Syringe Clearly label your syringe with the date of collection and the type of spores, so you can easily track its lifespan. This step is often overlooked, but it’s crucial for effective management. A simple adhesive label or even a permanent marker will do the trick. Just ensure it’s legible and placed where it won’t wear off over time. In addition to the date and type, consider noting any specific storage instructions on the label. This way, anyone who might handle your supplies will know how to store them properly. Properly labeling your spore syringe not only allows you to monitor when to use it but helps in organizing multiple syringes as well. It reduces any confusion when it comes to selecting the right type of spores for cultivation. Final Thoughts on Storing Your Spore Syringe By following these simple steps, you can ensure that your spore syringe remains viable for future use. Proper storage not only extends the life of your spores but also increases your chances of a successful cultivation. Happy growing!
- The Best Substrates for Growing Mushrooms at Home: A Deep Dive into Animal Dung-Based Options
Mushroom cultivation at home has gained massive popularity in recent years, and one of the most important factors in a successful grow is choosing the right substrate. The substrate acts as the food source for mycelium, providing the necessary nutrients for mushrooms to thrive. Many different materials can be used as a substrate, but for certain mushroom species, animal dung is an especially beneficial addition. Common Mushroom Substrates Mushroom substrates vary depending on the species being cultivated. Some of the most common substrates include: Hardwood sawdust or chips – Ideal for species like Lion’s Mane and Shiitake. Coco coir and vermiculite – A popular mix for growing many gourmet and medicinal mushrooms. Straw – A great choice for Oyster mushrooms. Manure-based substrates – Essential for dung-loving mushrooms like Psilocybe cubensis. Coffee grounds – A sustainable option that works well for species like Oysters. Composted materials – A mix of organic matter that provides a rich nutrient base. Among these, manure-based substrates are particularly important for cultivating certain fungi that thrive in nutrient-rich environments. Why Use Animal Dung in Mushroom Substrates? Animal dung is packed with organic material and beneficial microorganisms that help fungi break down complex nutrients, making them highly bioavailable. Many mushrooms, especially Psilocybe cubensis and other dung-loving species, naturally grow in manure-rich environments. Adding dung to a substrate can boost yields, improve colonization speed, and enhance the overall robustness of the mushrooms. Ranking Animal Dung for Mushroom Cultivation Not all animal dung is created equal when it comes to mushroom cultivation. Here’s a ranking of different types of dung, from best to worst: 1. Alpaca Manure (Best Choice) Why? Alpaca manure is an exceptional substrate choice because it has a near-perfect balance of nutrients, excellent aeration, and low ammonia levels. It naturally supports robust mycelial growth while maintaining proper moisture retention without becoming too dense. Best for: Psilocybe cubensis, Agaricus species. Preparation: Requires minimal aging, but should still be dried and leached to optimize conditions. 2. Horse Manure Why? Horse manure is considered one of the best dung options for mushroom substrates. It has a high fiber content, excellent water retention, and a balanced nutrient profile that supports healthy mycelium growth. Best for: Psilocybe cubensis, Agaricus species. Preparation: Aged and leached to remove excess ammonia and nutrients. 3. Cow Manure Why? Cow manure is another excellent choice, though it can sometimes be too wet and dense, requiring additional bulking agents like straw or vermiculite. Best for: Psilocybe cubensis, Agaricus species. Preparation: Should be well-aged and mixed with straw or other aerating materials. 4. Donkey and Mule Manure Why? Similar in composition to horse manure, it provides good water retention and a balanced nutrient profile. Best for: Psilocybe cubensis and similar dung-loving species. Preparation: Dried and aged properly to prevent excess ammonia. 5. Rabbit Manure Why? Rabbit manure is rich in nitrogen and doesn’t require aging, but it’s best when mixed with other bulk substrates to balance the nutrient density. Best for: Oyster mushrooms, Psilocybe cubensis when mixed with straw or coir. Preparation: Can be used fresh but is often composted for better consistency. 6. Goat and Sheep Manure Why? These manures tend to be lower in fiber and may require additional supplementation to improve aeration and structure. Best for: Limited use in mushroom cultivation; may be mixed with other materials. Preparation: Should be aged and mixed with a more fibrous substrate. 7. Chicken Manure (Worst Choice) Why? Chicken manure is too high in nitrogen and ammonia, making it too hot for most mushrooms. It can kill mycelium if used in large amounts. Best for: Not recommended unless heavily composted and diluted with other materials. Preparation: If used at all, it must be aged and composted thoroughly. How to Prepare a Manure-Based Mushroom Substrate Using manure as a substrate requires proper preparation to remove harmful ammonia and ensure a balanced nutrient content. Follow these steps: Aging and Leaching – Fresh manure contains high levels of ammonia, which can be toxic to fungi. Let it age for several weeks and leach it by exposing it to rain or soaking and draining. Pasteurization – To kill off unwanted bacteria and contaminants, pasteurize the manure by heating it to around 160°F (70°C) for 60–90 minutes. Mixing with Other Materials – For the best results, combine manure with bulk materials like straw, coir, or vermiculite to improve aeration and moisture retention. Hydration Check – Ensure the substrate holds moisture well but is not overly saturated. A good rule of thumb is the “field capacity” test: squeeze the substrate, and it should hold shape without dripping excessive water. Final Thoughts Animal dung-based substrates are some of the best options for growing dung-loving mushrooms, especially Psilocybe cubensis and Agaricus species. While alpaca and horse manure rank at the top, chicken manure should be avoided due to its high nitrogen content. With proper preparation, manure-based substrates can significantly improve mushroom yields and overall growth. Whether you’re a beginner or an experienced grower, understanding how different substrates impact mushroom cultivation is key to successful harvests. If you’re working with dung-based substrates, be sure to age, pasteurize, and mix them correctly to create an ideal growing environment.
- The Health Benefits of Lion’s Mane Mushrooms
Lion’s Mane mushrooms ( Hericium erinaceus ) have been used for centuries in traditional medicine, and modern research is now confirming what ancient healers already knew—this unique, shaggy-looking fungus is a powerhouse for brain health, immunity, and overall well-being. 1. Brain Health & Cognitive Function Lion’s Mane is best known for its neuroprotective properties. It contains compounds called hericenones and erinacines , which stimulate the growth of nerve cells and may help improve memory, focus, and cognitive function. Studies suggest that Lion’s Mane may: Enhance mental clarity and focus Support nerve regeneration Reduce symptoms of mild cognitive impairment and protect against neurodegenerative diseases like Alzheimer’s and Parkinson’s 2. Supports Mood & Reduces Anxiety and Depression Research indicates that Lion’s Mane may help regulate mood by promoting the production of nerve growth factor (NGF) , which supports brain plasticity and mental well-being. Some studies have found that consuming Lion’s Mane extract may: Reduce symptoms of anxiety and depression Support a balanced mood and emotional well-being Improve sleep quality 3. Boosts the Immune System Lion’s Mane is rich in antioxidants and polysaccharides , which can strengthen the immune system and enhance gut health. A healthy gut microbiome plays a key role in immune function, and Lion’s Mane may: Support the growth of beneficial gut bacteria Help fight off infections and inflammation Improve overall immune response 4. Supports Heart Health Some studies suggest that Lion’s Mane may help lower bad cholesterol (LDL) while increasing good cholesterol (HDL) . It may also reduce the risk of heart disease by: Lowering triglyceride levels Reducing oxidative stress Supporting healthy circulation 5. Helps with Nerve Regeneration & Recovery Because Lion’s Mane promotes nerve growth and repair , it has potential benefits for people recovering from nerve injuries, strokes, or neurodegenerative diseases. It may: Speed up recovery from nerve damage Reduce pain and inflammation Support spinal cord and brain healing 6. May Help Manage Diabetes Research suggests that Lion’s Mane can help regulate blood sugar levels and reduce diabetic nerve pain by: Improving insulin sensitivity Reducing oxidative stress Supporting nerve health in diabetic neuropathy How to Use Lion’s Mane Lion’s Mane is available in various forms, including: Tea & Coffee – A great way to add it to your daily routine Powder – Mix it into smoothies, soups, or drinks Capsules & Extracts – Convenient for daily supplementation Fresh or Dried – Can be cooked into meals for a delicious umami flavor Final Thoughts Lion’s Mane isn’t just another trendy superfood—it’s a science-backed functional mushroom with incredible health benefits. Whether you’re looking to boost brain power, enhance immunity, or support nerve health , incorporating Lion’s Mane into your routine can be a game-changer.
- What Challenges Might I Face in Mushroom Growing?
Mushroom growing can be a rewarding but complex endeavor. As with any form of gardening, it's essential to be aware of the challenges you might encounter along the way. In this post, we'll explore common obstacles and how to navigate them effectively. Step 1: Understanding the Growing Environment Mushrooms require specific conditions to thrive. Learn about the importance of humidity, temperature, and light. Humidity is vital for mushroom growth, with optimal levels often ranging between 80-95%. A humid environment helps to maintain moisture in the substrate, encouraging healthy mycelium development. Without adequate humidity, mushrooms can dry out, leading to poor yields. Temperature also plays a crucial role. Different mushroom species have unique temperature preferences for their growth stages. For example, some may prefer cooler conditions, while others thrive in warmth. It's essential to research the ideal temperatures for your chosen mushrooms to ensure a robust growing environment. Additionally, light exposure matters, but not in the same way as traditional plants. Mushrooms need indirect light to trigger fruiting but too much direct sunlight can be detrimental. Understanding these nuanced requirements allows you to create a harmonious growing space that maximizes yield. Step 2: Managing Contamination Risks Discover how to recognize and prevent contamination, which can compromise your mushroom crop. Contamination is one of the biggest enemies in mushroom growing. It's a sneaky foe that can come in various forms, from mold to bacteria. Learning to identify these threats early on is crucial. Regularly check your substrate for any unusual growths, as catching contamination promptly can save your harvest. Sanitation practices are your first line of defense. Ensure all tools and surfaces are thoroughly cleaned and disinfected before use. This might seem tedious, but establishing a routine can significantly reduce contamination risks. Use gloves when handling substrates to minimize the introduction of unwanted bacteria. Another important strategy is to maintain controlled environments. Variability in temperature and humidity can lead to conditions favorable for contamination. By stabilizing these factors, you can create a less hospitable environment for potential contaminants. Step 3: Choosing the Right Mushroom Species Not all mushrooms are suited for novice growers. Find out which types are best to start with. Choosing the right mushroom species can be a daunting task, especially for newcomers. Some varieties, like oyster mushrooms, are known for being forgiving and relatively easy to cultivate. They can adapt well to various substrates, making them ideal for beginners. On the other hand, some mushrooms, such as shiitakes or chanterelles, might require more expertise and patience. Understanding the specific needs and challenges of different types will guide you toward making an informed choice. Start with easier varieties to build your confidence. Furthermore, consider your growing conditions. Some species thrive indoors while others prefer outdoor settings. Aligning your goals and environment with your mushroom choice is crucial for a successful growing experience. Step 4: Dealing with Pests and Contamination Learn about common pests and diseases that can affect mushrooms, and how to combat them. Pests can wreak havoc on your mushroom crop if left unchecked. Common issues include flies and mites that can invade your growing environment. Recognizing the signs of infestation early allows for more effective control measures. Sticky traps can be a practical tool for monitoring pest populations. Manual extraction is typically the best method if the mono tub isn't over ran with pests. Additionally, specific types of mold such as Trichoderma, lipstick mold, and cobweb mold can also pose significant threats to your mushroom crop. Trichoderma, often recognized by its greenish color, is a resilient mold that can compete with your mushrooms for nutrients, leading to poor yields. It's crucial to catch it early, as it can spread quite rapidly if left unchecked. Lipstick mold, named for its striking reddish hue, can appear in your substrate when conditions are too wet or contaminated. This mold can be tricky to deal with but acts as a clear signal that something has gone wrong. Maintaining proper moisture levels and a clean environment can help prevent its growth. Cobweb mold, identified by its fine, cobweb-like appearance, often arises in environments that lack good air circulation. It's a sneaky intruder that can quickly overtakes your growing space. Regularly monitoring your environment and ensuring sufficient airflow can keep this mold at bay. By being aware of these types of mold and their symptoms, you'll be better equipped to manage and prevent contamination in your mushroom growing efforts. Remember, early detection and proactive measures are key to ensuring a healthy and bountiful harvest. Maintaining clean growing conditions and ensuring proper airflow also significantly reduces the risk of pests and diseases. Regularly check your setup, and if you do spot any issues, don't hesitate to act swiftly. It's better to tackle a problem early than face a bigger challenge later on. Step 5: Overcoming Harvesting Challenges Harvesting mushrooms at the right time is crucial. Understand the signs to look for. Timing your harvest can make all the difference in mushroom growing. Picking too early can result in smaller yields and less flavorful fungi, whereas waiting too long can lead to spore release and degradation of quality. Familiarize yourself with the visual cues that indicate when mushrooms are ready for harvest. For example, many mushrooms will display a specific color or size that signals they are at their peak. Observing the gills of the mushroom can also be informative; if they begin to turn dark, it’s likely time to harvest. Taking the time to learn these signs pays off with a more fruitful and delicious end product. Moreover, having a plan for storing your harvest right after picking is essential. Proper storage conditions can help in maintaining freshness and flavor for later use. Overall, being attentive during the harvesting phase is key to reaping the rewards of your hard work. Final Thoughts on Overcoming Challenges in Mushroom Growing By understanding the unique challenges of mushroom growing, you can better prepare yourself for a successful harvest. Remember, persistence and adaptability are key in overcoming these hurdles. Happy growing!
- 20 Reasons Agar Plates Are a Mycologist's Best Friend
Agar plates are a crucial tool for mycologists, providing an environment where fungi can thrive, be observed, and studied. In this listicle, we'll explore twenty compelling reasons why agar plates should be a staple in any mycologist's toolkit. 1. An Ideal Cultivation Medium Agar plates provide a sterile environment that is perfect for cultivating various fungi. The gel-like consistency of agar serves as an excellent substrate for mycelial growth, ensuring that nutrients are easily accessible. In addition to their sterility, agar plates can be infused with specific nutrients tailored to the needs of different fungal species. This not only promotes healthy growth but also reduces the risk of contamination, a critical consideration in any mycological study. 2. Easy to Prepare and Use Preparing agar plates requires minimal ingredients and steps, making them accessible for all levels of mycologists. With basic items like agar premixes that is ready to use, you can create a reliable growth medium without the need for complex equipment. The straightforward preparation process means that even those new to mycology can quickly learn to make agar plates effectively. This fosters a beginner-friendly environment where experimentation and learning can occur at any level. 3. Versatility Across Fungi Species Whether you're working with mushrooms, molds, or yeast, agar plates can accommodate a wide range of fungal species. This versatility makes agar plates an indispensable tool in both academic and practical applications. Different types of fungi have unique growth requirements, and agar plates can be customized to meet those needs. From adjusting pH levels to incorporating specific nutrients, the adaptability of agar plates ensures optimal conditions for various fungal families. 4. Supports Fungal Development Phases Agar plates allow mycologists to observe and study various growth phases of fungi, from spores to mature fruiting bodies. This ability to monitor developmental stages is crucial for understanding a fungus's life cycle and ecological impact. Through agar plates, researchers can document morphological changes during growth, providing valuable data for taxonomic studies. The transitions observed can reveal adaptations fungi make in response to environmental factors, enhancing our understanding of their biology. Moreover, monitoring these stages on agar plates can help identify potential issues, such as contamination or desiccation, allowing for timely interventions to protect and cultivate the desired fungi. 5. Facilitates Mycelium Isolation Using agar plates, mycologists can isolate specific strains of mycelium for further research or cultivation. This isolation is vital in identifying and understanding specific characteristics unique to certain fungal strains. By ensuring that each isolated strain is free from contaminants, researchers can conduct more accurate experiments. Gel containing the mycelium serves as a barrier against unwanted growth, ensuring the focus remains on the fungi of interest. 6. Promotes Examination of Fungal Morphology Agar plates make it easy to examine the morphological characteristics of fungi, aiding in species identification. The clear gel medium allows for easy visualization of fungal structures and growth patterns, essential for accurate classification. Through careful observation and documentation of features such as color, texture, and growth rate, mycologists can compile a comprehensive profile of each species. This morphological analysis is just as important as genetic sequencing in establishing identities within the vast fungal kingdom. 7. Integration with Other Techniques Agar plates work well alongside other mycological techniques, such as liquid cultures and tissue cultures. This integration presents a holistic approach to studying fungi, allowing researchers to leverage the strengths of each method. For example, while agar plates are excellent for solid culture growth, liquid cultures can exponentially increase biomass in a shorter period. Combining both methods can optimize strain development and lead to more efficient research outcomes. 8. Avenue for Antibiotic Testing With agar plates, mycologists can test the effects of various antibiotics on fungal growth. This is crucial not only for the study of pathogenic fungi but also for understanding the implications of antibiotic resistance. By incorporating different concentrations of antibiotics into agar plates, researchers can observe how fungi respond. This information can ultimately guide agricultural practices and inform medical approaches to fungal infections. 9. Educational Tools for Students Agar plates are excellent educational tools, helping students learn about fungi in a hands-on manner. The simplicity of their preparation means students can engage in practical classes without the burden of complicated procedures. Furthermore, administering lessons that involve agar plates not only teaches students about fungi but also instills an appreciation for scientific observation and experimentation. This sparks curiosity and encourages future exploration in mycology and related fields. 10. Storage and Transportation Ease Agar plates can be stored and transported easily, making them convenient for laboratory work. Their compact nature allows for easy stacking and storage in various refrigeration conditions, enabling long-term preservation. This convenience is particularly beneficial for collaborative research, where samples may need to be shared across institutions. The ability to transport agar plates without significant risk of damage plays a vital role in the seamless operation of mycological research. 11. Cost-Effective Research Medium Using agar plates can reduce the costs associated with more complex culturing methods. Materials required for agar plates are relatively inexpensive compared to the high costs associated with maintaining high-tech equipment. For independent researchers and small labs, this affordability opens doors to conducting high-quality experiments without the financial strain. Utilizing agar plates makes mycology more accessible and sustainable for researchers at all levels. 12. Evaluation of Fungal Pathogenicity Agar plates allow researchers to assess the pathogenicity of fungi, essential for agricultural studies. This evaluation informs crop management practices and helps mitigate the impact of harmful fungal infections on yields. By inoculating crops on agar and monitoring growth, researchers can develop effective antifungal strategies to protect plants. This intersection of mycology and agriculture emphasizes the practical implications of agar plate research. 13. Influence on Fungal Ecology Studies They provide insights into ecological interactions between different fungal species and their environments. Agar plates facilitate studies on competition, symbiosis, and the role fungi play in nutrient cycling. By fostering these interactions in a controlled setting, mycologists can generate data that informs ecological models and conservation strategies. The knowledge garnered from such studies can greatly enhance our understanding of biodiversity. 14. Enhanced Observation of Contamination Agar plates can help identify contamination in fungal cultures, thus maintaining the integrity of experiments. The transparent nature of the plates makes it easy to spot intruders, whether bacteria or mold, that could compromise research validity. Identifying contamination promptly allows for the appropriate corrective measures to be taken, safeguarding the valuable research underway. Through diligent monitoring, mycologists can ensure that their findings are accurate and reliable. 15. A Simple Method for Spore Printing Creating spore prints is simplified with agar plates, allowing for easy collection and study of spores. This technique not only aids in the identification of species but also promotes a deeper understanding of their reproductive biology. With agar plates, spore prints can be created in a controlled environment, minimizing contamination and maximizing clarity. This precise method opens avenues for both academic and recreational endeavors in mycology. 16. Facilitates Genetic Studies Agar plates support genetic mapping and studies of inheritance in fungi, expanding our understanding of fungal genetics. These studies can lead to insights into genes associated with desirable traits, such as resistance to disease or enhanced growth rates. By isolating specific strains on agar plates, researchers can conduct genetic analyses that contribute to breeding programs and industrial applications. This versatility demonstrates the critical role agar plates play in both academic research and commercial endeavors. 17. Compatible with Various Growth Agents They can be supplemented with various nutrients or growth agents to tailor the environment for specific fungi. This customization opens up a world of possibilities for enhancing growth and performance in cultured fungi. Incorporating growth factors like vitamins, minerals, or hormones transforms basic agar plates into specialized media, enabling precise control over fungal development. The adaptability of agar plates reinforces their status as a staple in mycological laboratories. 18. Promotes Citizen Science Projects Agar plates can encourage citizen science efforts, allowing enthusiasts to engage in mycology at home. With simple preparation methods and easily obtainable materials, anyone can start growing fungi and contributing to broader research. These home projects not only promote an interest in mycology but can also yield significant data on fungal distributions and biodiversity in local areas. Citizen scientists can contribute valuable observations and enhance community engagement with science. 19. Support for Commercial Mushroom Cultivation Agar plates are essential for hobbyists and businesses aiming to cultivate gourmet mushrooms effectively. Ensuring that the chosen strains are free from contaminants is critical for successful and profitable cultivation. Moreover, the ability to manipulate growth conditions in agar plates allows cultivators to refine their techniques, optimizing yields and maintaining quality. From small-scale growers to large operations, agar plates play a central role in the mushroom cultivation industry. 20. Analyzing Fungal Symbiotic Relationships Agar plates can help explore the symbiotic relationships fungi have with plants and other organisms. These relationships are fundamental to ecosystems, influencing nutrient availability and plant health. By cultivating specific plant-fungal combinations on agar plates, researchers can better understand interactions and dependencies that enhance biodiversity. Understanding these interactions can inform conservation efforts as we aim to sustain ecological integrity.
- What Is a Mushroom Grow Kit and How Does It Work?
In recent years, mushroom grow kits have gained popularity among gardening enthusiasts and culinary adventurers. But what exactly is a mushroom grow kit, and how does it facilitate the growth of these unique fungi? In this guide, we'll break down the essentials of mushroom grow kits and delve into how they work, making it easy for anyone to get started on their mushroom-growing journey. What Is a Mushroom Grow Kit? A mushroom grow kit is a pre-packaged set that contains everything you need to grow mushrooms at home, including pre-sterilized grain spawn, dung or wood based pasteurized substrate, mushroom spores/liquid culture, and instructions. These kits are designed to make mushroom cultivation accessible to everyone, regardless of prior gardening experience. They typically come with easy-to-follow instructions, allowing you to dive right into the world of mycology. From the moment you open the kit to the first signs of growth, it’s all part of an exciting adventure. Children and adults alike are captivated by watching mushrooms develop almost overnight! Components of a Mushroom Grow Kit Learn about the essential components included in a typical mushroom grow kit, such as the grain spawn, substrate, spores/liquid culture, and monotub chamber with FAE holes. The grain spawn is a crucial component of any mushroom grow kit and acts like the engine to kick-start your mushroom-growing adventure. What makes sterilized grain spawn special is its high sugar and carbohydrate content, which provides an ideal fuel source for the mycelium as it begins to expand. When you introduce the grain spawn to your prepared substrate, you’re essentially giving the mycelium the perfect environment to thrive and spread. The substrate serves as a growing medium and is nutrient rich. There are dung based substrates that are for research/medicinal varieties and wood based substrates for most gourmet/culinary varities. It's important to note that substrate recipes can vary in quality; premium substrates will include dung and a variety of nutrients that are essential for producing robust fruit bodies. The spores/liquid cultures included in your grow kit serve as the reproductive material that will ultimately develop into your delicious mushrooms. Think of them as tiny seeds ready to sprout! Depending on the specific kit you choose, you might find a delightful variety of mushroom types, each boasting its unique flavor and growth patterns. This is how you choose which variety you want to grow! Whether you're in the mood for the rich taste of shiitake or the earthy notes of portobello, the spores or liquid cultures are where the magic begins, providing the essential foundation for your mushroom adventure. The monotub chamber with FAE holes is another essential element of your mushroom grow kit. Think of it as the cozy home where your mushrooms will flourish! These fresh air exchange (FAE) holes play a crucial role in ensuring your mushrooms receive the right amount of oxygen, which is vital for their growth. When mushrooms are growing, they need fresh air to develop properly. The FAE holes offer just that, allowing for proper ventilation while keeping unwanted contaminants at bay. It’s all about creating a balanced environment—enough airflow to fuel growth, but not so much that it dries out your substrate. How Does a Mushroom Grow Kit Work? We’ll explore the growing process, from inoculation of the substrate with spores/liquid cultures to the ideal environment for fruiting. Mushroom grow kits are an exciting and accessible way to cultivate your own tasty fungi at home. Here's a simple breakdown of how they work. Inoculation : Introduce the mushroom spores/liquid cultures into the pre sterilized grain. This is your starting point for growth! Create the Right Environment : Place the grain in a dark, warm spot (70-80°F) for a 10-20 days to encourage mycelium development. Combine the inoculated grain with substrate : Once you see a white fuzzy mycelium that has taken over the grain, combine the inoculated grain with the substrate and put the combination into the monotub grow chamber. Introduce fruiting conditions : Once the mixture has spent 10-15 days in the dark, allowing it to colonize without any airflow, it's time to introduce fruiting conditions. This means providing 12 hours of light followed by 12 hours of darkness. You'll want to make sure the fresh air exchange (FAE) holes are covered with filter patches or micropore tape during this stage. This balance of light and darkness creates the perfect environment for your mushrooms to thrive and develop into delicious treats! Troubleshoot Challenges : Keep an eye out for mold or insufficient humidity or low temperature, adjusting conditions as necessary. With patience and care, you'll transform your kit into fresh, delicious mushrooms perfect for your next meal! Enjoy the journey of mushroom cultivation! Tips for Successful Mushroom Cultivation One of the most important tips is to maintain consistent humidity. Remember, a well-hydrated substrate is key! Proper sterilization procedures are also critical. Make sure to use sterilized materials when inoculating the substrate with your spores or liquid cultures. By starting with clean, sterile conditions, you’re setting your mushrooms up for success right from the beginning. Temperature is another crucial factor. Keep your kit in a location that maintains stable temperatures, generally between 70-80°F depending on the mushroom variety. Be patient! Mushrooms can appear rather quickly, but the entire growth cycle takes time. Ensuring you’re giving them the right environment will reward you with a beautiful harvest. Common Challenges and Solutions One of the first challenges you might encounter is contamination. If your kit isn't kept in a clean environment, mold or bacteria may spoil your grow. Always wash your hands before handling the kit! Another common issue is insufficient humidity. If you notice that your mushrooms aren't growing as expected, it might be time to increase humidity levels. A simple spray bottle can do wonders! Finally, keep an eye on temperature fluctuations. If your mushrooms aren’t fruiting, check if they’re too warm or too cool. Adjusting their environment can resolve many growth issues. While challenges can arise, remember that mushroom cultivation is all about learning and experimenting. Each kit will present its unique journey, and overcoming obstacles can be incredibly satisfying! Final Thoughts on Mushroom Grow Kits Mushroom grow kits offer an accessible and rewarding way to grow your own delicious mushrooms at home. With a little patience and care, you’ll be enjoying fresh mushrooms in no time. Whether you’re a seasoned gardener or a curious novice, the joy of cultivating your own fungi can be both fun and fulfilling!
- Are Spore Syringes Legal to Own?
Spore syringes are a popular tool for mycology enthusiasts, allowing for easy inoculation of substrates with mushroom spores. However, legal concerns often arise regarding their ownership and use. In this blog, we will explore the legality of spore syringes, their uses, and what you need to know before purchasing or using them. What is a Spore Syringe? A spore syringe is a cylindrical container filled with a liquid medium that contains mushroom spores. These syringes are used to inoculate various substrates for mushroom cultivation, making them an essential tool for hobbyists and researchers alike. These syringes typically contain sterilized water or nutrient-rich solutions that help facilitate the growth of the spores once introduced to the substrate. This straightforward method allows enthusiasts to engage in a fascinating hobby—cultivating their own mushrooms at home. Moreover, the convenience of spore syringes lies in their ready-to-use format, which eliminates the need for complicated procedures often associated with traditional spore printing. As a result, they have gained widespread popularity among amateur mycologists and experienced cultivators alike. In essence, spore syringes can serve as a gateway into the vast world of fungal cultivation, giving individuals a fascinating opportunity to explore diverse mushroom species, from culinary delights to potent medicinal varieties. Understanding their structure and function underscores the importance of responsible use in cultivation practices. The Legal Status of Spore Syringes in the US In the United States, the legality of owning spore syringes varies significantly from state to state. While they are legal in many regions, some states impose restrictions due to the potential for misuse in cultivating illegal mushrooms. For example, states like California and Colorado have more lenient laws, allowing the purchase and use of spore syringes without significant restrictions. However, in states such as Georgia and Idaho, legal gray areas exist, as owning spore syringes is only permissible when they are not used in the cultivation of certain psychoactive fungi. This inconsistency often leaves potential buyers in a dilemma as they navigate purchasing options. To avoid any legal complications, prospective owners must familiarize themselves with both state and local laws. Understanding the potential implications of owning spore syringes can prevent unintentional infringement upon the law. Furthermore, keeping abreast of changes in legislation is crucial. Some states have taken steps to reconsider their stances, which could impact the legality of spore syringes in the future. Thus, consulting legal resources and staying informed can empower individuals to make educated decisions regarding their ownership. International Perspectives on Spore Syringe Ownership Outside of the US, the legality of spore syringes can also differ widely. In some countries, ownership is unrestricted, while others treat spore syringes similarly to controlled substances, making understanding international laws crucial for travelers. For instance, in countries such as Canada and the Netherlands, owning spore syringes is legal, provided they are not intended for cultivating illegal mushrooms. This leniency fosters a thriving community of mycology enthusiasts who actively engage in research and cultivation. Conversely, countries such as Australia and New Zealand impose stricter regulations where the possession and sale of spore syringes could lead to severe legal consequences, especially if related to psychoactive species. This discrepancy signifies the importance of conducting thorough research before traveling or relocating. Being aware of local customs, regulations, and restrictions can enhance the experience of any mycology enthusiast while mitigating risks. As a result, an informed traveler can juggle legal compliance with their passion for mushrooms, enriching their knowledge of fungi and its cultivation. Navigating Local Laws and Regulations Because laws can change and vary by locality, it's essential to research your local regulations regarding spore syringe ownership. Consulting legal resources or local authorities can help avoid potential legal issues. Many online communities dedicated to mycology provide invaluable information on these laws, helping newcomers understand what is permissible in their areas. Engaging with these groups can offer insights and support for responsible cultivation. In addition to online resources, legal experts often recommend that individuals keep an up-to-date file of local laws affecting spore syringes. Over time, as the popularity of mushroom cultivation continues to grow, laws may evolve, reflecting both societal attitudes and scientific advancements. Ultimately, taking proactive steps to familiarize oneself with local regulations is a key component of responsible cultivation and ownership. By staying informed, mycologists can ensure they remain compliant and navigate their passion safely and legally. Tips for Responsible Use and Acquisition Buying and using spore syringes responsibly involves understanding the intended use and adhering to local laws. Look for reputable suppliers and be knowledgeable about the species you are cultivating to ensure compliance and safety. It's also crucial to examine the labeling and sourcing of the syringes. Registered suppliers often provide information on the spore species, cultivation techniques, and safe handling practices. Transparency in these areas not only promotes trust but also enhances your ability to cultivate successfully. Additionally, consider joining local mycology clubs or attending workshops. Such activities offer opportunities to meet like-minded individuals who can share insights and provide guidance on best practices for using spore syringes. A community-based approach can significantly enhance your education and enjoyment of the hobby. Lastly, always be mindful of your overall impact on the environment. Sustainable practices in mushroom cultivation are essential to prevent over harvesting and to protect natural ecosystems. Responsible use doesn't solely mean following laws; it encompasses ethical considerations that go hand-in-hand with the passion for mycology. In Summary: Navigating Spore Syringe Legality Understanding the legal landscape surrounding spore syringes is crucial for anyone interested in mycology. While the legality of owning these syringes can vary by region, the information discussed in this blog should provide clarity. Always stay informed and consult local regulations to ensure compliance.