
Incubation Chamber Mushrooms: Temperature and Setup Guide
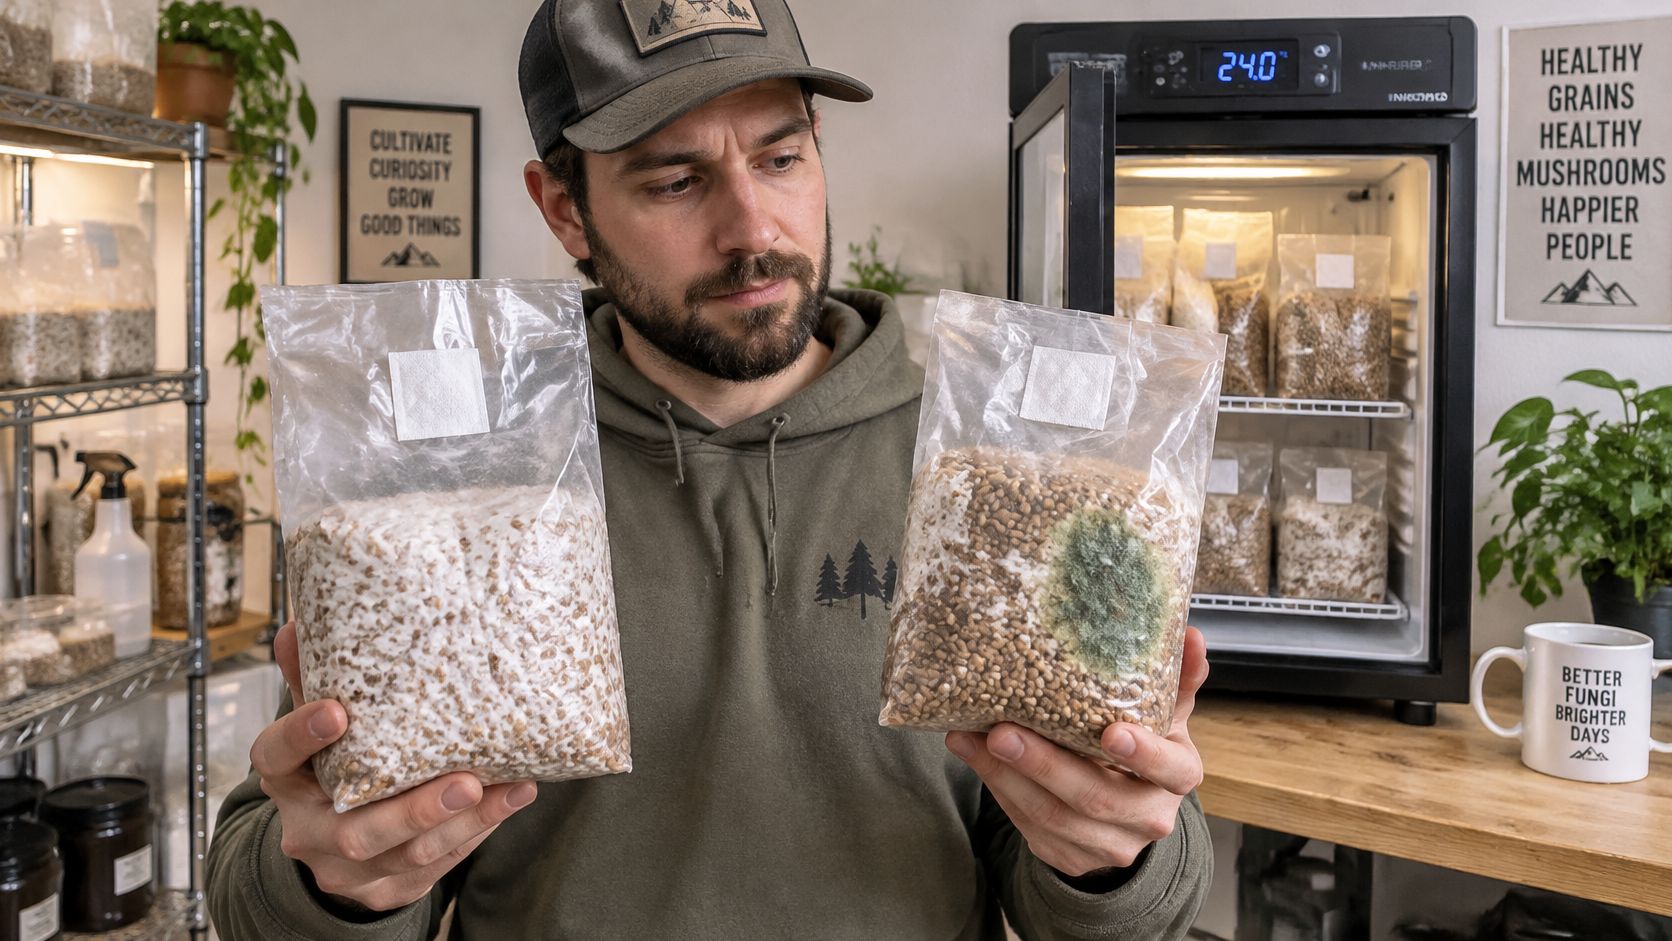
Your grain bags looked clean on day one. By day ten the white growth has stalled, or a green spot has shown up, and the room is the only thing that changed. Nights ran cold. Afternoons climbed. That swing is how a lot of first grows fail before a single mushroom forms.
An incubation chamber is the quiet part of the job. It holds the substrate steady while mycelium colonizes grain, sawdust, or an all-in-one bag. It is not the box you will use later to fruit, and more fresh air is not automatically better while colonization is still running.
What an Incubation Chamber Does for Mycelium
Say the bags sit on a shelf in a spare room. The thermostat reads fine at dinner, then the heat kicks off overnight and the sun hits the window after lunch. Mycelium doesn't average those readings the way a person does. It grows, or it stalls, in the actual air around the bag.
An incubation chamber is a sealable enclosure that keeps temperature and humidity steady while mycelium runs through the substrate. Think of a nursery that keeps seedlings out of the weather. The plants still do the growing. The nursery just stops the cold snap and the dry wind from deciding the outcome.
Cornell University's commercial mushroom-cultivation guidance names temperature and humidity as the two primary variables during incubation. Lighting and carbon dioxide are generally not important at this stage. For indoor cultivation, that guidance recommends a temperature near 70°F (about 21°C) and advises growers not to exceed 80°F (about 27°C).
Why the chamber gets hotter on its own
Colonizing mycelium makes metabolic heat. As the white growth thickens, the bag warms the air around it. A chamber that already sits near the top of the range can climb further, slow the run, and raise the chance of contamination. That is why the useful target is a steady, moderate setting, not the warmest number the heater can reach.
The same limit shows up in other living cultures. Bakers who track how 2°C shifts change dough rising already know a small drift changes the pace of a biological process. Mycelium is the same kind of problem. A couple of degrees, held for days, is not a rounding error.
Fruiting is a different job. Cornell recommends humidity above 85% during fruiting, plus more fresh-air management. An incubation chamber should not be treated as a fruiting chamber. For a small grow, prioritize temperature stability, keep bags out of direct light, and save intensive humidity and ventilation for later. Exact settings still shift by species and strain.
Practical rule: If the room swings from cold nights to warm afternoons, fix that swing before you change the substrate.
Target Temperature and Humidity by Growth Stage
Colonization and fruiting work like germination and transplanting. The first stage wants a stable, closed environment. The second wants open air and constant moisture on exposed surfaces. Read the targets for each before you buy a heater.
Incubation and fruiting targets by stage
Stage and source | Temperature | Relative humidity | CO2 | Airflow |
|---|---|---|---|---|
Incubation, indoor baseline (Cornell) | 21°C (70°F), not above 27°C (80°F) | Hold steady, below fruiting levels | Not a primary control | Limited |
Incubation, controlled study | 21–24°C | Keep surfaces from drying out | Allowed to rise | Low, no fan across substrate |
Grey oyster mycelial development | Warmer than the indoor baseline | Steady, below fruiting needs | Higher than fruiting | No fan across bags |
Spawn run, expert guidance | Near the indoor baseline | Moist enough that filters don't dry | 10,000–20,000 ppm | Minimal exchange |
Grey oyster fruiting, controlled study | 20–25°C | 80–95% | Below 600 ppm | Increased fresh air |
Fruiting, expert range | Often a drop from incubation | Above 85% (Cornell) | 500–800 ppm | Increased fresh air |
A cultivation methods paper in the McGill University repository places spawn-run carbon dioxide near 10,000 to 20,000 ppm, and associates fruiting with roughly 500 to 800 ppm. Those two bands should never be averaged into one setpoint.
How to read the two columns that matter
Temperature and humidity do different work at each stage. During colonization the bag stays mostly closed, so the grain's own moisture and the filter patch handle humidification. The chamber's job is holding a steady temperature. During fruiting the exposed surface loses water constantly, and the room's humidity becomes the control that keeps pins from stalling. The same logic applies to airflow: while colonization runs, extra ventilation buys you nothing the bag was not already doing, and it can pull moisture out of surfaces you cannot re-wet.
Grey oyster shows why a single "mushroom temperature" fails. Its colonization runs warmer than the general indoor baseline, while its fruiting band sits below that colonization optimum. Species charts such as this guide to mushroom growing requirements are the right place to check your strain before you lock a dial.
One chamber can serve both stages only if the controller changes settings when you move from colonization to fruiting. If the chamber cannot hold the baseline within a few degrees, fix temperature stability before you tune humidity. A perfect hygrometer reading does not help a bag that spends the afternoon above the safe ceiling.
Managing CO2 and Airflow Without Over-Ventilating
A grower adds a small fan to the incubation tote because fresh air sounds like progress. Two weeks later the grain is dry around the filter patch and colonization has stalled. The instinct made sense. The timing was wrong.
More fresh air is not automatically better while colonization is running. That advice is true later, during fruiting, and beginners tend to apply it a stage too early. Colonizing mycelium respires and releases carbon dioxide, and a modest CO2 rise inside a sealed or filtered container harms nothing. Limited gas exchange also holds moisture in the bag, which is what the mycelium needs to finish the job. Airflow during this stage works like a faucet: a trickle through the filter patch is enough, and opening it wide only drains water you cannot put back.
What the container is already doing
Gas exchange should follow the container, the species, and the stage. A controlled cultivation study ran incubation at 21 to 24°C, then switched fruiting to more fresh air, 80 to 90% relative humidity, and CO2 below 600 ppm. High CO2 during fruiting stretches stems, shrinks caps, and cuts quality. During incubation, that same rise is part of a low-disturbance mode, and chasing it down with ventilation costs you humidity for no benefit.
Use sterilized containers with microporous filters or properly prepared lids. Keep bags up off cold or wet chamber floors, and watch for condensation or a filter that has clogged. The incubation mode is simple: no fan blowing across exposed substrate. Fruiting mode is separate, with active ventilation you switch on only after colonization is finished.
Sealed or filtered bags usually need no fan. A chamber full of open blocks is a different room.
A decision you can apply tonight
Filtered grain bags or all-in-one bags: Leave them sealed. The patch is the air supply. A chamber fan mostly steals moisture.
A few open blocks in a large tote: Keep airflow gentle and check that surfaces aren't crusting over.
Many blocks in a small chamber: Monitor CO2. Respiration load scales with substrate mass, so ten blocks are not "a little more" than two.
Species also differ in how much gas they push out of the substrate, so the same tote can need different ventilation after you swap varieties, even when the thermometer hasn't moved. Anyone who already tracks home air quality has seen how a closed room's gas reading drifts for reasons the wall thermostat never shows. A mushroom chamber is smaller, wetter, and full of respiring substrate, so that drift shows up faster.
If you change only one thing, match airflow to the container in front of you. Save the fruiting schedule for fruiting.
Set Up and Verify Your Chamber Step by Step
A controlled chamber can hold a much tighter band than a spare bedroom. In a peer-reviewed study of an Internet-of-Things monitoring system for grey oyster mushrooms, the chamber was set to 25°C and 90% relative humidity. The system held temperature between 24.5°C and 25.5°C, a spread of only 1°C, and humidity between 88% and 92%. That is the benchmark for tight control, not a target you must copy for every species. The same grey oyster monitoring study notes that settings change with the stage and the mushroom. Pick the species target, then prove the empty box can hold it.
We build grow chambers and kits to be easy to use, and the checks below still apply if you are using a tote.
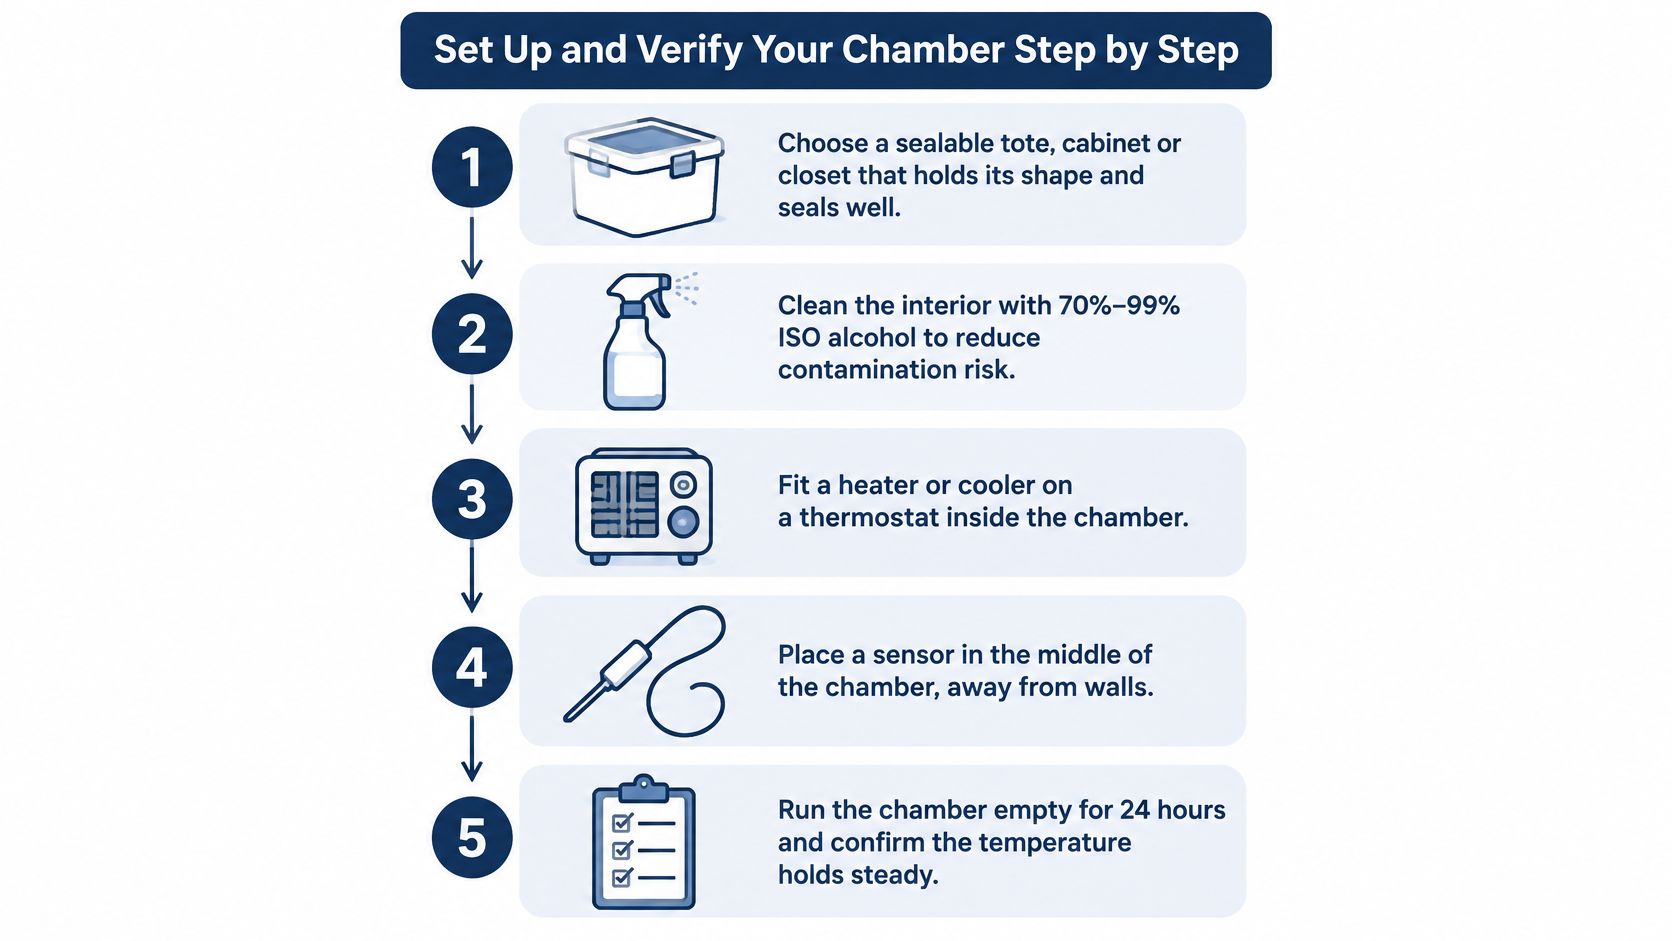
Choose the box. Use a sealable tote, cabinet, or closet that holds its shape. A lid that warps won't keep a setpoint, no matter how good the controller is.
Clean before you trust it. Wipe the interior with 70% to 99% ISO alcohol so dust and old spills aren't waiting for the first bags. Skip this and you may blame the culture for a dirty box.
Put heat and cooling on a controller. Set incubation around 21 to 24°C unless your strain sheet says otherwise. An unregulated heat mat under a bag is how the bottom overheats while the lid still looks fine.
Add humidity you can read. A small humidifier or a water tray plus a hygrometer is enough. Aim at the species row in the table, and don't chase fruiting humidity while bags are still sealed.
Place the sensor at substrate level. Wall and lid air can read differently from the bags. If the probe sits next to the heater, you will "control" a hot corner and miss the shelf.
Run it empty for 24 to 48 hours. Log temperature and humidity. You want short, repeatable swings, not a spike every time you picture the door opening.
Keep it dark and out of direct sun. A window can add an afternoon heat load the thermostat wasn't sized for.
Load only after the empty run stays inside the band. Before the first grow, write down a CO2 plan for the loaded bags and a separate fruiting mode with more fresh air. If a check fails, go back to the setup. Don't "fix" it by changing the substrate.
A short walkthrough helps if you'd rather see the parts than read a list.
If you're setting up a whole room rather than one tote, our grow room setup notes cover layout, and we offer personal consultation for customers who are new to mycology and want to set up a growing room. Measure at the bags, then decide whether the room even needs a chamber.
Common Setup Mistakes and How to Avoid Them
The mistake we see most often is trusting the room thermostat. That dial sits on a wall, often in a hallway. Your bags sit in a closed tote that makes its own heat. The room can read comfortable while the substrate runs several degrees hot.
Fixes you can do without new gear
Heat mats set too high. Colonization adds its own warmth, and the bag can pass 27°C (80°F) even when the room feels mild. Set the controller to hold 21 to 24°C and read a sensor at the substrate, not the mat.
Condensation dripping onto bags. Wet lids and pooled water invite contamination. Dry the chamber back, and if water builds up, use the drainage hole to empty standing water or lower humidity.
Opening the door to "just check." Each opening swings temperature and humidity. Read the gauges through a window or a clear lid, and open only when you need to move a bag.
One setpoint for both stages. Incubation and fruiting want different humidity, CO2, and airflow. Save two modes on the controller, or use two spaces. Mixing them means neither stage gets its target.
Ignoring CO2 at the wrong time. During incubation, high CO2 in filtered bags is usually fine. In a crowded fruiting chamber it builds, and you get long stems and small caps. Start ventilation when fruiting starts, and monitor CO2 when many blocks share a small box.
A weekly pass beats a daily fuss. Three checks are enough.
Look at the sensor reading against your setpoint, look for new condensation on the lid or bags, and look at substrate color. Healthy colonization stays evenly white. Green, black, or a sour wet patch is a stop, not a dial to turn. If the sensor, the lid, and the color all look the same as last week, leave the chamber alone.
What Controlled Conditions Change in Yield
In 2025, an IoT-controlled mushroom cultivation chamber produced a mean yield of 352.5 grams versus 136 grams in a non-controlled setup, according to researchers at Manila Southern Colleges Foundation.
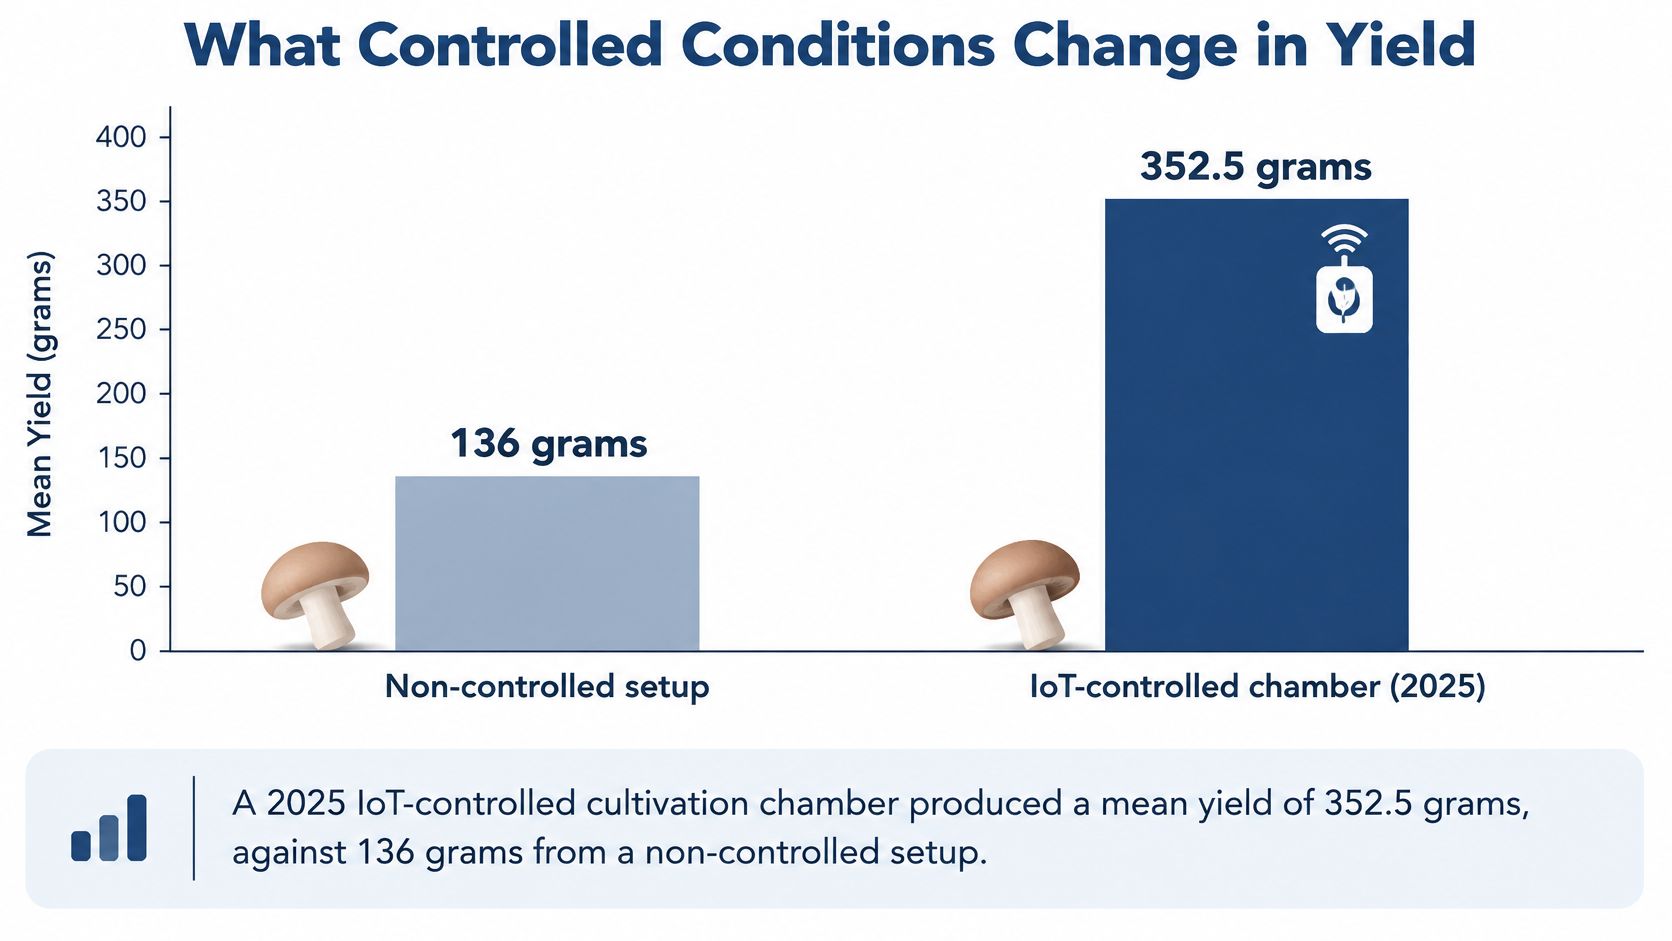
That gap is the whole microclimate, not incubation alone. Your result will still depend on species, substrate, and whether contamination gets in. A controller can't rescue a bag that was opened on a dirty counter.
What a week of logs should show
Say you're running a 60-litre tote in a Denver apartment. The room log swings from about 24°C at night to about 30°C in the afternoon. You add a controller aimed at 22 to 24°C and leave the bags sealed. After a week, the useful log isn't a record harvest. It's steadier colonization, fewer stalled bags, and a more even white color from top to bottom.
A plain tote with a thermostat is enough when the room is already close and you're only running a few filtered bags. A sensor-driven cabinet earns its space when the room swings hard, you're running many blocks, or you're fruiting in the same box and need a second mode. Logging is easier in the cabinet. Cost and footprint are lower with the tote. Neither one helps if you load it before the empty test holds a band.
For the harvest side of this, our notes on how to increase mushroom yield pick up after the block is fully colonized. This week, do the earlier job. Run the chamber empty, log the readings, and load the first bags only after the log shows a steady band.
Colorado Cultures carries sterilized grain, substrates, all-in-one bags, and grow chambers for home cultivators who want incubation and fruiting set up as separate stages. If you're in the Denver metro area, or ordering online, start with a clean bag and a chamber you have already tested empty. Visit Colorado Cultures when you're ready to pick supplies or ask about a first grow room.
Comments