
Liquid Culture Contamination: How to Spot and Prevent It
The popular advice to discard every cloudy liquid culture and trust every clear one is too simple. Appearance is a screening tool, not a verdict. Healthy mycelium can make broth look crowded or cloudy, while unwanted microorganisms can remain invisible. The useful question isn't whether the jar looks clean. It's whether controlled testing supports using it.
Why Clear Liquid Can Still Be Contaminated
Clear liquid isn't proof of sterility. A liquid culture contains mushroom mycelium growing in nutrient broth, but that same broth can support organisms you didn't intend to introduce. When contaminants are sparse, dispersed, or slow to become visible, you may see transparent liquid around apparently healthy mycelium.
This isn't a new problem. A historical review of microbiology describes Pasteur's demonstration of microbial fermentation in 1857 and his swan-neck-flask experiments reported in 1861, which showed that sterilized liquid remained sterile when airborne particles were excluded. The relevant distinction was controlled exposure, not whether someone thought the liquid looked acceptable.
What the jar can actually tell you
Looking through the glass lets you notice changes in texture, distribution, and color. It doesn't let you rule out microscopic passengers. A contaminant might become obvious only after incubation, a withdrawal, or transfer into another medium.
Solid media help because organisms grow across a surface rather than together throughout a liquid. Separate colonies can reveal differences that a tangled suspension hides. That's why confirmation on agar is more informative than repeatedly holding a syringe against a light.
Practical rule: Treat a clean appearance as permission to investigate, not permission to expand an untested culture.
Keep these distinctions separate:
Appearance describes what you can see.
Purity concerns whether unwanted organisms are present.
Viability concerns whether the intended mycelium can still grow.
A jar can look reassuring without being pure, and a pure culture can perform poorly. Keeping those questions separate prevents both unnecessary disposal and expensive expansion of a questionable batch.
Signs of Contamination and What Each One Means
Liquid culture signs, likely meaning and next step
Sign | Likely Meaning | Next Step |
|---|---|---|
Fast, milky cloudiness with a sour smell | Suspected bacterial contamination | Quarantine and test on bacterial-supporting medium |
Green, black, blue or pink fuzzy spots | Suspected mold contamination | Discard; don't transfer to grain |
Slimy film or sheen on the surface | Possible bacterial biofilm | Quarantine and compare with a control |
Fine sediment or small settling pellets | Often normal mycelial fragments | Gently swirl a culture without other warning signs and observe its settling pattern |
Thin, slow growth with no smell | Possible vigor or nutrient problem | Compare with an uninoculated control and test viability separately |
Strong acetone or rotten smell | Suspected bacterial or other spoilage activity | Keep isolated; discard rather than expand, with testing reserved for investigation |
Clear liquid with no growth after an observation period | Possibly weak or non-viable inoculum | Test a small sample before using the batch |
These are working interpretations, not organism identifications. Color doesn't identify a mold species, and a glossy surface alone doesn't establish a bacterial biofilm. Use the table to choose your next action, not to name an organism from a photograph.
The distinction between growing material and the broth matters. A tinted nutrient solution isn't the same as a colored fuzzy colony. Likewise, discrete suspended clumps aren't the same observation as a uniform haze that persists throughout the liquid.
Clinical fungal diagnostics also require more than appearance alone. A review of fungal diagnostic methods describes the limitations of culture assessment and the use of complementary methods, including microscopy, to distinguish meaningful fungal growth from contamination.
Look for combinations and change
A more concerning pattern combines several observations: rapid widespread haze, a spreading film, and poor recovery after transfer. Thin growth without those accompanying changes leaves more room for explanations involving culture condition or the medium.
Watch where the change occurs. Does it remain as organized material that settles, or does the liquid between the clumps become increasingly opaque? Compare photographs taken under similar lighting rather than relying on memory.
For visual comparisons, our mycelium contamination pictures guide can help you describe what you're seeing. Photographs are most useful for recognizing warning patterns, not certifying a culture as clean.
When to isolate immediately
Colored fuzzy growth: Keep the vessel closed and remove it from clean work.
Spreading slime or film: Stop withdrawals while you investigate.
An off odor noticed without deliberate sniffing: Treat it as a warning and don't expand the culture.
Don't open a sealed jar or syringe for a smell test. Opening it sacrifices the barrier you're trying to evaluate, and deliberately sniffing unknown growth isn't a sensible diagnostic method. Odor is incidental evidence, not a required check.
How to Test a Suspect Culture Before Expanding It
Testing should answer a specific question: does the sample produce growth consistent with the intended mushroom, without detectable unwanted growth under the test conditions? A useful test includes a comparison, a documented sample, and a decision made before valuable grain is inoculated.
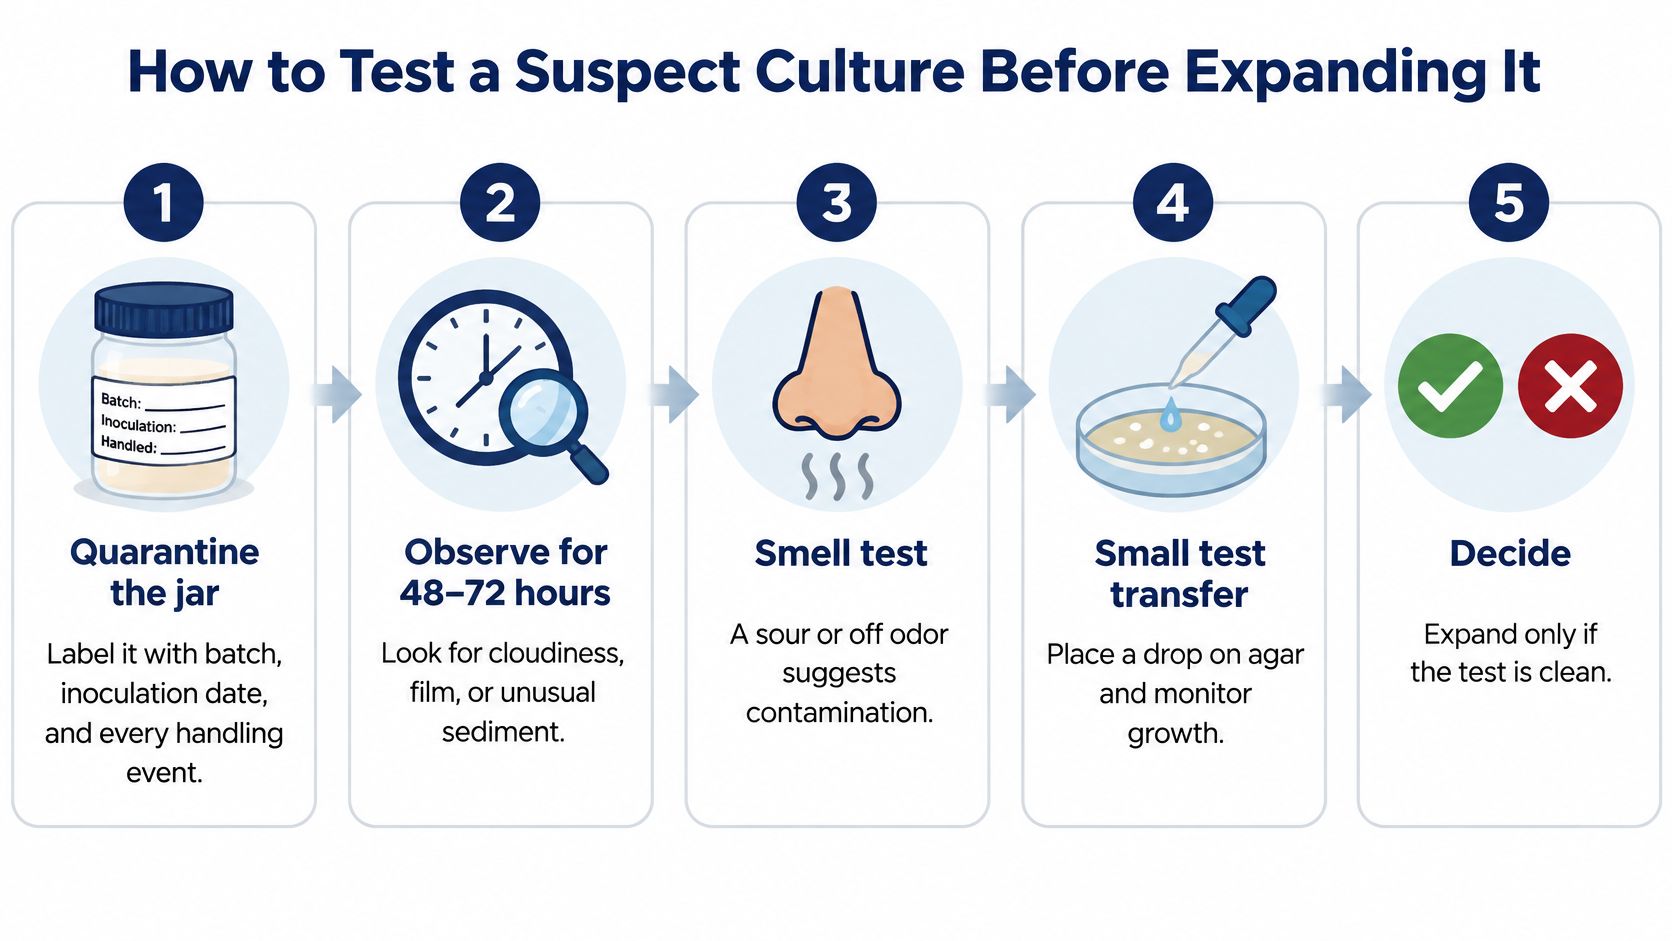
The workflow illustration summarizes the decision process, but skip deliberate smell testing and don't treat a fixed observation window as proof of purity.
Collect evidence in a controlled order
Quarantine and identify the jar. Keep it closed and separate from cultures intended for expansion. Record the source batch, inoculation date, operator, and every withdrawal or other handling event.
Check an uninoculated control. Compare the culture with sterile broth from the same preparation, stored under equivalent conditions without intentional inoculation. Growth in that control directs attention toward preparation, the vessel, or subsequent handling rather than the inoculum alone.
Use microscopy as a screen if you have the equipment and training. Examine a separately collected sample for fungal filaments, unexpected cells, or bacterial aggregates. An apparently unremarkable field doesn't clear the jar, because your sample and field of view are limited.
Record the distribution of growth. Note organized clumps and branching material separately from diffuse turbidity. This gives you a description to compare with plate results, not an independent pass or fail.
Plate a small, labeled sample. Use a bacterial-supporting medium and a fungal-supporting medium, with uninoculated negative controls handled alongside them. Keep test plates closed during observation and record changes rather than opening them repeatedly.
A fermentation study in the Journal of Industrial Microbiology and Biotechnology assessed bacteria by dilution and spread-plating on nutrient agar, recording results at 0, 18, and 40 hours, and assessed fungal contaminants separately on potato-dextrose agar. Those were that experiment's sampling times, not a universal clearance schedule for mushroom cultures.
For practical background on the solid-medium step, use our guide to fungi agar plates. The important advantage is spatial separation: you can inspect emerging colonies without trying to interpret everything suspended in broth.
Interpret the test before making a transfer
Compare early and later samples when available. A retained sample from before routine withdrawals provides a useful reference. A later positive result may implicate subsequent handling, although a negative earlier sample can also miss low-level contamination.
Expand only after acceptable controls and consistent growth. If a negative control grows, the test itself is compromised. If the sample produces unwanted colonies, don't distribute that culture into grain or substrate.
A clean test increases confidence in the sample you tested. It isn't a guarantee about every part of the jar or every future withdrawal.
We publish written instructions for the Microppose Mark 1 Grow Kit, Gro Magik Grow Kit, All in One Grow Bag, and Full Flush Grow Kit. Keep the instructions for your particular workflow beside your culture log so you can distinguish a culture problem from a transfer mistake.
Use the accompanying video as a visual supplement to your written testing notes.
Where Contamination Enters a Liquid Culture
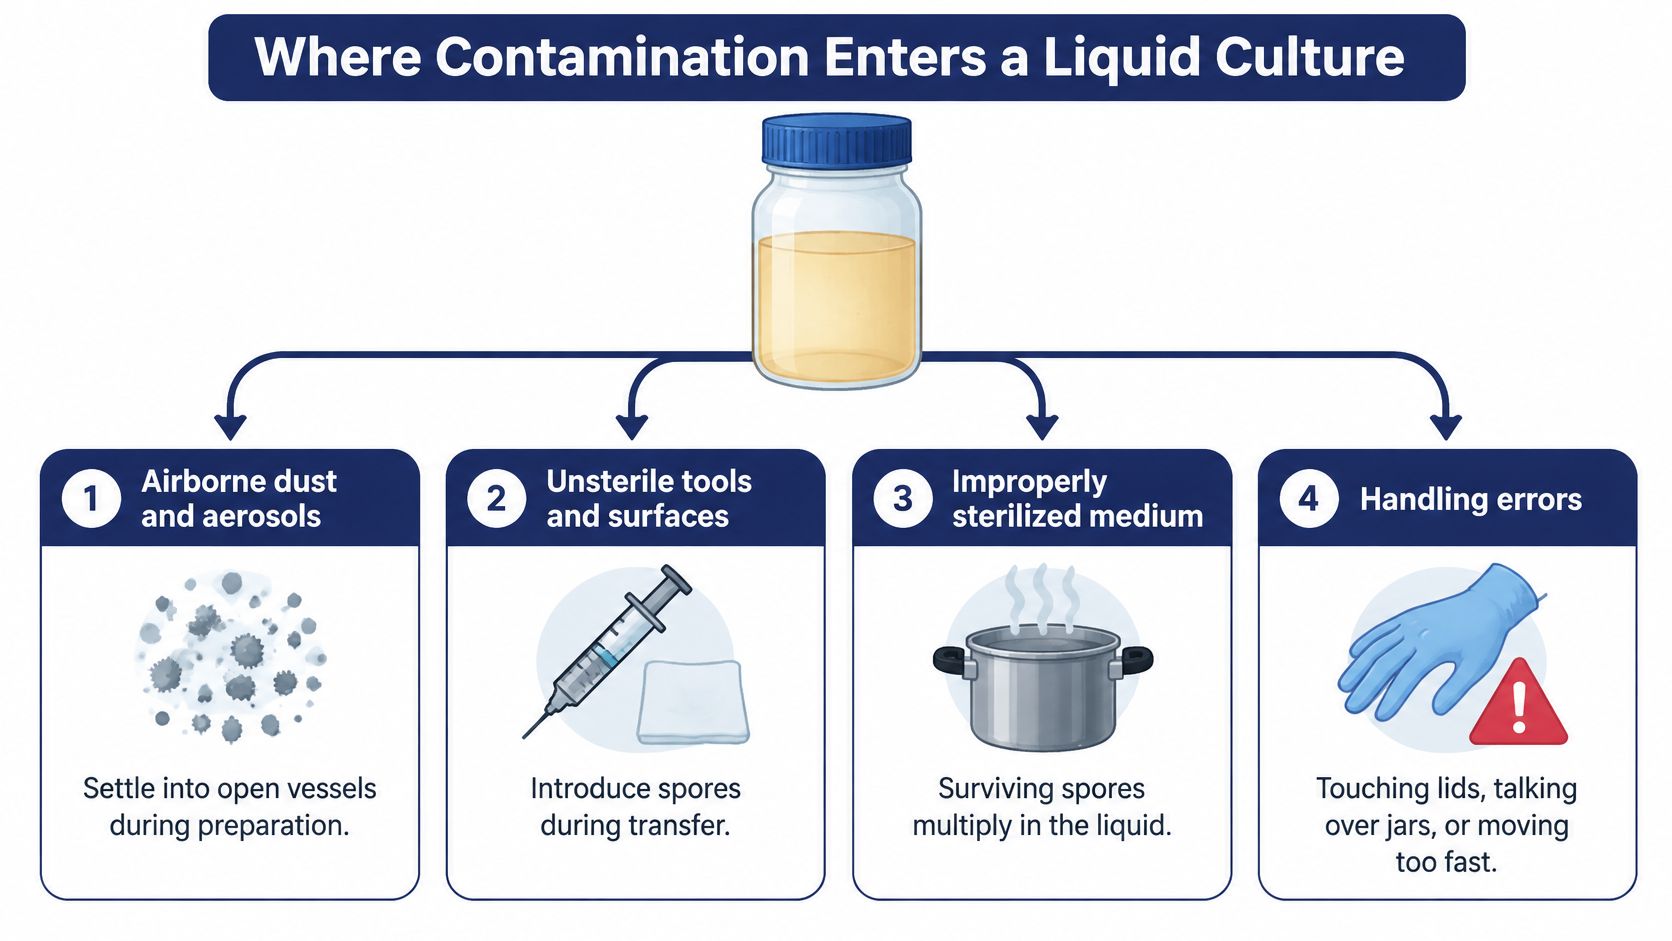
Contamination doesn't appear spontaneously in a sealed jar. An unwanted organism either survived preparation or entered through an exposure point. Finding that point requires tracing the culture's handling, not blaming whichever component is easiest to replace.
Use this diagram to map potential entry routes before reviewing your own transfer sequence.
Follow the exposed surfaces
Airborne dust and aerosols matter when vessels or sterile tools are uncovered. Particles can settle onto a lid's underside, a needle, or the opening of a jar. The eventual contamination may appear in the broth even though the original contact happened elsewhere.
Tools provide another route. A sterile syringe doesn't remain sterile after its working end touches a dirty surface. Spoons, stirrers, and other implements can likewise carry material into broth if their preparation or handling is inadequate.
Closures deserve their own inspection. An injection port, lid, or filter can become a weak point when damaged, improperly fitted, or handled carelessly. A jar that stays physically closed can still have an unreliable barrier.
Hands, movement, and preparation
Gloves aren't automatically clean. Touching a phone, sleeve, door handle, or container exterior can contaminate them before the next sterile task. Fast movements and nearby fans can also carry particles across exposed materials.
Incomplete sterilization creates a different problem: organisms may already be present before inoculation. An uninoculated preparation control helps distinguish that possibility from contamination associated with the transfer itself.
Repeated withdrawals add further opportunities for mistakes. The relevant question isn't merely how old the jar is, but what happened to its ports, tools, and surroundings during use.
Review the sequence with a short exposure map:
Before inoculation: Record medium preparation and vessel condition.
During transfer: Note tools, accidental contact, airflow, and interruptions.
During storage: Record closure damage, leaks, or unusual handling.
At withdrawal: Log each access and any departure from your usual procedure.
A culture handled late in a session isn't automatically contaminated. However, if late-session failures recur, inspect accumulated clutter, contaminated gloves, and rushed handling rather than assuming the broth recipe is responsible.
Sterile Practices That Lower Contamination Risk
Contamination control by workflow stage
Workflow Stage | Main Risk | Control |
|---|---|---|
Medium preparation | Incomplete sterilization | Use a validated moist-heat cycle appropriate to the medium and load, checked with indicators |
Vessel and tools | Surface contamination | Sterilize items contacting the culture; disinfect exterior surfaces and keep sterile items covered |
Inoculation | Dust, aerosols and hands | Wash hands, disinfect the bench, and minimize time containers stay open |
Storage and withdrawals | Repeated openings | Label with date and source, limit openings, and quarantine questionable jars |
Every stage needs its own control. A well-prepared medium won't compensate for a touched needle, and a disinfected bench won't compensate for organisms that survived inside the liquid.
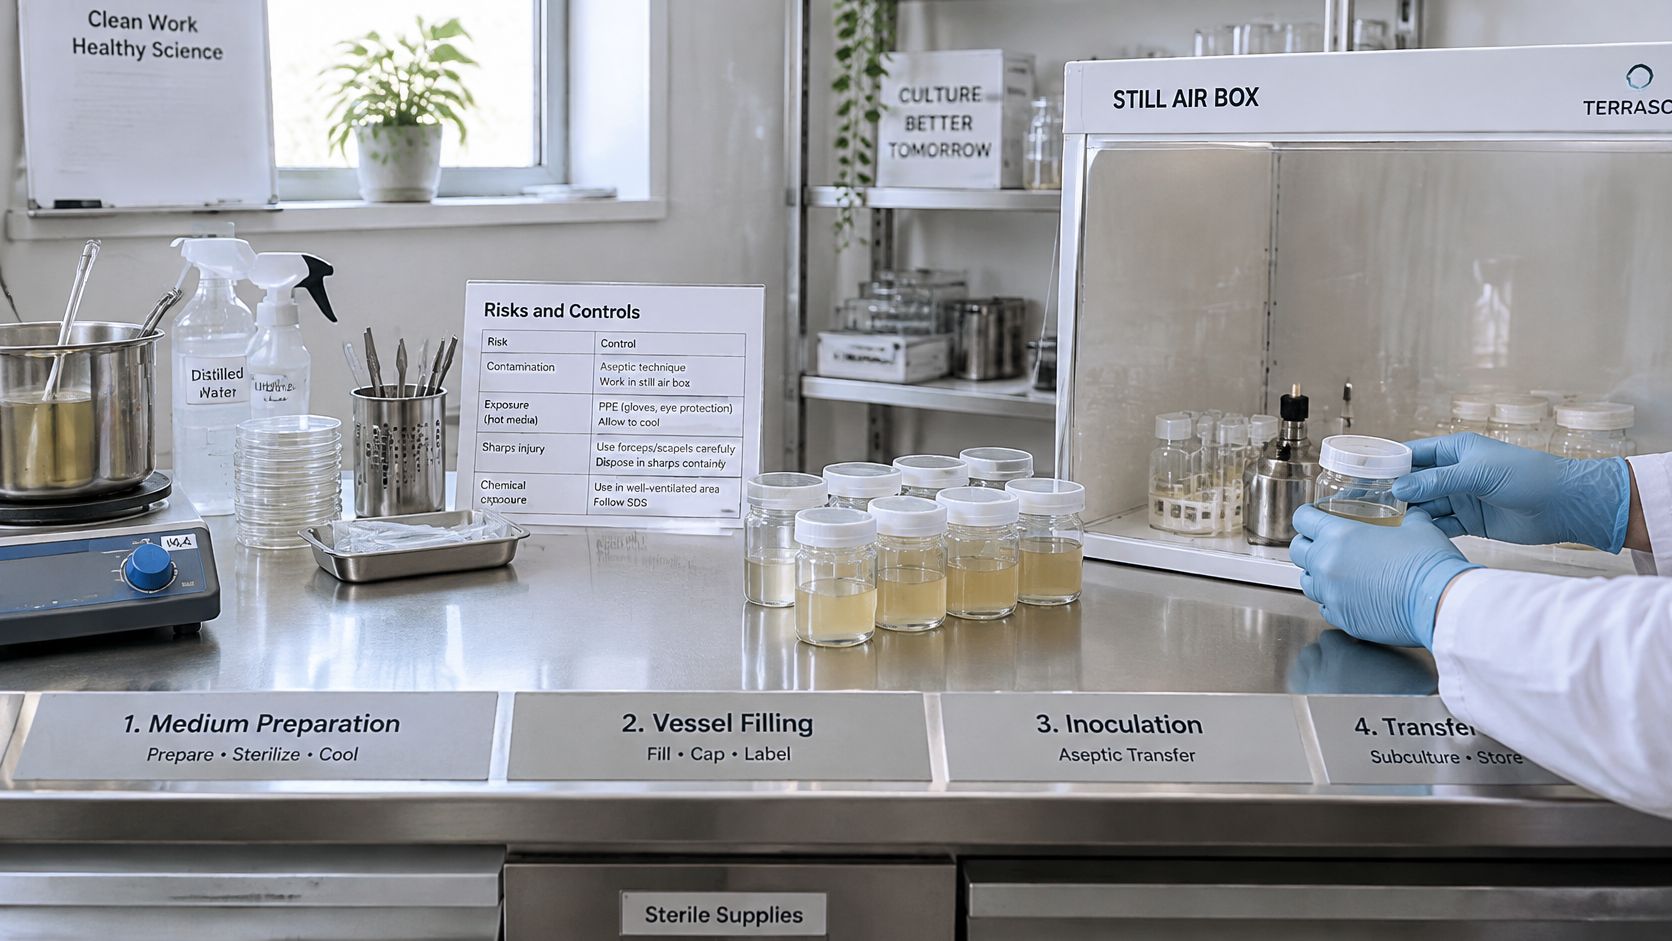
A controlled workspace helps protect prepared materials, but an enclosure alone doesn't make everything inside it sterile.
Make clean handling repeatable
Prepare before opening: Arrange labels, tools, controls, and waste containers so you don't reach over exposed materials.
Wash hands and maintain glove hygiene: Re-sanitize gloves after contact with non-clean surfaces, and let disinfectant dry before continuing.
Clean the bench before and after work: Remove visible residue before disinfecting the surface.
Protect sterile contact surfaces: Keep tools covered and avoid touching the underside of lids or the working ends of instruments.
Reduce disturbance: Avoid fans, unnecessary movement, and talking, coughing, or sneezing toward exposed materials.
Our basic sterile technique guide provides a practical reference for organizing those habits. A written sequence is especially useful when you're still learning which surfaces must never be touched.
Validate sterilization rather than watching the clock
A laboratory methods guide hosted by NERC identifies approximately 121 °C at 15 psi for about 15 minutes as a standard autoclave condition, but load size, vessel geometry, and heat penetration determine whether a cycle is adequate. That reference condition isn't a universal recipe for every culture jar or household pressure-cooker load.
Use the validated process appropriate to your equipment, medium volume, and container arrangement. Check suitable indicators and retain uninoculated controls. An indicator shows evidence about the process it monitors; the control helps reveal whether prepared medium subsequently develops growth.
Keep the distinction clear: Disinfecting a work surface doesn't sterilize the nutrient broth inside a vessel.
For terminology, the VirusFAQ guide to sterilization levels from VirusFAQ.com is a useful companion when separating cleaning, disinfection, and sterilization.
For the H2Shroom growing chamber, our cleaning instruction specifies 70%-99% ISO alcohol. That's a chamber-cleaning instruction, not a substitute for sterilizing culture medium or tools. Alcohol is flammable, so keep it away from ignition sources and don't combine wet alcohol cleaning with open-flame work.
Examples of Clean-Looking Cultures That Fail
A failed transfer doesn't identify its own cause. A HortTechnology article on liquid spawn describes concerns involving residual nutrients and the inability of some liquid spawns to colonize particular substrates. Purity and suitability are separate requirements.
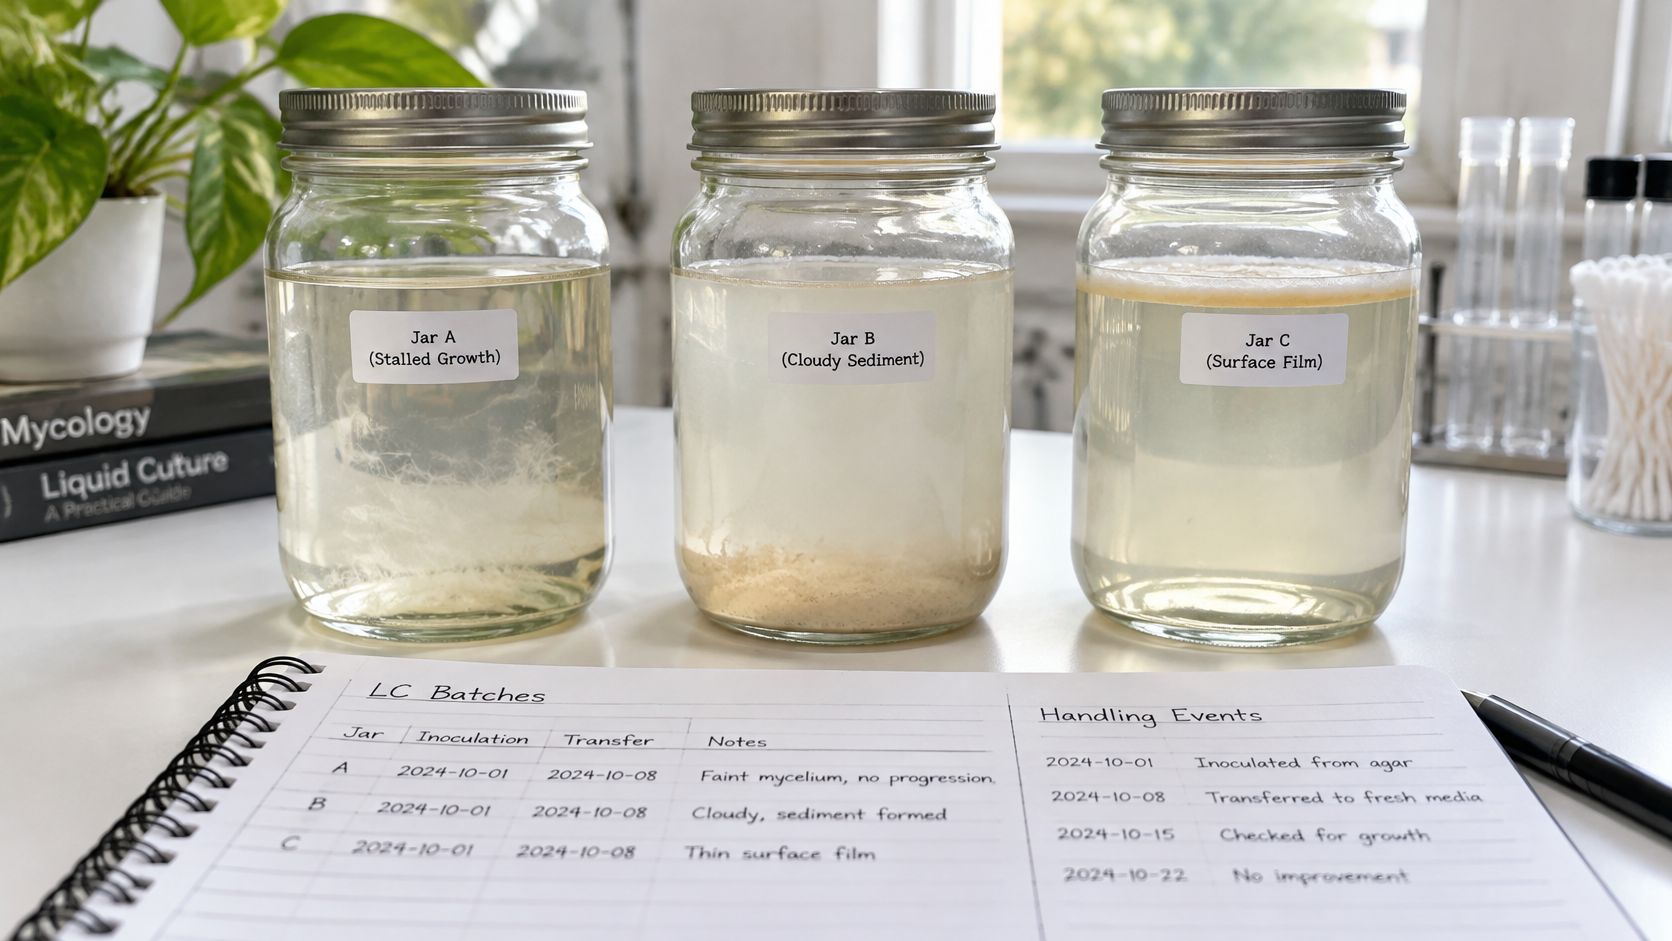
These example jars represent different questions to investigate, not diagnoses made through the glass.
A clean jar that stalls on grain
Say a culture passes its plate checks but barely grows after transfer. Don't immediately declare it contaminated. Check the transfer date, grain moisture, aeration, temperature, and whether the substrate suits the mushroom.
Damaged mycelium or excessive nutrient-solution carryover may also contribute. A parallel transfer of a known vigorous culture into equivalent grain helps distinguish a substrate problem from a problem with the suspect inoculum.
A rapidly cloudy jar after messy inoculation
In another hypothetical batch, the broth becomes cloudy within a day of an interrupted, poorly controlled inoculation, and a sour odor is noticeable without opening it. That combination warrants quarantine rather than an experimental transfer into a full grain bag.
Check the uninoculated broth control and review the bench handling. If the control remains unchanged, investigate the inoculum and transfer events without treating that observation as definitive proof of either source.
A jar that changes after repeated access
Suppose a culture initially tests acceptably, then develops unwanted growth after several withdrawals over two weeks. Count the openings and review the transfer log, including contact with ports and tools.
Compare any retained early sample with a later sample. The sequence may point toward handling, but sampling limitations mean it can't conclusively prove the original jar was free of contamination.
Troubleshooting clean-looking and cloudy cultures
Symptom | Likely cause | First check |
|---|---|---|
Clean jar stalls after transfer into grain | Damaged mycelium, sugar carryover, poor aeration, or pH and temperature mismatch | Compare with a control transferred alongside |
In a hypothetical batch, cloudiness within a day of messy inoculation with a sour smell | Suspected bacterial contamination | Quarantine and review inoculation date and bench handling |
In a hypothetical batch, contamination after several withdrawals over two weeks | Possible introduction during repeated openings | Count openings and review the transfer log |
Clear broth with no growth after transfer | Weak or non-viable inoculum, or incompatible substrate | Test a small sample on a compatible substrate |
The objective isn't to make every jar look identical. It's to establish that the intended fungus is present, unwanted growth hasn't been detected, and the culture can grow in the conditions you plan to use.
We offer mycology and lab supplies, spawn, substrates, and grow kits alongside written growing instructions. Visit Colorado Cultures to choose supplies for your next controlled test and get practical guidance before committing a questionable culture to a larger grow.
Comments