
King Oyster Mushroom Kit: A Denver Beginner's Guide
A king oyster mushroom kit is a pre-inoculated block of supplemented substrate that can produce about 600 to 850 g of fresh mushrooms over 1 to 2 harvests, provided it gets cool, humid, and well-ventilated conditions. In Denver, the main challenge isn't starting the kit. It's creating a small climate that stays moist without becoming stale.
You may be standing at your kitchen counter with a cardboard box open, a white block inside a plastic bag, and no obvious resemblance to a mushroom. There are no seeds, roots, or leafy stems to plant. The block is already alive, and your job is to give it the environmental signal that tells the mycelium to make fruit.
That signal matters along the Front Range. Dry indoor air can pull moisture from the block quickly, while warm rooms can leave king oysters stalled or oddly shaped. Altitude doesn't change the basic care routine, but it can make evaporation, dehydration, and inconsistent humidity more noticeable in a home grow.
What a King Oyster Mushroom Kit Actually Is
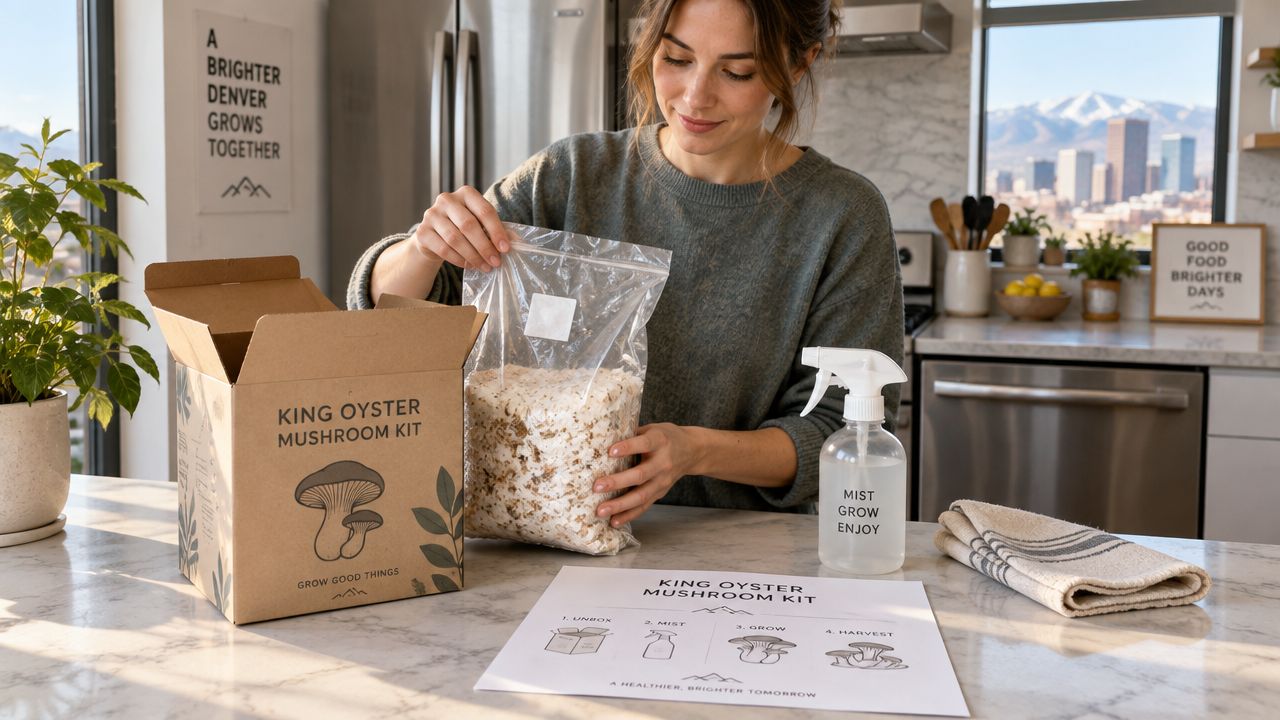
A Denver beginner named Maya opens her kit beside the coffee maker and expects something like a potted herb. Instead, she finds a dense white block sealed in a bag. Her first question is sensible: “What exactly am I supposed to grow?”
The answer is fully colonized mushroom substrate. The block usually contains hardwood sawdust or another supplemented growing medium that has been consumed by the white network of Pleurotus eryngii, the species commonly called king oyster, king trumpet, or eryngii mushroom. The mycelium is the living organism. The substrate is its food source.
The bag isn't ordinary packaging, either. A filter patch allows gas exchange while helping protect the colonized block from airborne contaminants. Once the kit is ready to fruit, you expose a small area, maintain moisture, and place the block where the temperature and airflow suit this cool-fruiting species.
Why king oysters feel different from other kits
King oysters are prized for their thick, firm stems, not for producing broad caps like some common oyster varieties. They generally prefer a cool basement, garage, or winter windowsill over a warm living room. A review of the species' commercial development describes U.S. production beginning in 2000, with U.S. output reaching 85 tons by 2004, while China's production rose from 21,000 tons in 2001 to 114,000 tons in 2003 (commercial history and kit context).
That history helps explain why today's kits feel standardized. Controlled bags and bottles made the species practical to produce consistently, then helped bring it into home cultivation.
If you're used to kitchen fermentation, the comparison can help. A mushroom block has the same “living food culture” quality as a starter, although its structure and care are different. For a useful parallel, see what a bread starter kit includes, then think of the mushroom block as a mature culture already occupying its food supply.
The review linked above describes incubation commonly lasting 21 to 28 days at 23 to 25°C, depending on substrate volume. A ready-to-fruit kit skips that early inoculation work, but it doesn't skip the need for patience.
What's Inside the Box and Why Each Piece Matters
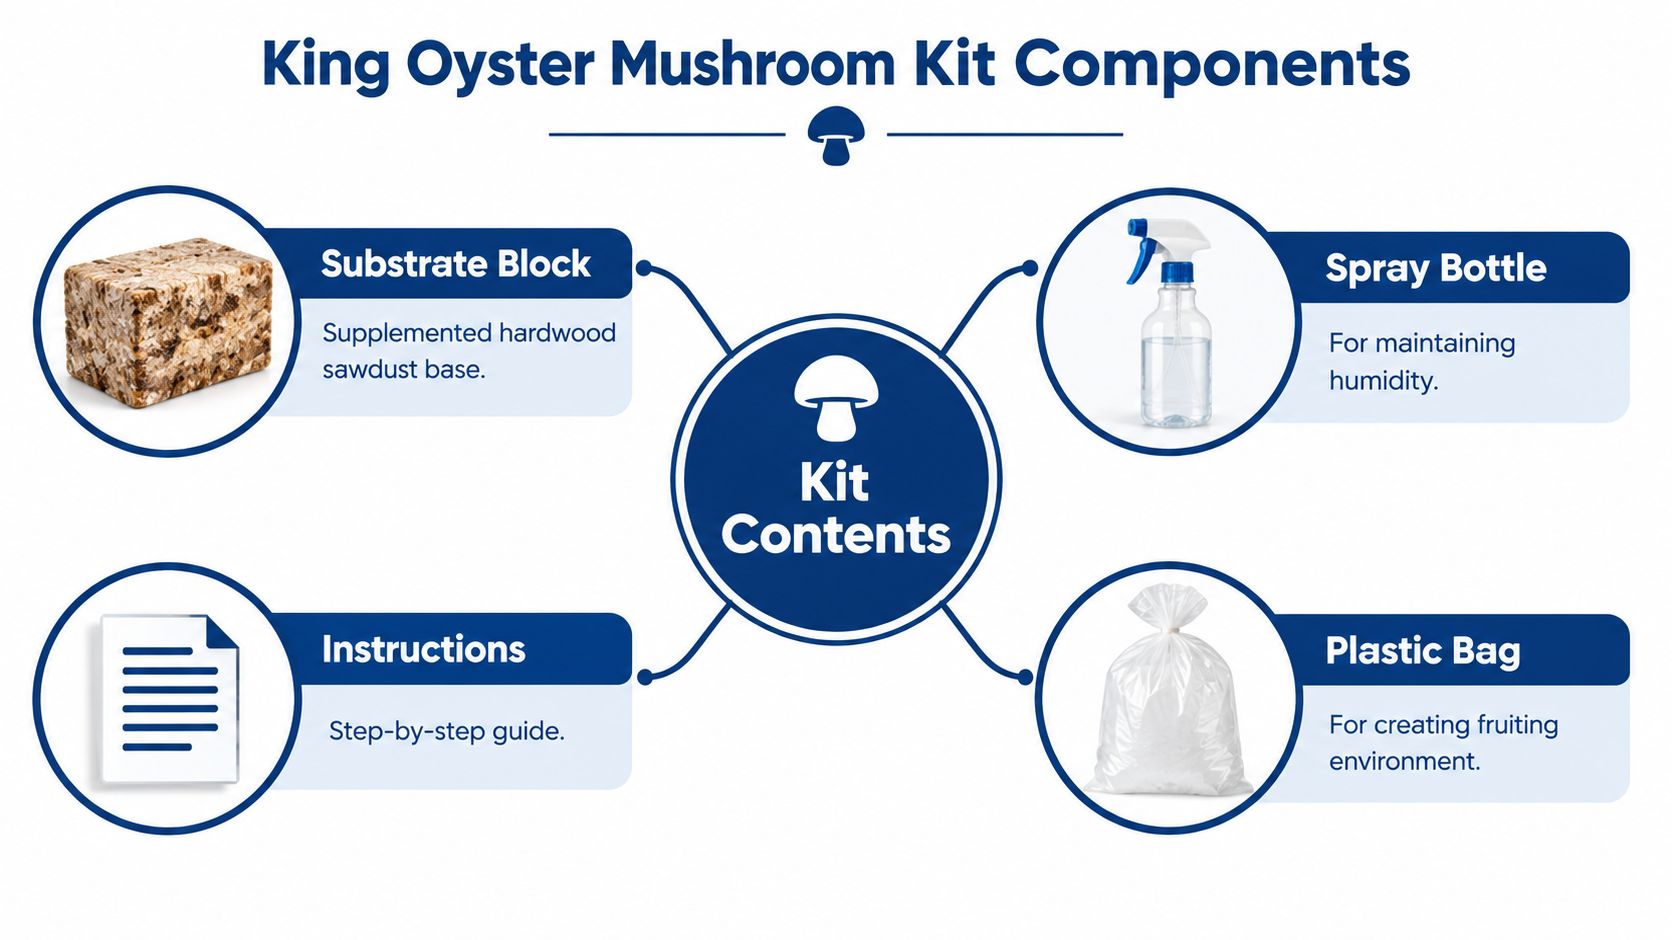
Set the contents on a clean counter and identify them before cutting anything. A typical kit contains a colonized block, a bag or box with a filter area, printed instructions, and sometimes a spray bottle or simple humidity tent.
The block is the pantry
The block is usually made from hardwood sawdust with nutritional supplementation, though some products use straw pellets or another prepared substrate. Hardwood gives the mycelium a fibrous food base. Supplementation adds nutrition that supports the dense, substantial stems people expect from king oysters.
Look for a block that appears solid and predominantly white. A fully colonized kit is ready to fruit. A spawn-only product is an earlier-stage material intended to inoculate additional substrate, so it isn't the same purchase and won't offer the same beginner-friendly experience.
The white growth is the mushroom
The white layer isn't mold by default. It is the mycelium, the network that has already digested the substrate and is prepared to produce fruiting bodies. Healthy colonization usually looks integrated with the block rather than like a loose, brightly colored patch sitting on top.
Green, black, or strongly foul-smelling areas deserve caution. Don't scrape suspicious growth away and continue using the kit. A contaminated block is not a normal fruiting stage.
The bag manages air
The filter patch is a controlled doorway. Mycelium needs gas exchange, but an open block is more exposed to contamination and rapid drying. Once you cut the fruiting opening, the kit needs a balance between humidity and fresh air, not a sealed plastic prison.
Some sellers include a spray bottle, plastic tent, or small humidity dome. Those accessories can make setup easier, but they don't replace a cool location, a clean knife, and a way to observe moisture on the exposed surface.
Read the seller's instructions before following a generic method. Cut size, bag orientation, and storage recommendations vary between kit designs.
Realistic Yields and What Success Looks Like
A ready-to-fruit listing for a 2.5 kg pre-inoculated kit gives a practical benchmark of about 600 to 850 g of fresh mushrooms over 1 to 2 harvests (ready-to-fruit yield reference). That works out to roughly 24% to 34% of the kit's substrate mass, which is more useful than judging a kit by a dramatic product photograph.
Flush | Expected Fresh Weight | Biological Efficiency | Notes |
|---|---|---|---|
First harvest | Part of the total 600 to 850 g | Usually the stronger share of the roughly 24% to 34% total benchmark | Expect the largest cluster when conditions are stable |
Second harvest | The remaining portion of the total range | Included in the roughly 24% to 34% total benchmark | Often smaller and less uniform |
Total | About 600 to 850 g | Roughly 24% to 34% | Applies to the cited 2.5 kg ready-to-fruit benchmark |
For a deeper comparison of how kit size, substrate, and harvest weight relate, use this guide to mushroom grow kit yield. Treat any benchmark as a comparison tool, not a promise. A dry room, poor airflow, or a kit that suffered during shipping can move your result toward the lower end.
What healthy king oysters look like
A respectable harvest has firm white stems, relatively modest tan caps, and a clean mushroom aroma. The stems may dominate the cluster visually, which is normal for this species. The ideal kitchen result is dense and substantial, not necessarily enormous.
Denver water can also affect your routine. If your tap water leaves heavy mineral deposits on a humidifier or spray bottle, use filtered or otherwise suitable water for misting rather than allowing residue to accumulate on the fruiting surface. Water quality isn't the only factor, but hard water can make equipment maintenance more annoying and can encourage growers to overcorrect with excessive spraying.
Don't judge success only by weight. A smaller, clean, well-formed flush is more informative than a heavy harvest with damaged caps, sour odor, or signs of bacterial trouble.
Setting Up Your Kit for the First Pin
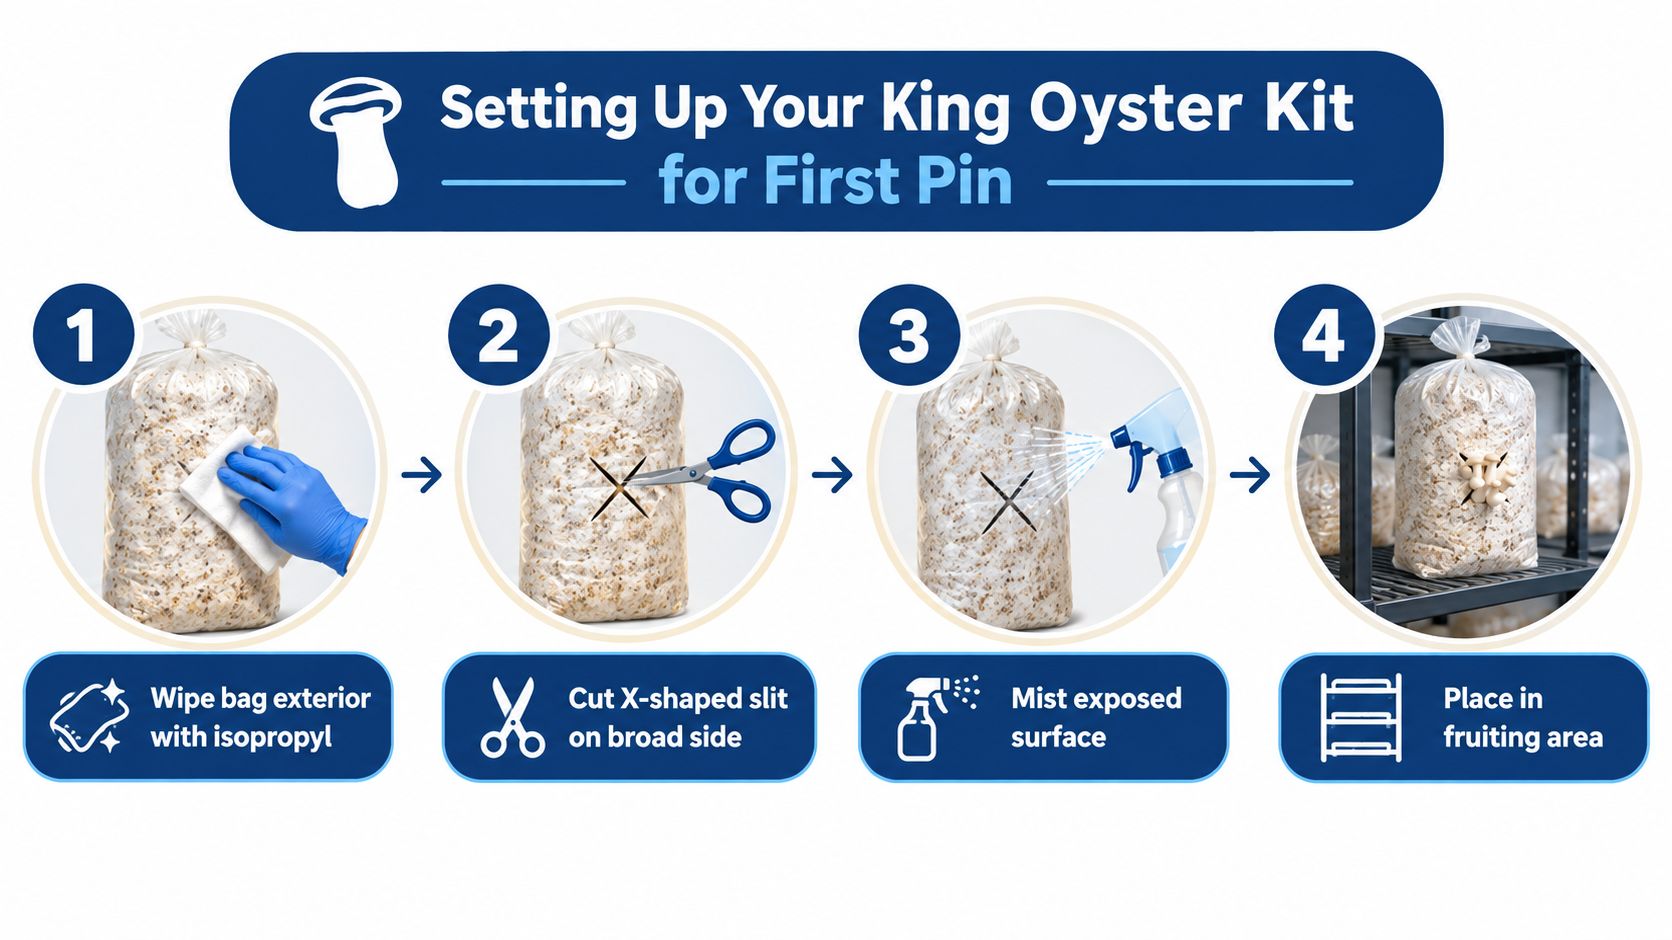
Start with a clean work area and give the block a gentle inspection. If the substrate is fully colonized and the seller's instructions don't specify a different method, the basic setup is simple.
Clean the exterior. Wipe the outside of the block's bag with isopropyl alcohol and let the surface dry. You're reducing the chance of dragging debris toward the cut.
Make the fruiting opening. Cut an X-shaped slit on the broad side of the bag. A small opening is easier to keep humid than a large, exposed wound, so follow the kit's supplied dimensions instead of cutting away the entire face.
Moisten the surface. Use non-chlorinated or filtered water to lightly mist the exposed substrate. The surface should look damp, not flooded.
Build a loose tent. Place the block in a clean plastic storage tote or large fruiting bag, leaving room for air to move. A pre-humidified tote wall can help in Denver's dry indoor air, but don't seal the container so tightly that stale air accumulates.
Make the room do some of the work
Choose a cool basement shelf, shaded bathroom, or protected window area. Keep the kit away from direct heat, forced-air vents, and strong sunlight. A daylight LED placed roughly 30 to 60 cm below the kit on a 12-hour cycle can provide a simple light routine, but light won't compensate for warm or dry conditions.
Denver homes often need more attentive moisture management than generic guides suggest. Check the exposed surface several times through the day and mist when it begins to lose its damp appearance, while allowing brief fresh-air exchange so the chamber doesn't become stagnant.
A small pin looks like a pale bump or tiny cluster emerging from the cut. Don't expect a dramatic mushroom overnight. The first visible primordia may appear after several days when the temperature, moisture, and airflow are aligned.
For a visual walkthrough of the process, use the embedded guide below.
Temperature, Humidity, and Fresh Air Working Together
King oyster fruiting works best when you treat temperature, humidity, and fresh air as one system. The useful temperature window is about 10 to 18°C, with 12 to 16°C often producing especially thick, firm stems. During pinning and early expansion, aim for 85% to 95% relative humidity (king oyster fruiting conditions).
Those targets pull against one another. Cooler air can dry a surface quickly when Denver's indoor air is already dry. More fanning brings in fresh air but lowers local humidity. Adding moisture without ventilation creates a wet, stale environment that can damage pins.
Practical rule: Keep the surface humid, not dripping, and exchange enough air that the chamber never smells sour or feels sealed.
Adjust the triangle, not one dial
If stems become long and thin, the kit may be receiving too little fresh air. If caps expand quickly while stems remain short, the environment may be too warm or too heavily ventilated for the stem shape you're trying to produce. If pins appear and then stop, inspect all three conditions rather than spraying more often by reflex.
Above roughly 20°C, fruiting quality can decline, and stems may become thin or spindly (cultivation guidance for king oysters). That makes a cool Denver basement valuable during suitable seasons, while a warm upstairs kitchen may be a poor location.
The Front Range's elevation can make evaporation feel surprisingly aggressive, especially near heating systems or sunny windows. You don't need to measure every atmospheric variable. Use a hygrometer, observe the block surface, and make small changes. If fanning dries the opening, increase surrounding humidity rather than eliminating fresh air altogether.
A useful explanation of how fruiting conditions interact appears in this guide to all-in-one grow bag fruiting conditions. Apply the same principle here: the best setup isn't the wettest one or the most ventilated one. It's the one that keeps the block hydrated while supplying enough clean air for normal development.
Why Kits Stall and How to Fix Common Problems
A fully white block can still refuse to fruit. Colonization only tells you that the mycelium has occupied its food source. Fruiting requires a separate environmental change, and king oysters are particularly responsive to cool temperatures, surface moisture, and air exchange.
When nothing happens
The most common Denver problem is a dry-air stall. The cut surface crusts, the room feels comfortable to you, and the kit never forms pins. Move it away from a heat vent, increase local humidity with a loose tent, and mist the surface lightly instead of soaking the block.
A second mistake is treating misting as the entire airflow plan. Enclosing a kit in a box or cupboard can stop growth, while excessive warmth can prevent fruiting (king oyster kit instructions). Open the tent briefly, refresh the air, and watch whether the surface dries too quickly afterward.
Symptom | Likely cause | Practical adjustment |
|---|---|---|
No pins | Warm, dry, or stale fruiting area | Relocate to a cooler spot and improve balanced air exchange |
Tall, thin stems | Insufficient fresh air | Increase gentle ventilation while preserving surface moisture |
Wet, discolored surface | Over-misting or poor airflow | Mist only the exposed surface and allow excess moisture to evaporate |
Mushrooms on an unwanted side | Light or moisture gradient | Add a suitable fruiting opening or block competing exposed areas |
Storage before fruiting is easy to overlook
Gift buyers often receive a kit before they're ready to grow it. Seller guidance can vary widely. One source recommends using a kit within 3 days, another within 2 weeks, while a refrigerated kit may remain dormant for up to 4 weeks (storage guidance for king oyster kits).
The safe takeaway is not one universal deadline. Cold storage can delay fruiting, but the correct window depends on the kit design, seller handling, and condition at delivery. Keep the kit refrigerated only when the seller permits it, avoid freezing, and ask for written storage instructions before buying it as a gift.
After harvest, a smaller second flush isn't automatically a failure. Rehydration may help, but some blocks have only used most of their available energy. If the block smells sour, shows colored contamination, or remains inactive after appropriate care, discard it rather than trying to force another harvest.
Choosing and Buying a Kit in the Denver Area
A good local purchase starts with three questions. What is the substrate? Is the block fully colonized? Can the seller explain how it was stored and when it should fruit?
For Denver's dry indoor air, a dense hardwood-based block is often easier to manage than a loose, fast-drying material. Supplemented hardwood sawdust is a sensible choice for king oysters. Straw can work in some mushroom systems, but a seller should be able to explain why its specific formulation suits Pleurotus eryngii.
Factor | Good Choice | Avoid |
|---|---|---|
Substrate | Dense hardwood sawdust with supplementation | An unlabeled block with no substrate details |
Inoculation state | Fully colonized, ready-to-fruit block | Spawn-only or partially colonized material for a first kit |
Appearance | Solid white growth and a clean smell | Green or black patches, wet damage, or sour odor |
Seller support | Clear fruiting, storage, and replacement guidance | Vague instructions that ignore temperature |
Local handling | Pickup or short shipping with visible condition at arrival | A package left warm for an unknown period |
Inspect the block when possible. A Colorado mycology shop, community class, or pickup option can make it easier to ask questions before you take the kit home. If you buy online, ask how the kit should be stored immediately after delivery and what to do if it arrives already pinning.
Colorado Cultures sells king oyster liquid culture and publishes a dedicated guide for fruiting Pleurotus eryngii, so it can be one local source to compare with other vendors. Choose based on the clarity of the instructions and the condition of the specific kit, not on a promised harvest that ignores your growing environment.
Your First-Harvest Checklist and What Comes Next
Before cutting the bag, check five conditions:
Colonization: The block looks fully white, with no suspicious colored growth.
Cool location: The fruiting area can stay near 12 to 16°C for strong stem development (king oyster temperature guidance).
Humidity plan: You have a clean spray bottle, a loose tent, and a way to monitor the surface.
Airflow position: The kit won't sit inside a cupboard or directly beside a heating vent.
Harvest tool: Your knife or scissors are clean and ready before the cluster matures.
Cut the mature cluster cleanly at its base, then inspect the stems and caps. Harvest when the stems feel firm and the caps are still modest rather than waiting for a large, fully expanded cap. Remove loose debris, refrigerate the mushrooms promptly, and clean the fruiting area before preparing the block for another attempt.
Giving the block another chance
After the first harvest, the block may produce another flush, but don't assume it will match the first. Follow the kit seller's rehydration instructions. If the block needs water, use a clean method that doesn't leave it submerged or dripping for long periods, then return it to the same cool, humid, ventilated environment.
For a broader discussion of whether you can reuse mushroom grow kits, compare the kit's substrate condition with its original instructions. Once the block is clearly spent, compost it in a suitable shaded pile, bury it beneath leaf cover, or use it as mulch for non-edible garden beds. Don't eat mushrooms that fruit from a contaminated or deteriorating block.
If indoor growing has you hooked, Leaves & Soul's indoor gardening guide offers useful ideas for pairing mushroom projects with other compact edible plants. Denver Urban Gardens, local mycology clubs, and hands-on classes can also help you choose a next species and learn sterile technique. Save a spore print only from a clean, healthy mushroom, and treat future inoculation experiments as a separate project requiring appropriate sanitation.
Colorado Cultures offers king oyster liquid culture, grow kits, substrates, and the tools used to build a reliable home fruiting setup. If you're growing on the Denver Front Range and need help matching a kit to your cool space, dry indoor air, or next cultivation project, visit Colorado Cultures for supplies and practical guidance.
Comments