
Mushroom Picking Kit: What It Contains and How to Use It
The basket sits on the passenger seat. The knife is still in its sheath, and a plastic bag in the footwell holds three mushrooms you can't quite name. That gap between owning the gear and knowing what to do next is where most foraging plans fall apart, and it's the gap a good kit is supposed to close.
A mushroom picking kit is not a shopping list. It's a small system for three jobs: taking a clean specimen, keeping it that way on the walk home, and deciding whether it ever reaches a pan. The tools are the easy part. The workflow around them, cleaning, separating, labeling, checking permission, and knowing when to stop, is what separates a working kit from a decorated tote bag.
Tools Inside a Mushroom Picking Kit
A mushroom picking kit is a set of tools for cutting mushrooms cleanly, keeping each specimen intact, and keeping contamination off both the harvest and your hands. Most kits share three core pieces: a cutting tool, a brush, and a container. Everything else is optional, and the optional parts are where the honest differences between kits show up.
The inventory looks stubbornly boring for a reason. The University of Idaho Extension publication on mushroom cultivation notes that approximately 300 mushroom species are edible, only about 30 have been domesticated, and roughly 10 are grown commercially, with button, oyster and shiitake together accounting for about 70% of global production. Kits concentrate on which species has a reliable growth habit and an established food market, not which one is most interesting. Production data shows the same narrowing in reverse: a review indexed by FAO AGRIS estimated world mushroom production at approximately 43 million metric tonnes in 2018 to 2019, with shiitake alone at 26% of that total.
Tool | Main job | What to check before buying |
|---|---|---|
Mushroom knife or snips | Cut the stem cleanly at the base | Smooth, corrosion-resistant blade you can fully scrub |
Soft brush | Remove soil and debris without washing the mushroom | Natural or nylon bristles that dry quickly |
Mesh basket | Let spores drop as you walk | Rigid, open weave with a secure handle |
Paper or breathable bags | Keep species separate and dry | Labeled, one species per bag |
Disposable gloves | Protect hands and the specimen | Nitrile, fresh for each outing |
Specimen container | Preserve doubtful finds for expert review | Hard-sided, ventilated and labeled |
Notebook or log sheet | Record location, date and habitat | Waterproof paper or a phone note |
Why the Container Matters More Than the Knife
A sealed plastic bag is the most common mistake. It traps the moisture a mushroom releases, and that moisture accelerates breakdown from the inside out. A rigid open-weave basket lets air move around the specimens and lets spores fall away behind you instead of collecting in a warm, damp sack.
The same logic applies to the brush. Washing a mushroom under a tap looks thorough and is exactly wrong. Water soaks into the cap and stem, softens the texture, and pushes the specimen toward rot before it ever hits the fridge. Brush the grit off dry, and reserve water for the sink at home, right before cooking.
What Cheap Kits Leave Out
Two items are missing from most budget kits, and both matter more than a folding knife with a fancy handle. The first is a specimen container for finds you can't confirm, because a crushed mushroom in a bag is nearly useless to the person who could identify it. The second is a log sheet. A record of where and when you found something is the difference between a lucky afternoon and a spot you can return to next season.
Practical rule: if your kit can't produce a labeled, intact specimen for someone else to check, it's a collecting kit, not a foraging kit.
Once the tools are sorted, the rest of the trip planning is standard trail work. A trail preparedness checklist from Counter Assault covers water, layers, navigation and the emergency basics that sit outside the harvest itself.
Checking Permits, Seasons and Site Limits
Permission comes before technique. If you don't have the right to pick on a piece of ground, the quality of your knife is irrelevant, and mushroom collection rules differ by state, province and land type.
Start with ownership. On private land, that means asking the landowner directly and getting an answer for the specific date and the quantity you plan to take, not a vague memory of someone saying it was fine years ago. On public land, ask the agency that manages the site. A national forest, a state park, a county open space and a city greenbelt can all sit within twenty minutes of each other and follow completely different rules.
Those rules take several forms. Some areas require a free personal-use permit before you pick anything. Some cap how much one person can take per day. Some require you to cut each specimen in half lengthwise at the moment of harvest so it can't be resold, which changes how you carry your knife. Others prohibit collecting entirely inside designated wilderness or research areas.
Timing and Site Hazards
Season timing is the part beginners underestimate. Every species has a window, often only a few weeks, and a mushroom picked past its prime is a worse ingredient than one you left alone. Learn the window for the species you plan to target, then plan around it.
Then screen the site itself. These are the places I'd walk past without a second thought:
Roadside verges. Vehicle runoff, brake dust and salt accumulate exactly where the picking looks easiest.
Lawns and gardens. Treated turf and ornamental beds carry herbicide and pesticide residue you can't wash off.
Flooded or polluted ground. Recent flooding, standing water and industrial edges concentrate contaminants.
Dog-walking corridors and trail junctions. High traffic means high contamination on the fruiting bodies themselves.
A short pre-trip routine covers all of it. Confirm access rights, confirm the collection rules with the managing agency for today's date, note the season window for your target species, and mark any hazard sites on your map before you leave the car.
Rules also change. Agencies revise permits, close areas after fires, and adjust seasons. Repeating the check before every trip takes five minutes and is the cheapest insurance in foraging.
How to Clean and Sanitize Your Kit
Contamination arrives through three doors: your hands, your cutting surfaces, and any reusable tote or basket that carried the last haul. Cleaning is part of harvesting, not an afterthought you get to on Sunday.
The UNH Extension fact sheet on specialty mushroom quality and safety is blunt about the sequence, and it's worth following in order.
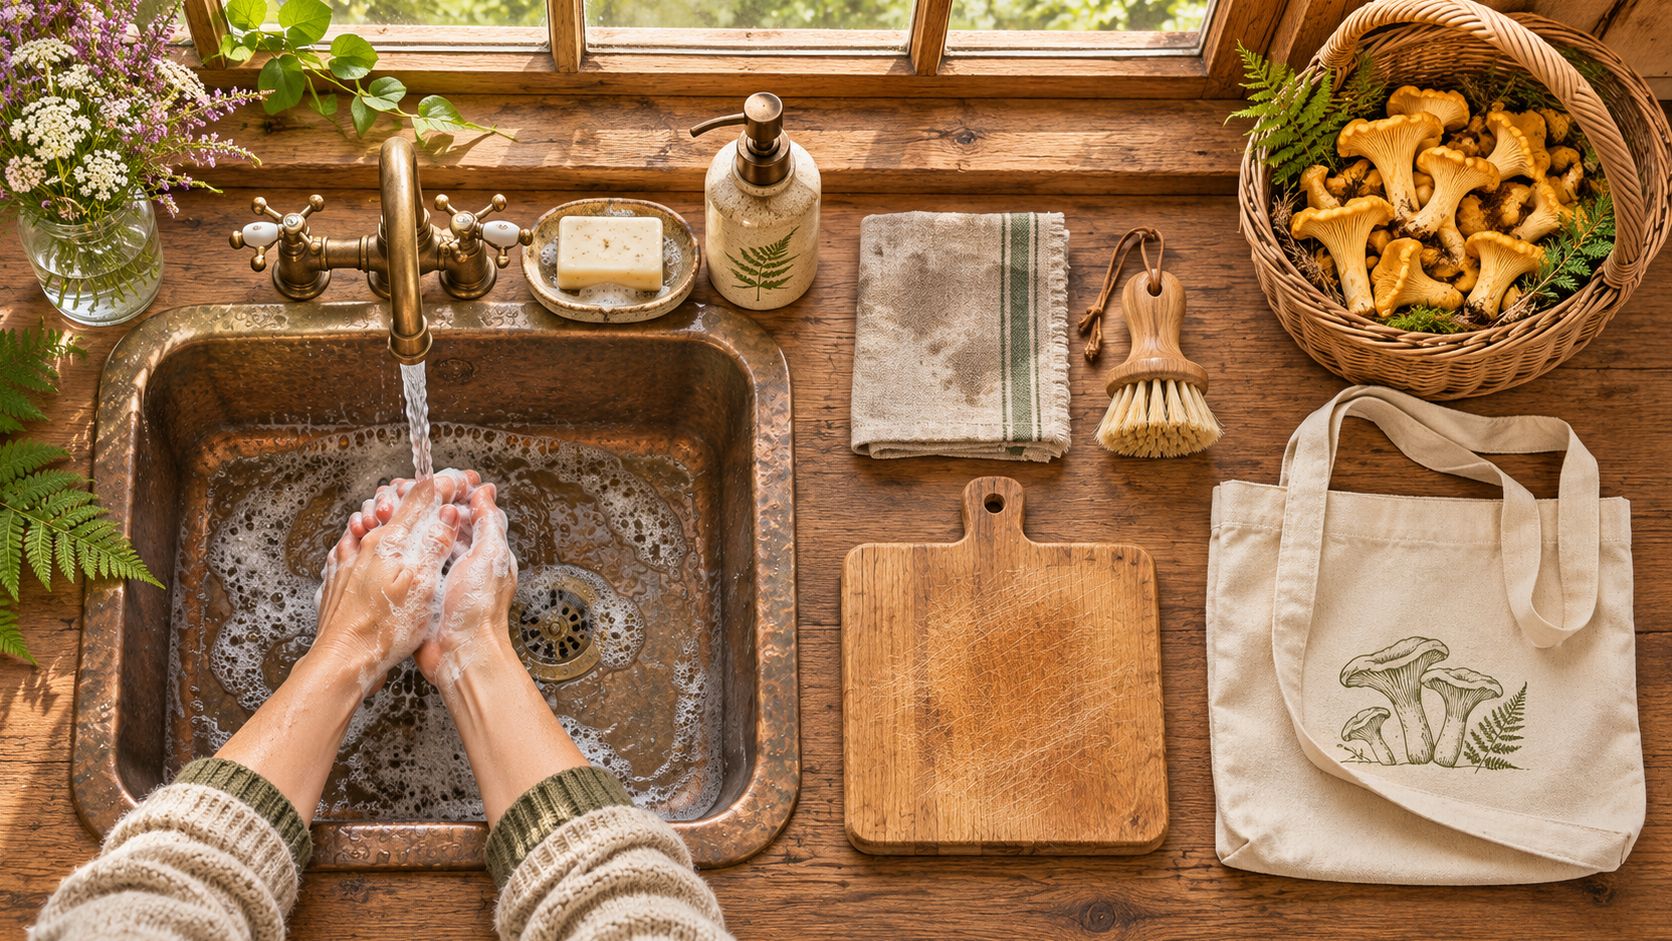
Wash your hands with soap for 20 seconds before the first cut, and again after handling soil or a suspect specimen.
Scrub the knife, brush and any reusable container in soapy water after every outing, not only when they look dirty. A blade that cut a soil-covered stem carries grit and spores into the next specimen.
Apply a food-grade sanitizer to the cleaned tools and to your work surface, and respect the contact time on the label. Sanitizer sprayed and wiped off immediately does very little.
Air-dry everything completely before it goes back in the bag. Damp tools in a closed box grow more than you'd like.
Replace bags and liners after a damp outing rather than turning them inside out for a second trip.
Choose Tools You'll Actually Clean
Selection criteria matter as much as the routine. A smooth, corrosion-resistant blade that can be scrubbed end to end beats a handsome wooden-handled knife with seams and crevices where debris collects. The same goes for containers: a tote with stitched corners and a moisture-retaining base is a contamination trap you'll start avoiding because cleaning it is tedious.
Delicate specialty mushrooms raise the stakes. Bruises, cuts and surface abrasions accelerate quality loss and create fresh entry points for spoilage organisms, which is why the UNH guidance puts sanitation and gentle handling in the same sentence. Clean tools protect the food, not just the reputation of your process.
The honest test of any kit is how quickly it comes back to clean. Skip the gadget with the fiddly mechanism and buy the plain version you can rinse, sanitize and dry in five minutes.
How to Harvest Without Damaging the Mushroom
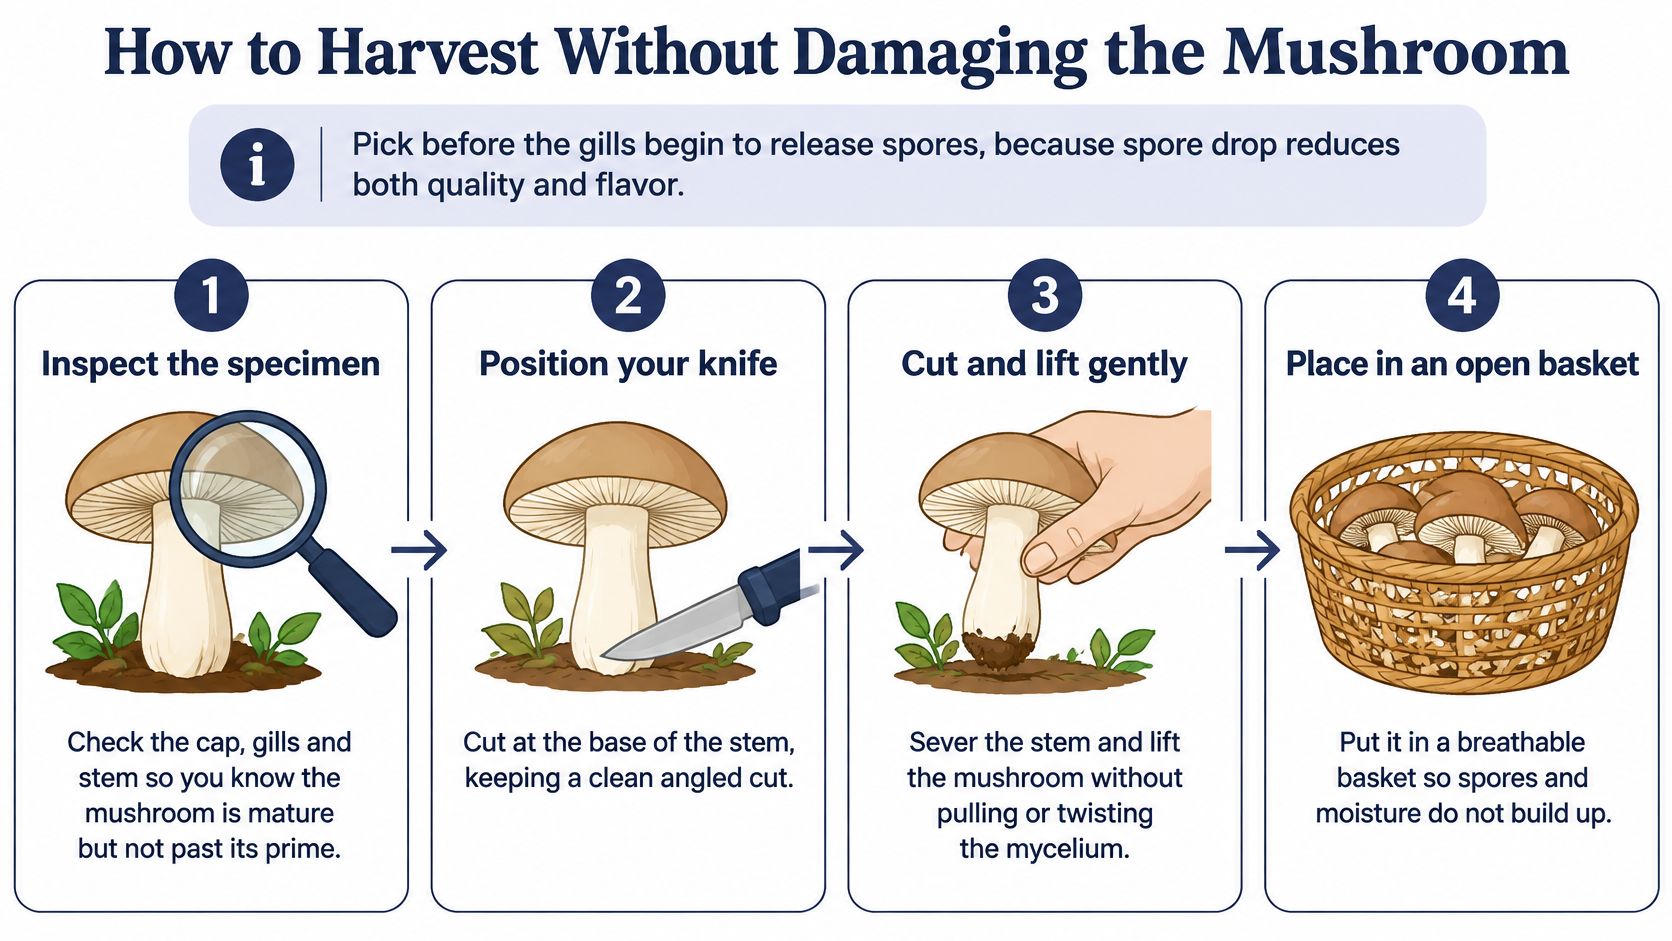
Timing decides more than technique. Pick before the gills begin to release spores, because a spore-dropping mushroom has already spent the quality and flavor you were after. That single rule changes what you look for when you crouch down.
Inspect First, Touch Second
Look at the cap, the gills and the stem before your hand goes anywhere. Check the cap shape, the attachment of the gills to the stem, the color at the base, and whether the specimen is firm or already going soft. This is the moment to decide the mushroom is mature but not past it, and the moment to walk away if you're unsure.
The usual mistake is handling first and identifying afterward. Every touch spreads spores, transfers soil, and bruises delicate tissue you'll want intact for the photo or the expert who reviews it later.
The Cut, Step by Step
Hold the stem gently near the base, as close to the soil or wood as you can reach without disturbing the surface.
Turn the stem slowly until you feel a small break, then lift. That gentle turn is how mushrooms are meant to come free, and it avoids hauling up substrate and tearing the mycelium underneath.
Switch to the knife when the stem resists. Cut cleanly at the base rather than pulling, because a yanked specimen takes a chunk of mycelium with it and damages the patch for next season.
Trim the dirty or woody base at the cut point, not halfway up the stem, so you're not throwing away edible tissue.
Place the specimen in a breathable container, cap down where the shape allows, without stacking pieces on top of each other.
If you want a visual walkthrough of the same sequence, this guide to harvesting mushrooms covers the hand movement and the cutting angle in more detail.
Edge Cases That Break the Pattern
Clusters are one. Tightly packed growth, like a shelf of oysters or a clump of honey mushrooms, is easier to cut as a group at the base and separate later than to pick one cap at a time and shred the rest. Fragile species are another: a thin-fleshed mushroom that crumbles at a touch does better with the brush and a shallow lift than with a blade.
Then there's the specimen that breaks in your hand. Don't press it back into the main basket. Bag it separately, note what happened, and treat it as a review item rather than dinner. A broken stem is also the cheapest identification lesson you'll get all season.
A clean harvest is quiet. One cut or one small turn, a wipe of the brush, a single layer in the basket, and you're walking again.
Finish each pick by looking back at the spot. If the surface is torn up, or the remaining mushrooms are crushed underfoot, you took more than the mushroom.
What to Do When Identification Is Uncertain
No photo, app or forum reply proves a mushroom is safe. Recent evidence is unusually direct on this point: the strongest tested AI identification system misidentified nearly 15% of real-world mushroom cases, and no app consistently produced a single correct answer suitable for life-or-death decisions, as reported in this analysis of AI-assisted foraging risk.
The consequences aren't hypothetical. That same source documents an outbreak in Northern California linked to foraged mushrooms producing 39 suspected amatoxin poisonings between November 18, 2025 and March 17, 2026, with three patients requiring liver transplants and four deaths. Fifteen percent sounds tolerable in a search engine. It doesn't sound tolerable with those numbers next to it.
The Stop Rule
Write this down and keep it in the bag, because it needs to be readable when you're tired and hungry and holding something beautiful.
Never eat a specimen based solely on an app, a photo, or an informal online confirmation. A confident-sounding reply from a stranger is not identification.
Preserve the sample. Keep the whole specimen, including the base, in a labeled container so a qualified person can check the features you didn't know to look at.
Contact poison control or emergency services immediately if anything was eaten, and bring the sample or what's left of it with you.
Learn the toxic lookalikes for your own region from qualified local experts, not from a national field guide that covers species you'll never meet.
Confidence level | Typical situation | Action |
|---|---|---|
Confirmed by a qualified local expert | Known edible species from your region, checked in person | Harvest and keep a labeled record |
Likely but unconfirmed | Match from an app or photo only | Do not eat; preserve the sample for expert review |
Unknown | No clear match, or a known toxic lookalike is present | Leave it in place; do not taste it |
Anything eaten that was not confirmed | Symptoms or uncertainty after eating | Contact poison control or emergency services now and bring the sample |
Why a Kit Should Help You Not Eat
Kits are usually marketed on what they help you collect. The more useful feature is a hard stop. A laminated uncertainty checklist, a hard-sided specimen container, a card with local emergency contacts, and a clear instruction that recreational observation is a legitimate outcome of a walk all do more for a beginner than a second knife.
Ambiguity between similar species is the norm, not the exception. Even a distinctive mushroom has a counterpart worth knowing, which is why the shaggy mane look-alike comparison is worth reading before you trust a confident first impression.
The kit's best moment may be the one where it stops a meal.
Sorting and Handling a Harvest Before Cooking
A forager heads out on a warm afternoon and comes back with a mixed haul: some firm caps, a few soft ones, a couple that looked better in the woods than they do in the kitchen light. By evening the bag is sweating and the nicest specimens have pressed against each other. Nothing about that haul is wrong except the handling.
Correct species identification doesn't settle the safety question on its own. A mushroom can be identified perfectly and still be unfit to eat because it's overmature, damaged, contaminated, or badly stored since picking. Research on Mid-Atlantic foragers found that people tend to collect particular species only at particular times and prefer mushrooms "in their prime", and it warns plainly that rotten or contaminated specimens can cause sickness or poisoning, as detailed in this ethnobotanical study of foraging practice.
Sorting Rules for the Kitchen Counter
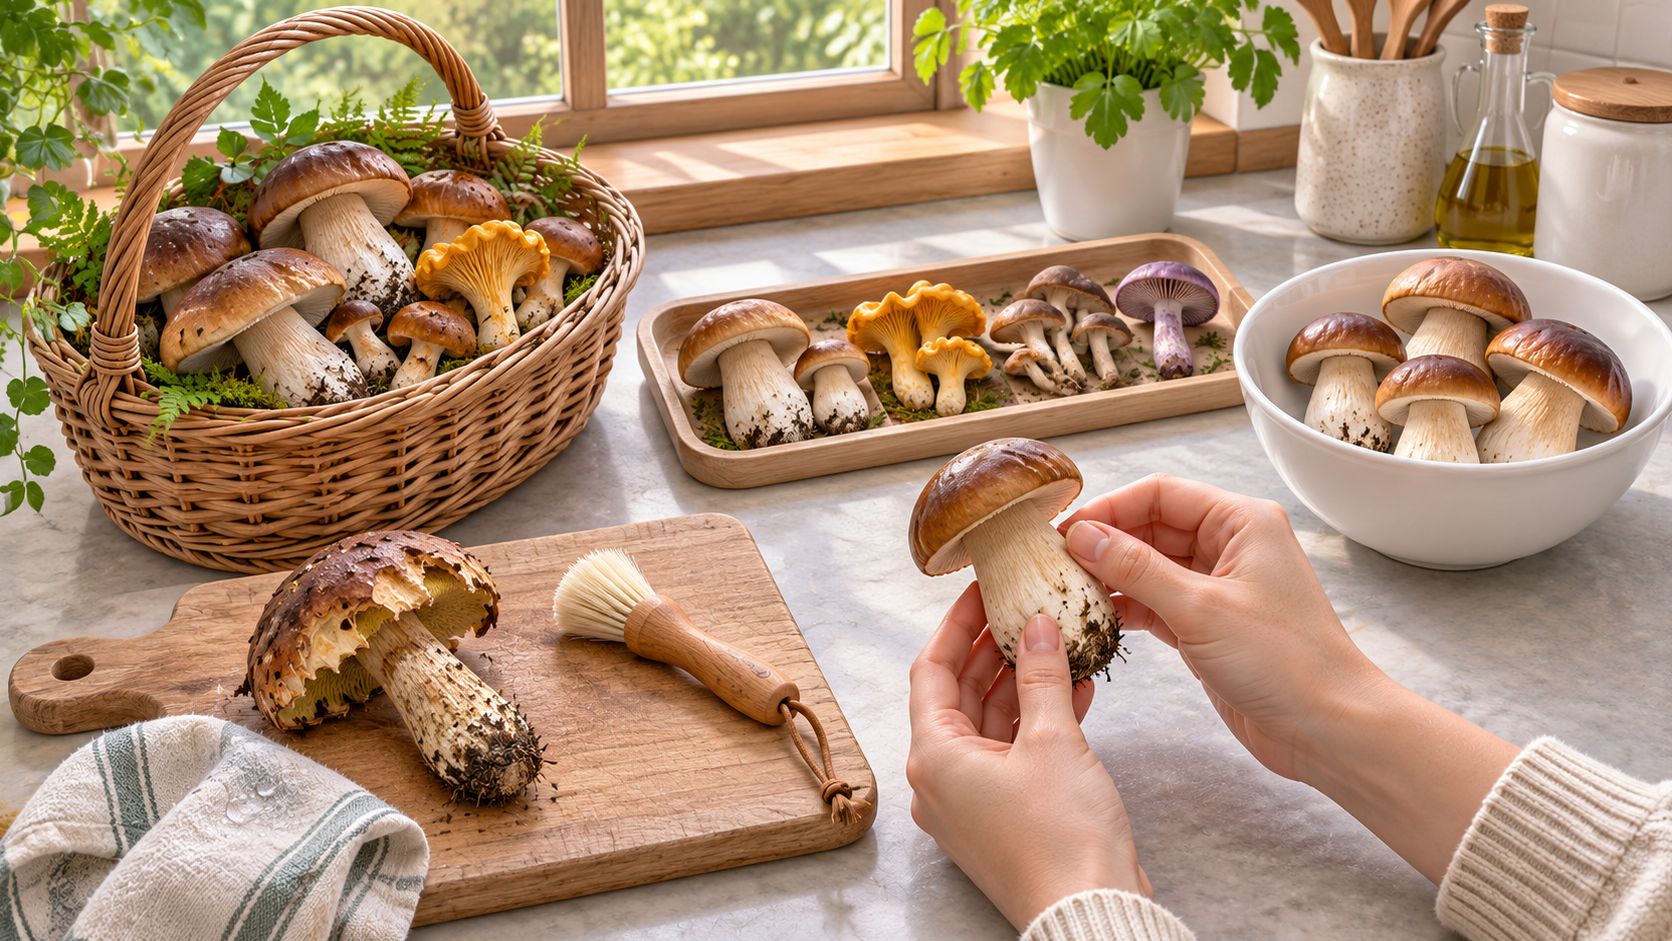
Spread the haul out rather than leaving it heaped. Then work through these:
Reject decay, insect tunnels and slime. A soft, dark patch spreads to the mushrooms touching it.
Keep one species per breathable bag, and don't mix a firm species with a fragile one in the same container.
Label every bag with species, date and location. Memory for these details lasts about four hours.
Cool and refrigerate promptly. A warm car is the worst place for a harvest to spend the afternoon.
Set doubtful finds aside on their own plate, clearly marked, until they're confirmed or discarded.
Cleaning technique varies by species, and the difference shows up in texture. Oysters, for instance, hold water in their gills, so this method for cleaning oyster mushrooms is worth following before you soak something that shouldn't be soaked.
The Decision Card
Three questions belong on a card in the kit, answered before anything hits the pan. Was the species confirmed by someone qualified? Were the specimens firm, clean and free of damage at sorting? Do you know exactly how long they spent at room temperature?
If any answer is shaky, the harvest doesn't get cooked. Losing one meal costs nothing. The alternative has a much worse tail. A log sheet that records species, date, location and habitat doubles as solid documentation for anyone doing citizen science, so the habit pays back twice.
If storage conditions are uncertain, the answer is no. You can always pick again.
Decide Whether You Are Ready to Go
One question settles the morning: are the tools clean, is today's site legal to pick, and is there a qualified way to confirm anything you find before it's eaten? Run these five checks against decisions you've already made.
Sanitation is packed. Soap, a food-grade sanitizer, and tools that air-dried after the last outing.
Access is settled for today's date, with the landowner or the agency that manages the site, not with an old forum post.
The written stop rule is in the bag and poison control or emergency services is saved in your phone.
A local mycological club or qualified expert is named before any specimen is treated as food.
The first outing is one known edible under that expert's guidance, using the kit to practise a clean cut, separate bags, a label for species, date and place, and a discard decision you follow through on.
If any check fails, the trip becomes an observation walk. That's a legitimate way to spend an afternoon, and an unidentified find stays uneaten.
Colorado Cultures stocks grow kits, sterilized grain bags and substrates for anyone who wants a reliable harvest without the guesswork of wild identification, and our written instructions and video tutorials walk you through each step at home. If you're in the Denver area, stop by our Lakewood or Englewood storefront, where our team can talk through grow kits, substrate options and harvest timing before your next attempt. Visit Colorado Cultures to browse kits and supplies, or check the CC Classroom calendar for hands-on classes.
Comments